Nội dung
Today’s article, AZDIGI will guide you through configuring WP Rocket with CloudFlare to improve performance, speed up the web and get the most out of it. WP-Rocket is a paid plugin that costs $49 for the SINGLE version, $99 for the PLUS version and $249 for the INFINITE version, when using WP-Rocket you get a different speed experience, but when finished with CloudFlare you will be configured with additional developer options to improve performance further as WP-ROCKET is fully compatible with CloudFlare.
When using Hosting and VPS at AZDIGI, you will receive a copyrighted WP Rocket and many other plugins and themes. See details here.
Cloudflare can do minification of CSS and JS files as well as WP Rocket; WP Rocket also has the option to combine files, which Cloudflare doesn’t have.
But AZDIGI recommends enabling minification in Cloudflare and WP Rocket to get the best results.

Condition
- You need to install WP-Rocket on your website.
- Create a CloudFlare account and connect your domain to CloudFlare.
Implementation guide
Step 1: Enable Rocke addon in website
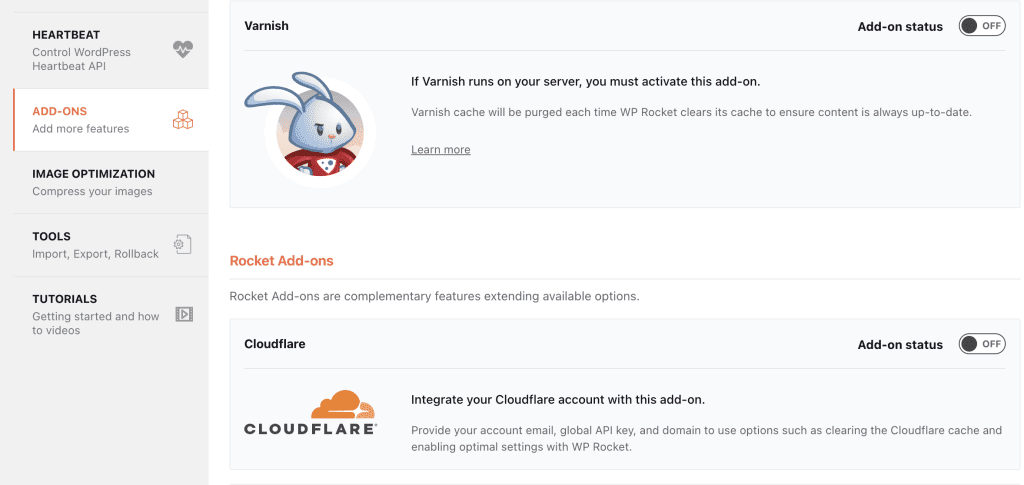
First, you need to enable the Rocket add-ons in Plugin. To enable it, go to Settings => WP Rocket => Add-ons and turn it on, as below:
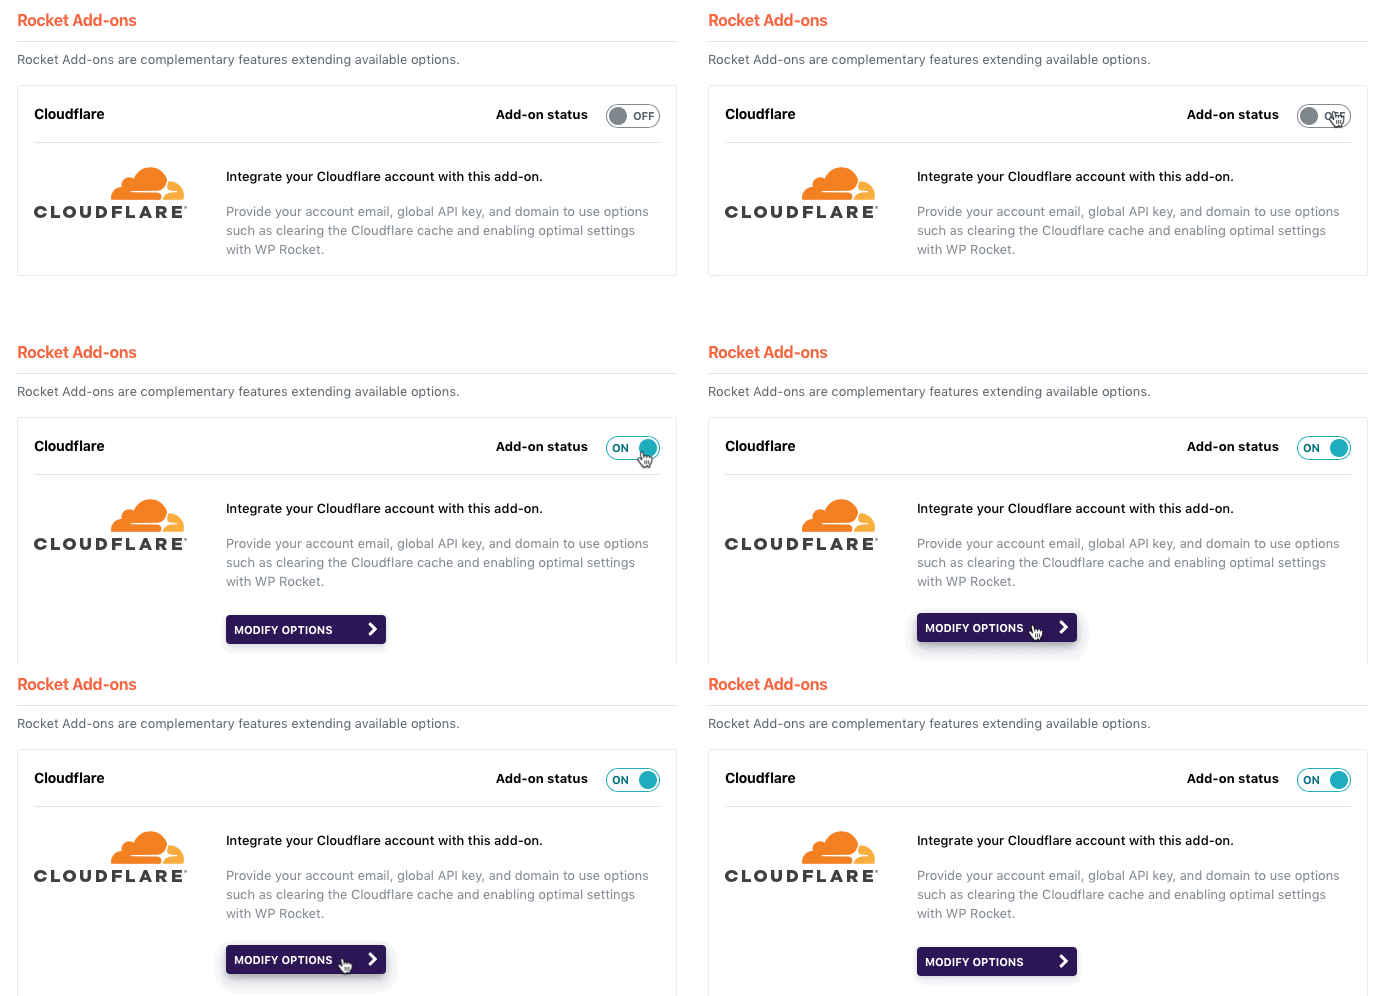
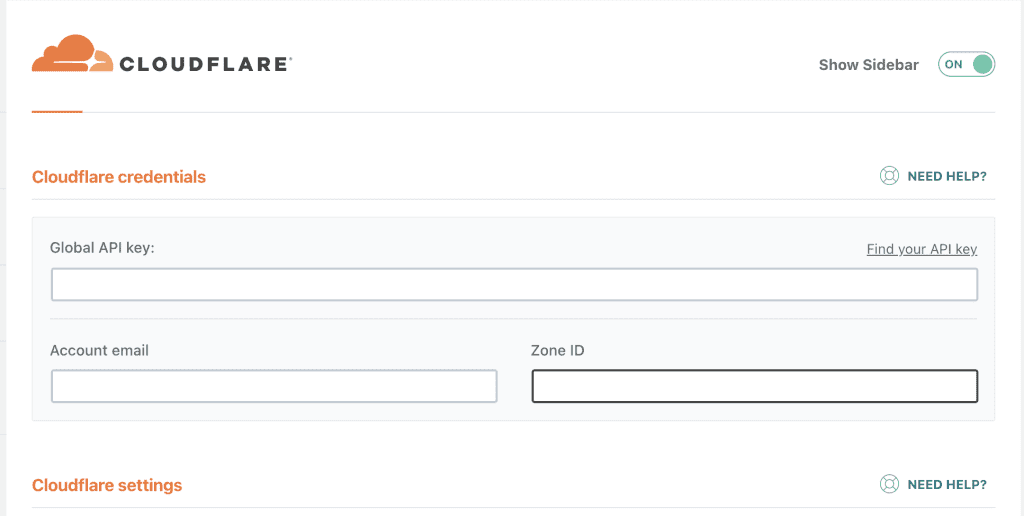
At the CloudFlare dashboard, it will ask you to enter your Global API key, Email and Zone ID information. To get this information you need to log in to CloudFlare to get the information and connect, follow step 2 to get it.
Step 2: Get connection information in CloudFlare
Get Global API Key information
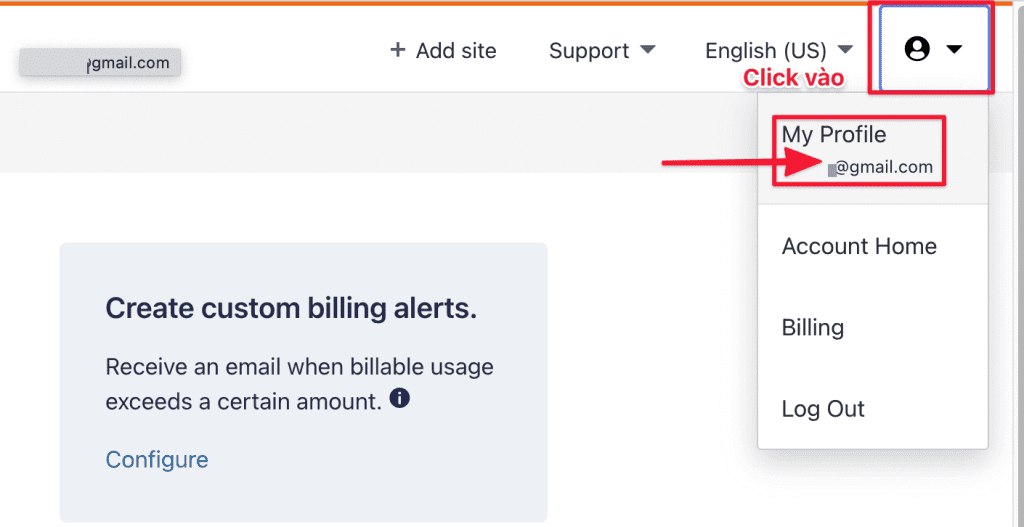
To connect, you need the Global API Key. You log in to CloudFlare => click on My Profile in the Account section.
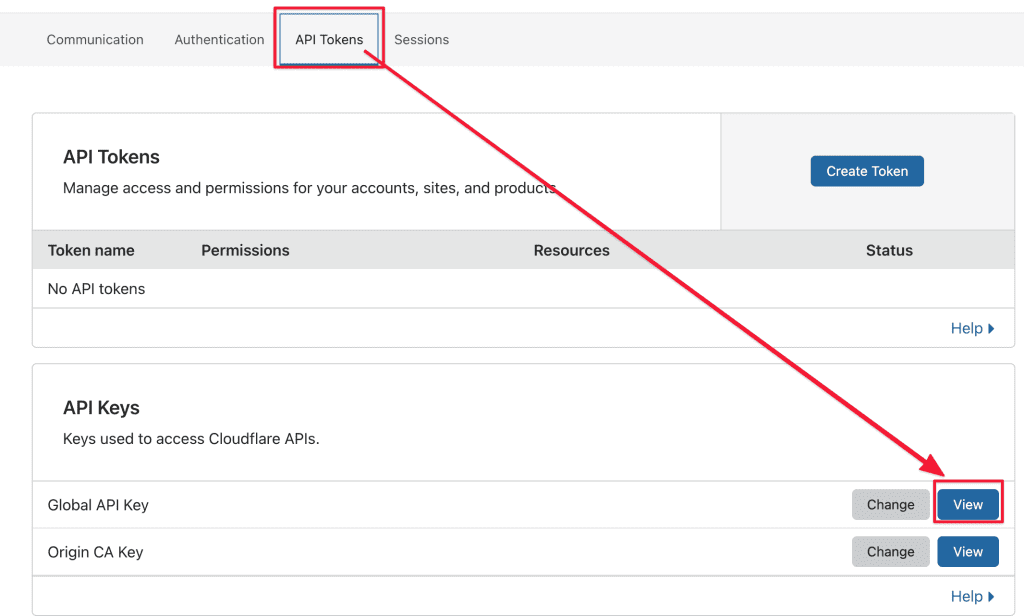
Next, you select the API Tokens tab, you will see the Global API Key => click View.
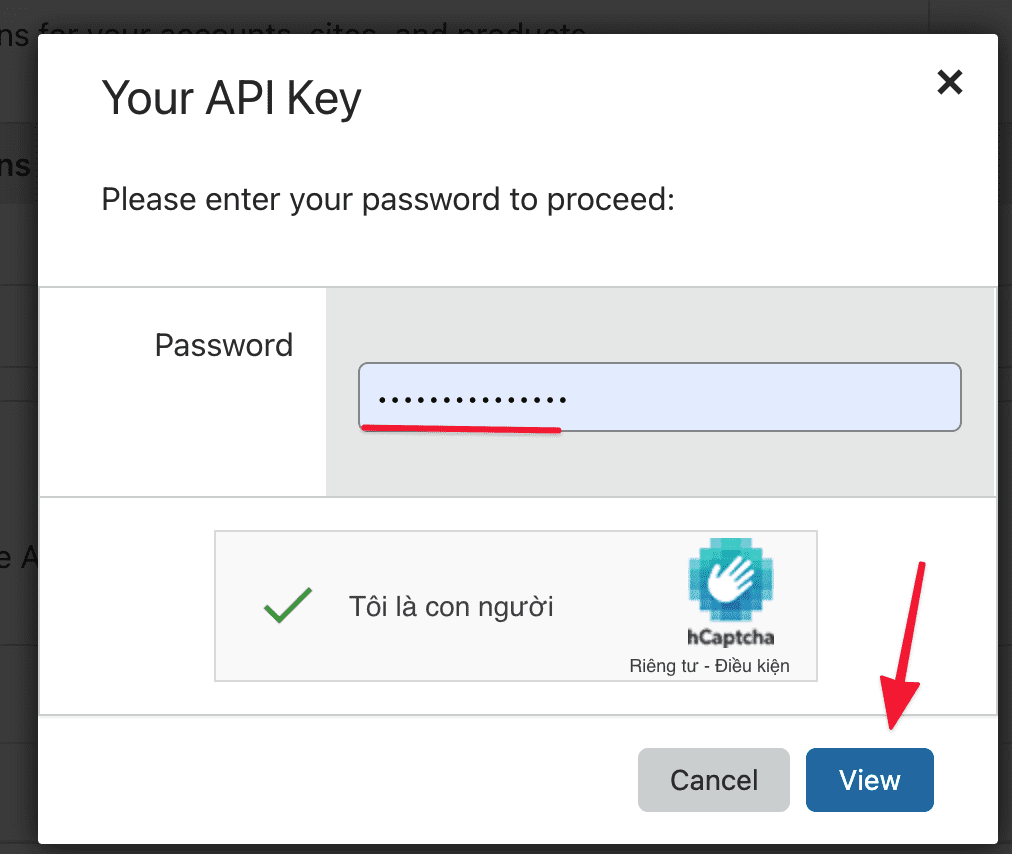
CloudFlare will ask you to enter CloudFlare password and check Captcha.
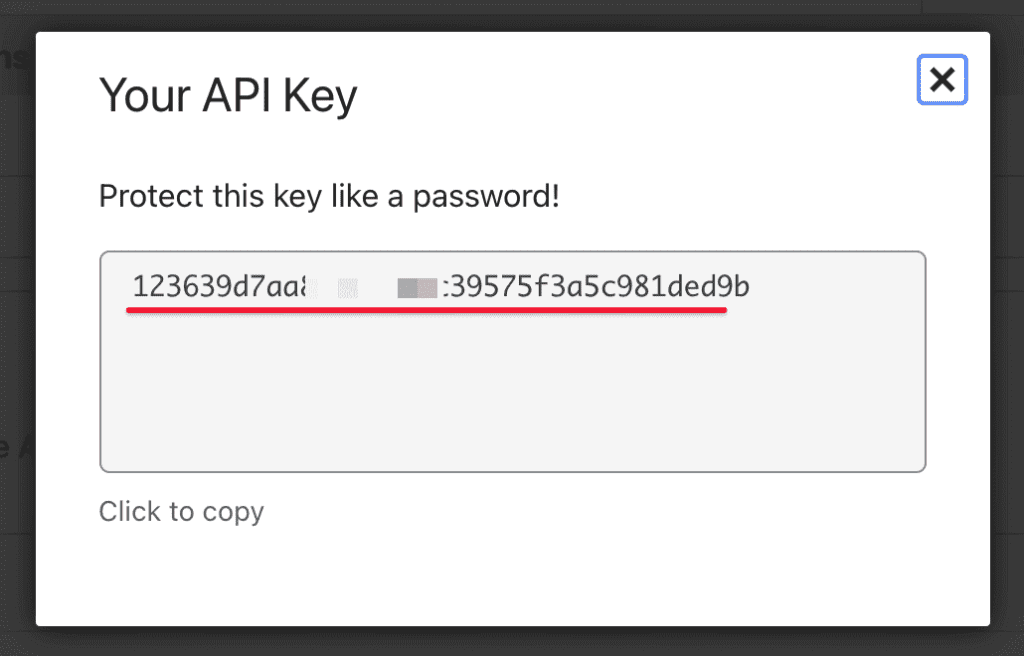
An API Key string appears, please copy it to serve the configuration in the next steps.
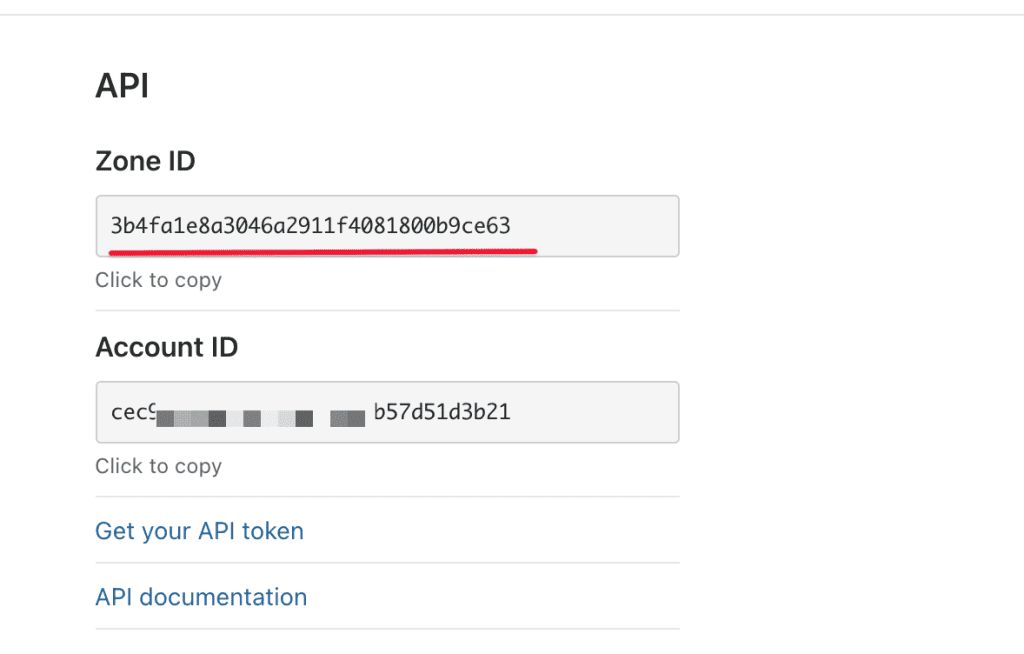
Get Zone ID information
This information is quite important, to determine your zone so that the server can understand and distribute the content. This information you can see right on the CloudFlare dashboard. Once you have all the information, proceed to step 3.
Step 3: Configure and Optimize WP Rocket with CloudFlare
You return to the CloudFlare configuration interface on the website, enter the information obtained in step 2, then turn on Optimal settings and Relative protocol.
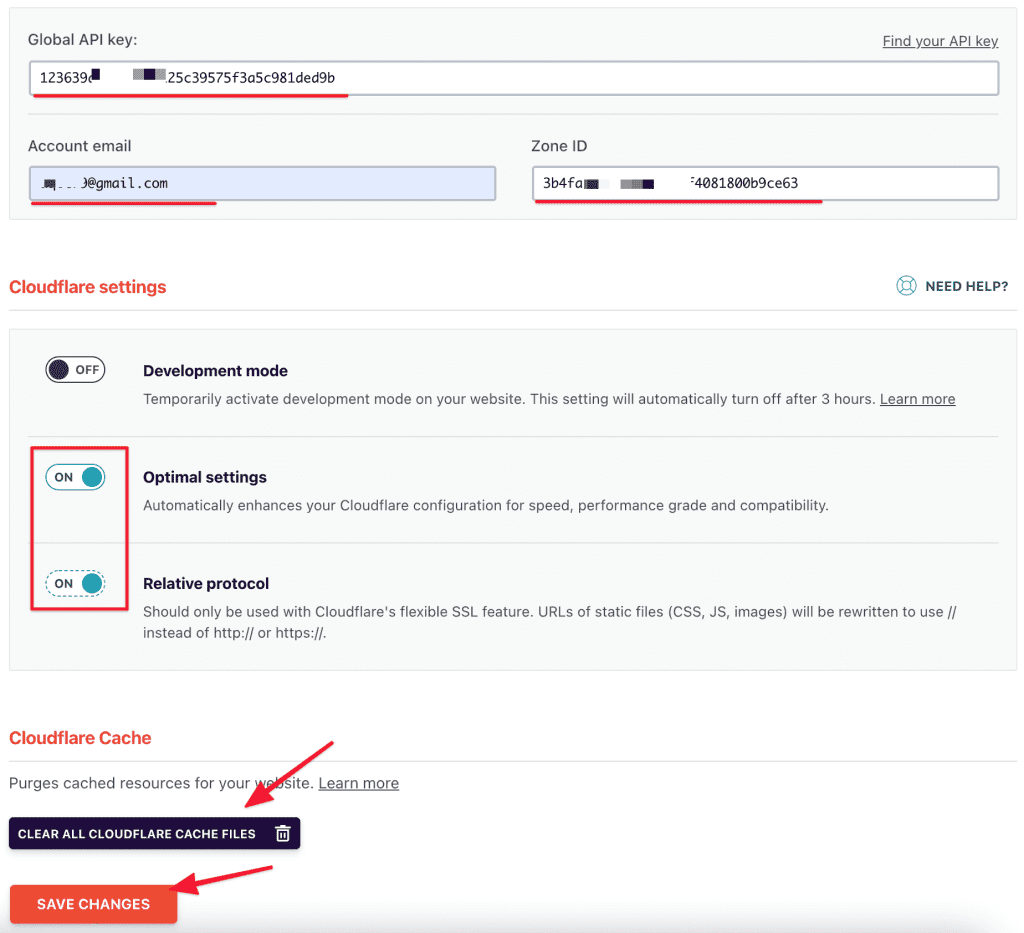
You save the information. After completing these steps, you need to change a little bit in the settings inside CloudFlare.
Optimal settings
Recommended features to enable. WP Rocket will automatically select profiles for Cloudflare to improve your site’s performance. Please set the following options
Turn off Rocket Loader

Edit Caching level and browser cache time.

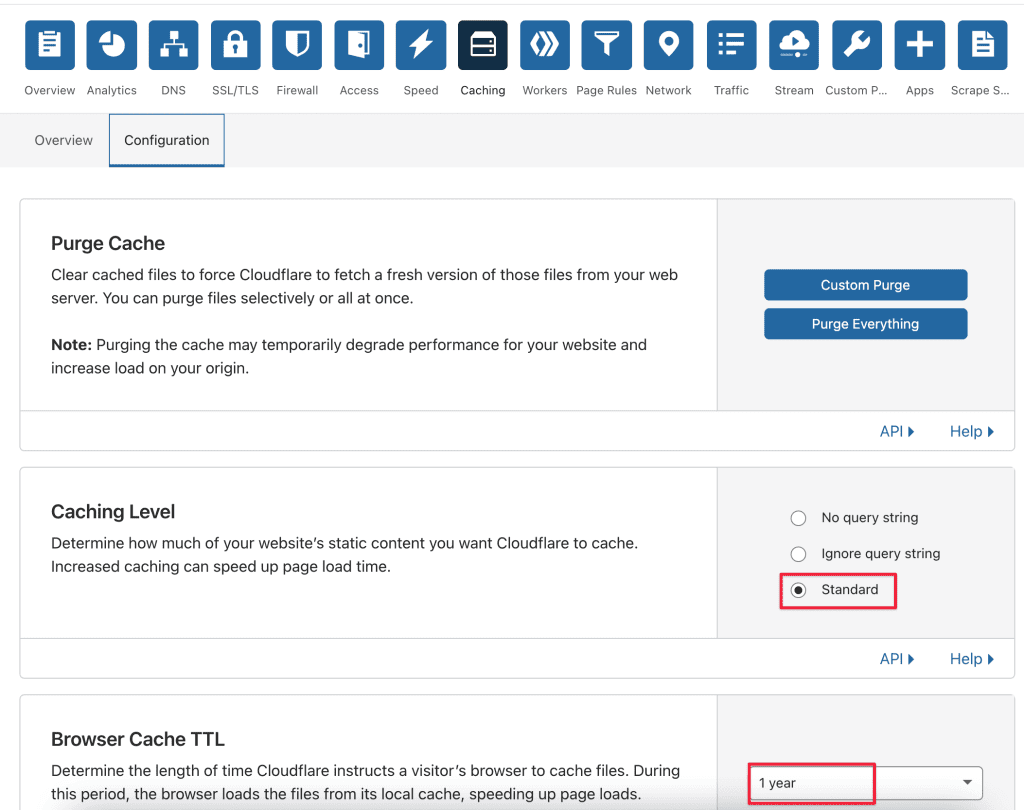
Relative protocol
This setting should only be enabled if you use Cloudflare’s Flexible SSL feature. If you use another SSL, you should not enable it.
Relative protocol will rewrite the URL of static files (e.g, CSS, JS, images) to use relative protocol ( // instead of http:// or https://).
Now do a Preload cache and wait for the Plugin to load, after it’s done, check your website speed has improved.
Hopefully, this article will bring you practical experiences, helping your website load faster and more stable. If you have questions or need support, please live chat with Technical Department. Or send the ticket to the Technical Department according to the information below.
- Hotline 247: 028 888 24768 (Ext 0)
- Ticket/Email: You can use your email to register for the service and send it directly to: support@azdigi.com
- Click on the AZDIGI website to refer to the best hosting/VPS service in Vietnam.

