Nội dung
How to activate Remote SQL Server on Linux with 2 methods!
I. Introduction
Welcome back to the AZDIGI documentation channel. In today’s article, AZDIGI will guide you on how to activate the remote SQL feature on the Linux system for any user or all databases under the root user.
In some control panels such as cPanel, this remote feature is already available, and you only need to configure it to enable remote access. However, for servers installed manually or some scripts, you need to assign permissions to these remote users. To do this, please refer to this tutorial.
II. Implementation guide
First, open the my.cnf file. Then, find the value of bind-address = 127.0.0.1, which means the server will only look for local connections. You need to change this value with your fixed IP address or use *, ::, or 0.0.0.0 to allow all connections.”
vi /etc/my.cnf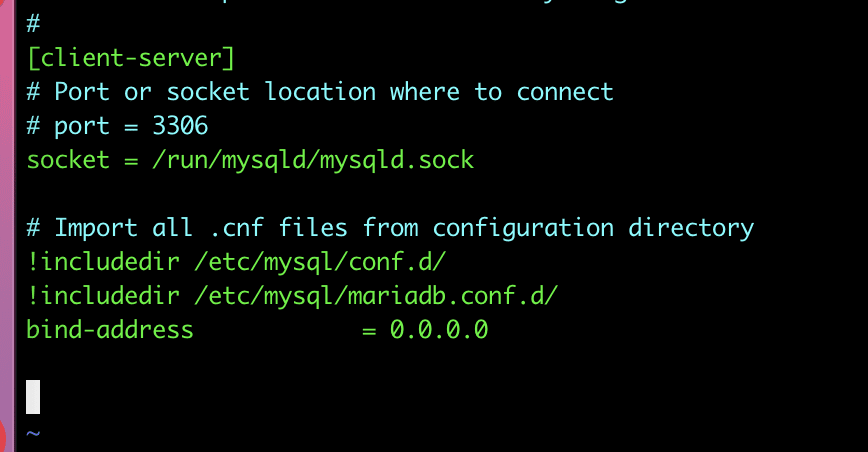
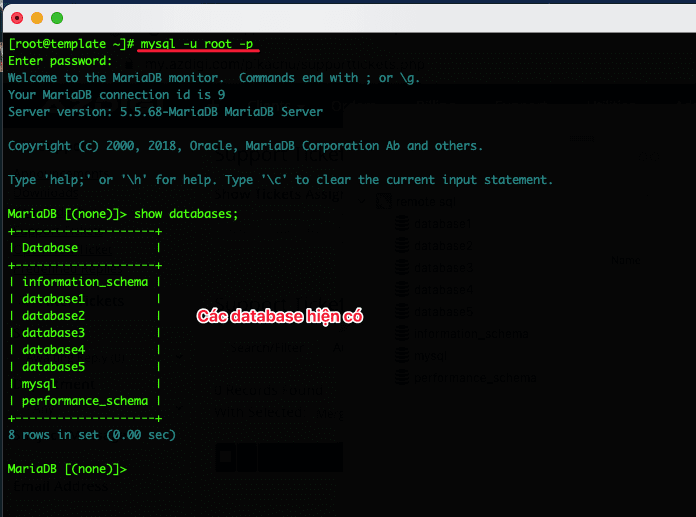
Next, to proceed, you need to identify the user that needs to activate remote access. You must also be able to access the database under the root privilege by using the command mysql -u root -p and logging in with the MySQL root password. This information is set up during the installation of MySQL/MariaDB.
1. Activate remote access for any database
To enable Remote SQL for a user, you use the following command:
Step 1: Access the database
First, you access the database as root to enable remote sql for the specified user.
mysql -u root -p
As shown above, I have many databases and I will enable remote for the database named database1 as follows:
Step 2: Remote SQL
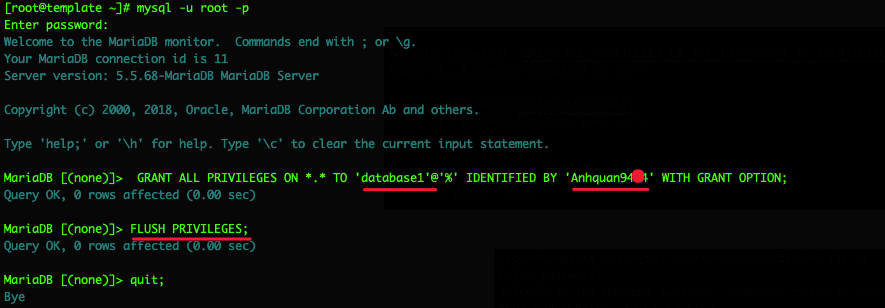
To enable for a certain database, you use the following command:
mysql -u root -p
GRANT ALL PRIVILEGES ON *.* TO 'database1'@'%' IDENTIFIED BY 'Mat_Khau_User_Database' WITH GRANT OPTION;
FLUSH PRIVILEGES;
And you need to change the following:
- database1: replace with your database name
- Mat_Khau_User_Database: Enter your Database user password
- %: If you allow all IP addresses to access remotely, use the
%sign. If you only allow one IP address, replace it with your IP address.
After completion, exit and restart the mysql/mariadb service. After completion, exit and restart the mysql/mariadb service. Here, I’m using MariaDB, so I will restart it using the command systemctl restart mariadb
For example:
Check SQL connection
Here, I’m using the Navicat software to connect. In addition, you can use other software such as Workbench or PHP functions.
Below is an actual image of the connection and the information, including:
- Connection Name: Set any name
- Host: Enter the server’s IP
- Port: 3306 (default)
- User Name: Enter your database user
- Edit Password: Enter Database User Password
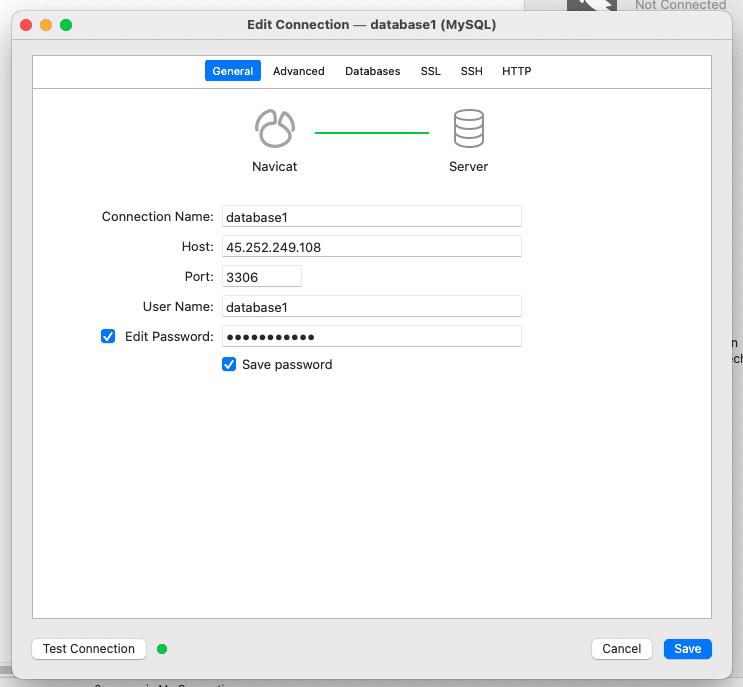
After importing, click Test Connection to check. If the screen shows the message Connection Successful as shown below, it is successful.
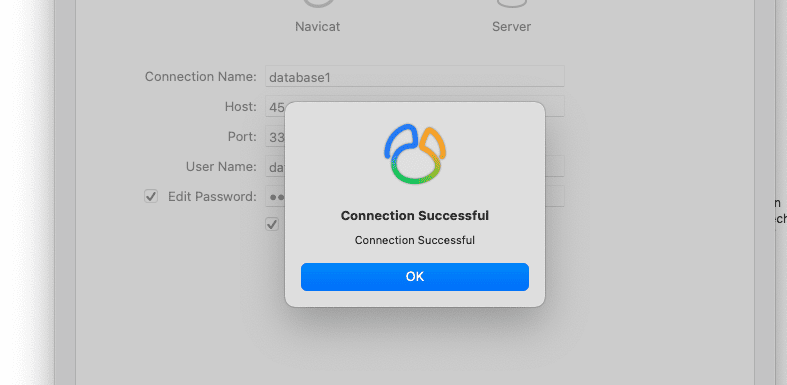
And this is the successful connection message when activating remote sql.

2. Active for the entire Database
If your server has multiple database accounts, and you want to activate remote access for all of them using the root user to remote and execute all databases, you can follow these steps.
Step 1: Access the database
Use the command mysql -u root -p, then enter the mysql root password to log in.
mysql -u root -p
Step 2: Activate remote SQL
Use the following command to activate remote MySQL for the root user:
GRANT ALL PRIVILEGES ON *.* TO 'root'@'%' IDENTIFIED BY 'mat_khau_root_mysql' WITH GRANT OPTION;
FLUSH PRIVILEGES;
In there:
- root is the root user used for remote access.
- %: If you allow all IP addresses to access remotely, use the
%sign. If you only allow one IP address, replace it with your IP address. - mat_khau_root_mysql: You enter the MySQL root password.

Restart the MySQL/MariaDB service
After completion, exit and restart the mysql/mariadb service. After completion, exit and restart the mysql/mariadb service. Here, I’m using MariaDB, so I will restart it using the command systemctl restart mariadb
systemctl restart mariadb
Check SQL connection
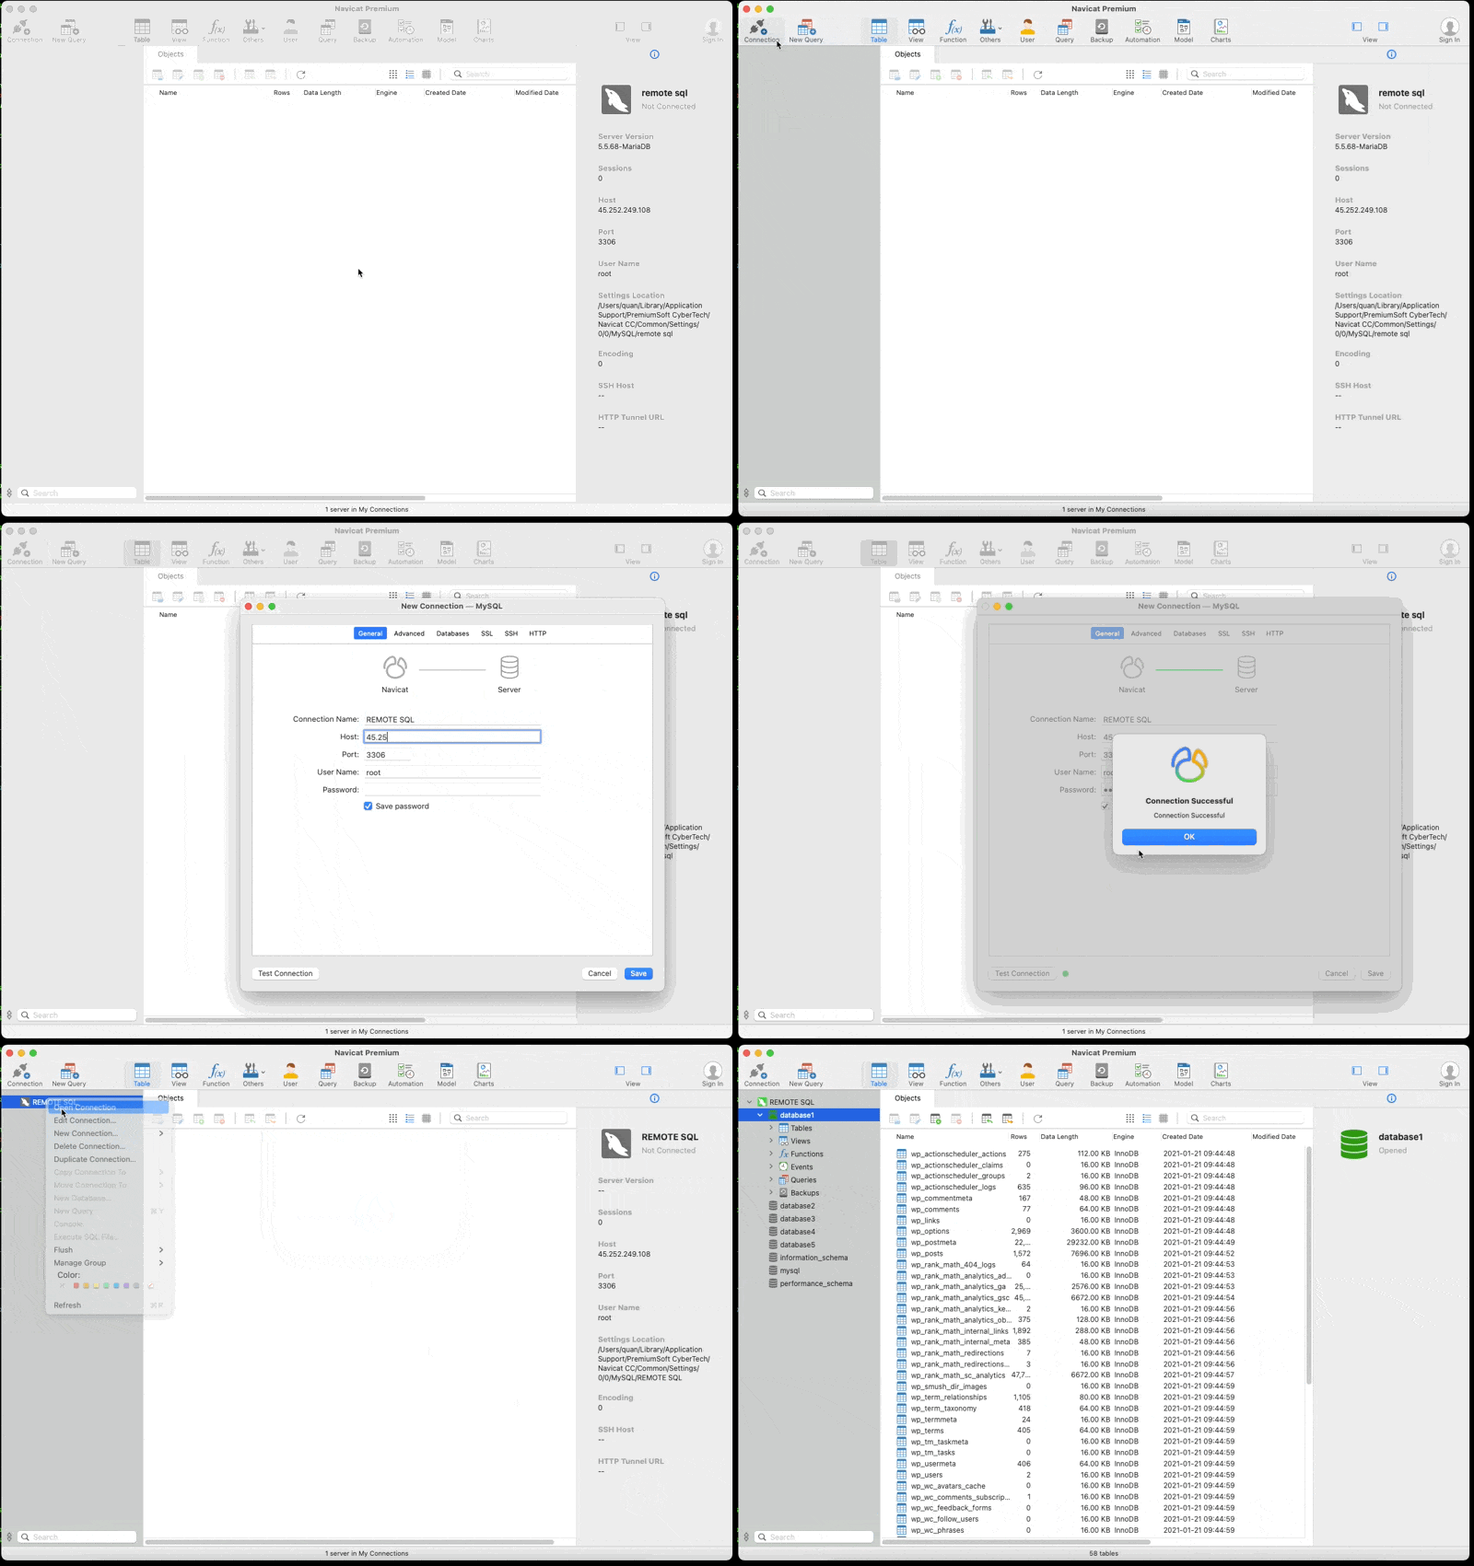
Here, I’m using the Navicat software to connect. In addition, you can use other software such as Workbench or PHP functions.
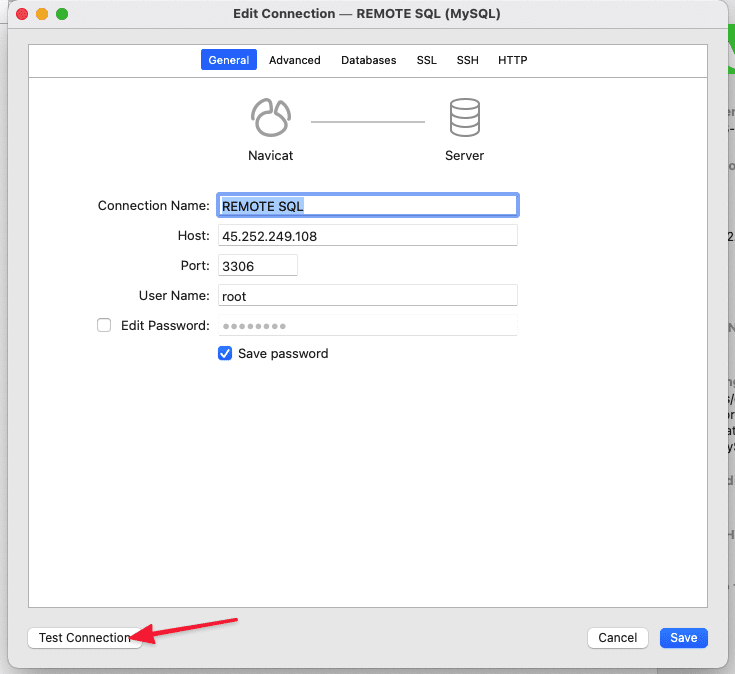
Below is an actual image of the connection and the information, including:
- Connection Name: Set any name
- Host: Enter the server’s IP
- Port: 3306 (default)
- User Name: Enter
root - Edit Password: Enter the
rootmysql password
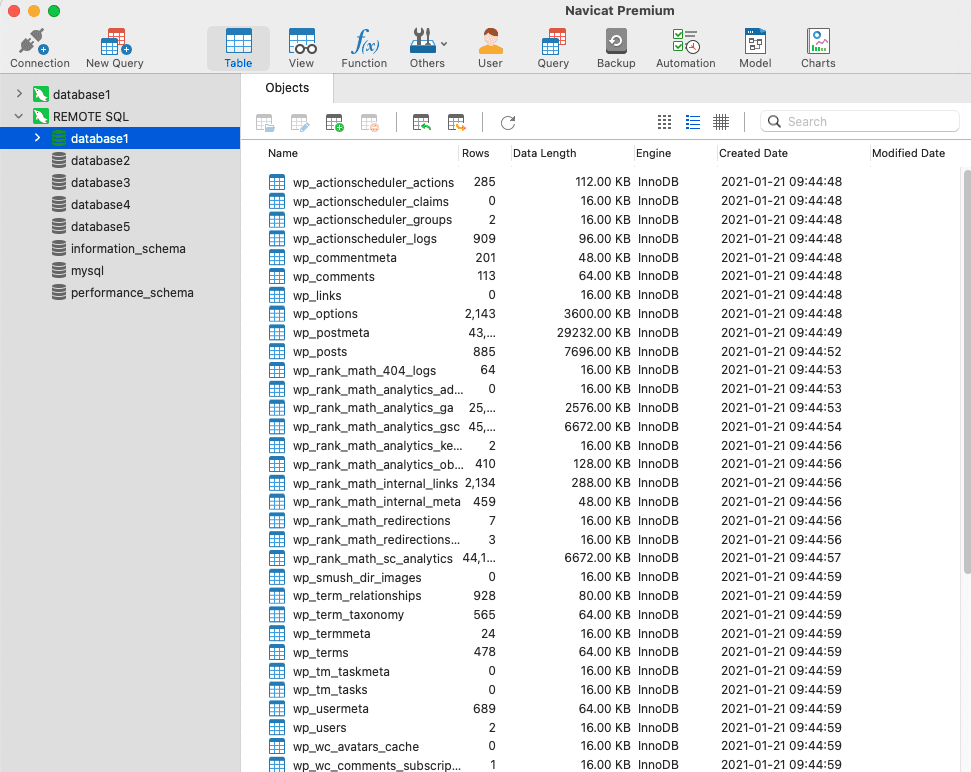
GIF image demonstrating the demo
Note: If you cannot access PORT 3306, you need to open IN/OUT Port 3306 on the firewall to make it work.
III. Summary
So AZDIGI has completed the steps to activate Remote SQL Server on Linux. Wishing you success! See more useful articles about Linux VPS at the following link:
If you need assistance, you can contact support in the ways below:
- Hotline 247: 028 888 24768 (Ext 0)
- Ticket/Email: You use the email to register for the service and send it directly to: support@azdigi.com .

