While all Web Hosting services at AZDIGI come with built-in daily automatic data backup support to ensure data preservation, customers using advanced services such as Virtual Private Servers (VPS) or Dedicated Servers will need to set up backups on their servers themselves.
In this article, AZDIGI will introduce you to a tool that supports automatic data backup and stores it on Google Drive, Dropbox, Amazon S3 quickly and efficiently, and that tool is Ottomatik. The special feature of this service is the ability to schedule backups every minute, every 5 minutes, every hour, every day, every week, and every month.
Introducing Ottomatik
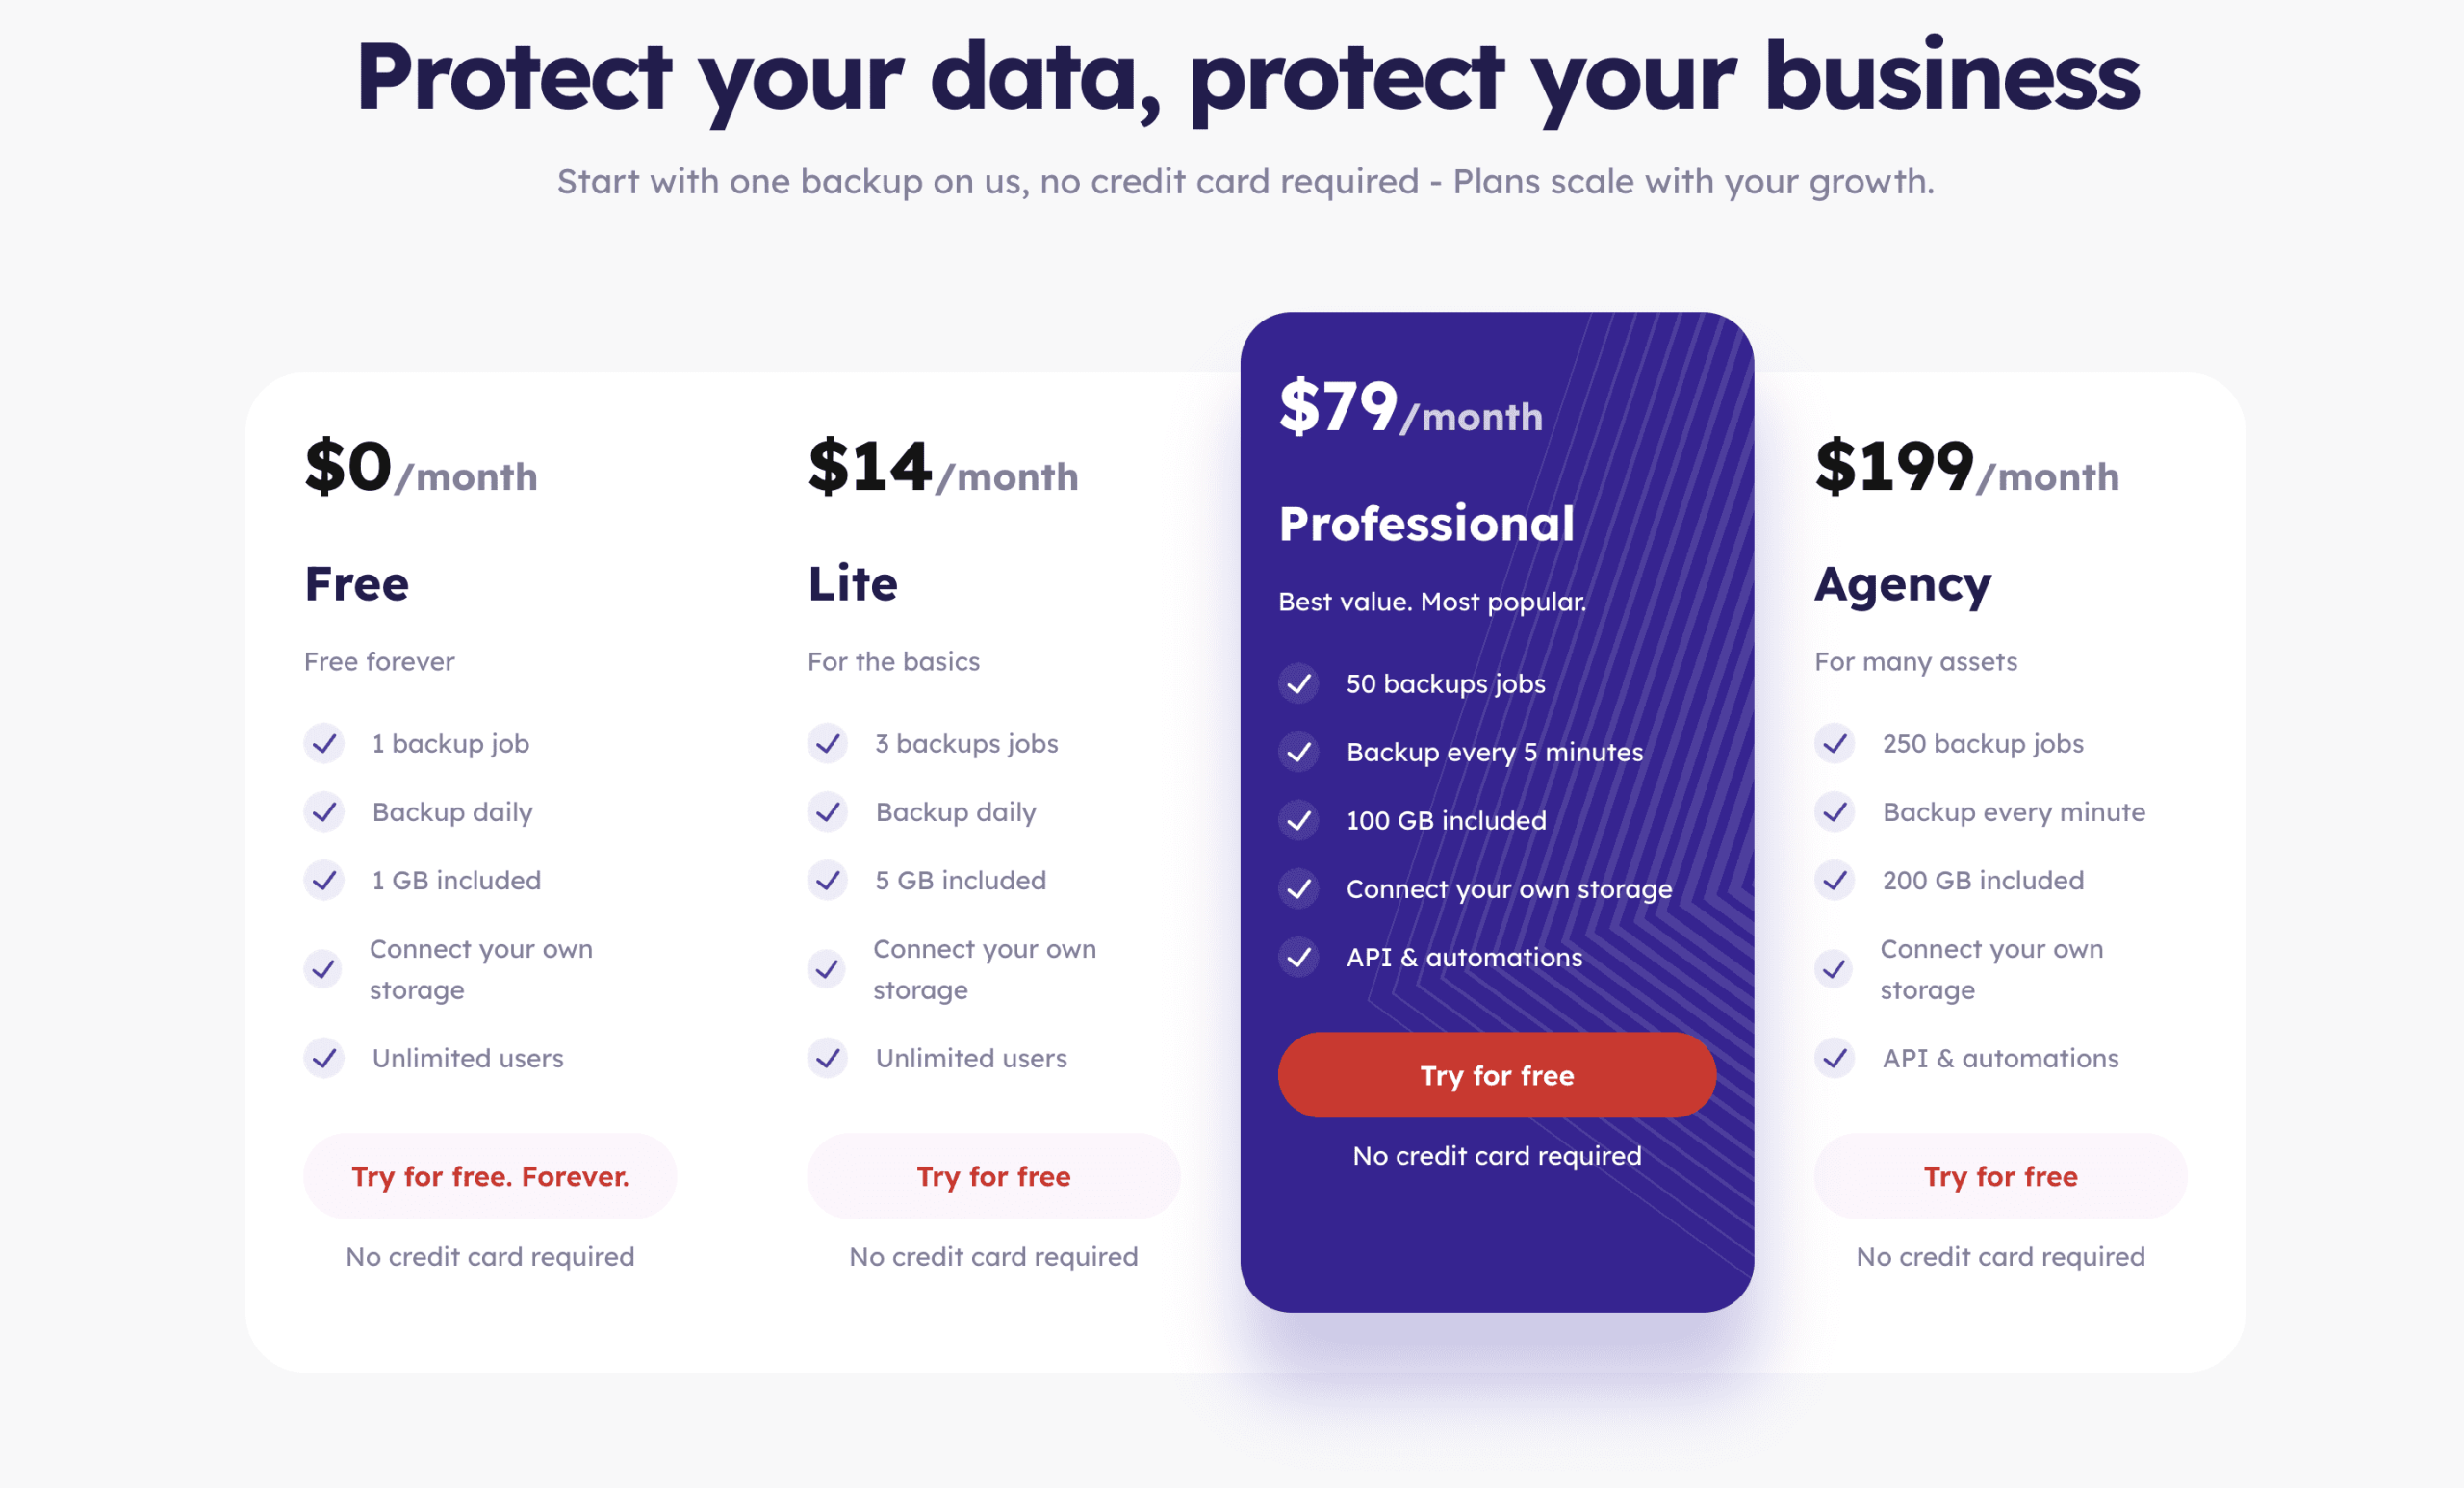
Ottomatik is a Backup-as-a-Service (BaaS) type of service, which means you will need to install their agent on your servers and manage the backed-up data from their admin panel. Ottomatik is a paid service, but there is still a free option available that is suitable for users with only a single server.

So with the free usage, you can create a backup job with a maximum backup frequency of once a day, and still have support for sending backup data to your storage accounts like Google Drive, Amazon S3,…
However, for more critical websites and servers, you might consider using the Professional package, which allows for more backup jobs and a maximum backup frequency of every 5 minutes, ensuring real-time data backup.
Setting up and using Ottomatik
In this article, we will guide you through installing Ottomatik on a Linux-based server. Ottomatik only supports Linux-based operating systems, including Amazon Linux, CentOS, Debian, Fedora, Linux Mint, Oracle Linux, Red Hat, Red Hat Enterprise, Scientific Linux, and Ubuntu.
To start with Ottomatik, you can sign up for an account at https://app.ottomatik.io/signup and use the premium features for free during the first 14 days without needing to add payment information to your account.
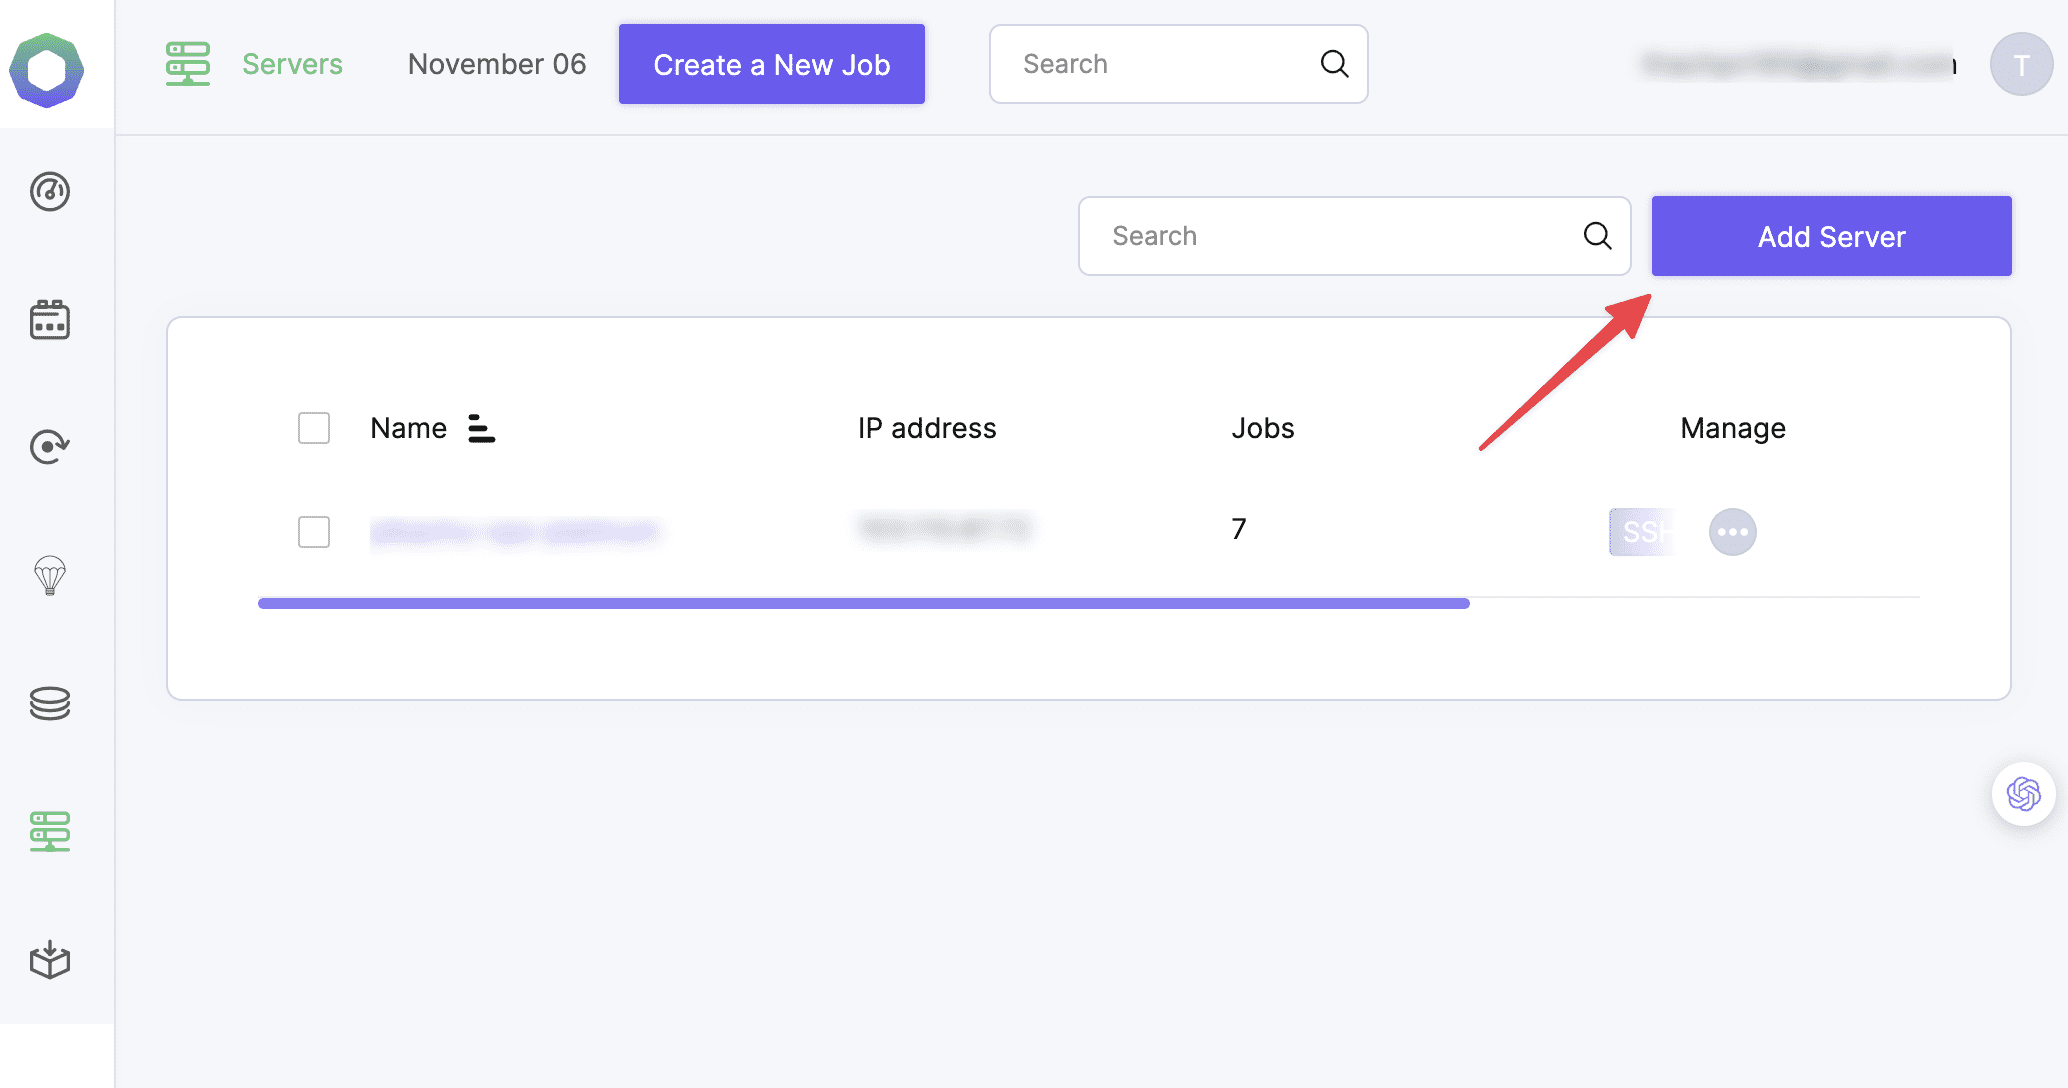
After completing your account setup, navigate to the “Server” section and click the “Add Server” button to specify the server you want to back up.
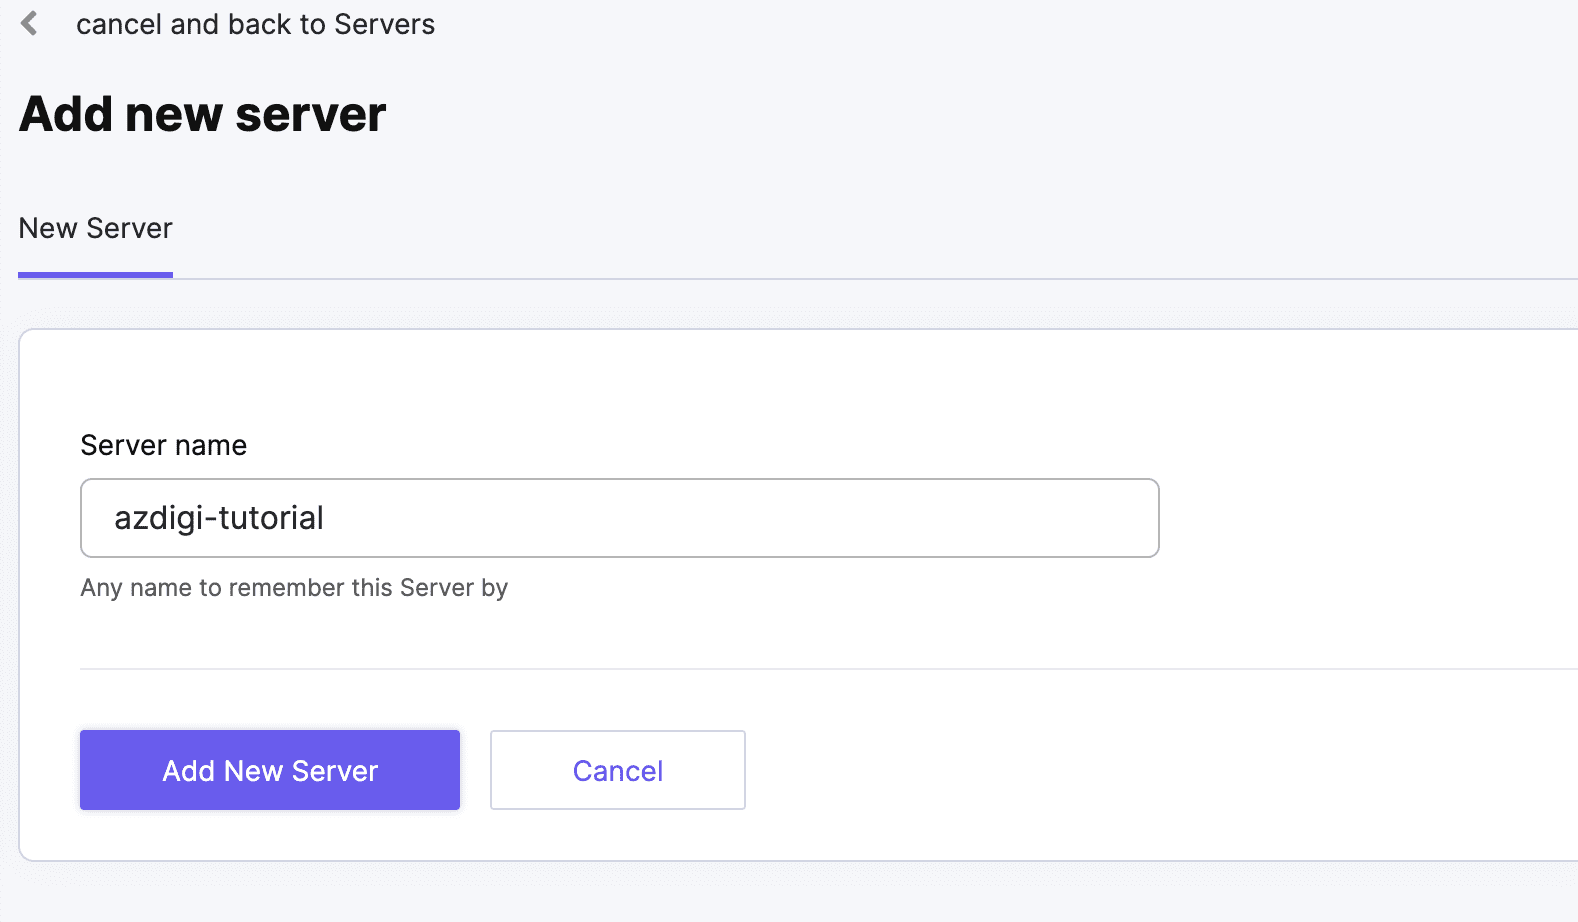
Next, give a name to this server for easy identification and click “Add New Server.”
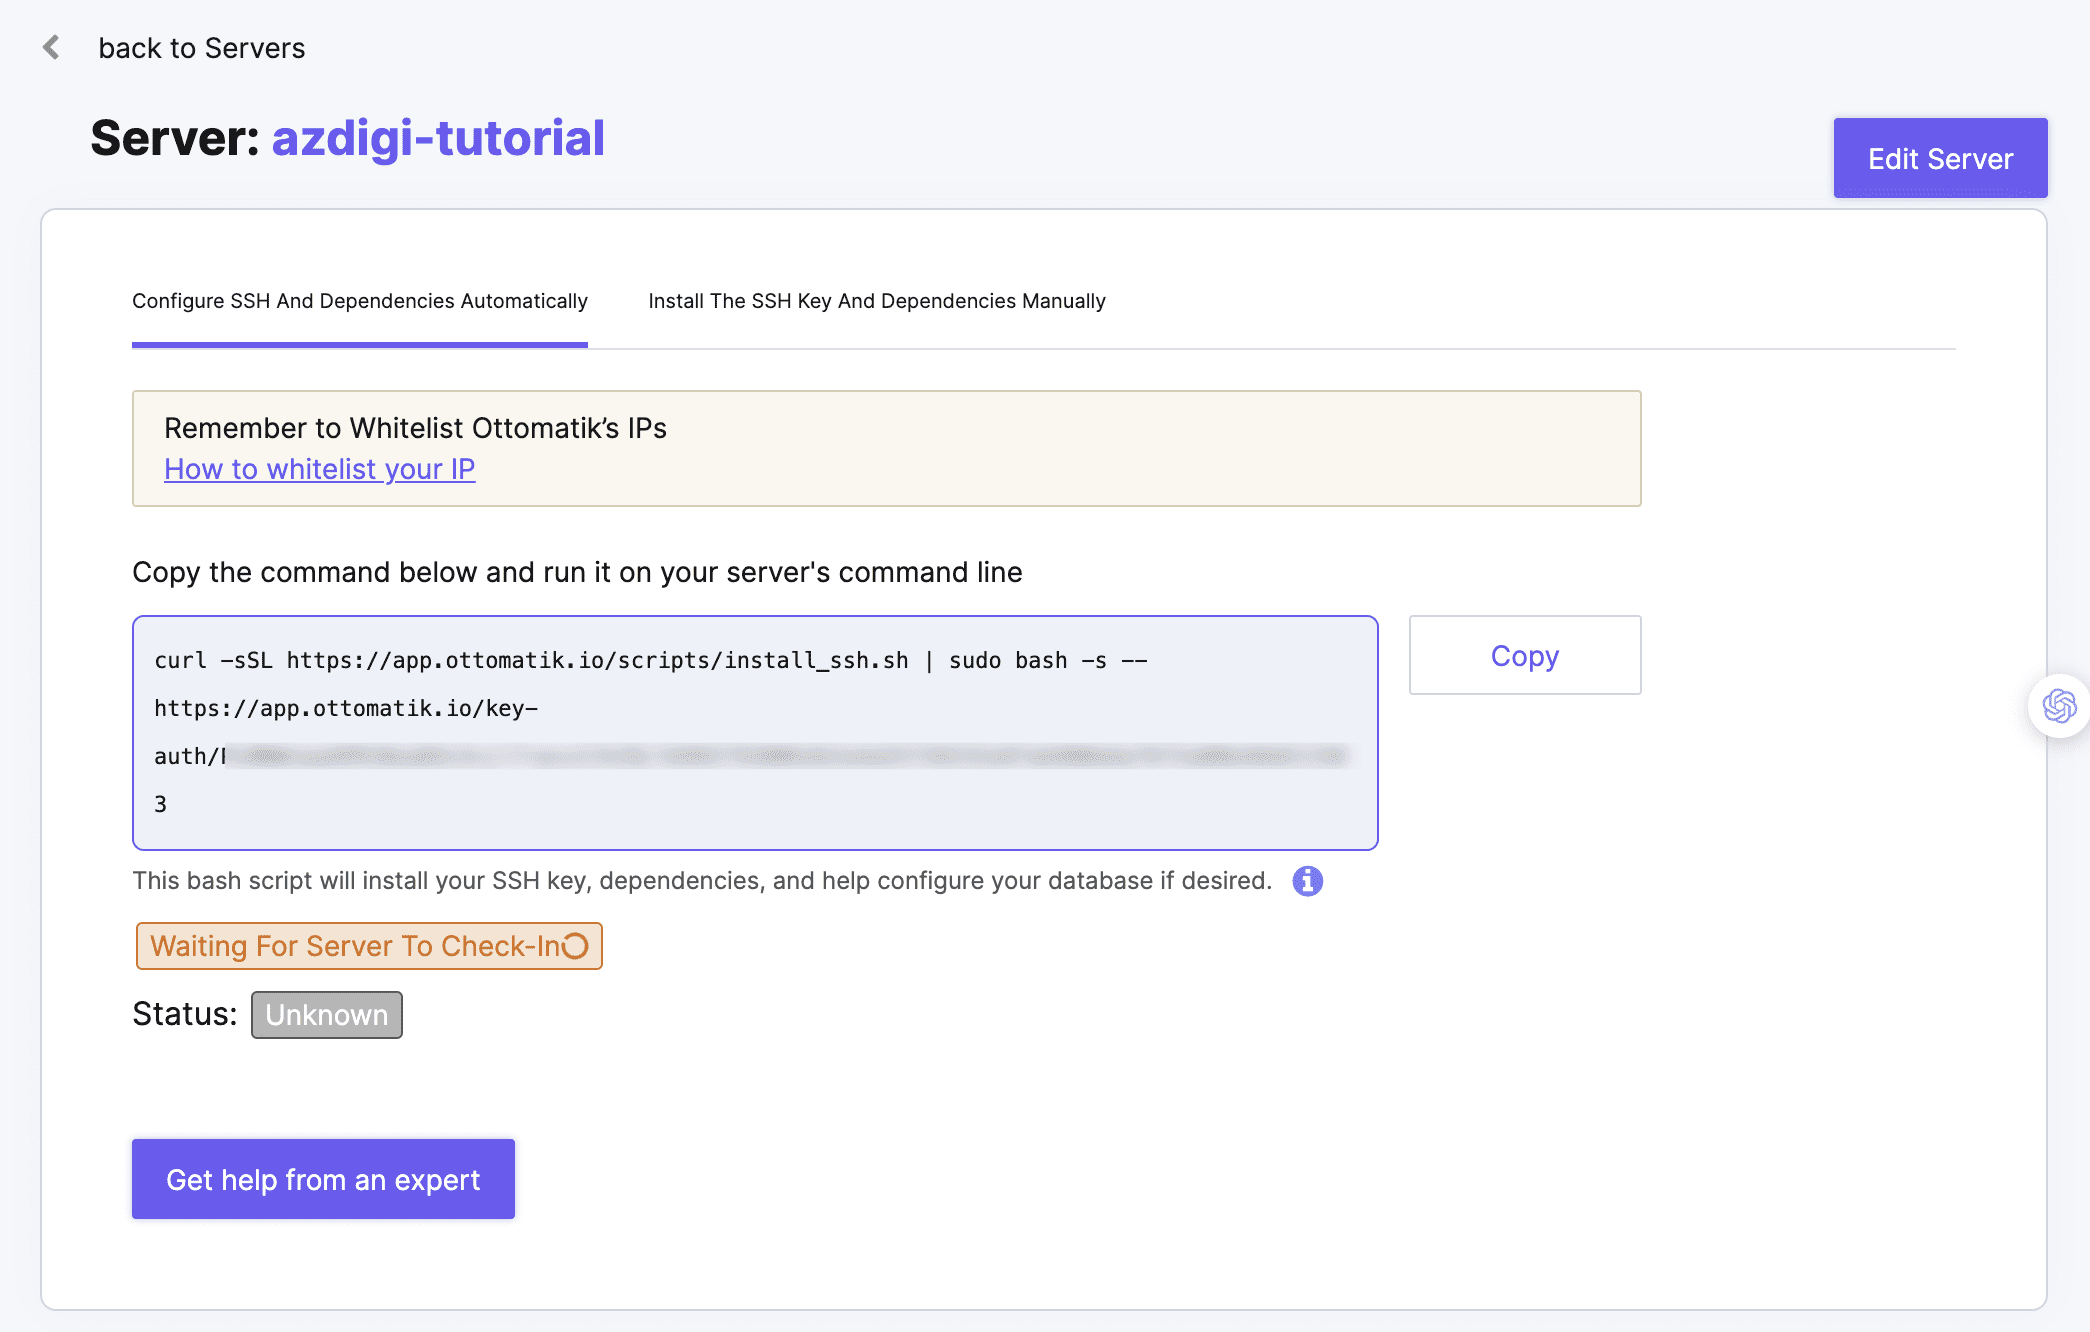
In the final step, they will provide a short script for agent installation, and you just need to copy it to your server and run it. Note: if your server has firewall software like CSF or firewalld installed, go here to get Ottomatik’s IP list and add it to the whitelist.
To ensure a successful installation, your server must have the /root/.ssh/authorized_keys file in place. So, create this file in case you are not using SSH Key for SSH access.
During the installation, it will ask if you want to enable real-time MySQL data backup, you can choose by typing yes or no However, please note that enabling this feature might impact performance on servers with limited CPU resources. Therefore, you should choose no if you don’t want to enable this feature.
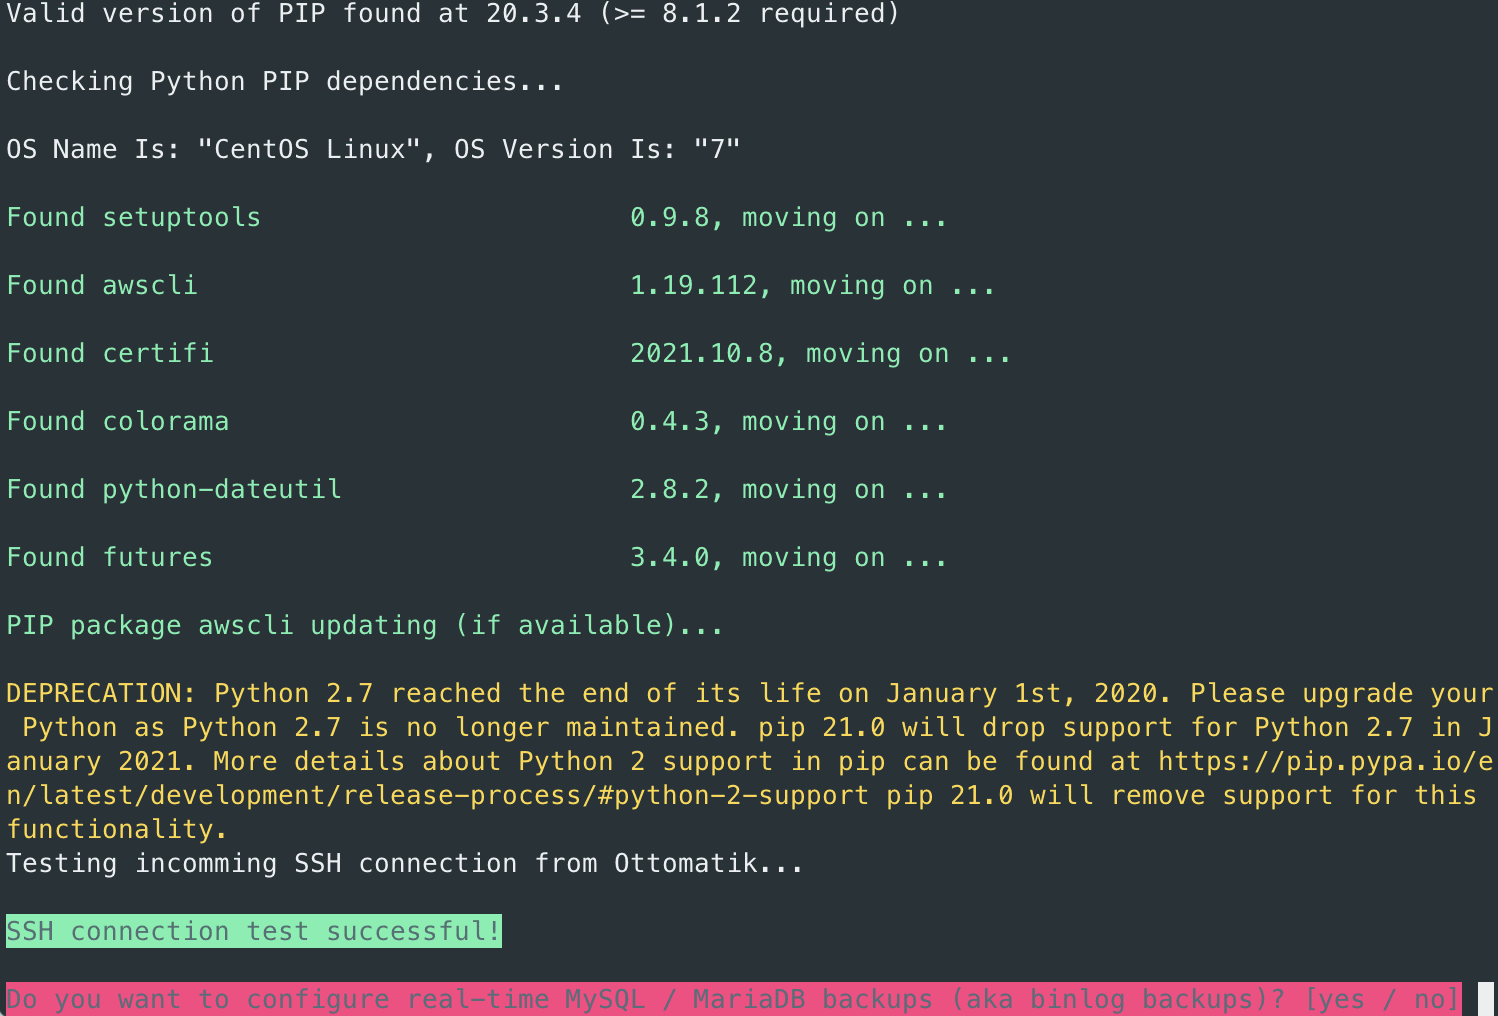
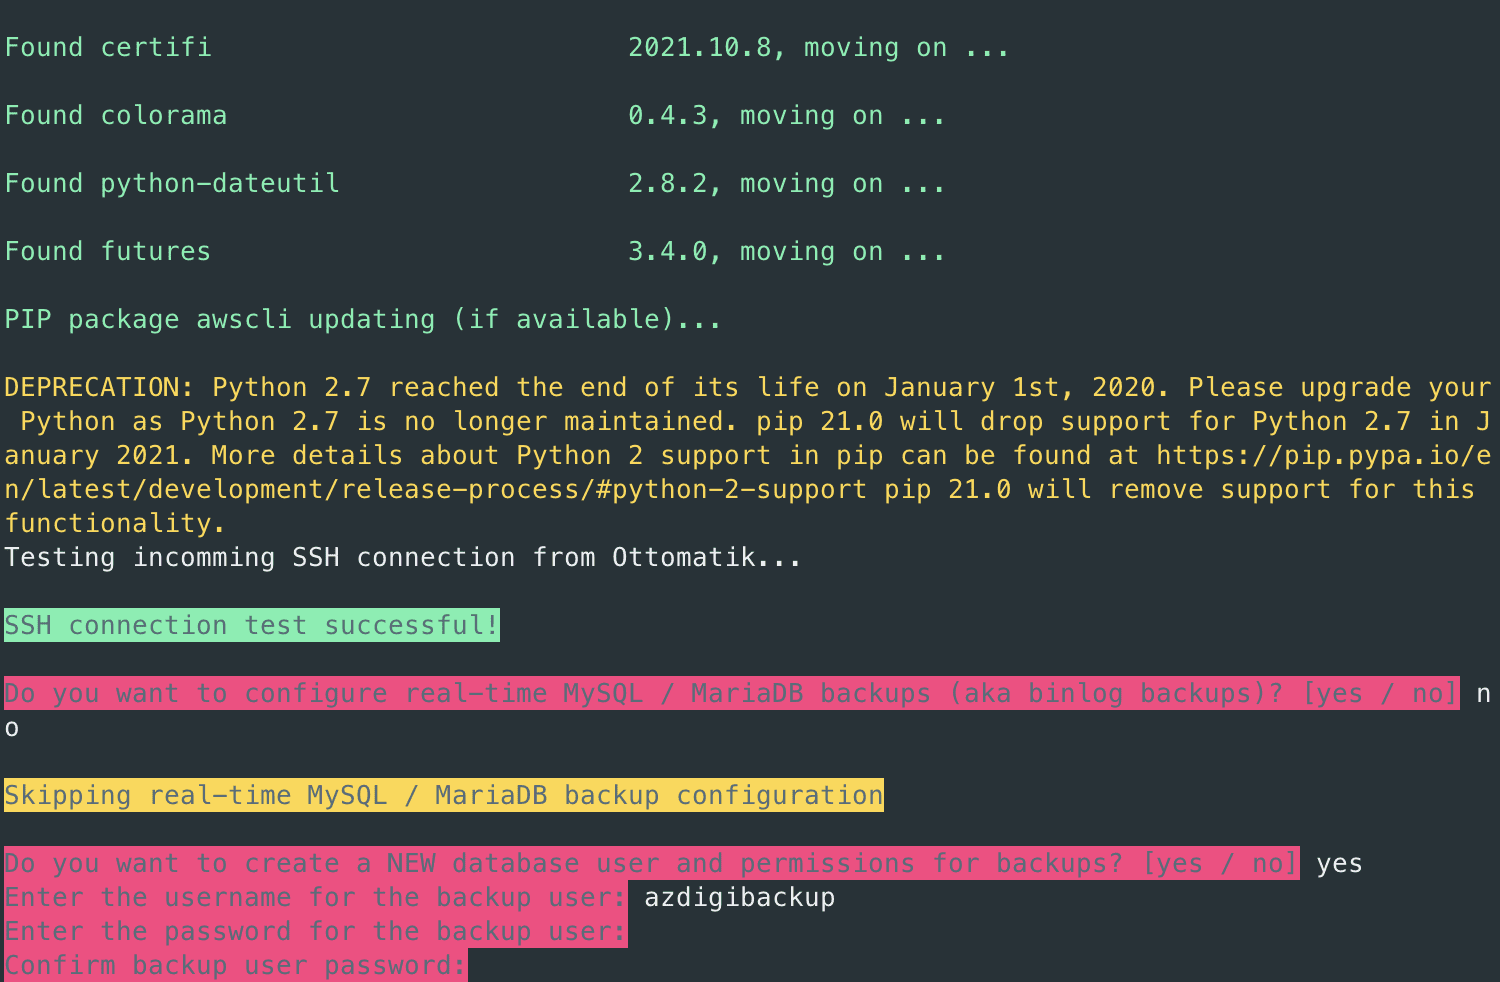
The next step is to ask you if you want to create a separate MySQL account for the backup task. Here, you should select yes and enter the username and password to create an account. It’s important to avoid using root MySQL account or the MySQL account of your website for running backups.
Keep the other information as it is and press Enter to proceed.
Once the installation is complete, Ottomatik will provide you with a set of commands to create a user database and grant permissions. You can copy these commands and access the MySQL management command line using the “mysql” command, then paste them.
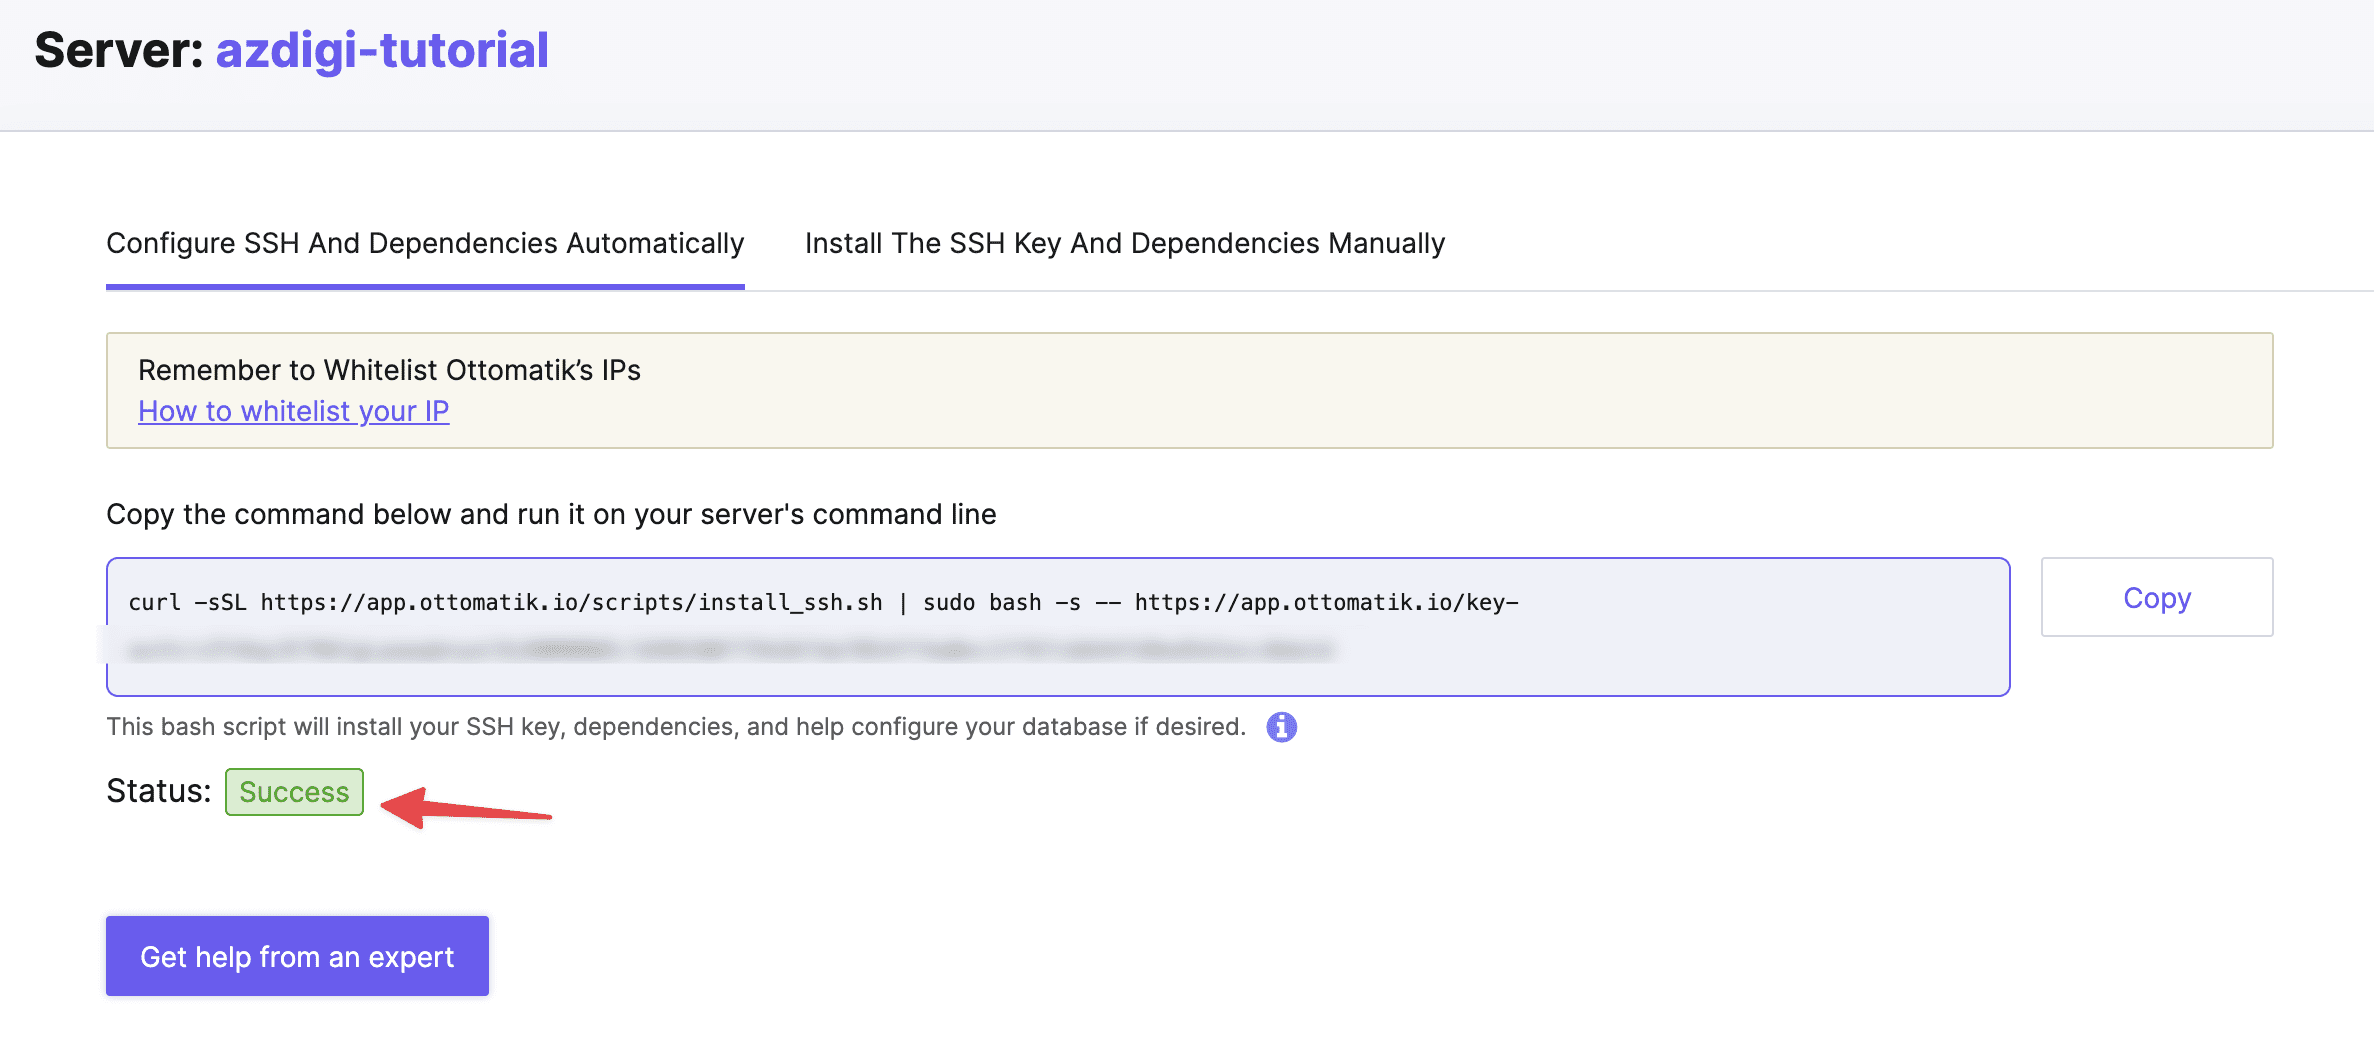
Now, go back to Ottomatik’s website, and you’ll see a “Success” notification, indicating that the server has been successfully added.
With this, the installation of the Ottomatik agent on your server is complete, and you can start configuring backups as instructed below.
Configuring Google Drive Account for Backup Storage
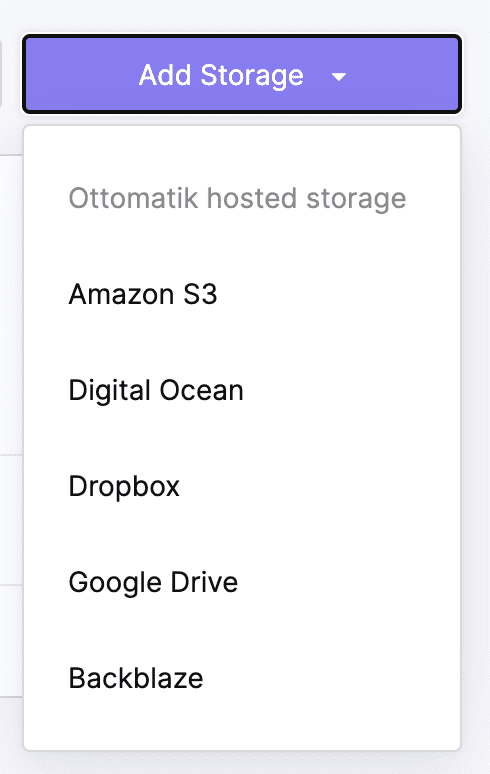
As mentioned earlier, Ottomatik supports storing backups on cloud storage services like Google Drive, Dropbox, Amazon S3, DigitalOcean, and Backblaze. To configure your storage account, you can access the Storage interface as shown below.

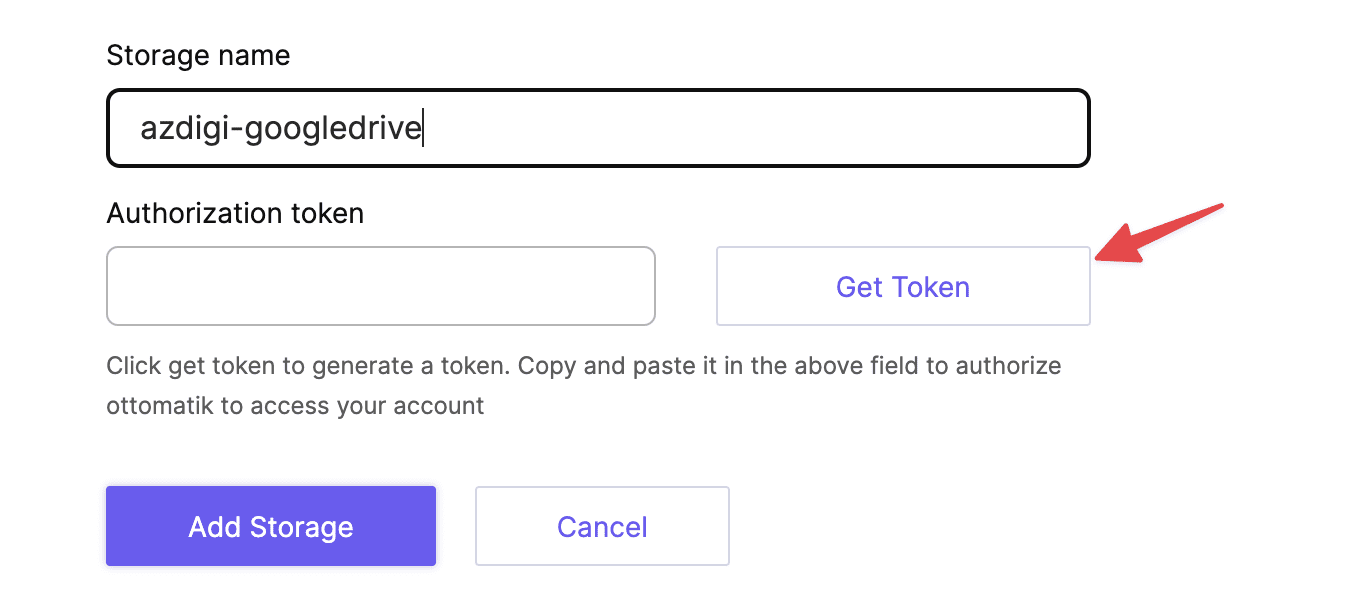
Next, click Add Storage and select the storage service you prefer.
Depending on the service you choose, there will be different setup methods. In this guide, we’ll focus on Google Drive. After selecting Google Drive, click the Get Token button in the next interface to obtain a connection token.
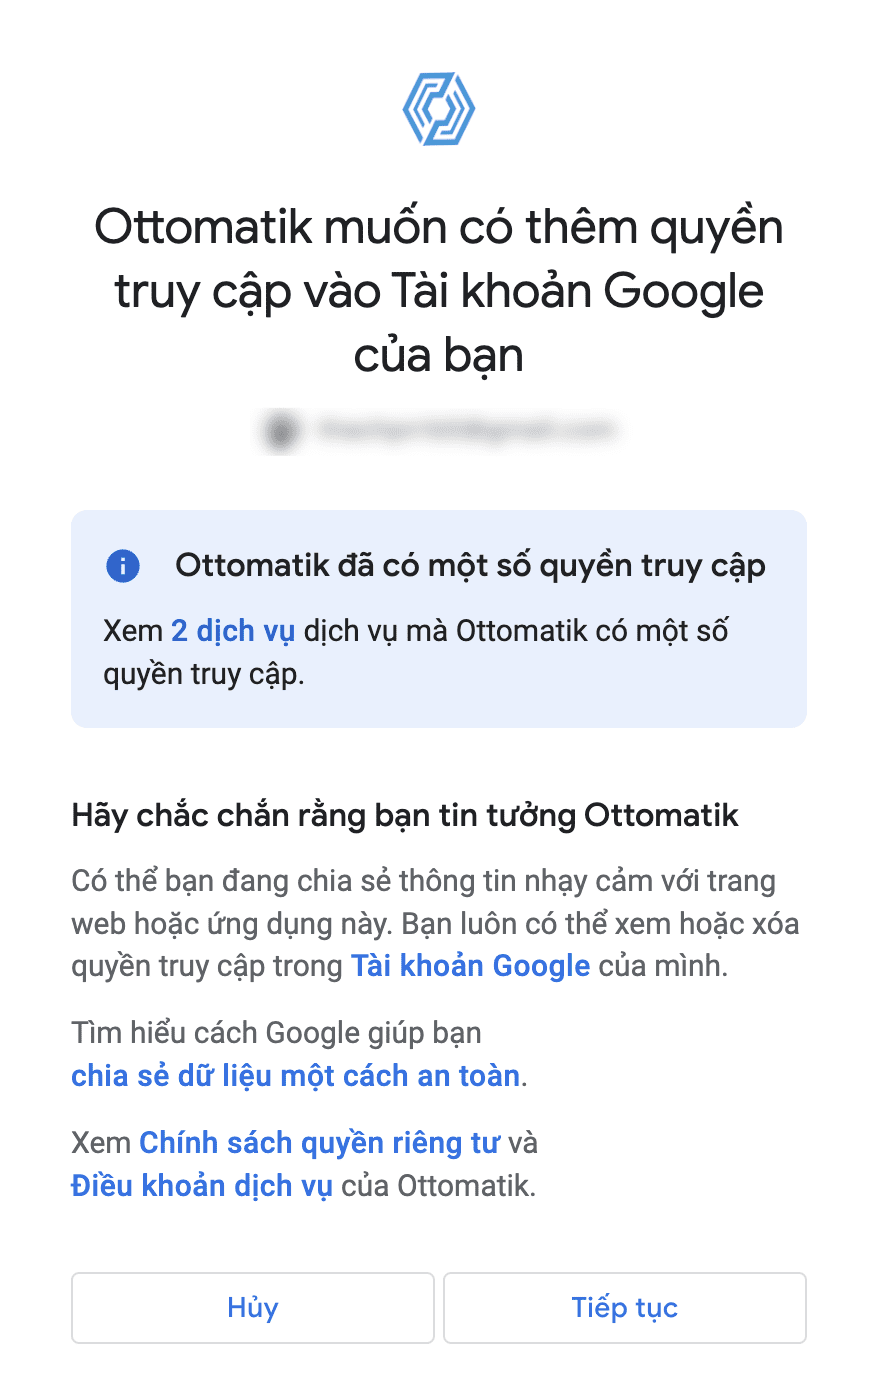
Grant the necessary permissions for the token.
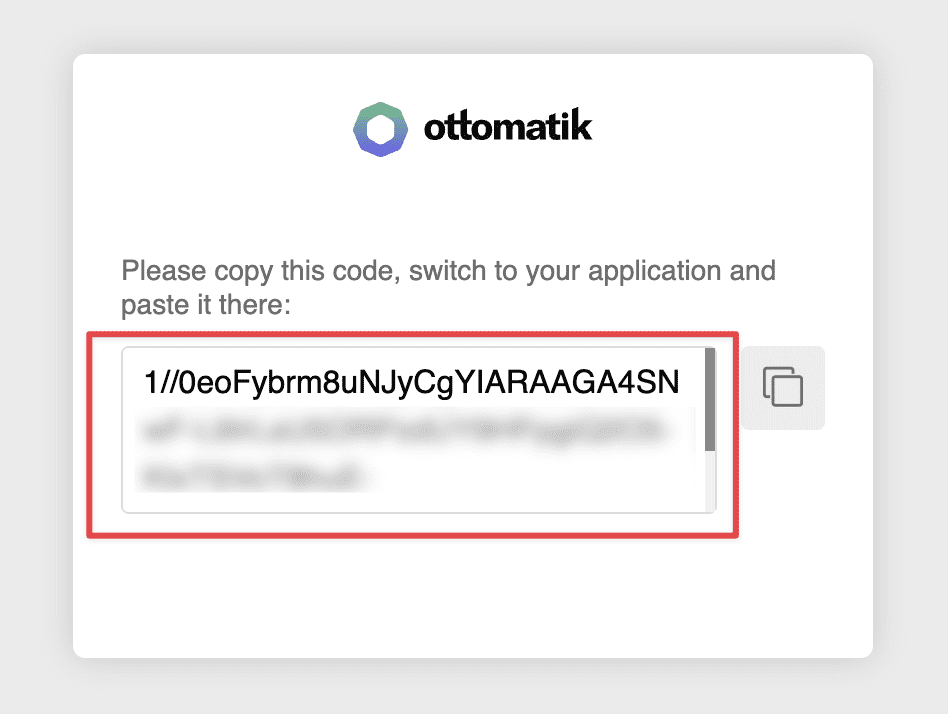
Next, copy the token code provided by your web browser and paste it into the Authorization token field on the Ottomatik interface.
Once you’ve entered the token, click Add Storage.
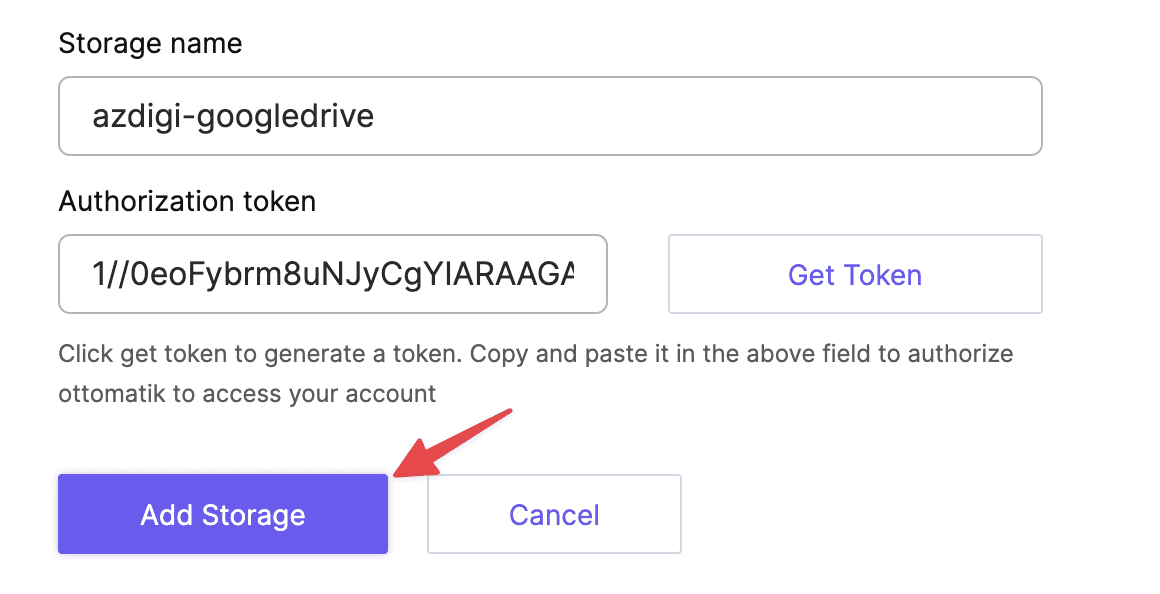
This completes the setup of your Google Drive account. In the future, you’ll only need to create backup jobs without reconfiguring the storage account.
Configuring MySQL Database Backup
To access the Parachutes interface for creating new backup tasks and managing existing ones.
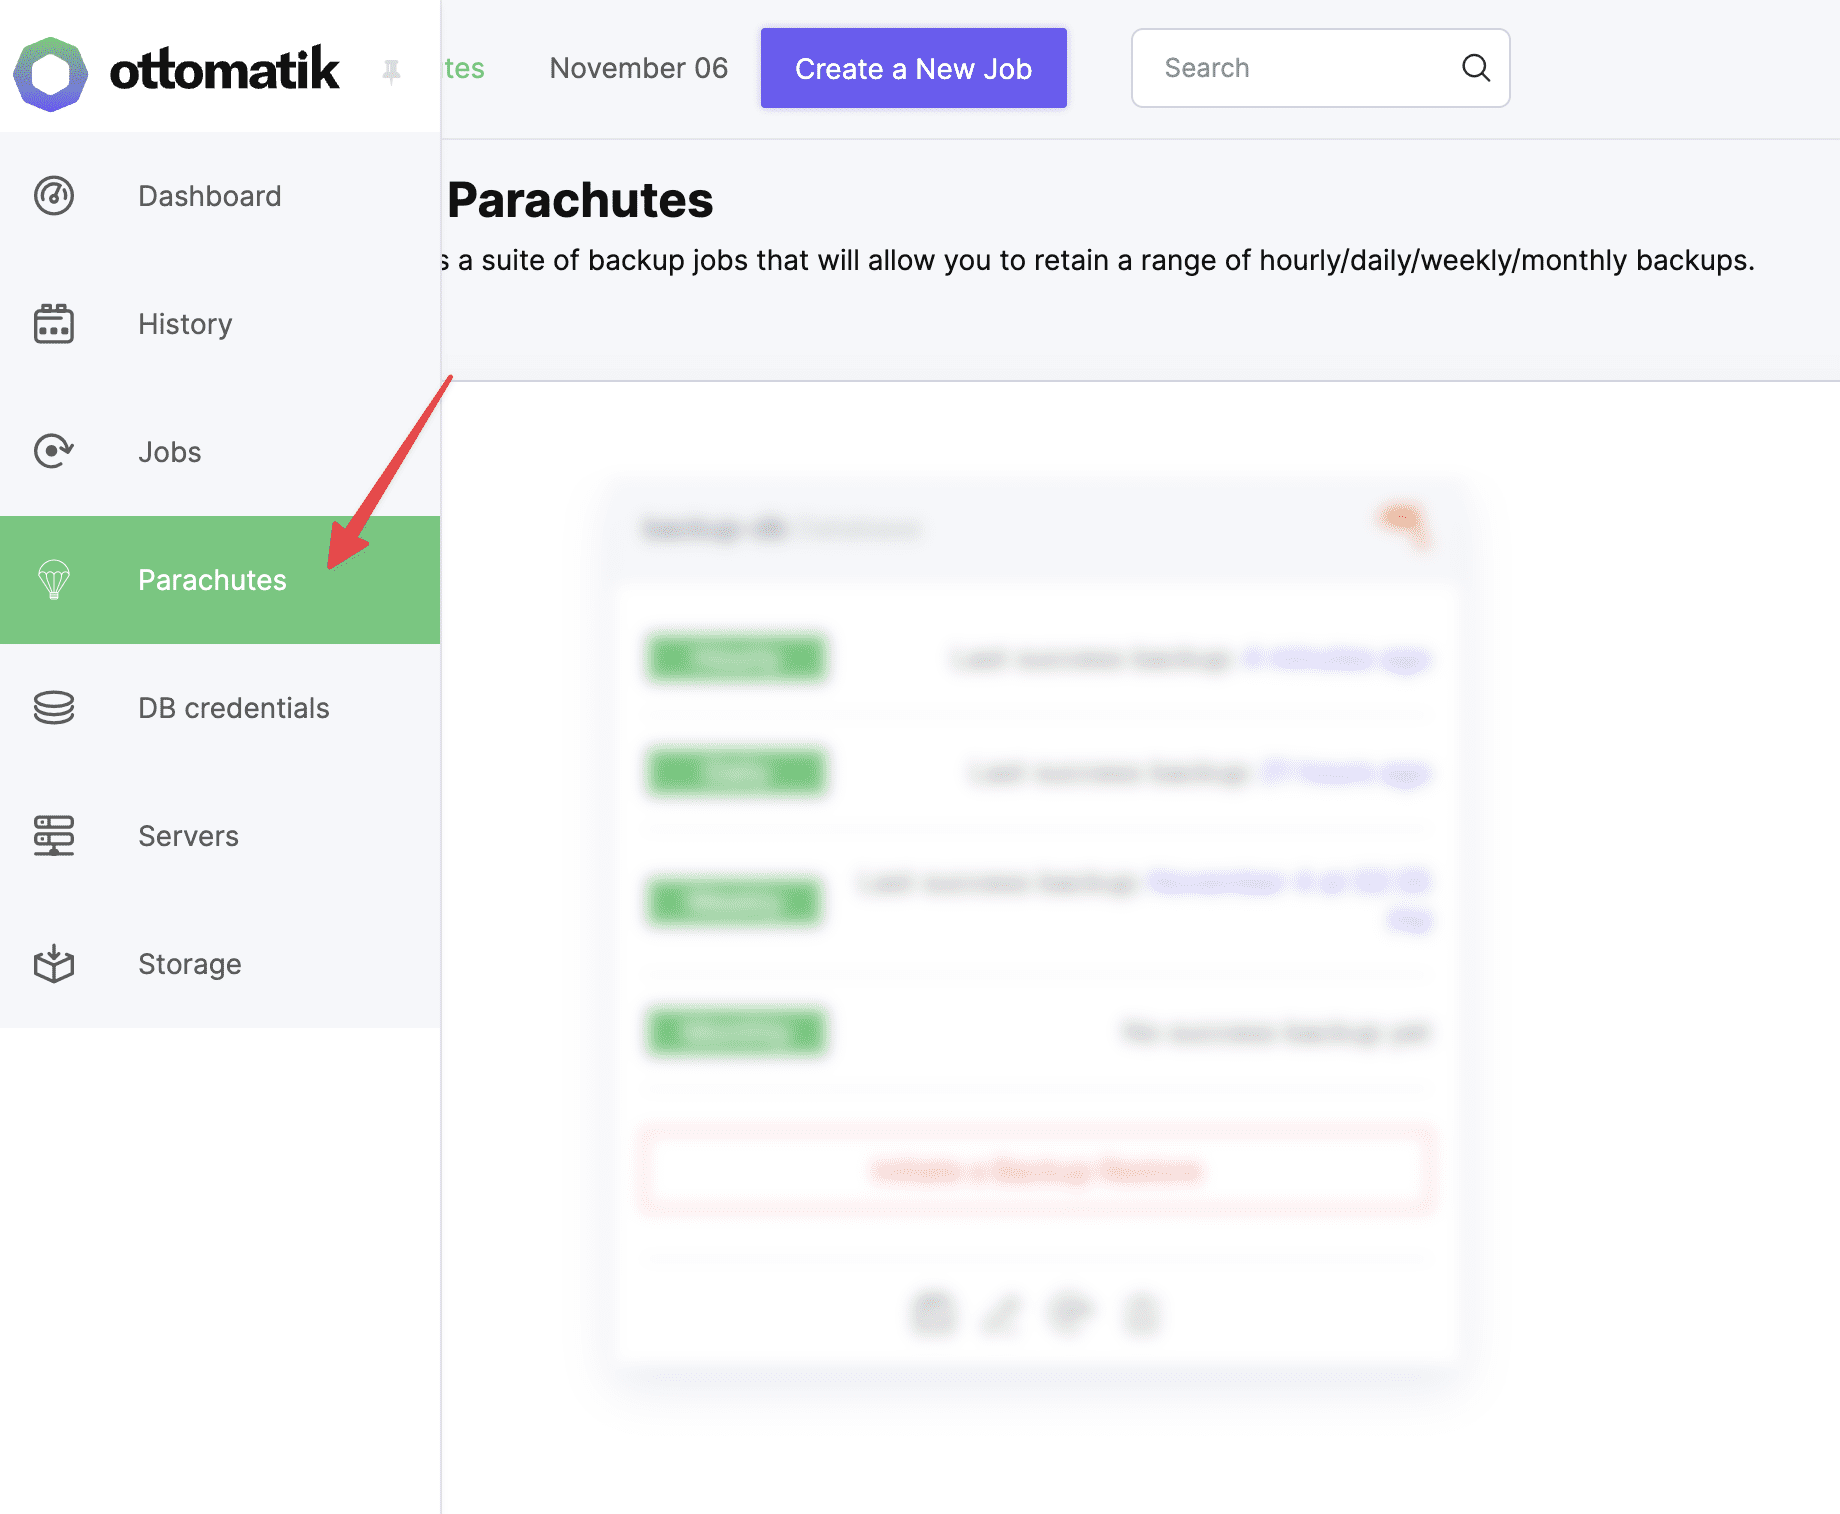
Next, press Create New to create a new backup task.
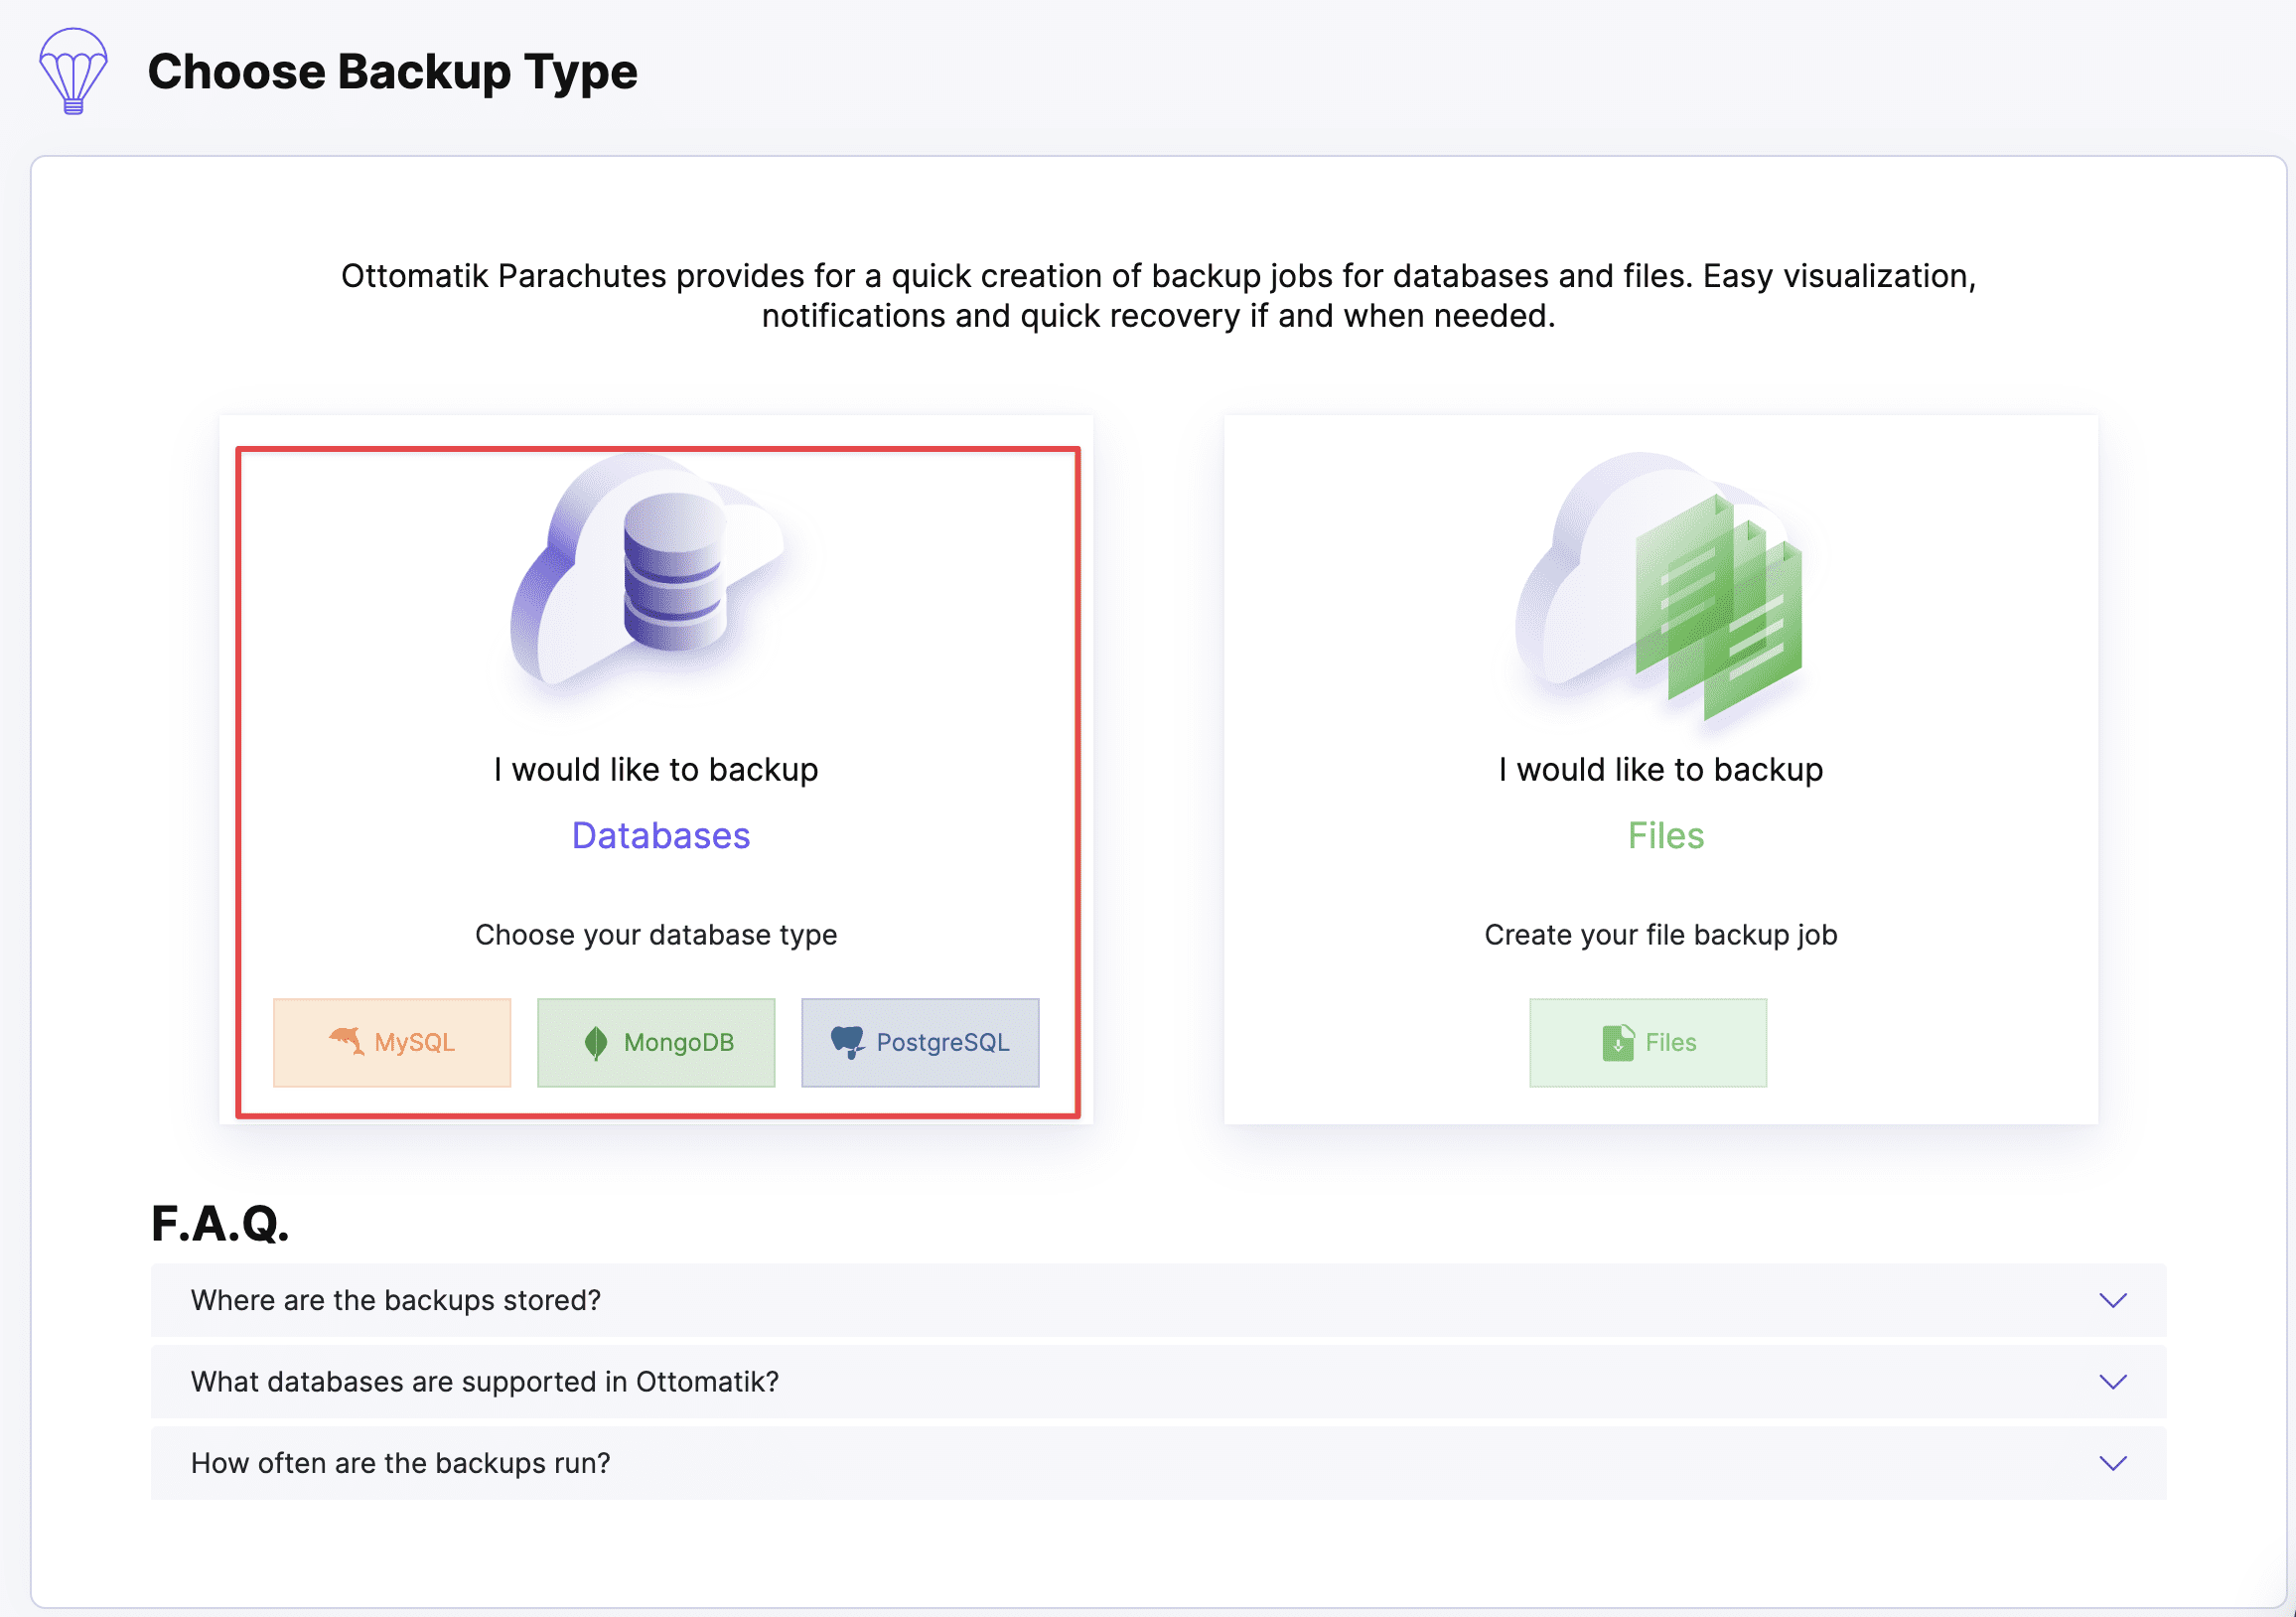
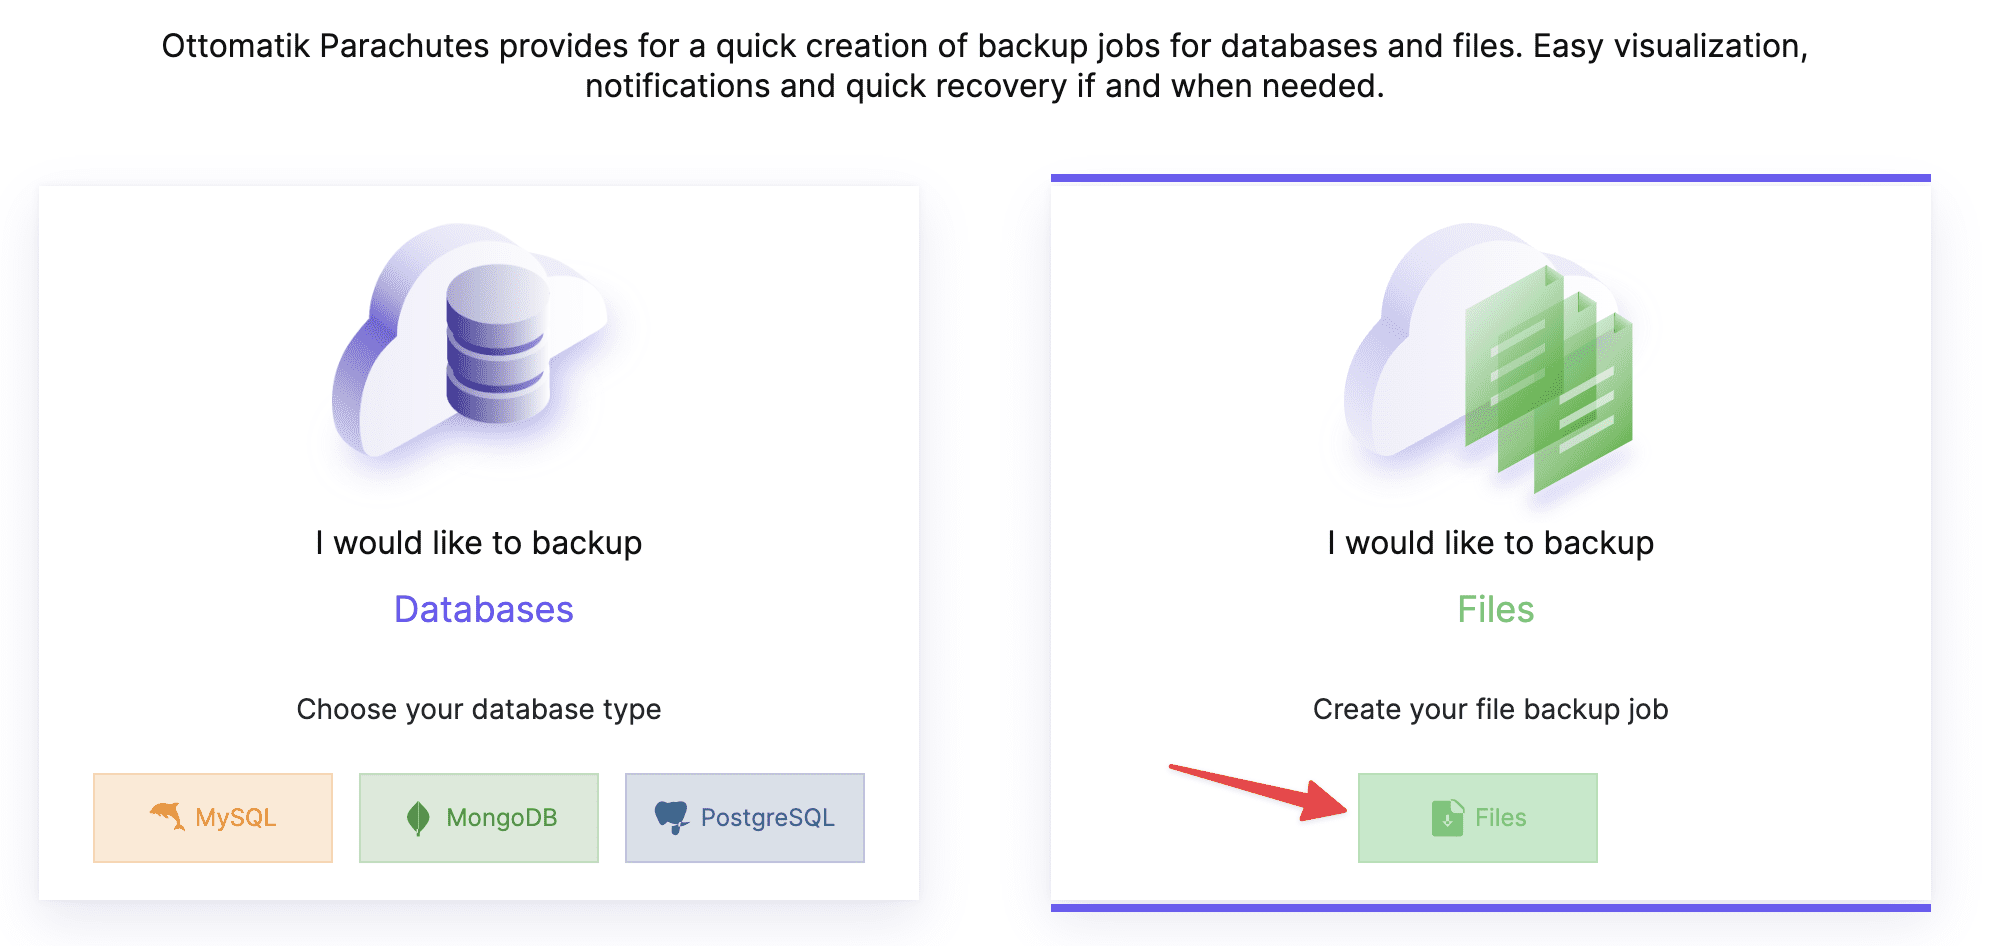
Choose “backup Database” and select the type of database software you want to back up. Ottomatik currently supports backup for MySQL/MariaDB, MongoDB, and PostgreSQL databases.
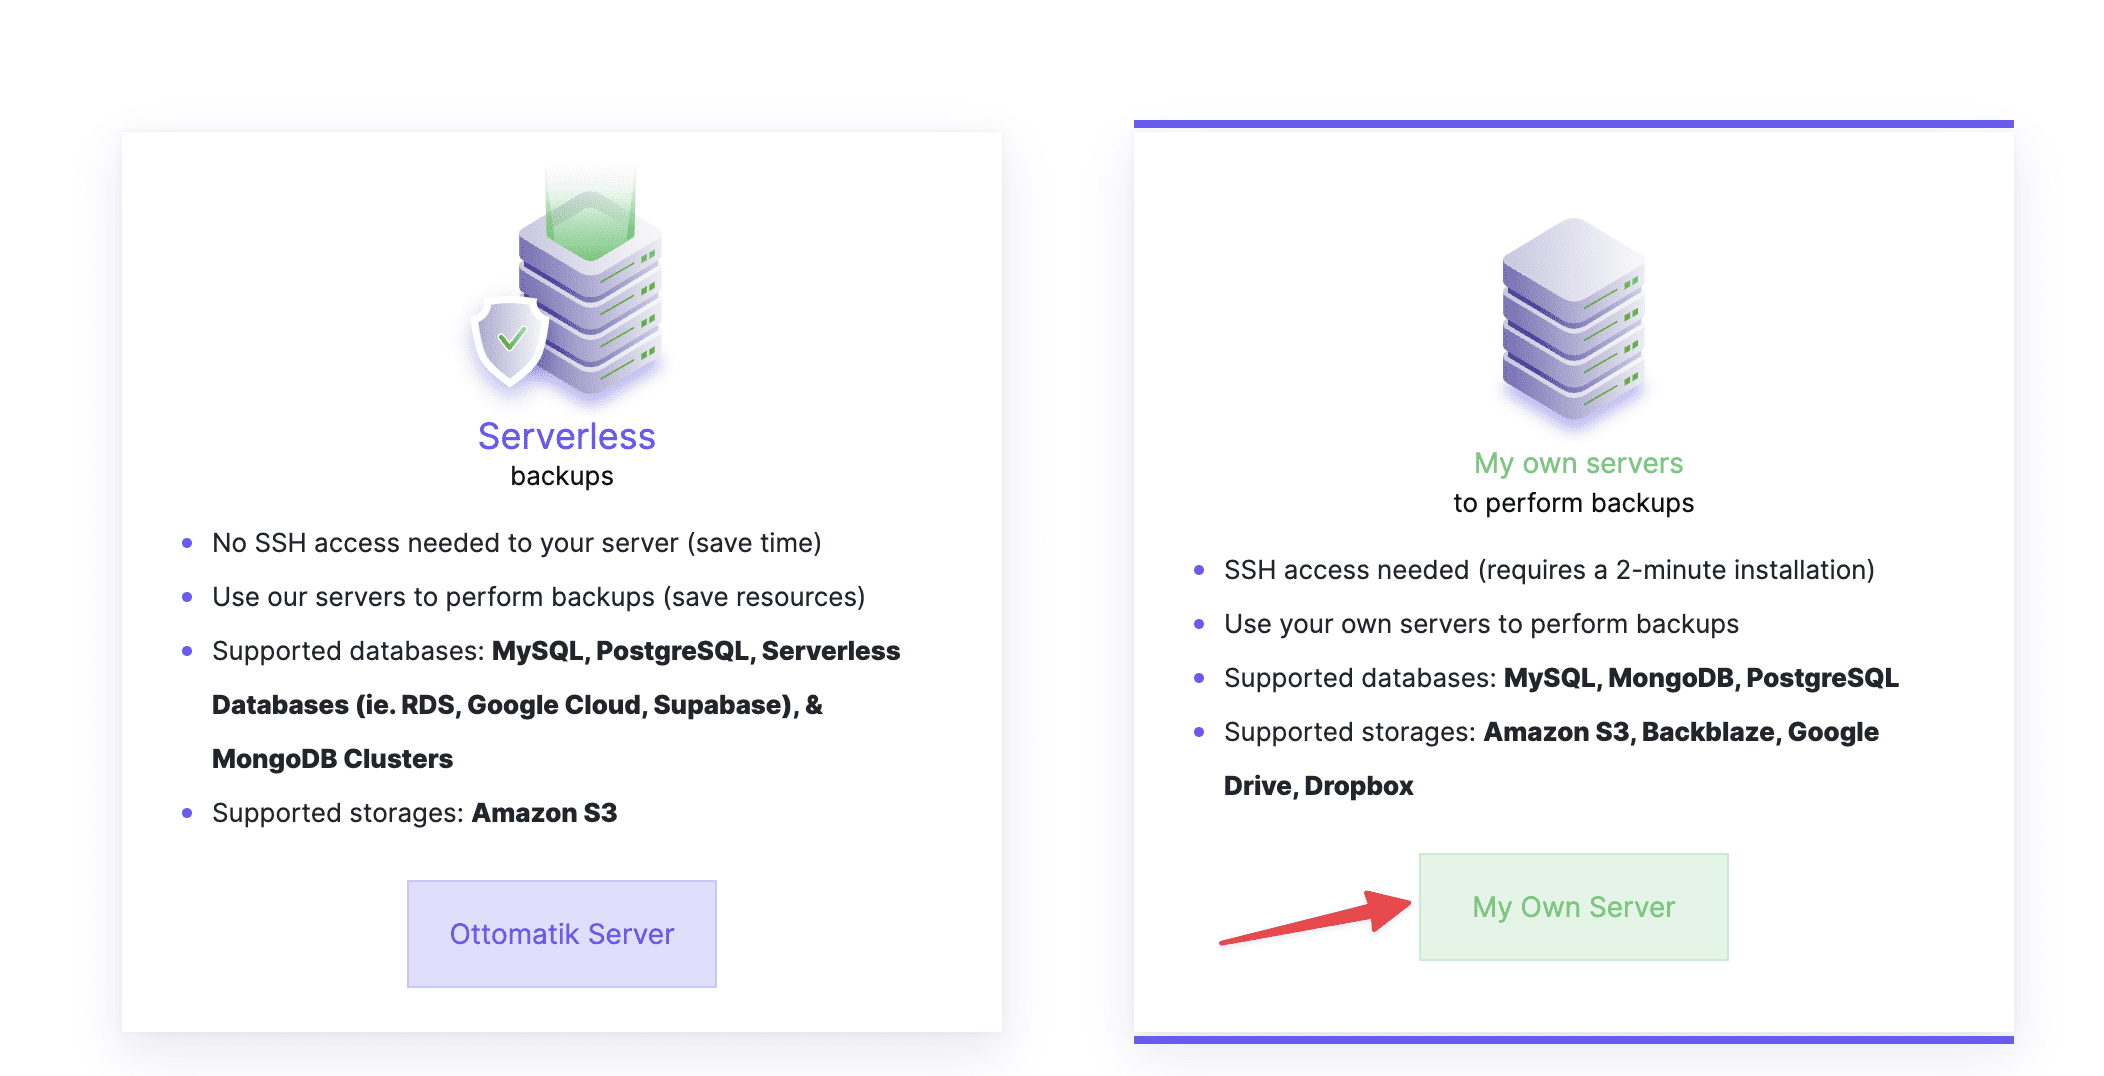
Select “My own server” as the storage server to store backups on your account.
Continue by selecting “Connect my own storage.”

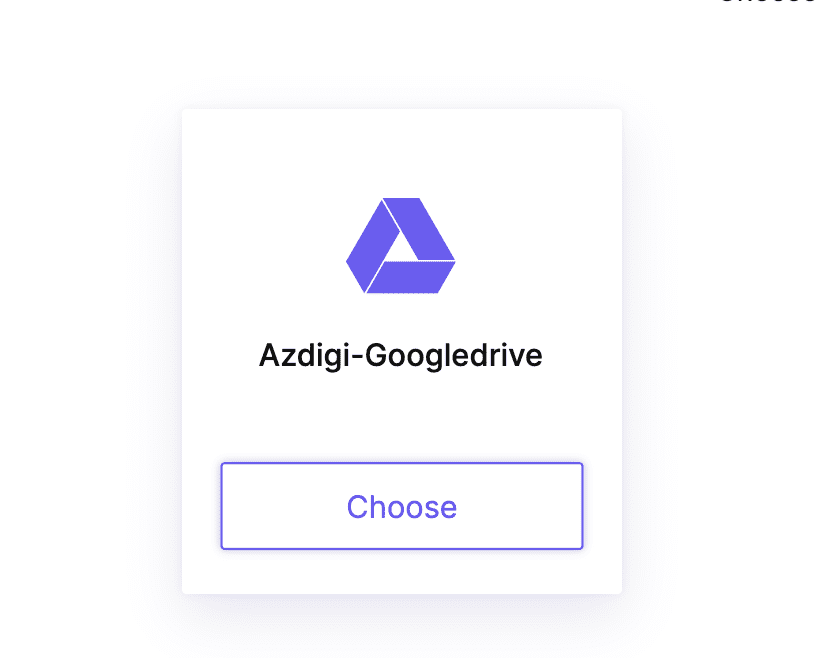
And choose the storage account you previously configured.
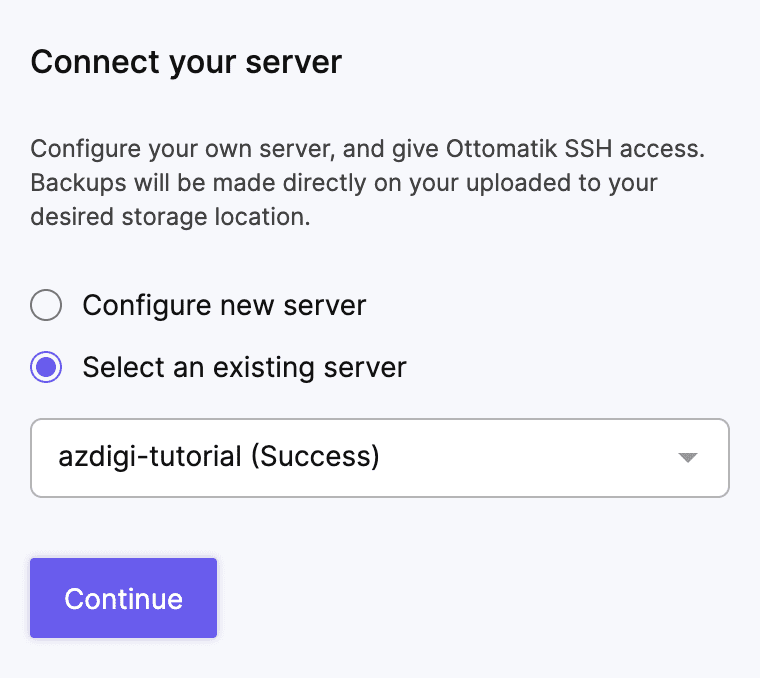
In the next step, you will select the server that you want to perform the backup on => choose “Select an existing server” and select the server you added earlier.
Then, enter the account and database details for the backup task.
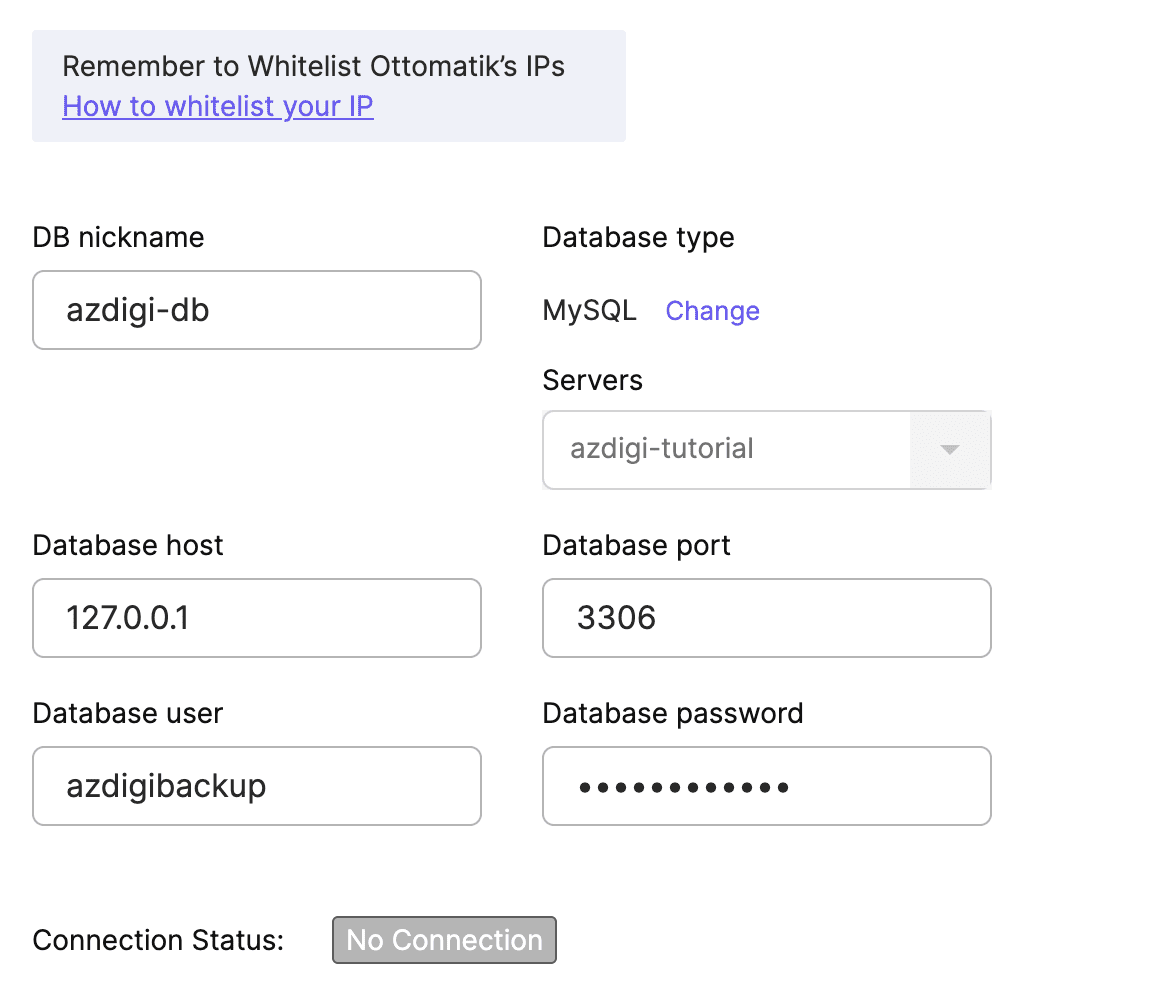
Here are the details:
- DB nickname: The name of the database you want to back up.
- Database host: The database server you are using; you can leave it as 127.0.0.1 if the database is running on the same server.
- Database port: The MySQL port, usually 3306 by default.
- Database user: The name of the database user with access to the
DB nicknamementioned earlier. If you created a separate user for backing up the database in the Ottomatik setup, you should enter it here. - Database password: The password for the database user above.
If you entered incorrect information, you can correct it by entering the database account you configured on the website. After entering the information, click Check and Save, if the information is valid and the connection is successful, proceed to the next step.
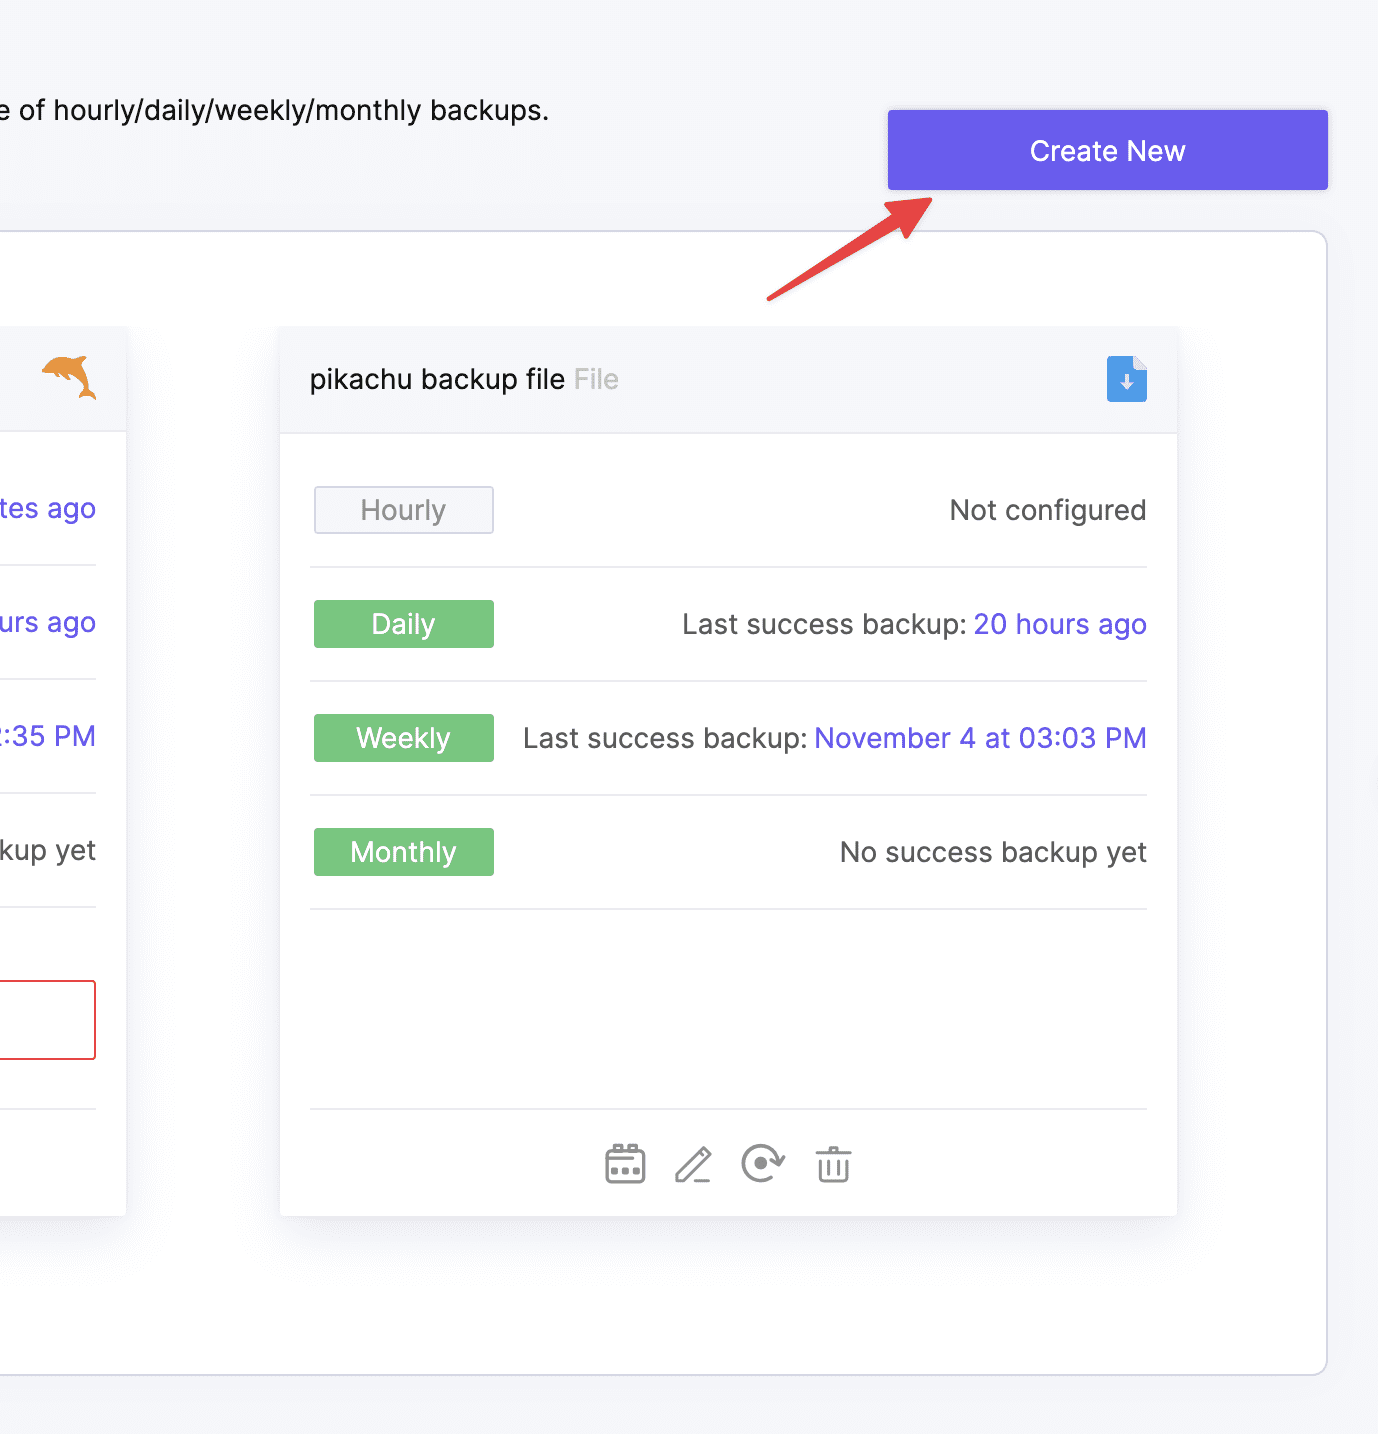
In the next step, you can choose the backup retention period, set a task name, and click Finalize Setup to complete the process.
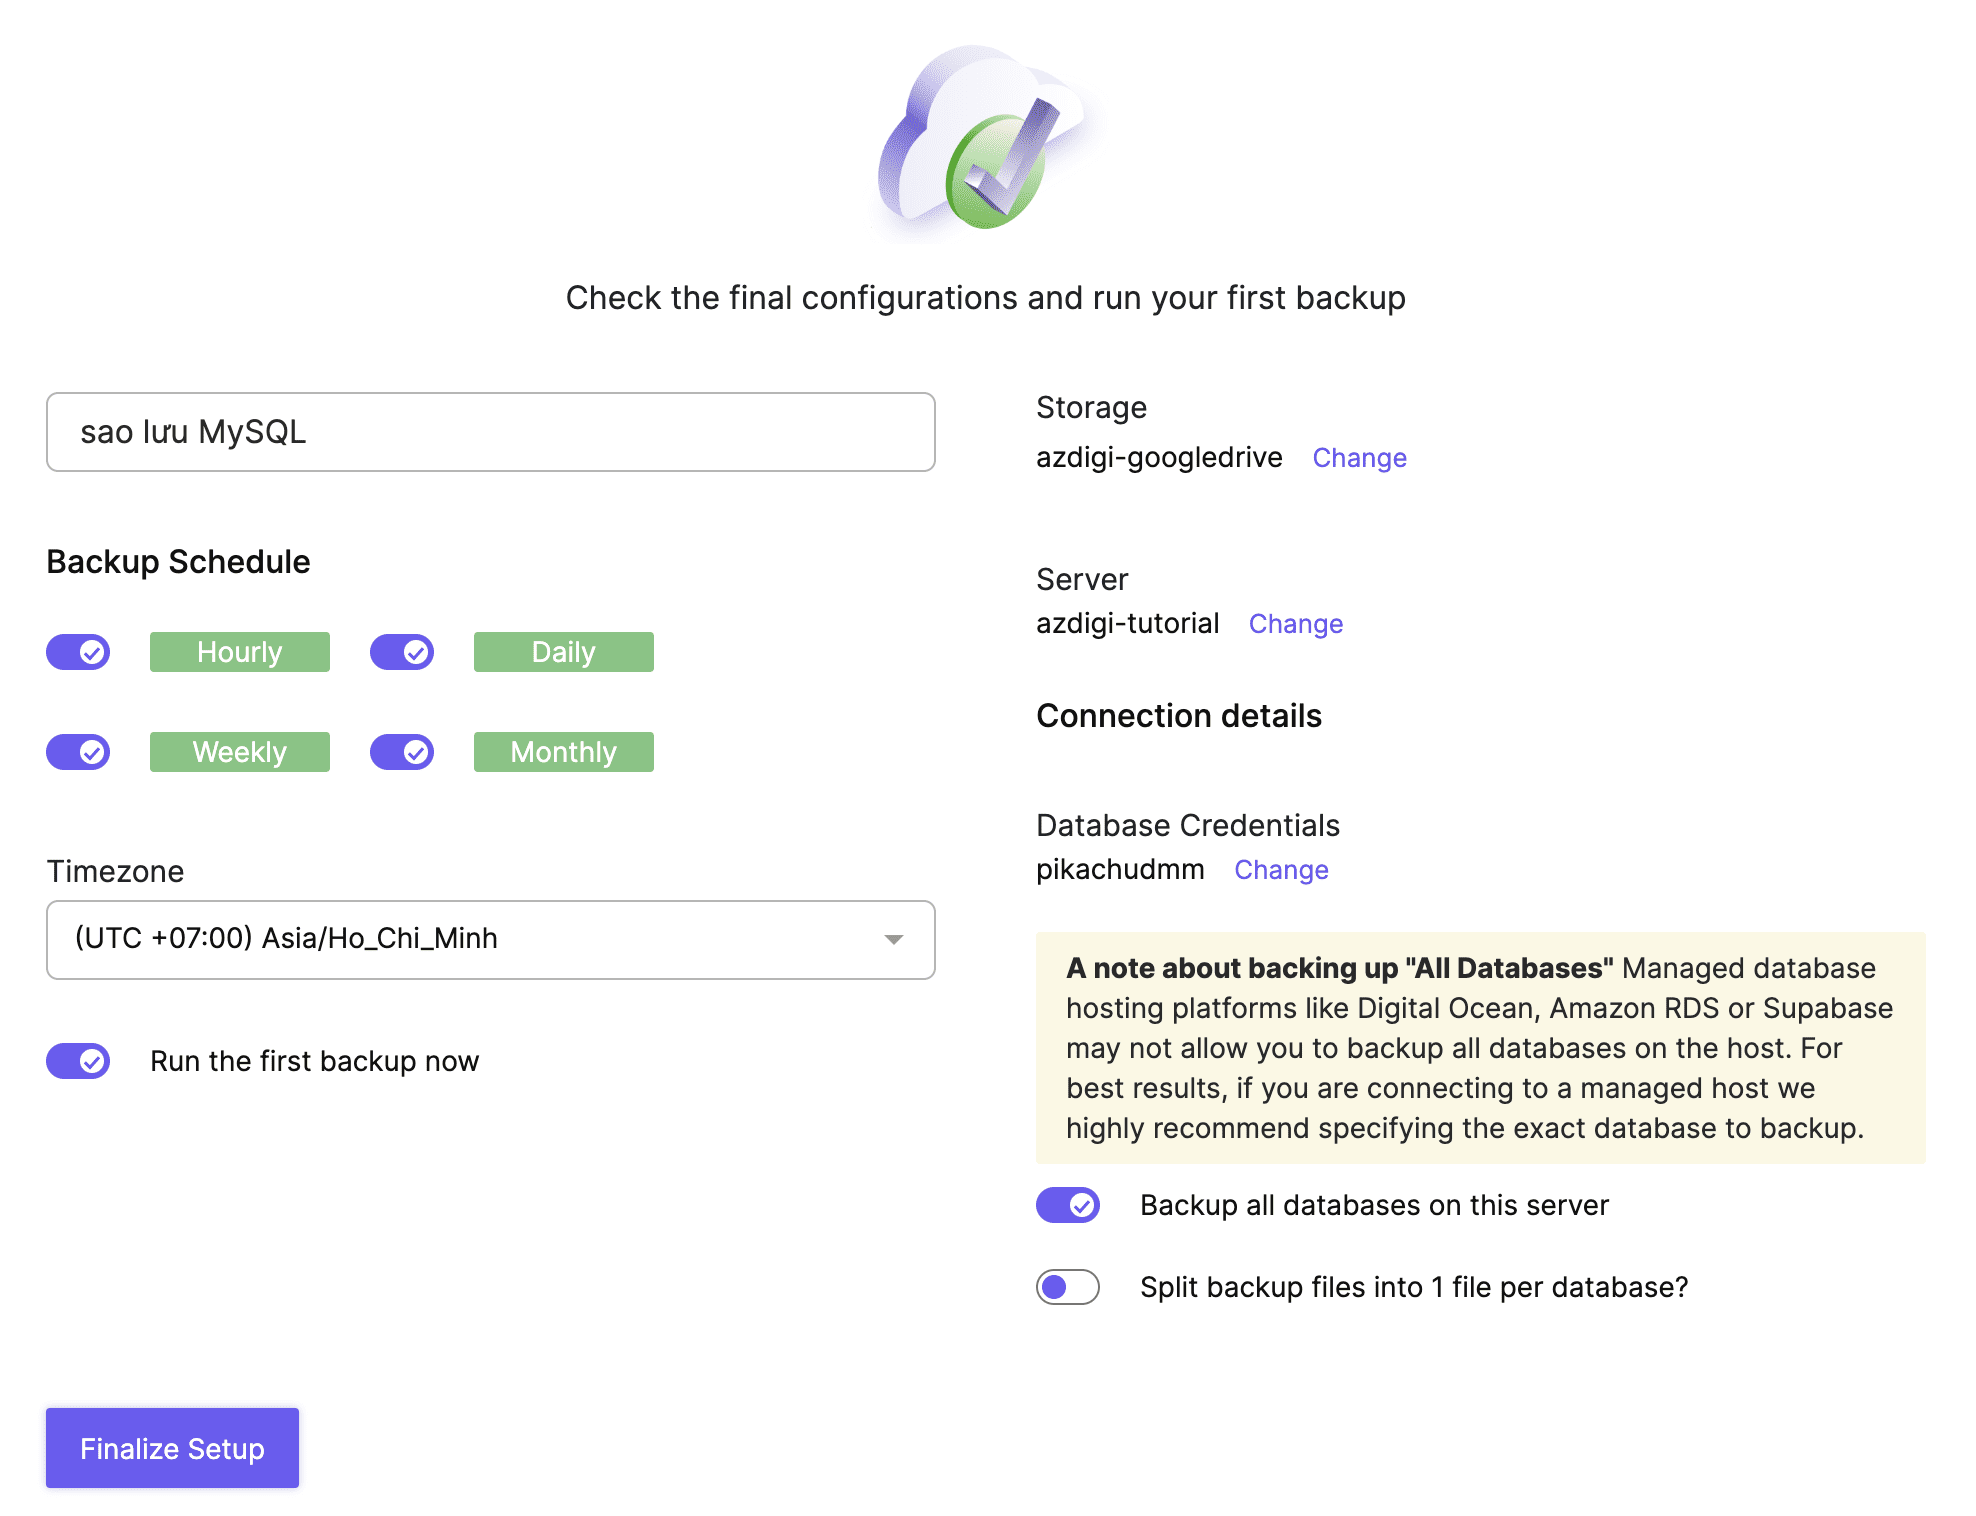
Once this is done, it will run the initial backup. You can check the progress in the Parachutes section.
Setting Up Backup File
You still need to access the Parachutes interface, select Create New to add a new task, and choose File.
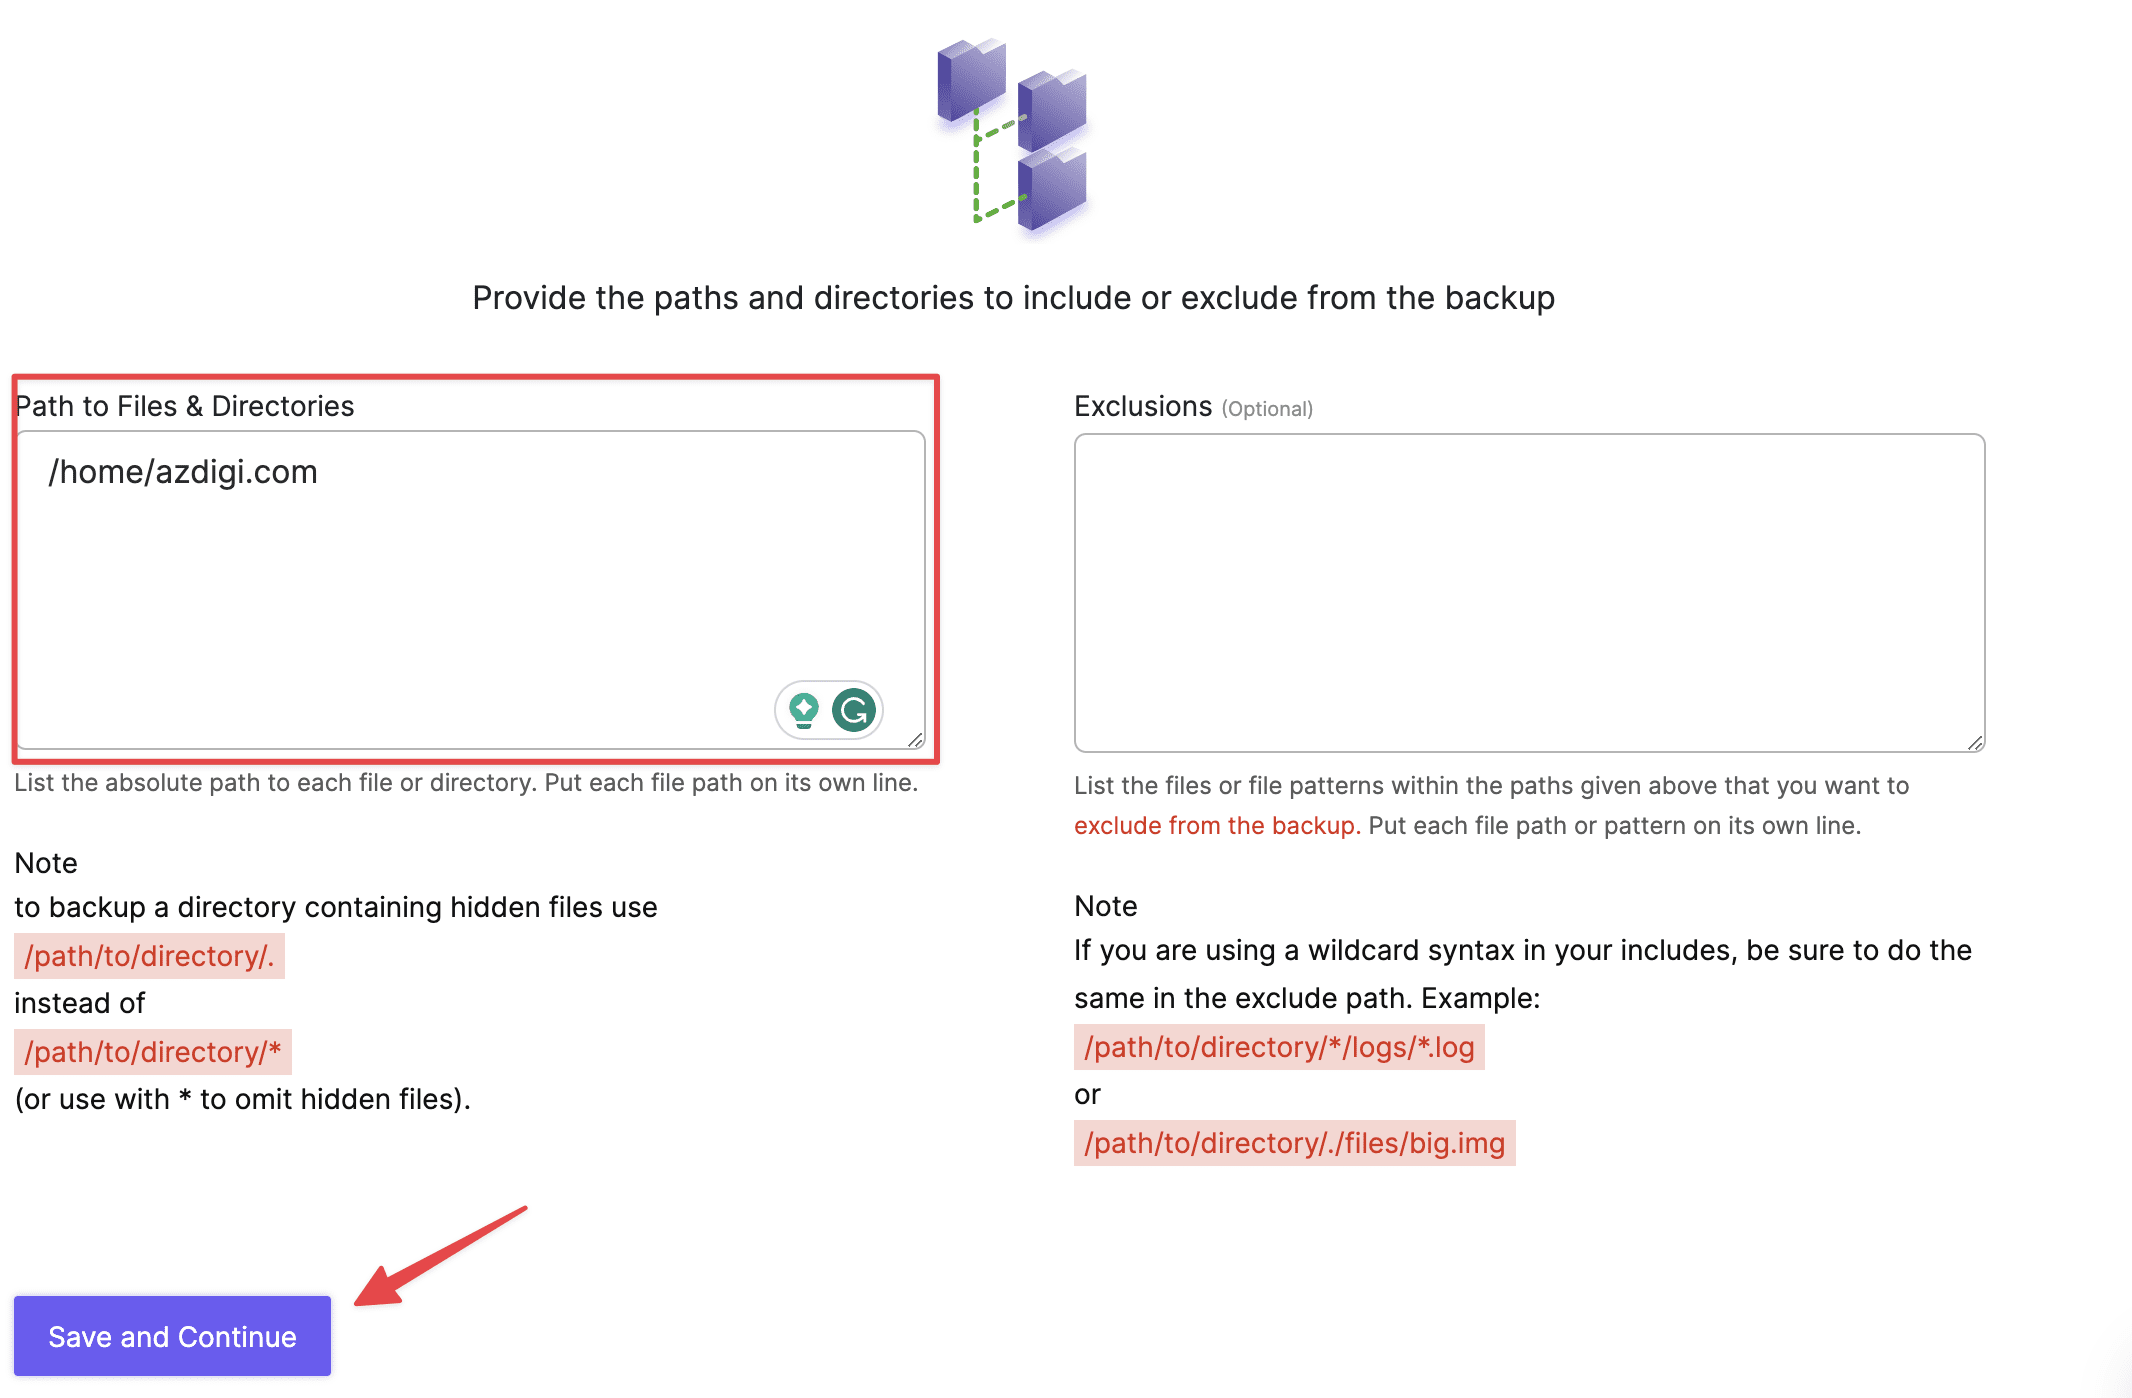
Continue by selecting “Connect my own storage,” choose the storage account, and select a server as you did in the previous steps. In the section for setting the file path, enter the folder path you want to back up; it will back up the data within that folder and any subfolders.
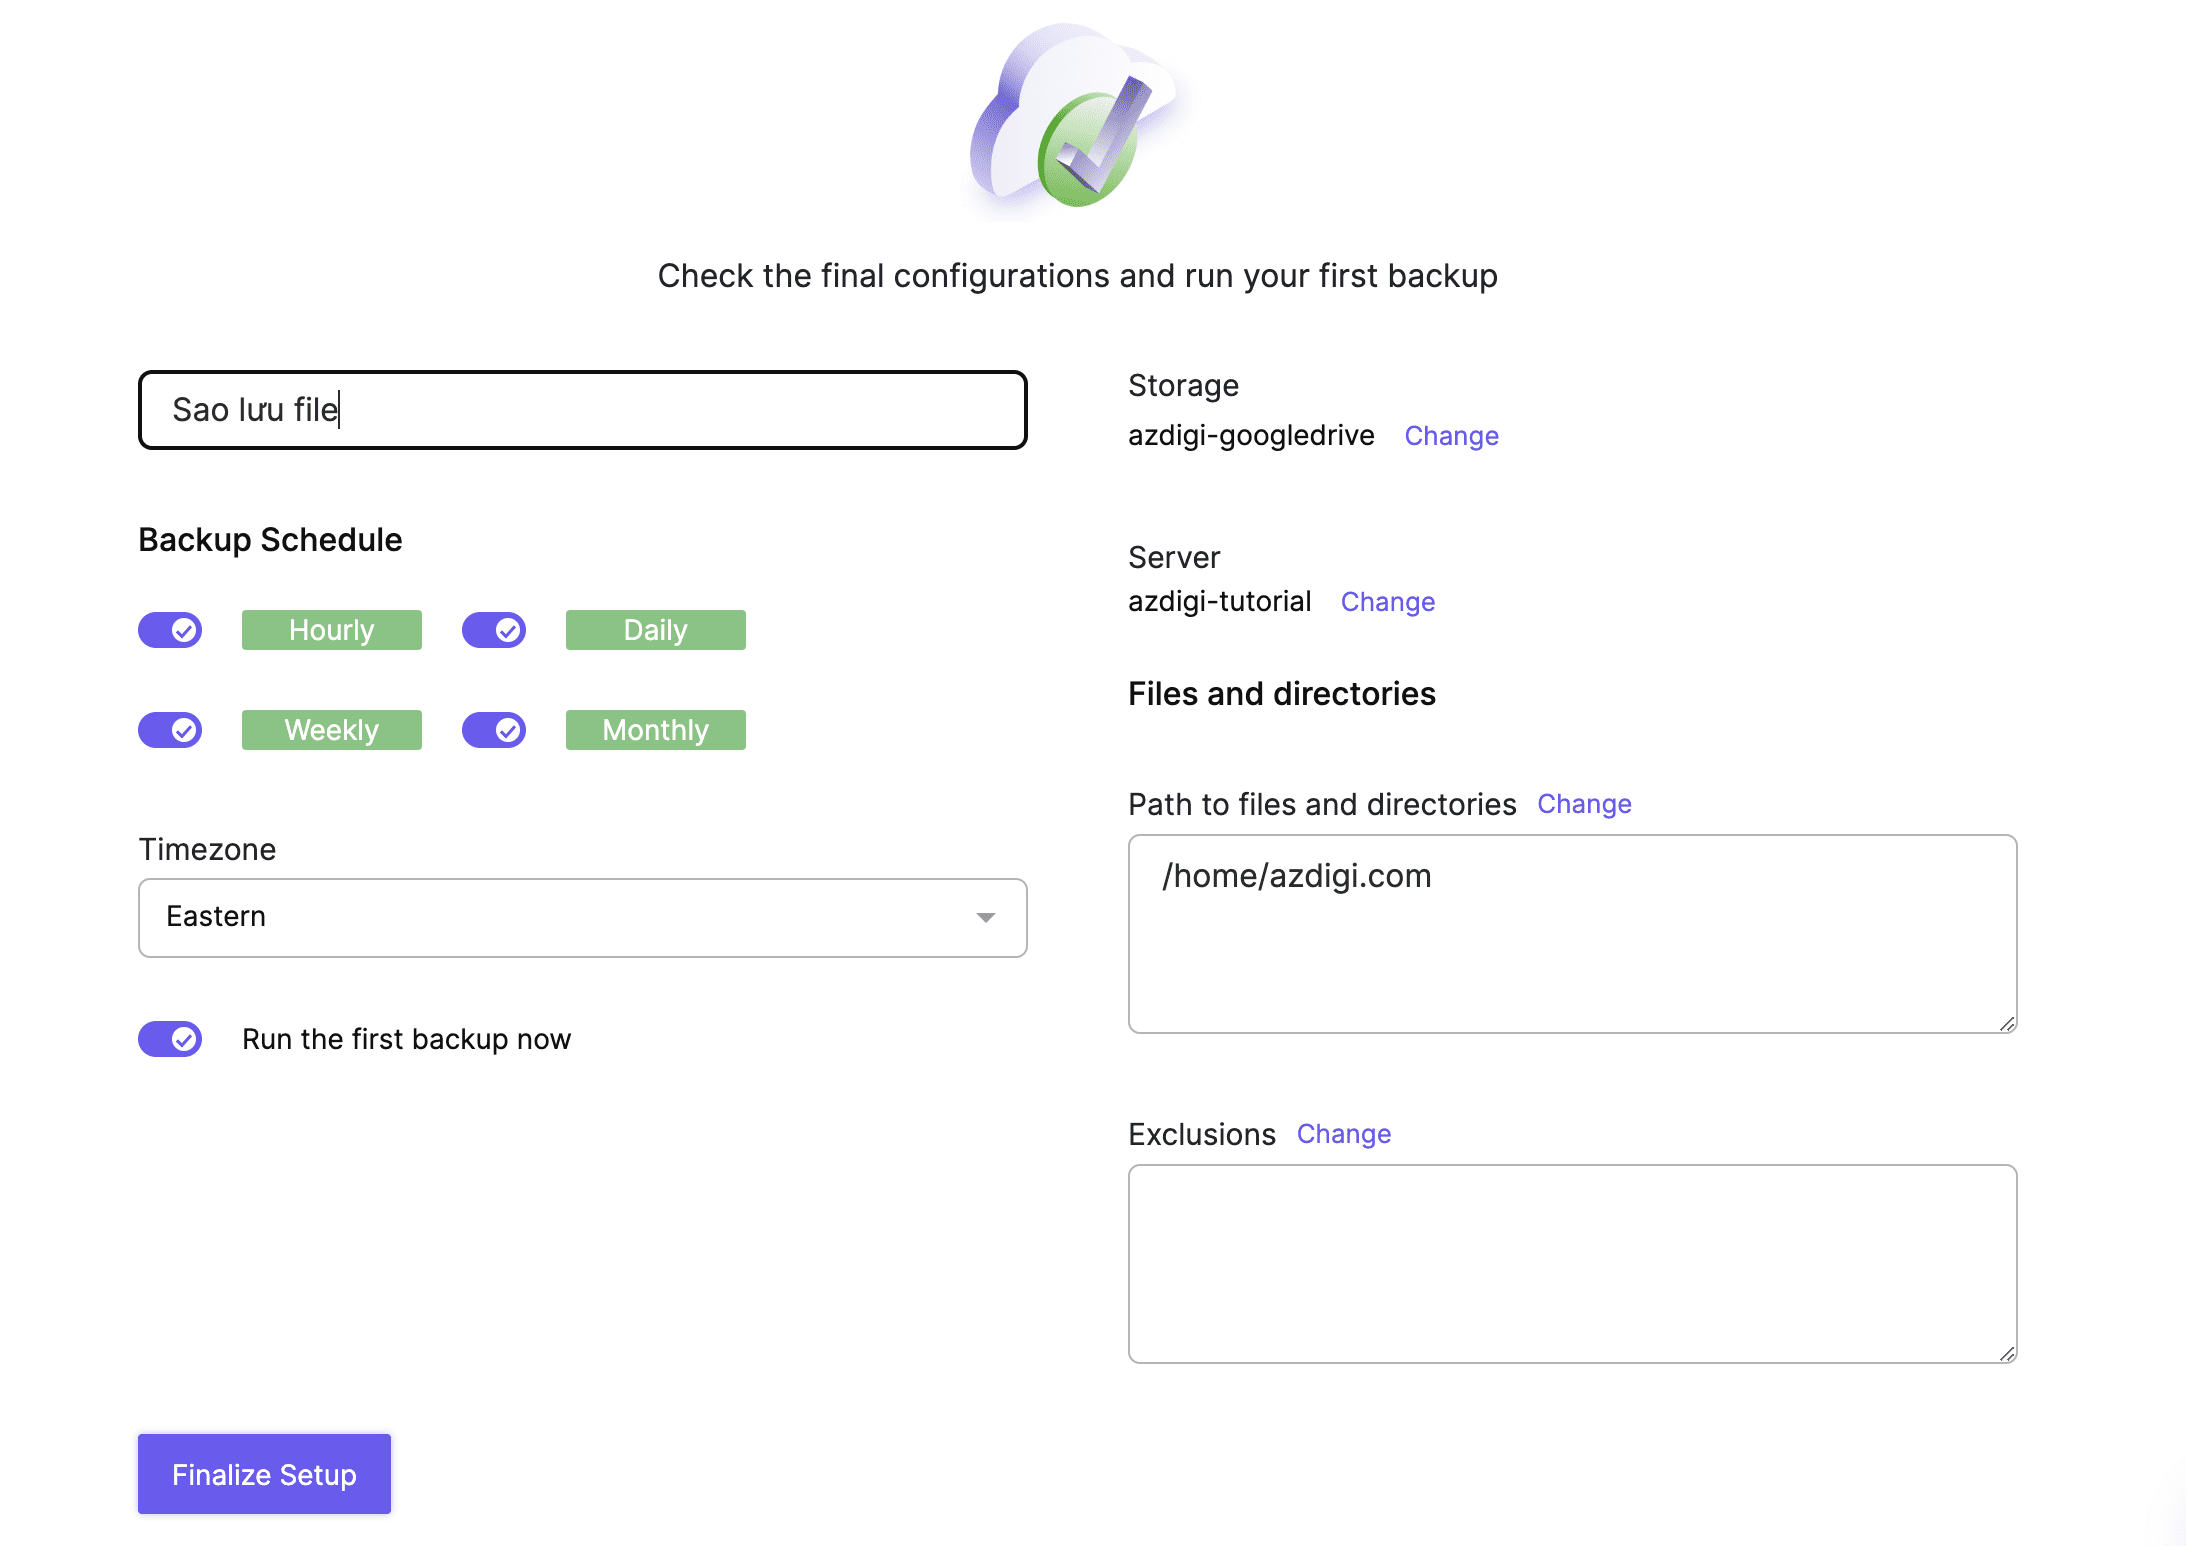
In the next step, you can also set the task name, backup frequency, and click Finalize Setup to complete the process.
This way, you have completed the File backup setup on your server using Ottomatik.
Conclusion
While Ottomatik offers straightforward usage and is cost-effective for truly important websites, the author of the article evaluates its effectiveness. It reduces the time and costs associated with backing-up systems with large amounts of data. Currently, the author uses this tool to back up databases up to 100GB in size, with a frequency of once per hour, and various File data, and it still operates very reliably.
You might also like
About the author

Thạch Phạm
Đồng sáng lập và Giám đốc điều hành của AZDIGI. Có hơn 15 năm kinh nghiệm trong phổ biến kiến thức liên quan đến WordPress tại thachpham.com, phát triển website và phát triển hệ thống.