
By default, when we install aaPanel, aaPanel encourages us to use Nginx Tengine as the main webserver on the server.
However, in the process of using, sometimes the Nginx Tengine web server has a few disadvantages as follows:
- .htaccess is not officially supported.
- Frequently encountering 502 status when working with heavy websites.
So for extremely heavy websites, I recommend using Apache rather than Nginx Tengine.
To switch the webserver from Nginx Tengine to Apache on aaPanel, please continue reading the article.
II. Switch web server from Nginx Tengine to Apache on aaPanel
To switch the webserver from Nginx Tengine to Apache on aaPanel, we follow these 3 steps.
Step 1: Access the admin page aaPanel
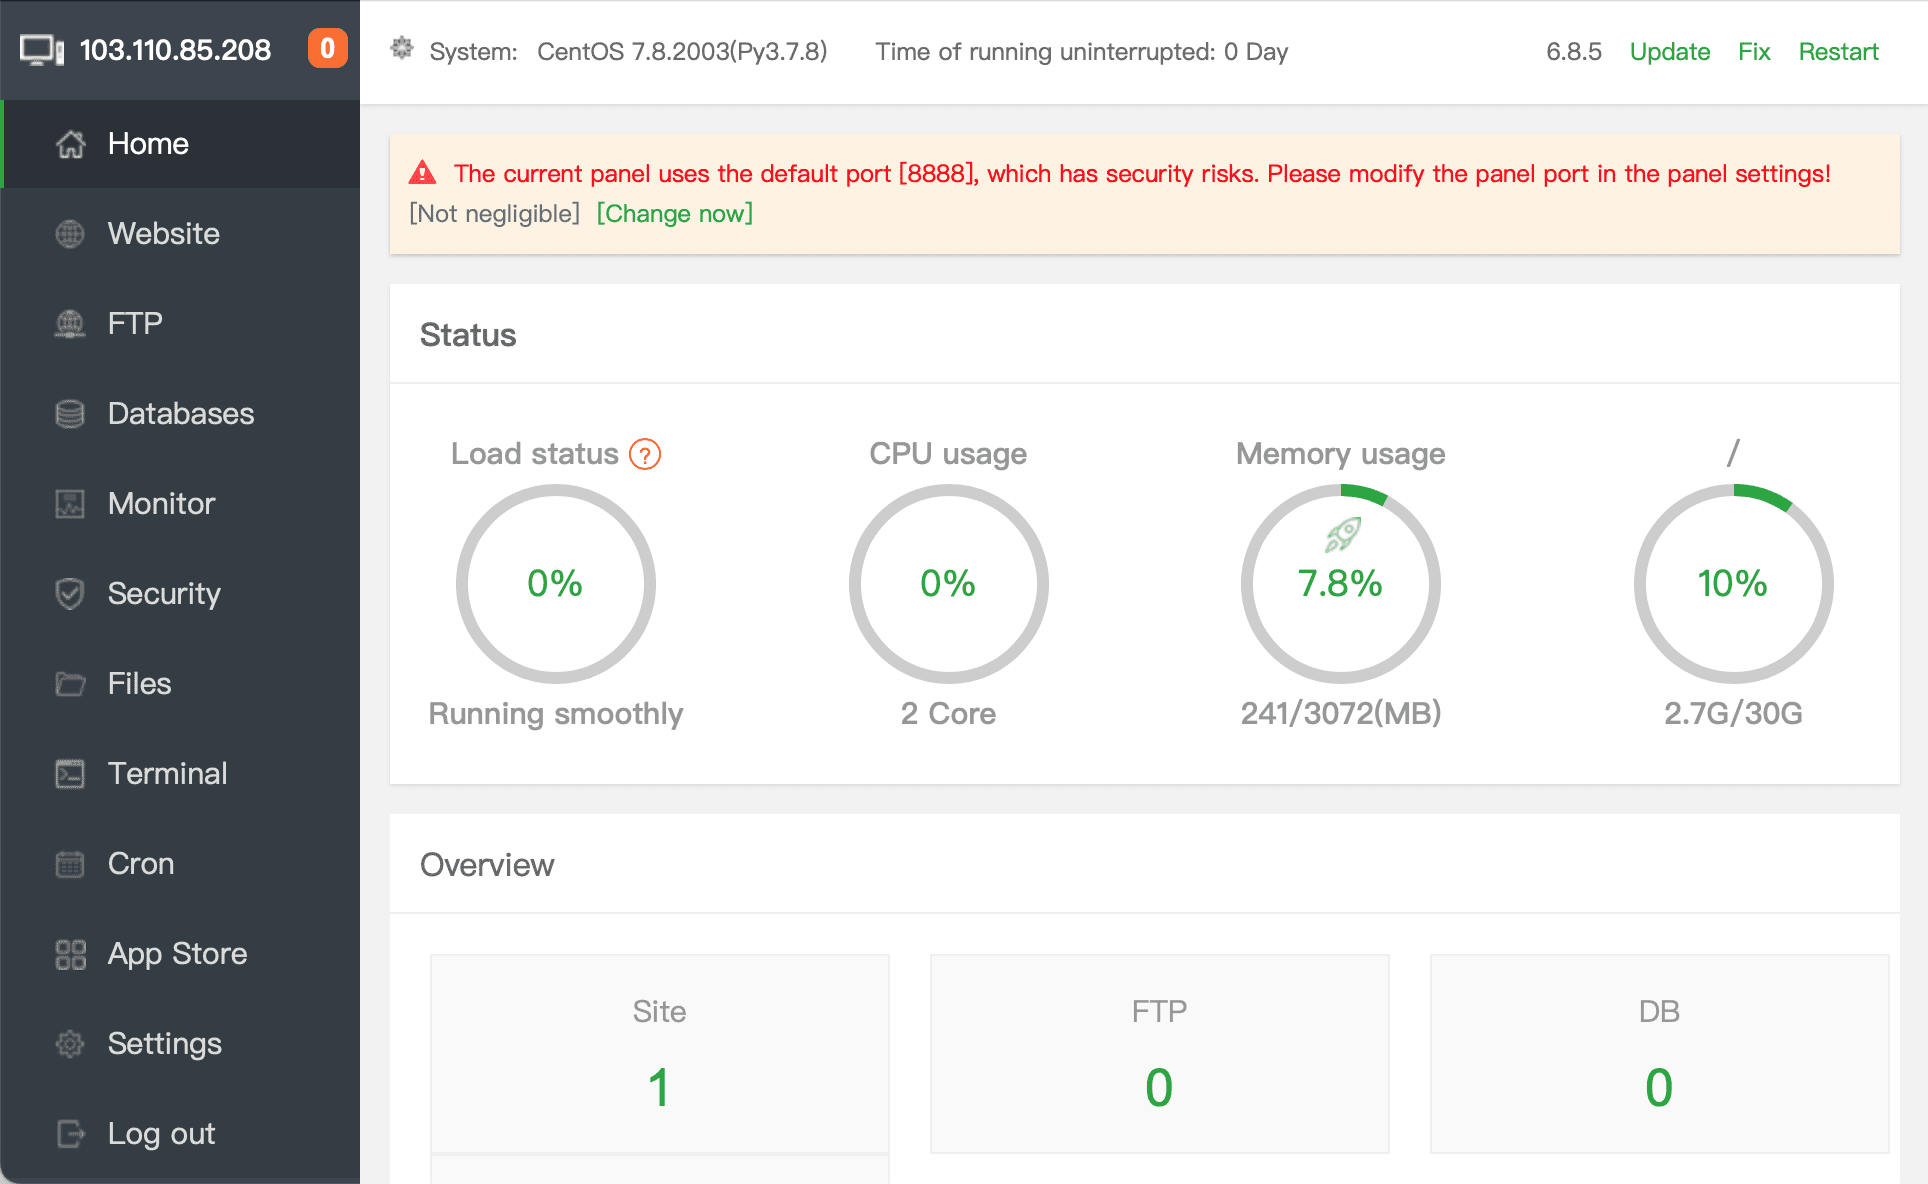
To access the aaPanel admin interface, we access the link http://IP:8888 on the browser.
Below is my aaPanel interface:
After accessing the aaPanel admin page, we continue to step 2 to uninstall Nginx Tengine before switching the webserver from Nginx Tengine to Apache on aaPanel.
Step 2: Uninstall Nginx Tengine on aaPanel
Note: Uninstalling Nginx Tengine will make the websites on your aaPanel server inaccessible until you have installed Apache. So you should only do it at a time of low traffic. And there should be a solution to notify the maintenance time to your customers.
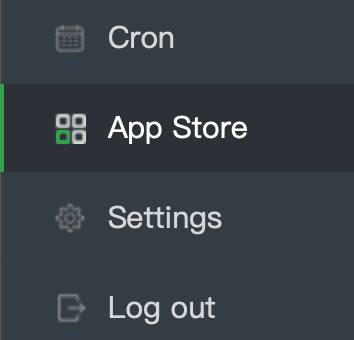
To uninstall Nginx Tengine on aaPanel, you access App Store.
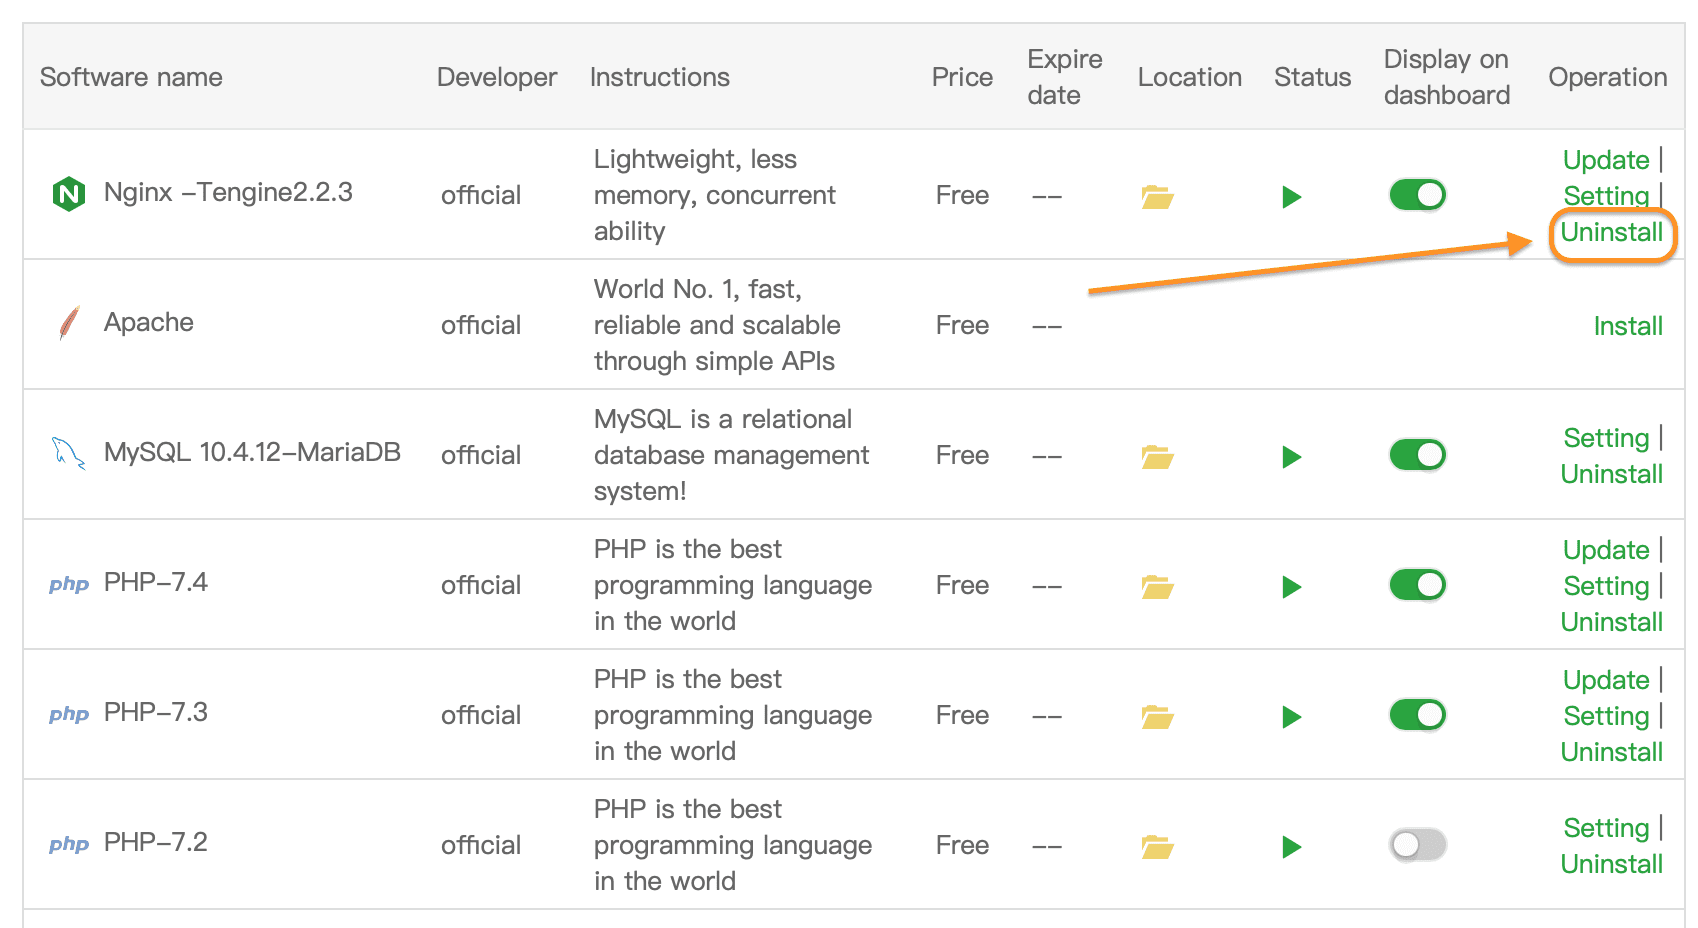
This section will show installed and uninstalled applications on your aaPanel. And usually, Nginx Tengine will be at the top. So we just need to select Uninstall to uninstall Nginx Tengine.
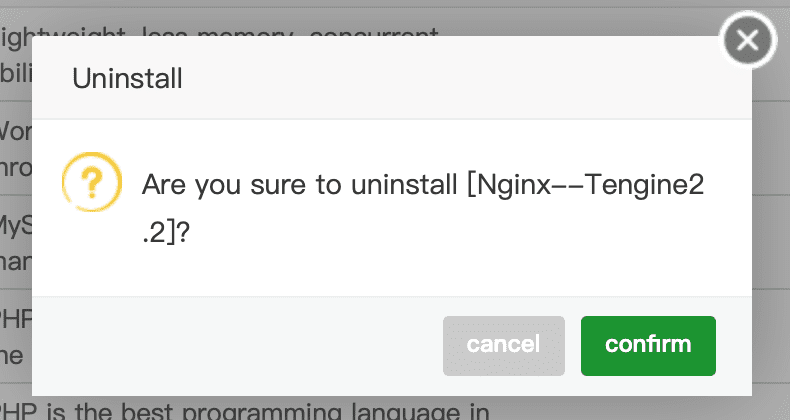
Next, click Confirm to confirm the uninstallation.
Then you wait a moment for the process of uninstalling Nginx Tengine on aaPanel to complete.
Step 3: Install Apache on aaPanel
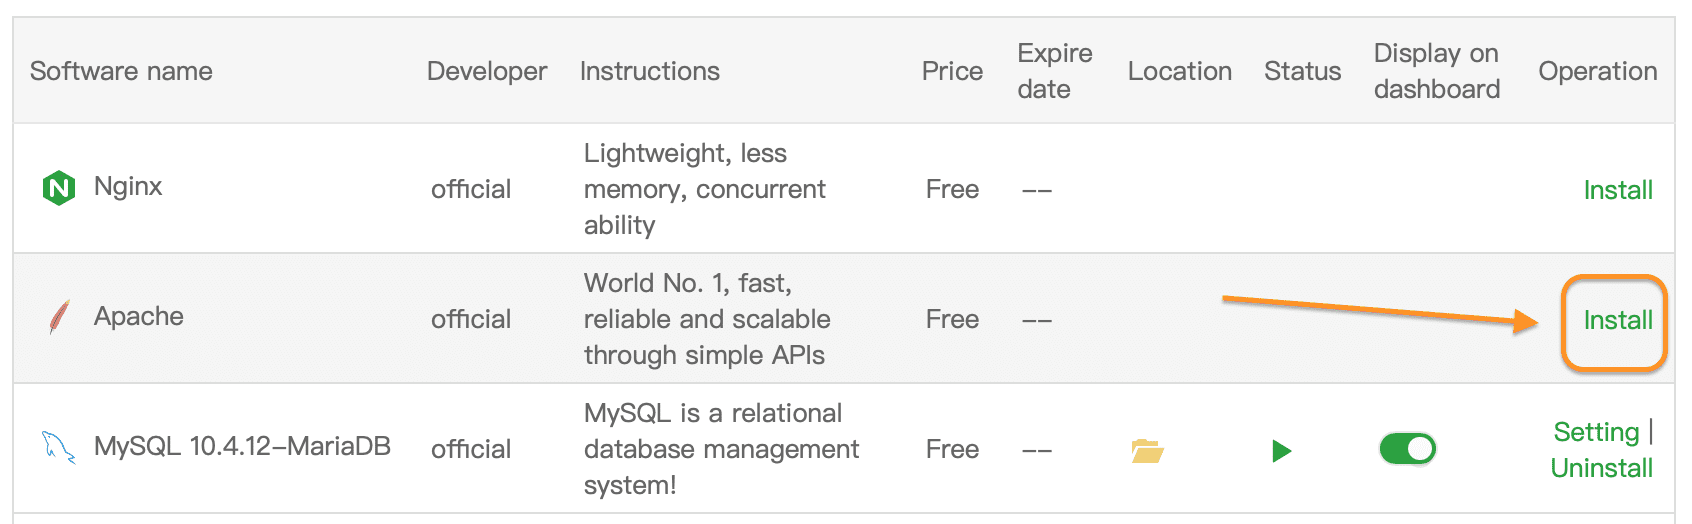
After uninstalling Nginx Tengine in step 2 is complete, we click Install in the Apache section to install.
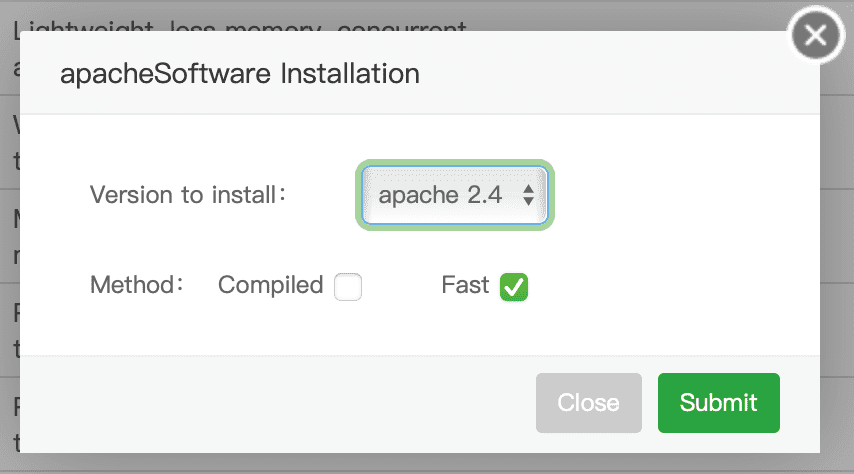
At the step of choosing the version and installation mode, remember to choose to install with the latest version for the highest security as well as higher processing ability than the old version.
And the installation mode you should choose is Fast, the installation process will be faster than Compiled (compile from source) click Submit to confirm the installation.
The installation process will be running in the background, if you want to see the installation progress, you can select the small red message next to the server IP address.

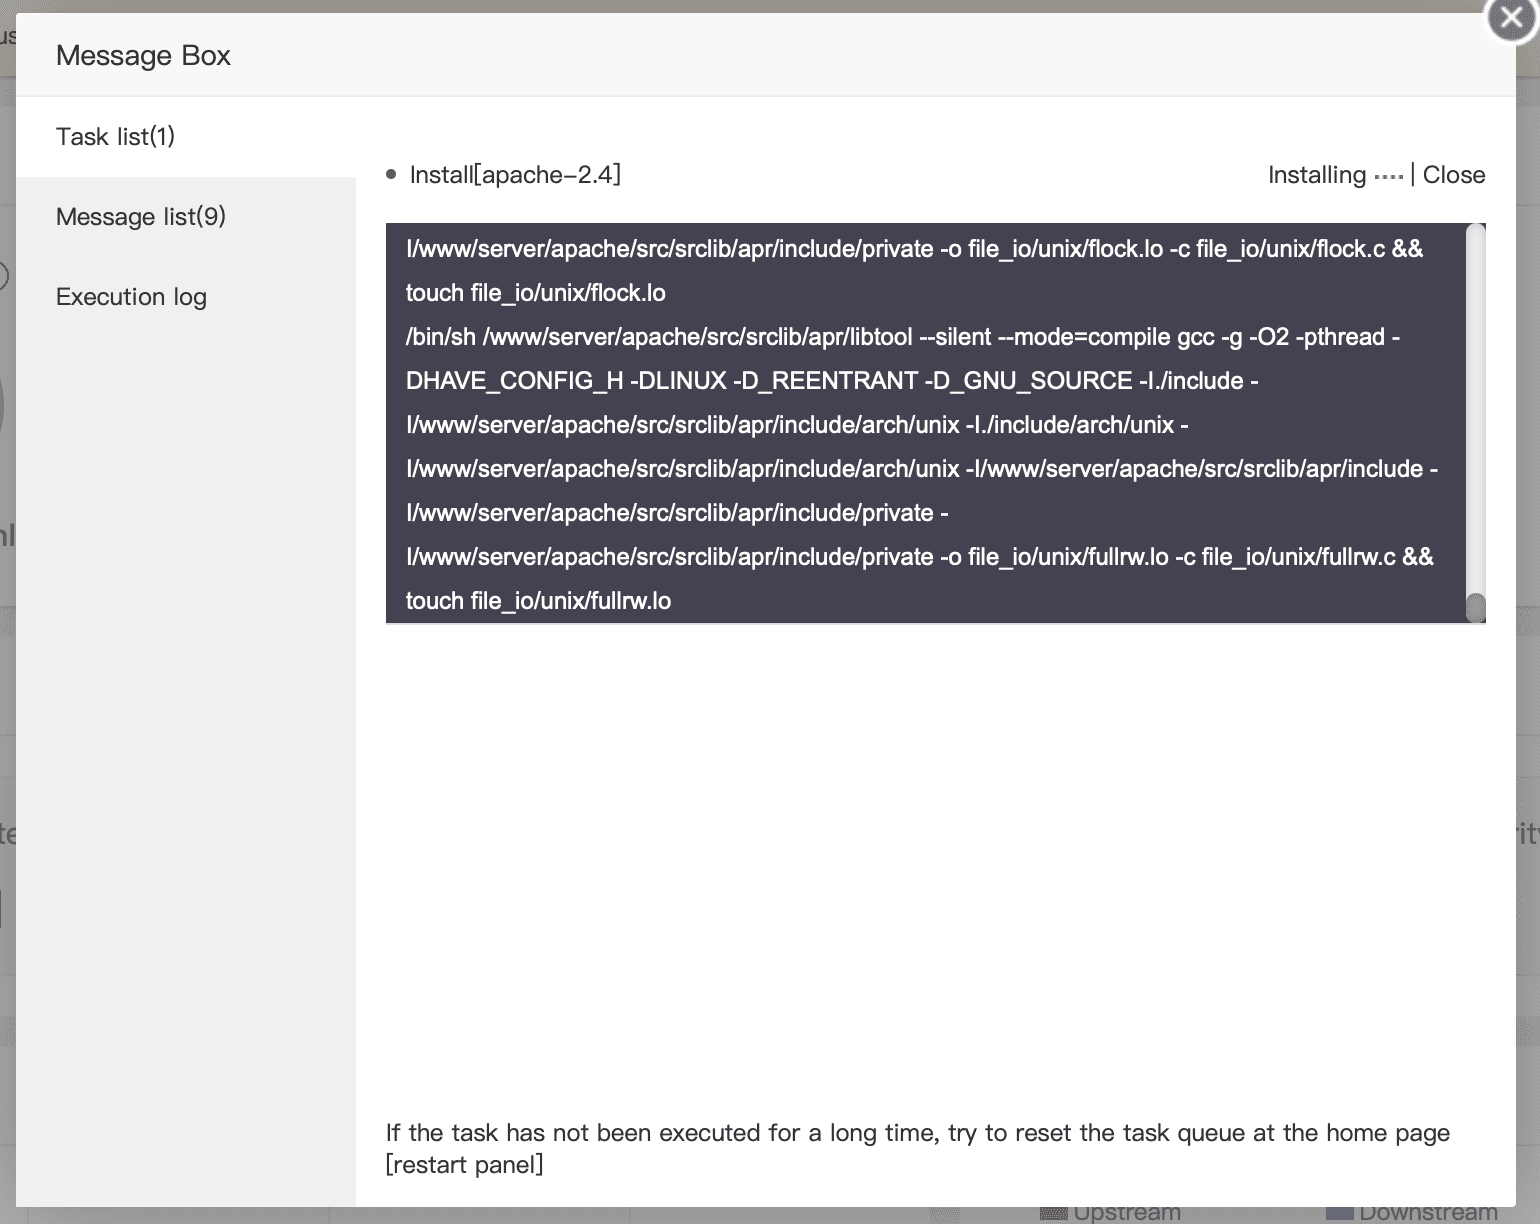
After only about 10 minutes, Apache will install complete.
III. Summary
Hopefully, through this article, you have figured out how to switch the webserver from Nginx Tengine to Apache on aaPanel. Depending on your use case, you can change between these two webservers.
- Case 1: Static website, not updating much content, high traffic should use Nginx Tengine.
- Case 2: Dynamic website with frequent content updates and high average traffic should use Apache.
Hope this article will be of help to you. Wishing you success!
About the author

Thạch Phạm
Đồng sáng lập và Giám đốc điều hành của AZDIGI. Có hơn 15 năm kinh nghiệm trong phổ biến kiến thức liên quan đến WordPress tại thachpham.com, phát triển website và phát triển hệ thống.