Nội dung
How to create a User on CloudPanel
In the previous post, AZDIGI showed you how to install CloudPanel on your server, then continue in this article AZDIGI will guide you through some of the functions available on CloudPanel so that you can get familiar with this new control panel. In this article, AZDIGI will guide you on creating a new User on CloudPanel with a few simple steps.
You can refer to some other features of CloudPanel at the link below:
I. Overview
What is the user?
User is a sub-account created to grant users, it uses packages to adjust and limit some features compared to Admin rights. Creating a User will make it easy for you to control and manage because the created Users will have separate login information and admin interface, you just need to provide users with their User information for them to take the initiative to manage. Please follow the steps below.
II. Implementation Guide.
To create a user on CloudPanel, follow these 2 steps:
Step 1: Access to Admin Admin
To create a user, you need to log in to the admin interface with Admin rights at the following link: https://45.252.249.106:8443/. You use the Admin information created in the CloudPanel installation step to log in, if you don’t know how to install CloudPanel, you can see the instructions at the link below:
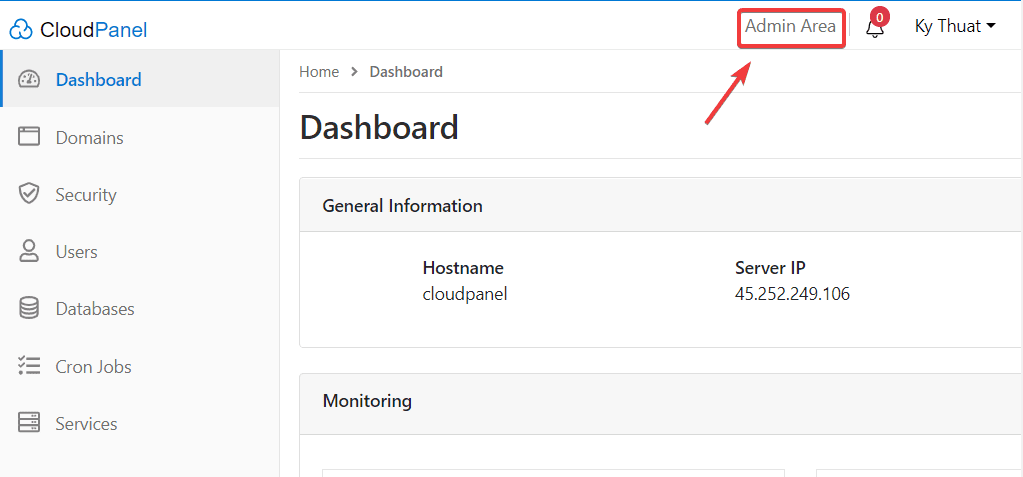
After successfully logging in, you click on Admin Area at the Dashboard interface to create a new user.
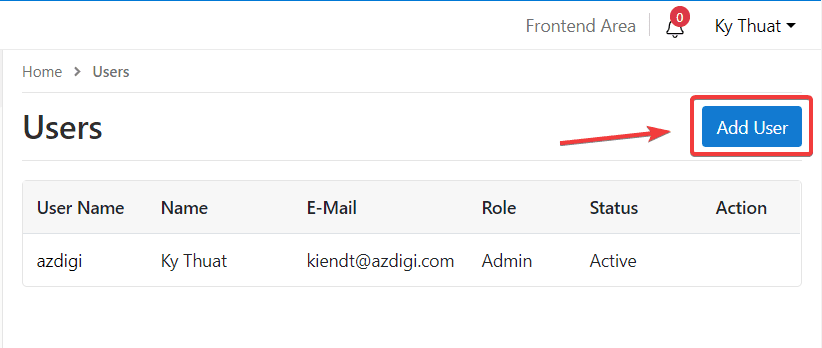
Next, at the User interface, click Add User.
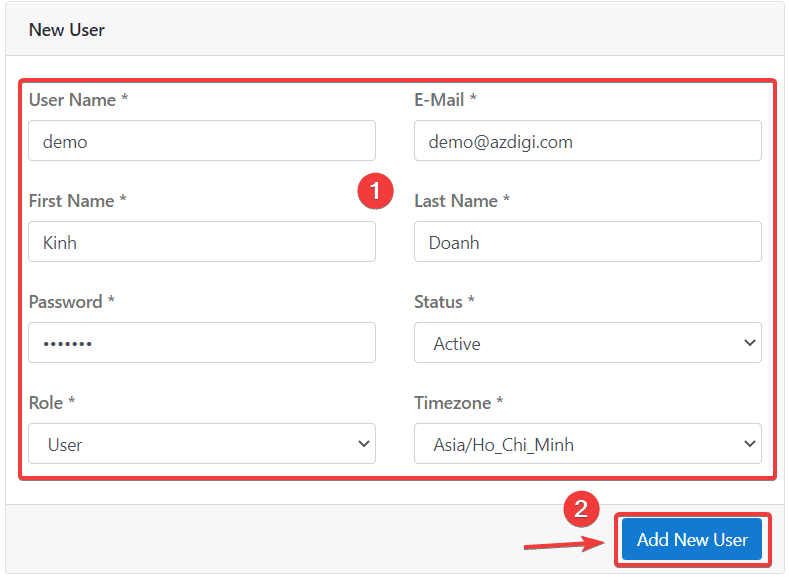
In this step, you need to fill in the User’s information as follows:
In there:
- User Name
- First Name
- Last Name
- Password
- Status: you can choose Active or Not Active
- Role: assign permissions to User (you can choose the right as User or Admin)
- Timezone: choose Asia/HO_Chi_Minh if you’re in Vietnam
After filling in all the information, click Add New User to create a user.
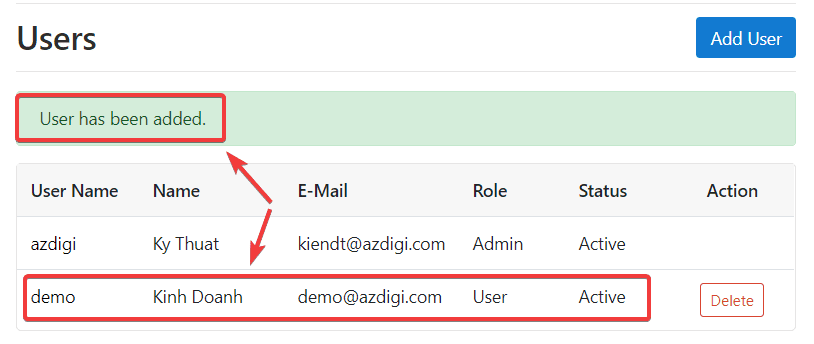
When creating a successful user, you will receive a User has been added message as shown below, and you will see the new user displayed in the User list.
Step 2: Check the user just created
After creating the new user, you can log out of the Admin user and use the new user information to try logging in.
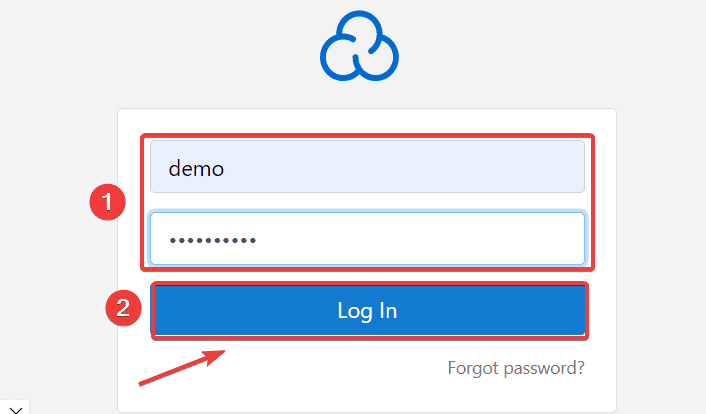
As shown below, I have successfully logged in with the new user.
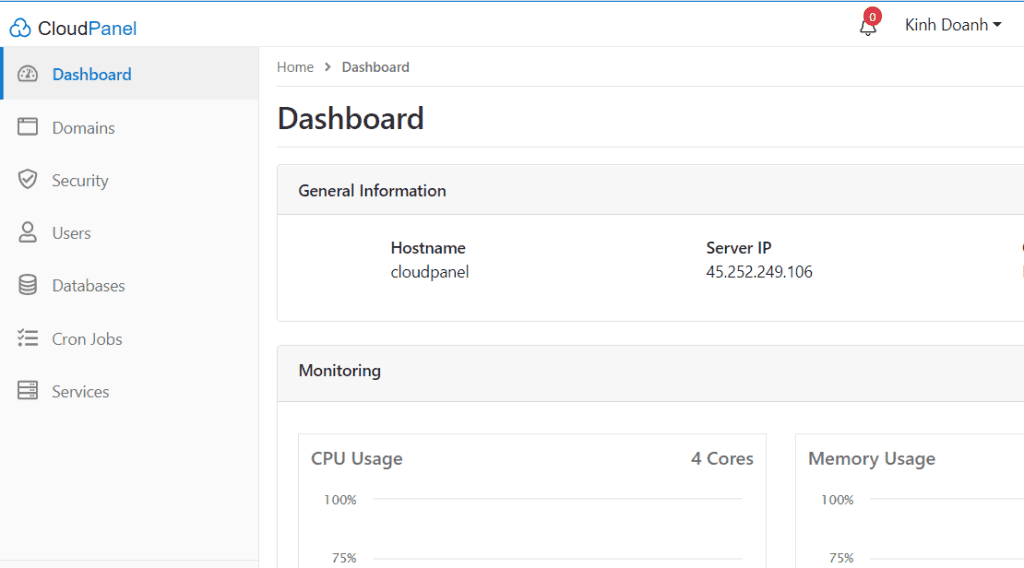
So you have successfully created a new user.
Note: If you need to create a new user, you can only do it when you are in Admin rights, with users other than Admin, you will not have the right to create.
III. Summary
So AZDIGI showed you how to create a new User on CloudPanel with just a few simple steps, creating a User and decentralizing that User will make it easier for you to manage your VPS as well as your data. If you find this helpful article, please share it widely.
Wishing you success! In addition, you can refer to some more articles about CloudPanel at the link below:
If you need assistance, you can contact support in the ways below:
- Hotline 247: 028 888 24768 (Ext 0)
- Ticket/Email: You use the email to register for the service and send it directly to: support@azdigi.com .

