Changing the PHP version and configuration on CloudPanel is simple with only 2 steps. Let’s take a look at the article to do with AZDIGI.
I. Overview
When you use VPS, if you use multiple websites on the same VPS, you will probably need to customize separate PHP versions because not all PHP versions can run on all websites.
When most other free control panels are having the problem of not being able to customize different PHP versions or if they are, they will be limited to 1 or 2 versions. However, in CloudPanel you can completely customize all PHP versions for each respective website in a simple and completely free way.
So how to customize, in this article AZDIGI will guide you on how to customize a PHP version for a certain website on CloudPanel in the simplest way.
You can find more information from NextCloud‘s homepage at the link below:
II. Implementation guide
To change the PHP version and customize the configuration, you can follow these 2 steps:
Step 1: Change the PHP version
A – Check the PHP version in use.
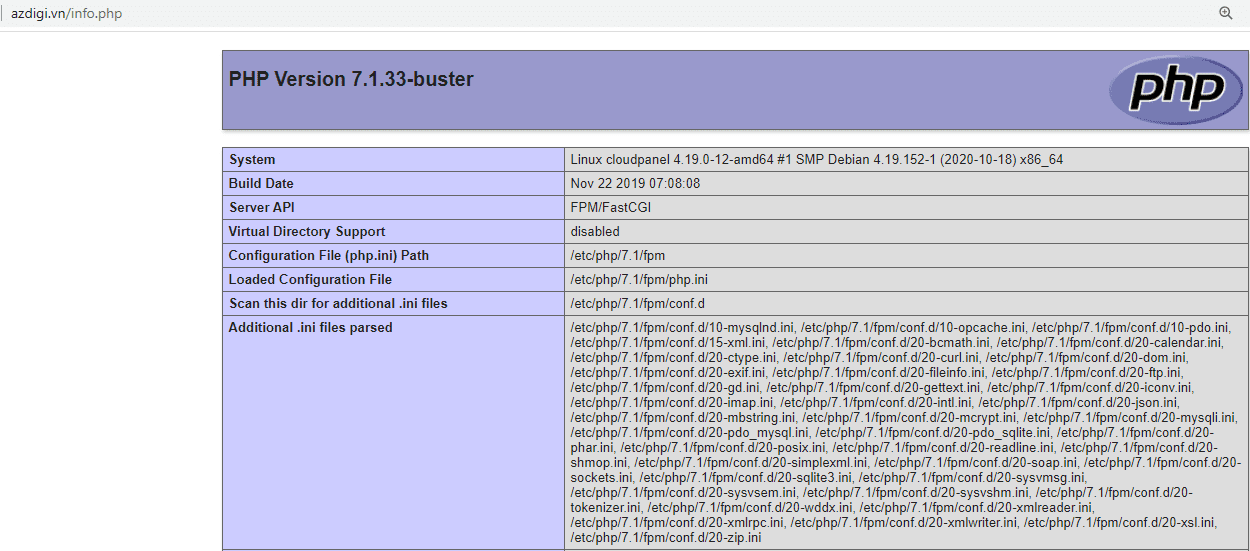
First, you need to check the current PHP version your website is using by creating a info.php file in the directory containing the website’s source code and inserting the code below:
phpinfo();
?>
Next, visit the created path to check, for example, https://azdigi.vn/info.php and as shown below, the site is running with PHP version 7.1

B – Change the PHP version
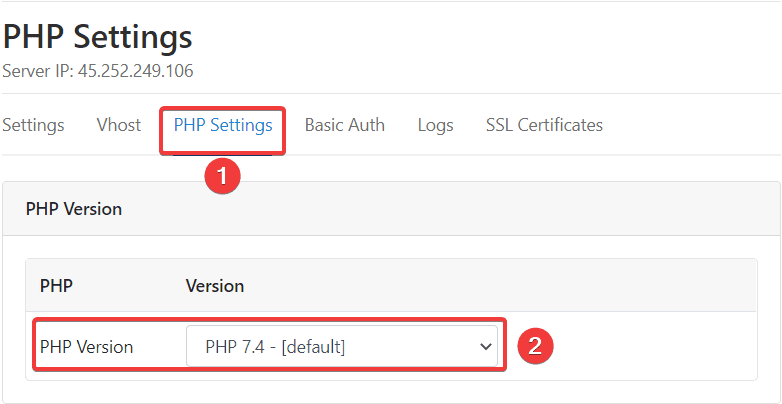
To change PHP, you first need to access the CloudPanel administration and use the User information containing the website to change the PHP version.
After login successfully, you access Domains => Website needs to be set up.

Next, click the PHP Settings tab => select PHP version to change => Update .

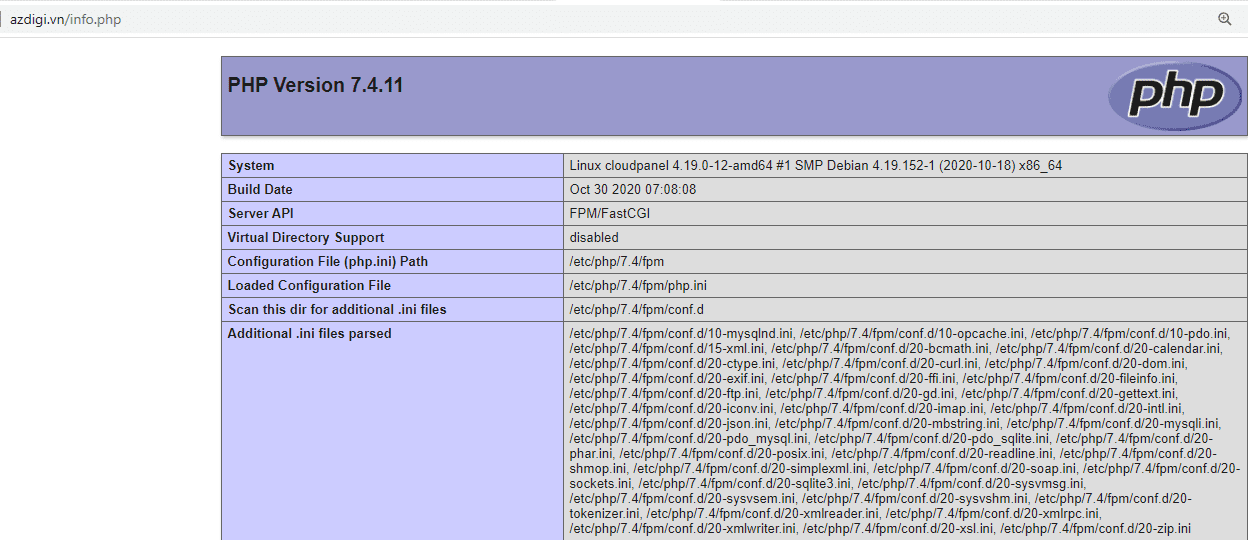
Now, please check your website to see if the new PHP update has been successful. As shown below, I have successfully changed the PHP version.
Step 2: Customize PHP configuration
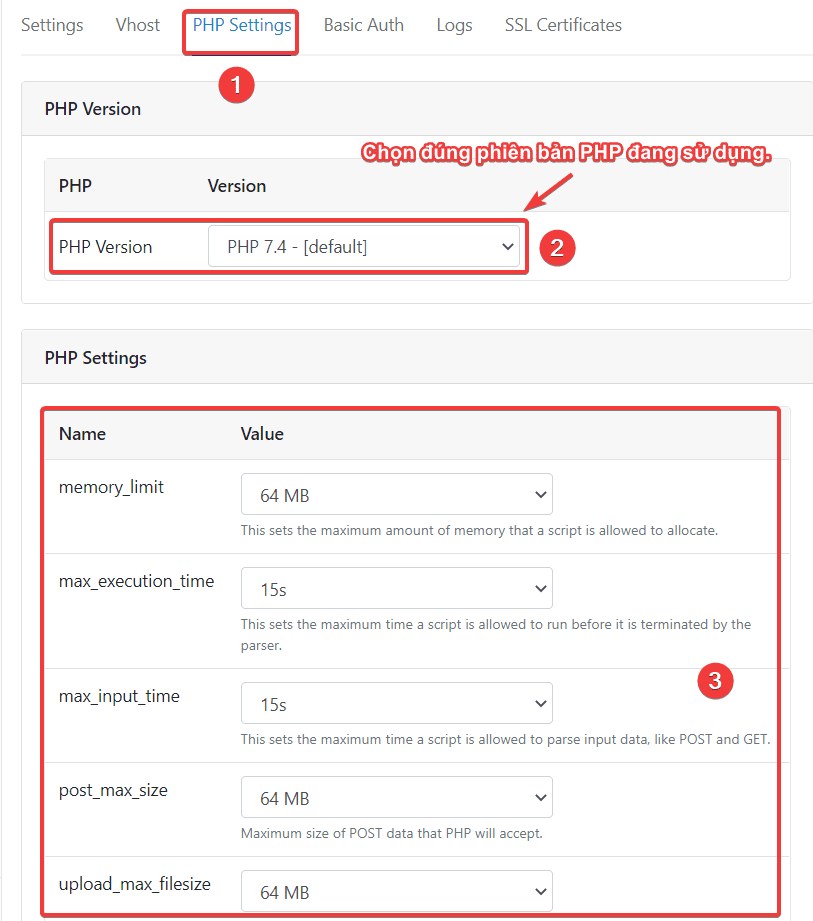
To set the parameters, access Domains => Website needs to be set up .

Next, click on the PHP Settings tab and set the following:
A – PHP Version: Choose the correct PHP version that the website is using (if you don’t know how much PHP your website runs, you can see step 1)
B – PHP Settings: Here you will set up some basic configurations as follows:
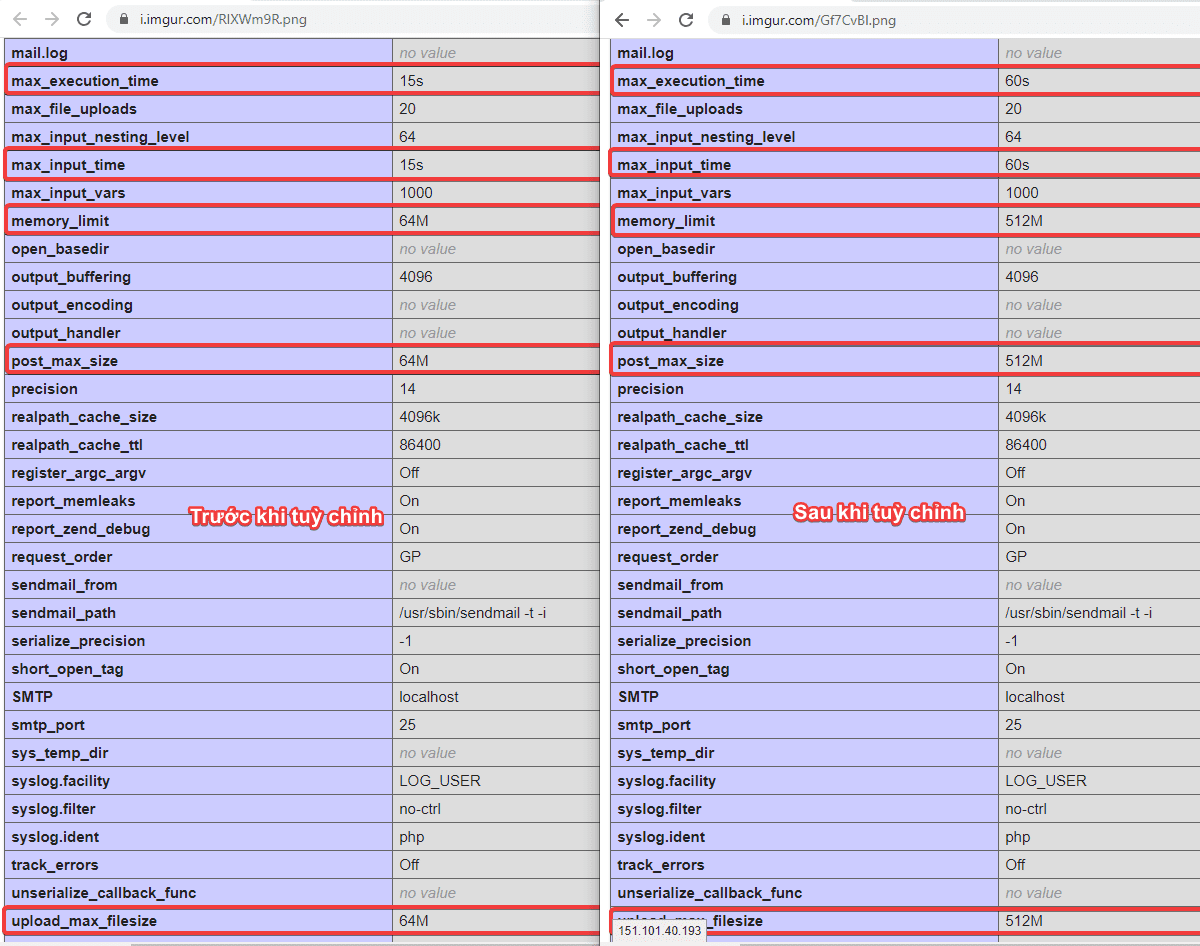
- memory_limit: By default, PHP will be assigned to use 128MB of system memory for scripting in PHP. However, large source codes may require more memory, so you will adjust here.
- max_execution_time: This is a very popular option, it will help you to extend the execution time of a certain PHP script if it takes longer than 30 seconds. If the script execution time exceeds this value, it will give the error “Fatal error: Maximum execution time of {number} seconds”. You can now raise it to 1M, which is 600 seconds.
- max_input_time: The maximum time a script is allowed to write to and is in seconds.
- post_max_size: Maximum size when uploading.
- upload_max_filesize: Maximum file size when uploading.
- display_errors: Option to display errors on the website. When learning to code or when coding for a project, you should turn it on by setting the value to On to immediately see the error instead of a blank page.
After the adjustment is complete, click Update to apply.

Now, check if the parameters have been changed, as shown below, I have changed them successfully.
III. Summary
So AZDIGI has shown you how to change the version as well as the basic configuration of PHP in the simplest and fastest way on CloudPanel. With this change, it will be suitable for some specific websites to help your website work better. If you find this article interesting and useful, don’t forget to share it widely for everyone to follow.
In addition, you can see some other tutorials about CloudPanel at the link below:
About the author

Thạch Phạm
Đồng sáng lập và Giám đốc điều hành của AZDIGI. Có hơn 15 năm kinh nghiệm trong phổ biến kiến thức liên quan đến WordPress tại thachpham.com, phát triển website và phát triển hệ thống.