Nội dung
How to install Let’s Encrypt SSL on CloudPanel?
In this article, AZDIGI will guide you on installing Let’s Encrypt SSL certificates on a website using CloudPanel control in the simplest and fastest way. please follow along.
I. Overview
What is an SSL certificate?
SSL is a certificate that helps encrypt information on devices or applications that support this encryption. SSL certificate will have Private Key and Public Key, in which Public Key will be installed in terminal applications that browsers or other applications can access. Private Key will be installed in applications that handle receiving data.
Its purpose of operation is like the key to helping decrypt the data sent from the terminal, which is also encrypted through the Public Key.
What is Let’s Encrypt?
Let’s Encrypt is an SSL authentication organization like Comodo, GeoTrust and Symantec, but the other point is that they are a non-profit organization established with the patronage of notable organizations in the world Cisco, Akamai, Mozilla, Facebook… Therefore, Let’s Encrypt SSL certificates will be no different from other types of SSL certificates. And you must renew every 90 days if you want to continue using them.
Reference article:
So how to install Let’s Encrypt SSL on a website using CloudPanel? Please see the steps below.
II. Implementation Guide
To install SSL Let’s Encrypt on CloudPanel, you can follow the following 2 steps.
Step 1: Install Let’s Encrypt SSL
To install SSL, you need to access the CloudPanel admin page by following the link: https://45.252.249.106:8443/ (remember to change your IP) and use the User information containing the website to be installed to log in. If you forget your login information, you can refer to the article below to reset your password.
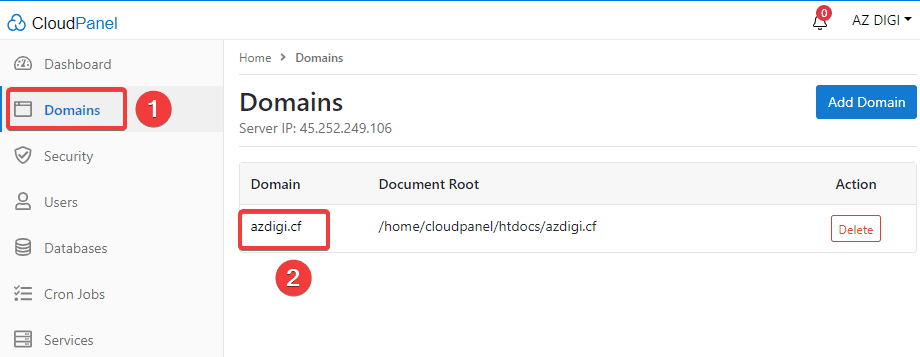
After successfully logging in to CloudPanel, you access Domains (1) => Select the website to install (1).

Next, click on the SSL Certificates tab (1) => Actions (2) => New Let’s Encrypt Certificate (3).

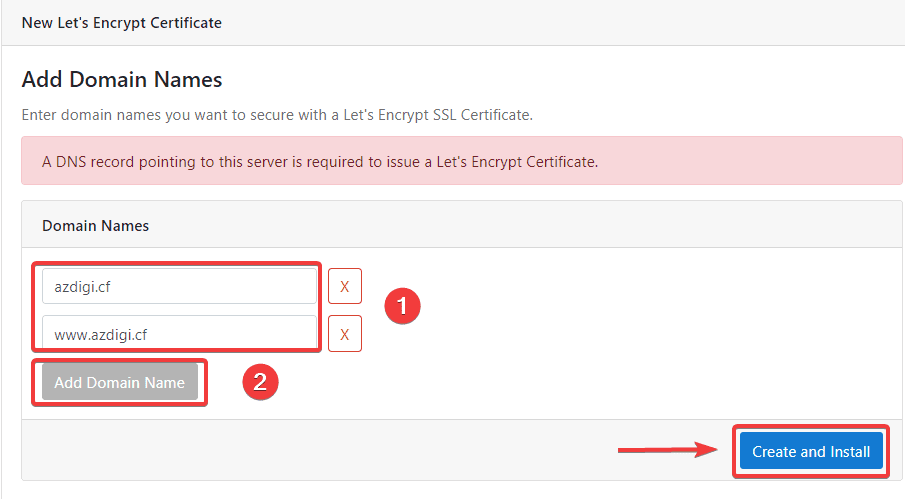
This section will display websites that can install SSL (1). If you want to remove any website, click X, otherwise, if you want to add a domain, click Add Domain Name.
Once finished, click Creat and Install to begin the installation process.

After successful installation, you will receive the message: SSL Certificate has been installed, and the certificate will be displayed in the SSL list.

Step 2: Check the certificate after installation
To more accurately check if your website has successfully installed SSL, you can check more through the 2 methods below.
Method 1: Check from the browser
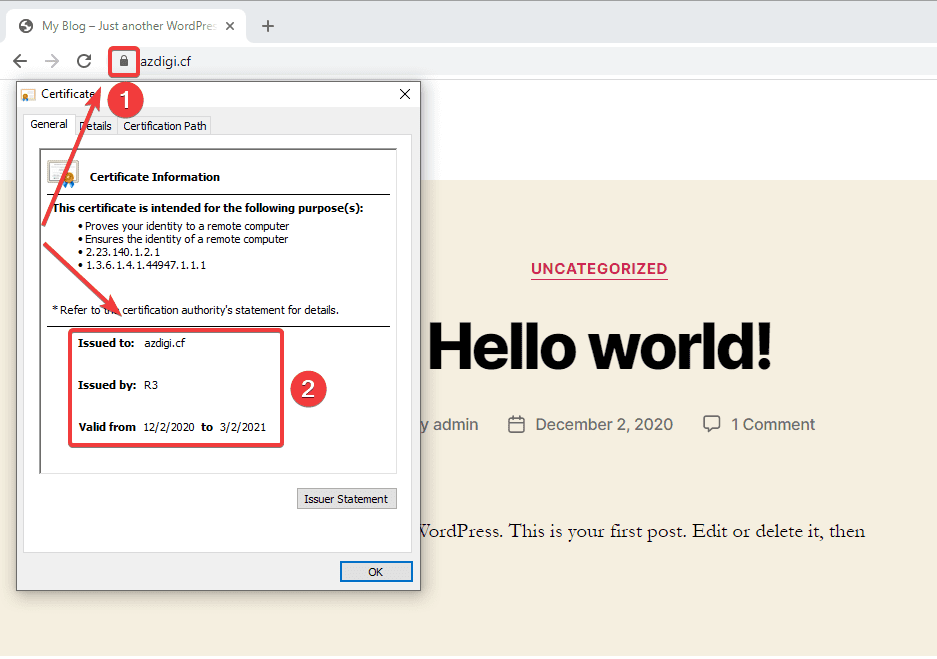
You can access your website in a browser and click on the padlock icon as shown below. It will display which company’s certificate the website uses and specify the issue date and expiration date.

Method 2: Check from the SSL Shopper page
You can access the SSL Checker page by following the link: https://www.sslshopper.com/ssl-checker.html
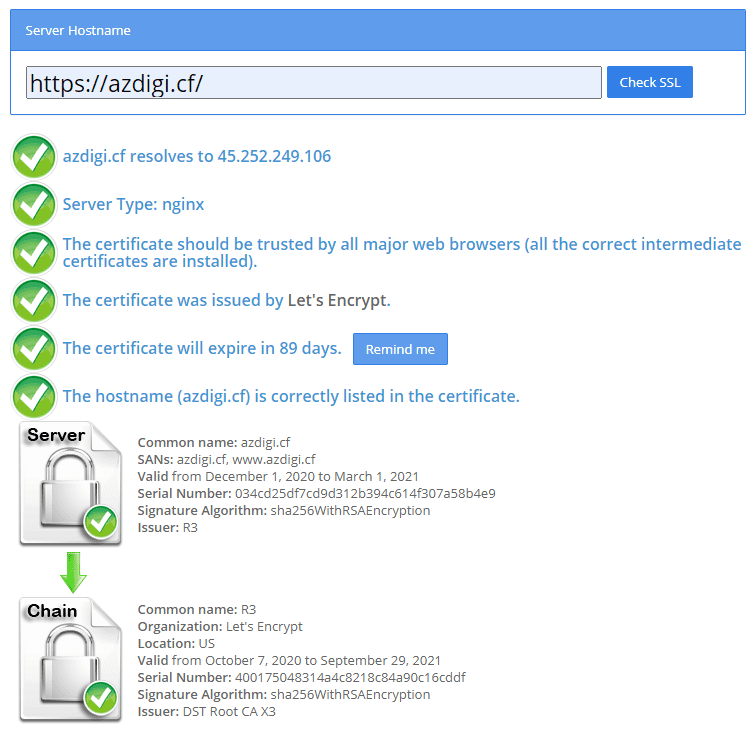
Then you enter your domain and click Check SSL. At this point, all information about the website’s certificate will be fully displayed as below:

III. Summary
So in this article, AZDIGI showed you how to install Let’s Encrypt SSL on a website using CloudPanel with just a few clicks. Installing this seemingly simple SSL helps a lot for your website in terms of security as well as good for SEO. Hopefully, this article will help you to install Let’s Encrypt SSL successfully!
If you find the article helpful, please share it widely. To refer to some other useful articles about CloudPanel, please visit the link below.
If you need assistance, you can contact support in the ways below:
- Hotline 247: 028 888 24768 (Ext 0)
- Ticket/Email: You use the email to register for the service and send it directly to: support@azdigi.com


