Nội dung
1. Overview
Currently, CyberPanel is growing and constantly releasing new upgraded versions to integrate more useful features. However, for users using the old version, if they want to use the new features, they need to upgrade to the latest version of CyberPanel.
Most recently, CyberPanel has released Version v2.0.2, fixing some bugs in the previous version and updating some outstanding features as follows:
- Google Drive backup
- Remote MySQL for whole CyberPanel
- Remote access for local databases
- Packages in API
- Bangla language
- Remote MySQL during WordPress installer
In this article, AZDIGI will guide you on how to upgrade CyberPanel to the latest version (at the time you upgrade) simply with just one command line.
Note: You should back up your data before performing the upgrade in case of errors during the upgrade process.
2. Installation steps
Step 1: Check the current version you are using and the latest version of CyberPanel
First of all, you can check the latest version of Cyber Panel at the homepage via the link: here (you can see details of updates and release time, new features added or upgraded in new versions)
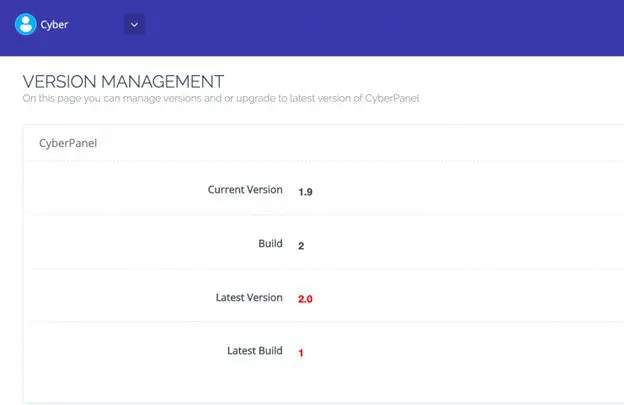
Next, you can see the current version in use
by going to the CyberPanel admin interface => click Version Management.

This example currently uses CyberPanel version 1.9 and is recommended for version 2.0. After you have checked the current version, if your version is older than the version posted on the homepage, then upgrade according to the instructions in Step 2.
Step 2: Upgrade the CyberPanel
You need to SSH into your VPS as root, if you don’t know how to SSH into your VPS, you can refer to the article below:
After SSH into the VPS, copy and paste the command below into the VPS.
sh

When running this command, the system will automatically upgrade to the latest version, the upgrade process will take about 10-15 minutes, depending on each VPS.
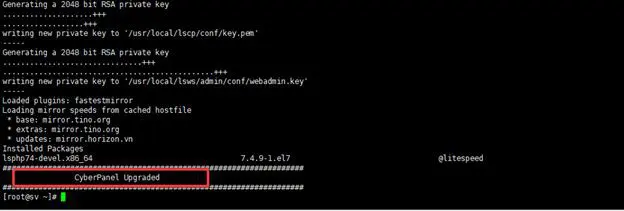
And when the upgrade is complete, you will receive a CyberPanel Upgraded message as shown below:

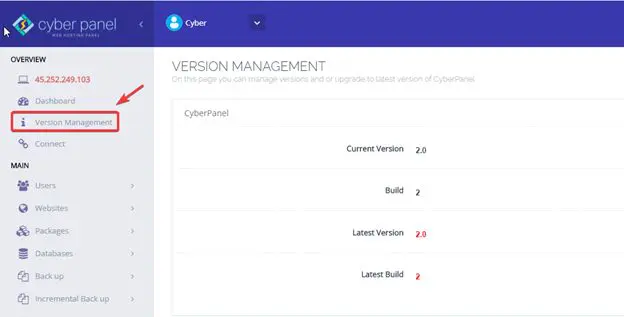
Now go to the CyberPanel admin page => click Version Management to see the new version.

So the upgrade process has been successful, the rest is for you to re-check the website and experience the newly updated features in the new version.
3. Summary
So in this article, AZDIGI has shown you how to upgrade the Cyber Panel version most simply, upgrading the new version will help fix the backlog errors in the previous versions, making the VPS operation stable and delivering a better experience. Hope the article is helpful to you. Wishing you success!

