Nội dung
In today’s article, AZDIGI will guide you to Install LiteSpeed Web Server Enterprise on CyberPanel instead of using OpenLiteSpeed normally.
I. Overview
LiteSpeed Web Server Enterprise is a paid webserver with many preeminent features that most shared hosting service providers often use. And of course, the shared hosting at AZDIGI is no exception. So AZDIGI uses LiteSpeed Web Server Enterprise to serve all customers with a powerful server.
Main features:
- Tăng gấp đôi dung lượng tối đa của các máy chủ Apache hiện tại của bạn with LiteSpeed Web Server’s streamlined architecture, capable of handling thousands of concurrent clients with minimal CPU and memory consumption.
- Bảo vệ máy chủ của bạn with mod_security rules and take advantage of a range of built-in anti-DDoS features, such as bandwidth and connection throttling.
- Giảm độ phức tạp by eliminating the need for HTTPS reverse proxies or additional third-party caching layers.
LiteSpeed Web Server Enterprise currently has a free version that supports 1 Domain and 1 Worker, allowing you to install it on a VPS server. And to install the free 1 domain version, please follow this article.
II. How to install
To install LiteSpeed Web Server Enterprise on CyberPanel, your server needs the following configuration:
- CentOS 7 64bit / 1CPU / RAM 2GB / 30GB SSD / Swap 2GB
- LiteSpeed Ent package FREE STARTER ($0/month limited to 1 website, RAM < 2GB)
Note: The free 1 domain version requires RAM less than 2GB. If your RAM is more than 2GB, it will not be able to install.

Step 1: Register for a license
Although the free version supports 1 domain, to install, you also need to register a License from the developer. Please visit the link to register.
After successful registration, you will have the following information:
- License ID
- Serial No
- Server IP Address
- Locked IP

Step 2: Login to the server
To install, you need to log in to the server/VPS. You can refer to the following article if you don’t know how to login to the server. You can run the installation in Screen if you are afraid that a sudden shutdown will cause the installation to be lost.
Step 3: Install LiteSpeed Web Server Enterprise on CyberPanel
After SSH into the server, run only 1 command to install:
sh
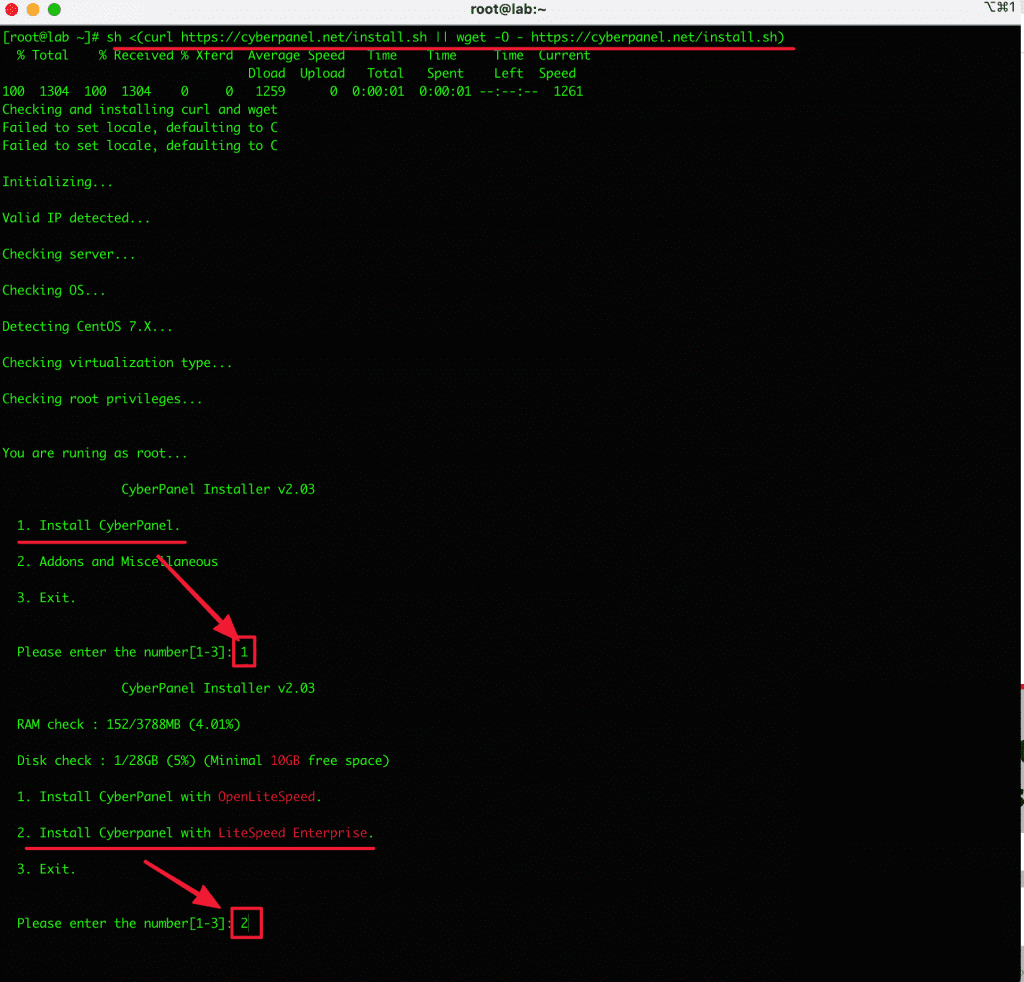
When choosing number 2 to install LiteSpeed Enterprise, the screen displays the following information, please see and enter it correctly:
- The serial number: Enter the registered license
- Full install: Enter Y if you want to install full functionality
- Remote SQL: Remote SQL function is a new function on CyberPanel. If you need to install it, choose Y. But it’s not necessary for me because I am able to manage the DB with phpMyAdmin, so I choose N.
- And the options to install redis, memcached, please choose Y because these extensions are necessary.
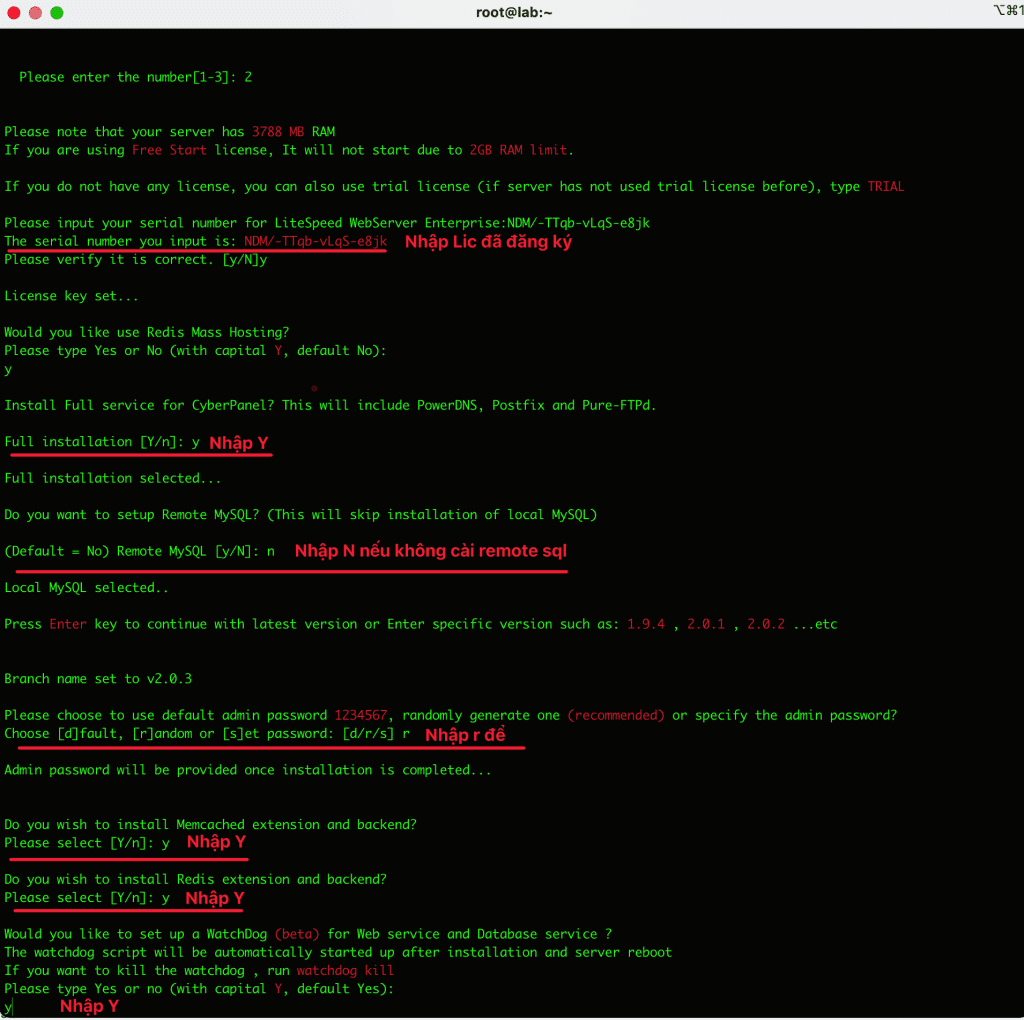
The installation process will take a long time, taking more than 30 minutes to complete, so I recommend you install it on the screen in case the device turns off suddenly for some reason or loses the internet.
The screen will display the following information below when the installation is complete:
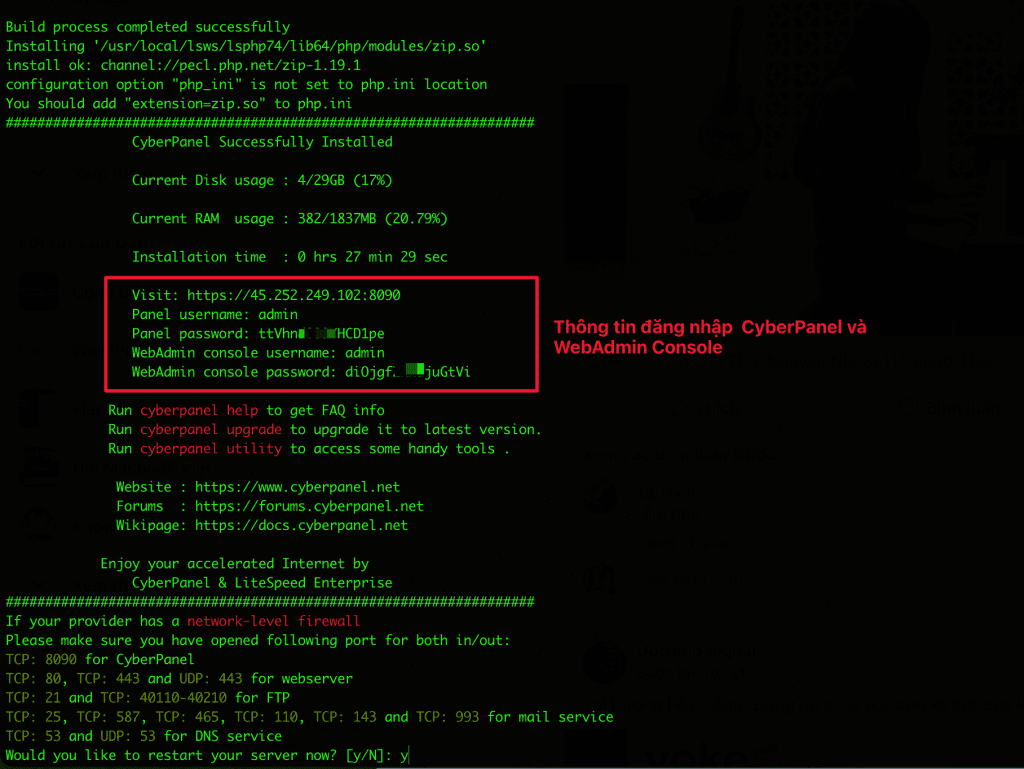
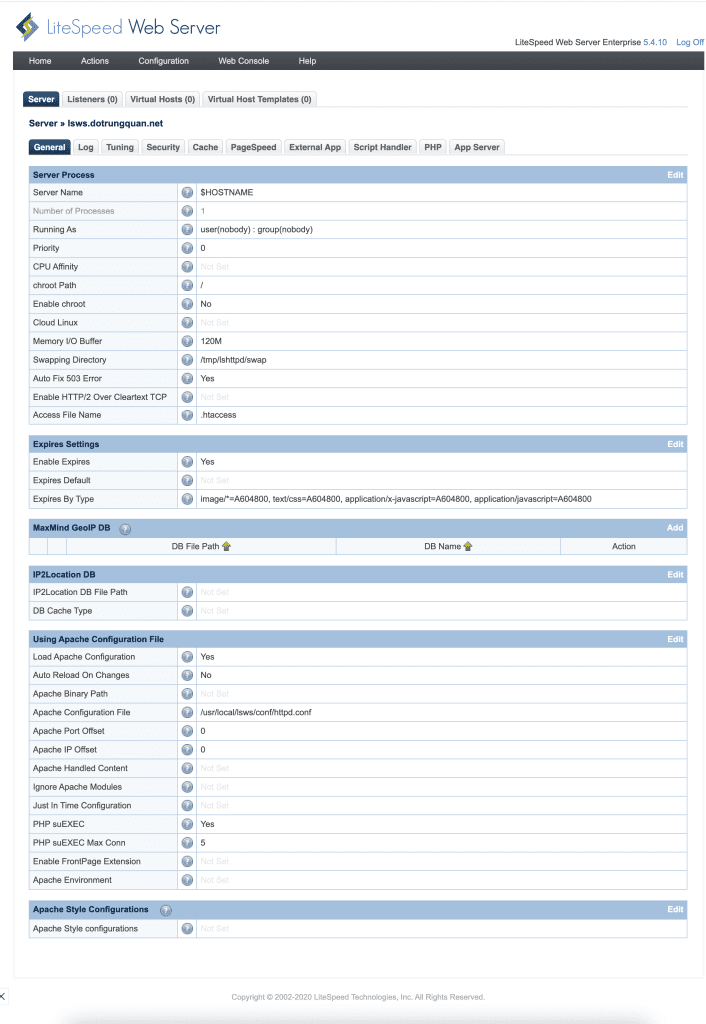
To log in to WebAdmin Console, go to your-my-ip:7080 and use the user/pass shown above to log in.
Note: If you cannot access WebAdmin Console using port 7080, please allow port firewalld or csf.
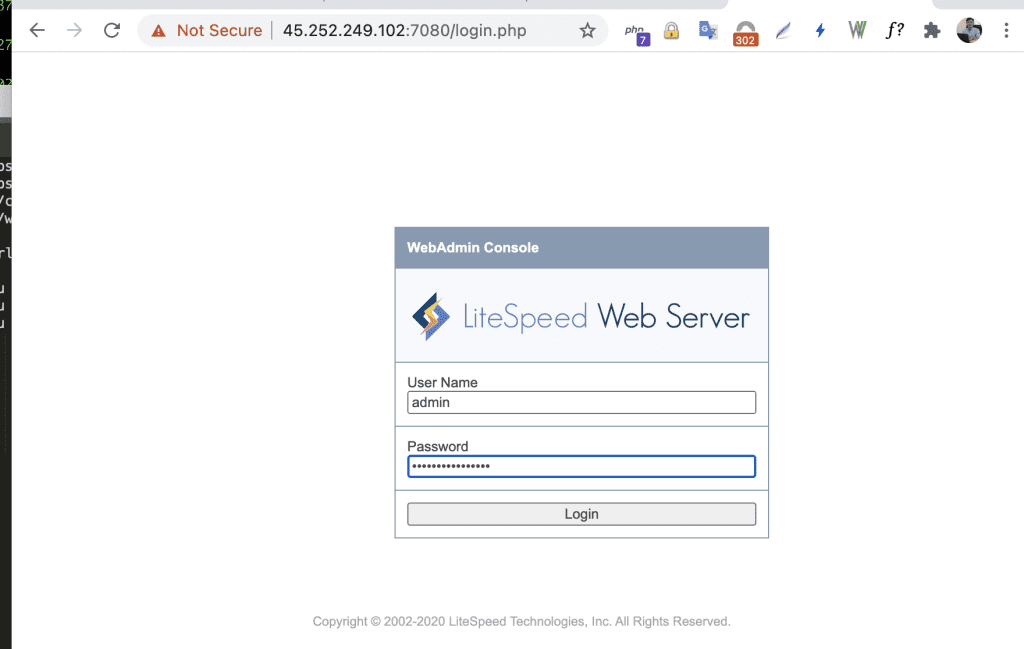
Below is the admin interface of LiteSpeed Web Server:
III. Summary
Hopefully, this article will help you self-deploy a LiteSpeed Web Server Enterprise on CyberPanel to make your website powerful and outstanding.
If you have questions or need support, please live chat with Technical Department. Or send the ticket to the Technical Department according to the information below.
- Hotline 247: 028 888 24768 (Ext 0)
- Ticket/Email: You can use your email to register for the service and send it directly to: support@azdigi.com

