Nội dung
Overview
Surely in the process of using the website, for some reason, you need to change the new domain name for your website. Changing the domain name is completely simple, but after changing the domain name, many users encounter some error problems, such as the image does not display, the website interface being deformed.
If this is the case, you don’t need to worry, the cause of the above error is that in the source code of your website, there are still links to the old domain name, so when accessing with the new domain name, the content cannot be loaded.
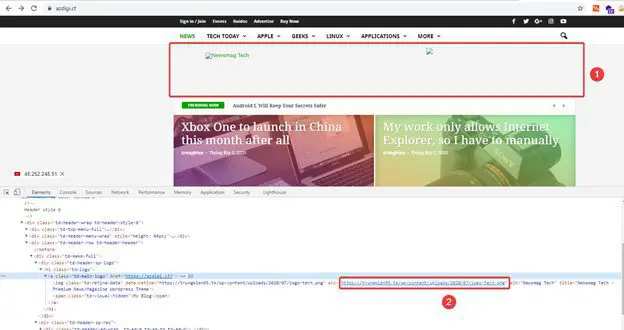
For example, I had a website that was previously running with the domain trungkien95.tk, because I had a need to change the domain name, I changed it to azdigi.cf. After changing the new domain name, the problem is that there are some images (specifically, the banner image) on the homepage that cannot be loaded and have an error, as shown below:
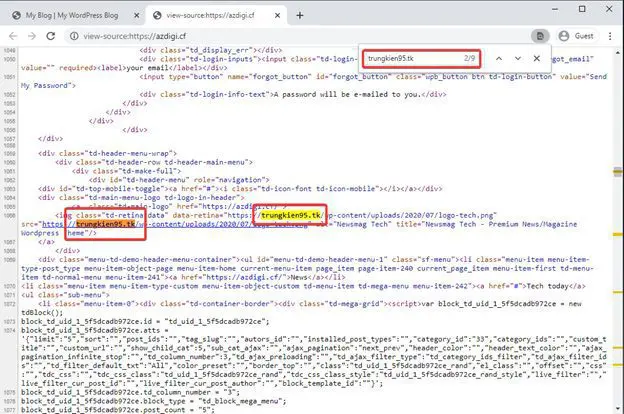
I have a view of the source, and I see many image links are still running with the old domain name trungkien95.tk:
So how to fix all these paths to new domains when you don’t have much coding knowledge? Don’t worry because in this article, I will guide you to fix the above links automatically through a plugin called Better Search Replace.
Note: Before editing anything related to the website source code, you should make a backup of all your data..
Steps to install and use the plugin
Step 1: Install Plugin
At the admin interface, you access Plugin (1) => Install New (2) => Search Plugin Better Search Replace (3) => Install (4).
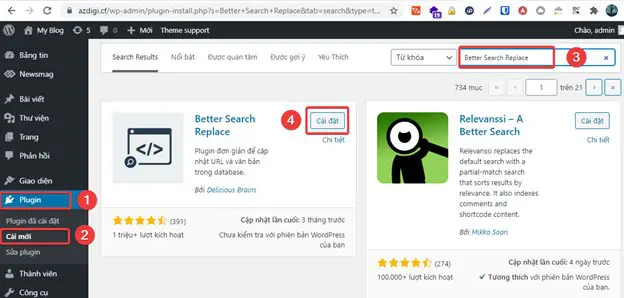
After the installation is successful, you click Activate to activate the plugin.
Step 2: Use the plugin
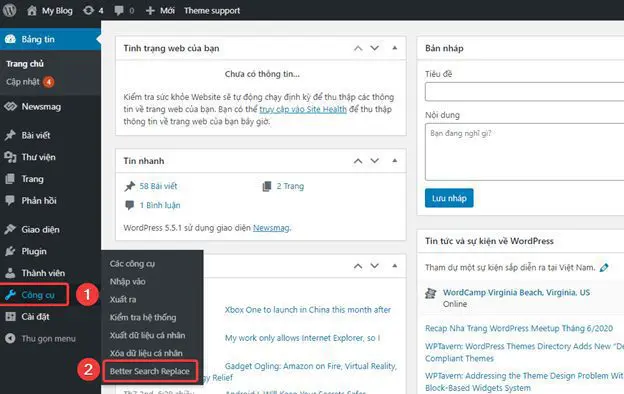
At the admin page, you access Tools (1) => Better Search Replace (2).
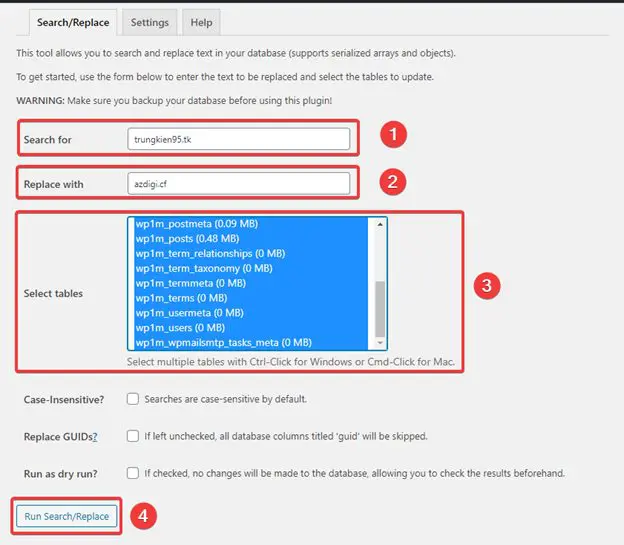
At the plugin interface, you fill in the following information:
Search for: enter the old domain to replace
Replace with: enter the new domain that needs to be replaced
Select tables: You select the table in the database that this plugin will scan.
- Select a table: You click on that table
- Select some tables: Hold down the Ctrl key and click to select the tables you want to select
- Select all tables: You press Ctrl + A
Case-Insensitive: Tick here if you want the plugin to be case-sensitive when scanning.
Replace GUIDs: Tick here if you want all tables titled guid to be replaced.
Run as dry run: Tick here, the plugin will only search and display the content to be replaced and will not perform the replacement. (So if you need to replace it, please untick it)
Note: If you want to replace the domain name for the purpose of this article, leave it blank and do not tick any box as shown below.
After you have filled in all the information, click on the word Run Search/Replace (4) to perform a scan and replace the content.
The scanning process will scan the entire website and when completed, it will display the following information:
- Number of tables the plugin scanned (17 tables)
- Number of items to replace found (66)
- Replaced Content (66)

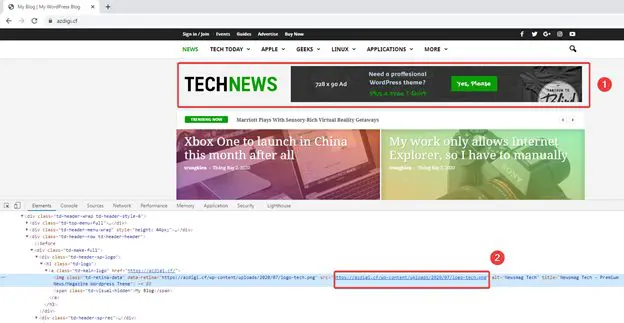
Now you proceed to check your website to see if the problem has been resolved.
So I have successfully processed and now the image has been fully displayed, the image links have also been replaced with the new domain successfully.
Summary
So in this article, AZDIGI has shown you how to handle errors arising from you changing the domain name for your website, using this plugin helps you do it quickly with just a few clicks without any manipulation code impact. If you find the article useful, please share it widely.
Wishing you success!
If you need assistance, you can contact support in the ways below:
- Hotline 247: 028 888 24768 (Ext 0)
- Ticket/Email: You can use your email to register for the service and send it directly to: support@azdigi.com

