Nội dung
After installing WordPress on FASTPANEL, we should install an SSL certificate to increase security and the website’s reputation in search engines’ eyes. And in this tutorial, AZDIGI will show you how to install SSL Let’s Encrypt for websites on FASTPANEL.
I. What is FASTPANEL?
FASTPANEL is an outstanding free web control panel with a lot of features such as:
- Create a website with just a few clicks.
- Email management.
- Database management.
- Manage backup/restore to the cloud.
- Website traffic analysis.
- Create user.
- Two-factor authentication is supported.
- Support SSL.
- Support Firewall.
- Support Cron.
- Supports multiple PHP versions.
- Integrated AI-BOLIT malware scanning.
- Integrated Spam Asasin.
- Supports command manipulation without SSH through the console.
- And many other features…
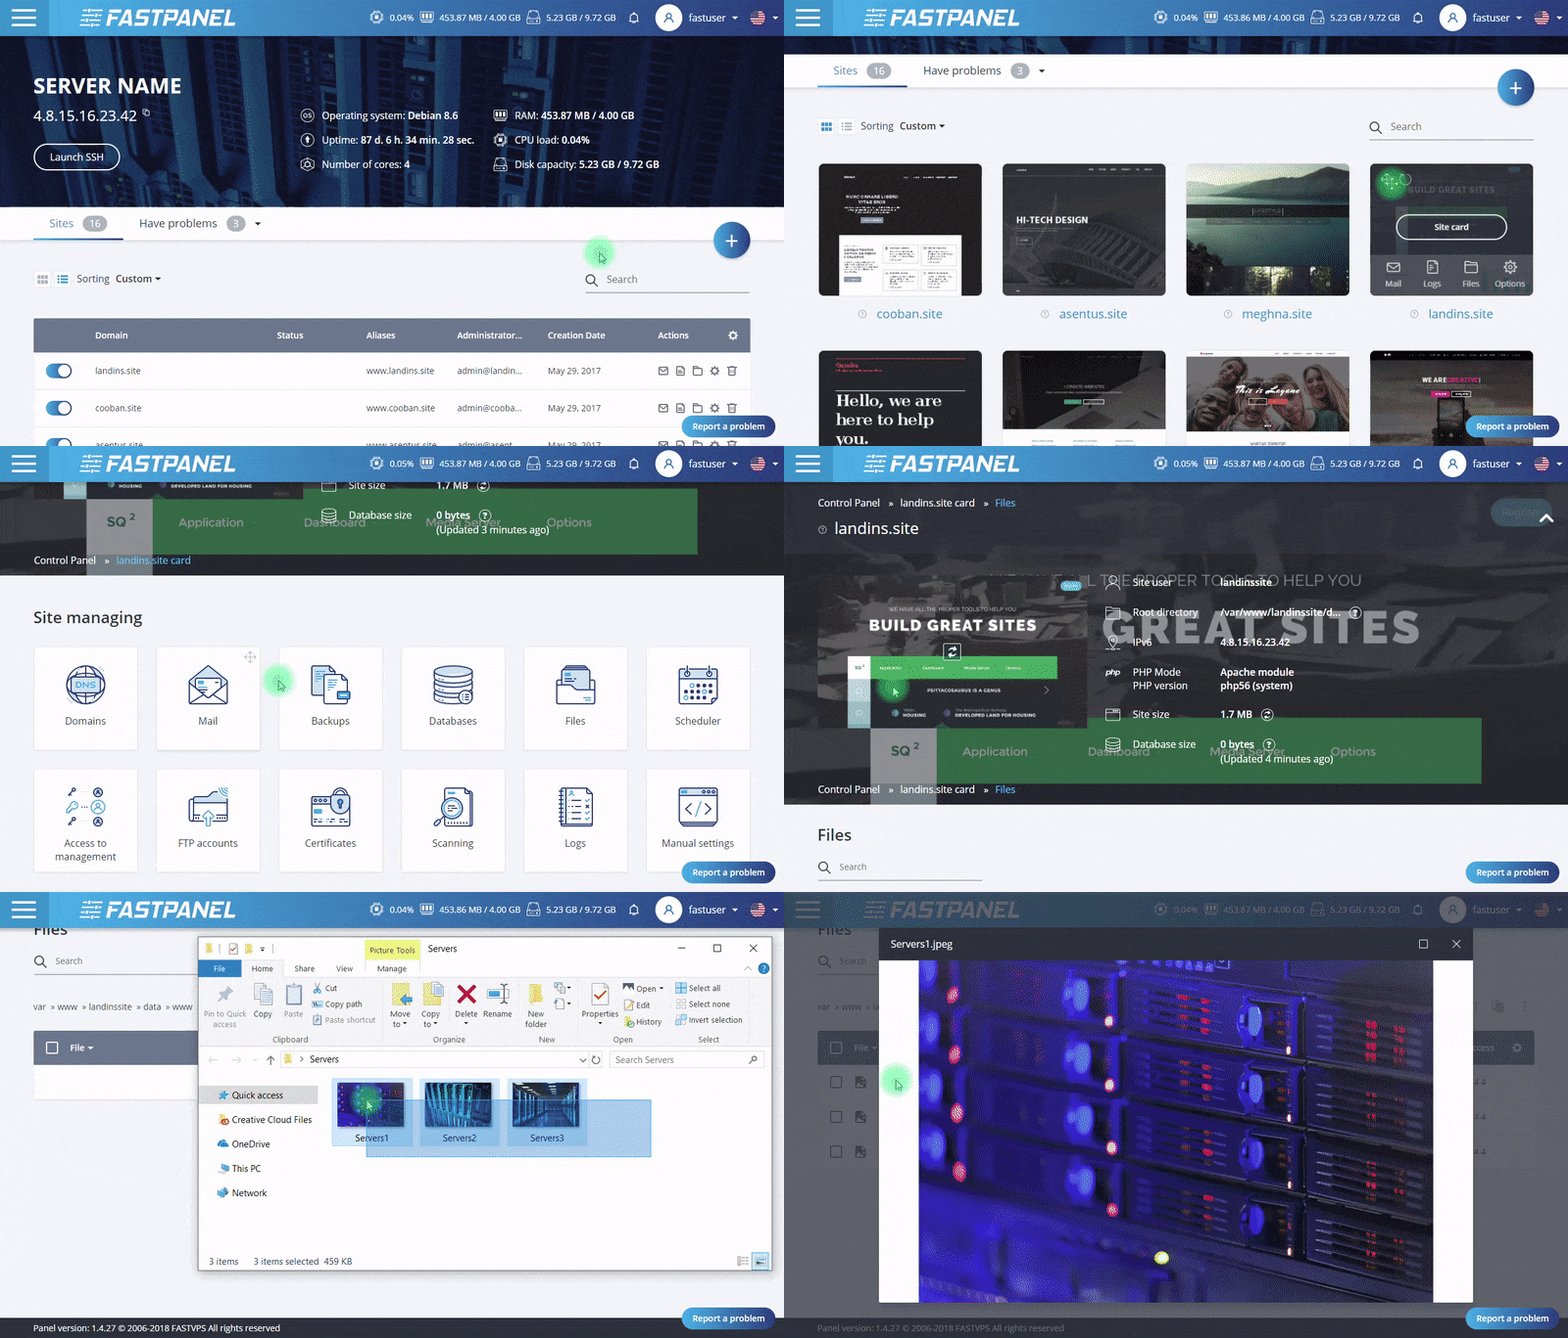
Below is the FASTPANEL interface:
II. How to install SSL for website on FASTPANEL
To install SSL Let’s Encrypt for websites on FASTPANEL, we follow these 3 steps.
Step 1: Access the FASTPANEL admin page
To access the FASTPANEL interface, you access the link in the form https://IP:8888 on your browser (replace IP to your VPS/Sẻver FASTPANEL IP)
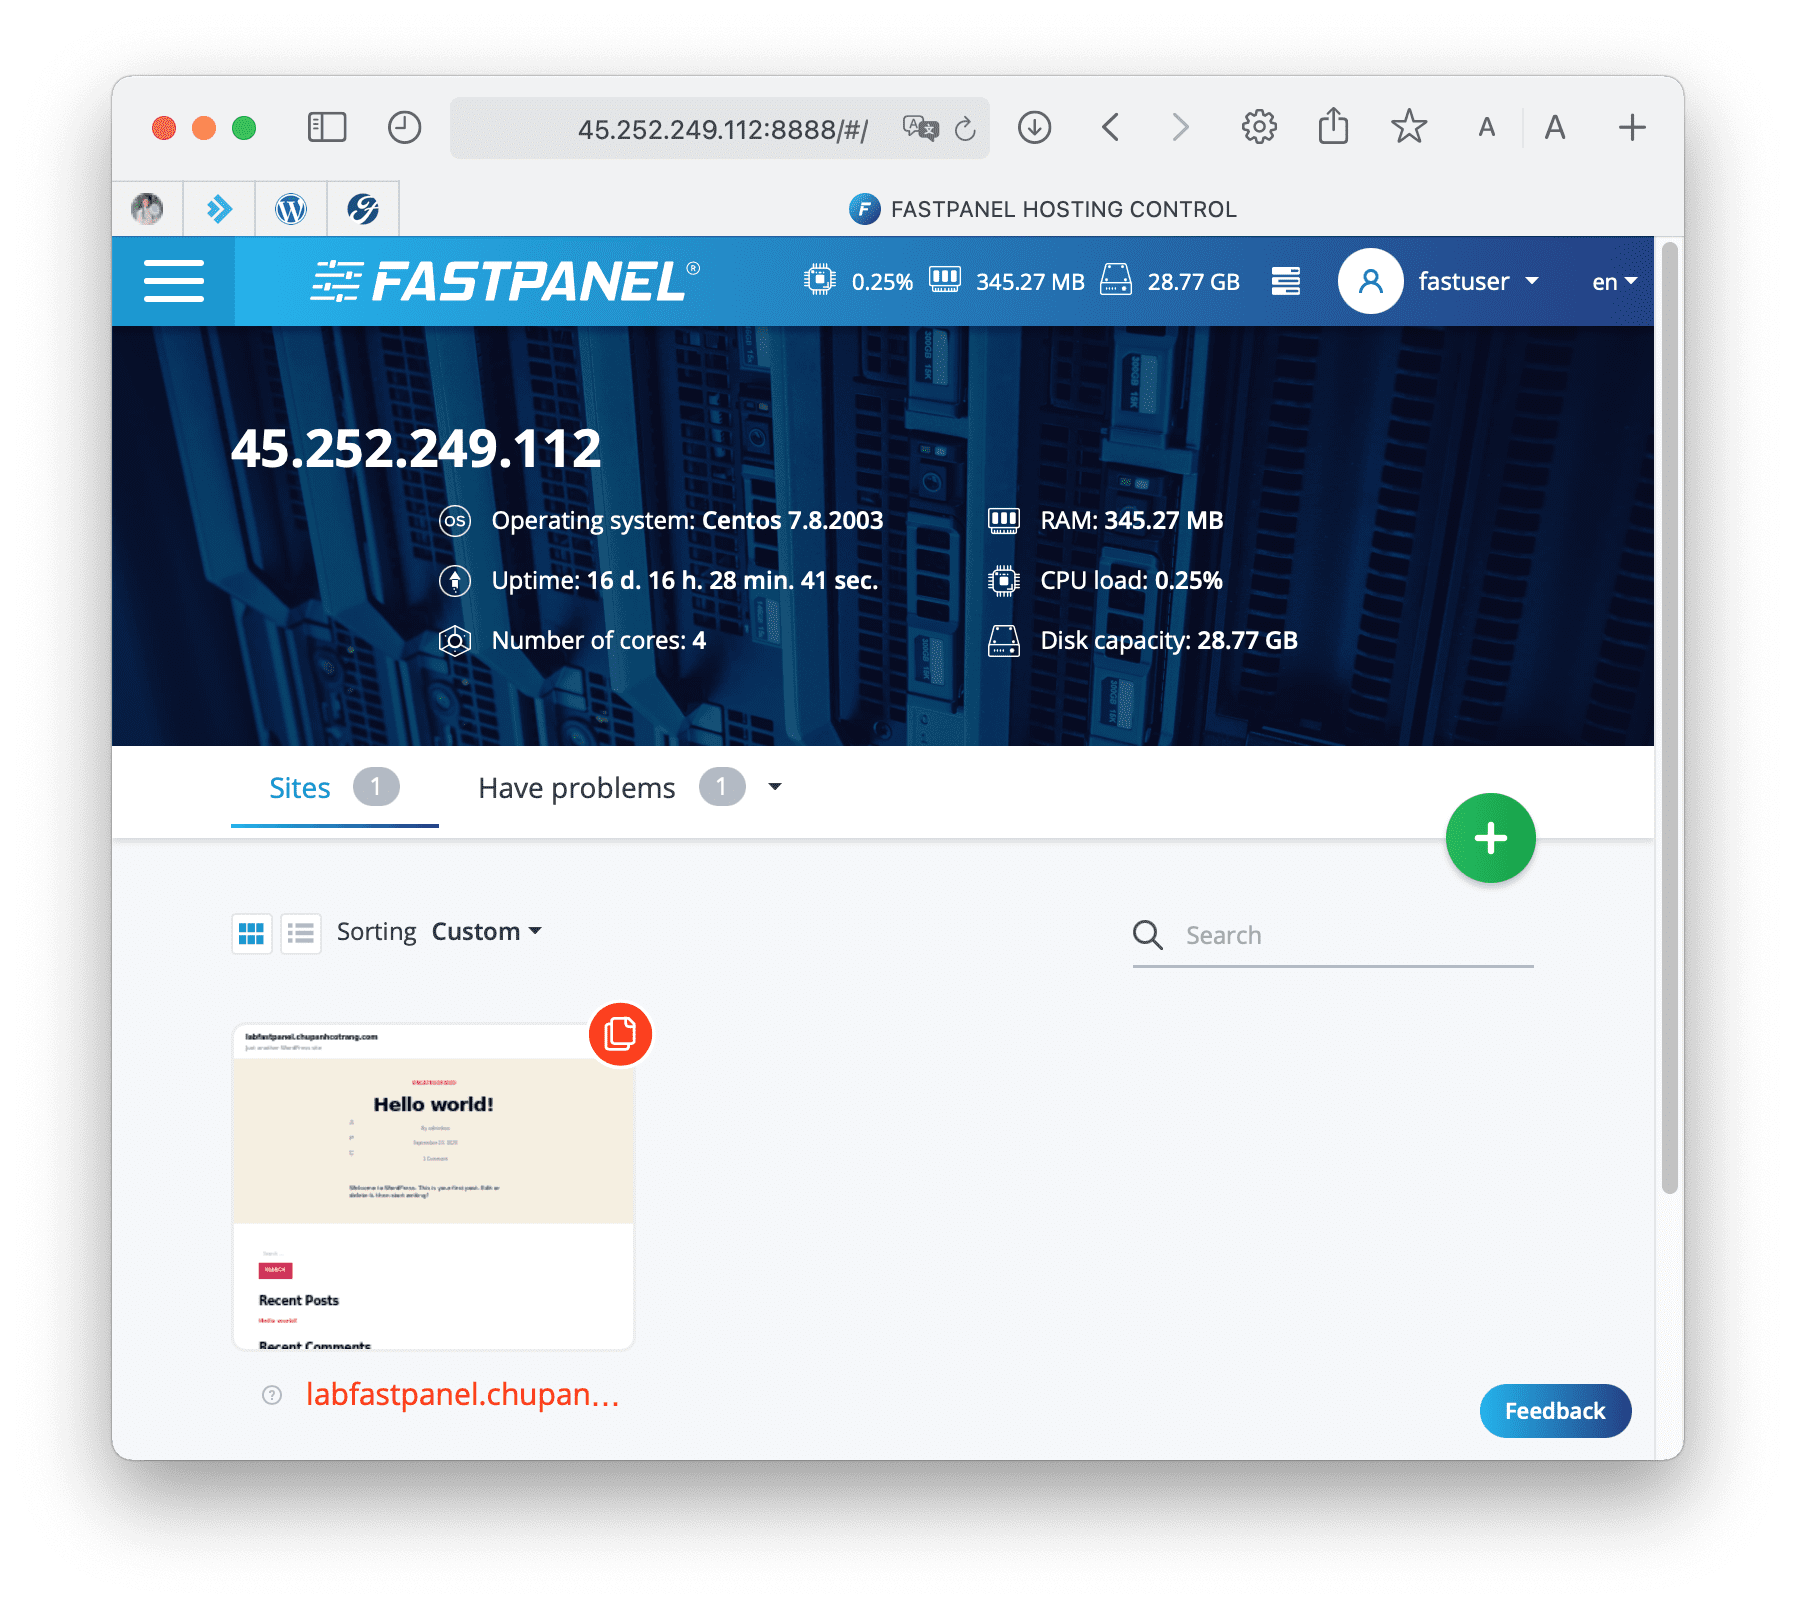
Below is the FASTPANEL interface: We continue to the second step to install SSL Let’s Encrypt for the website on FASTPANEL.
Step 2: Install SSL Let’s Encrypt for websites on FASTPANEL
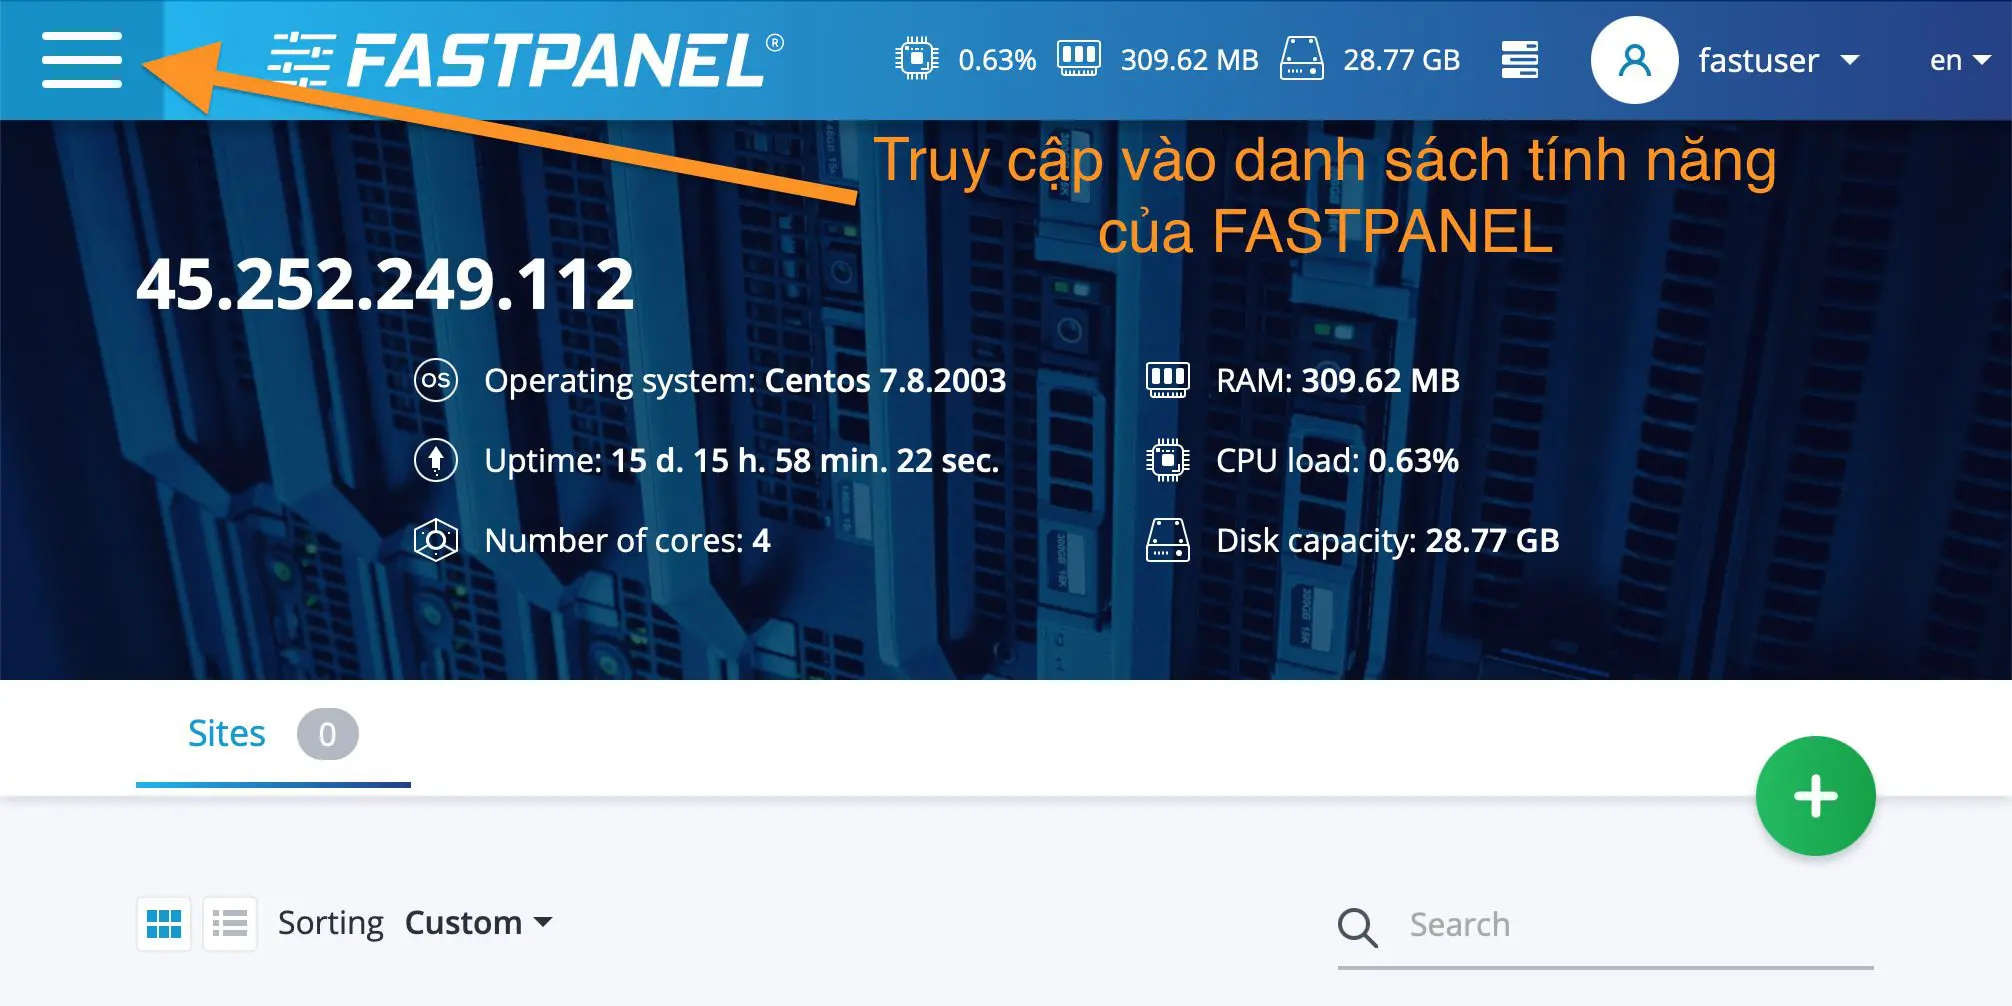
First, we click on the button in the upper left corner to access the feature list of FASTPANEL.
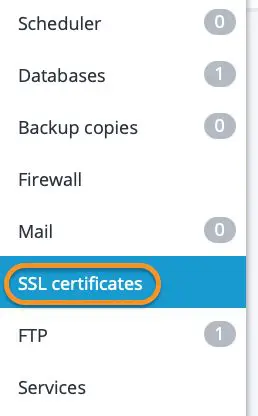
=> click the SSL certificates feature.
After accessing the SSL certificates feature interface, we select New certificates to create a new SSL certificate.

In the New certificates interface, a window will appear for the option to install SSL. In the Type item, we choose Let’s Encrypt.
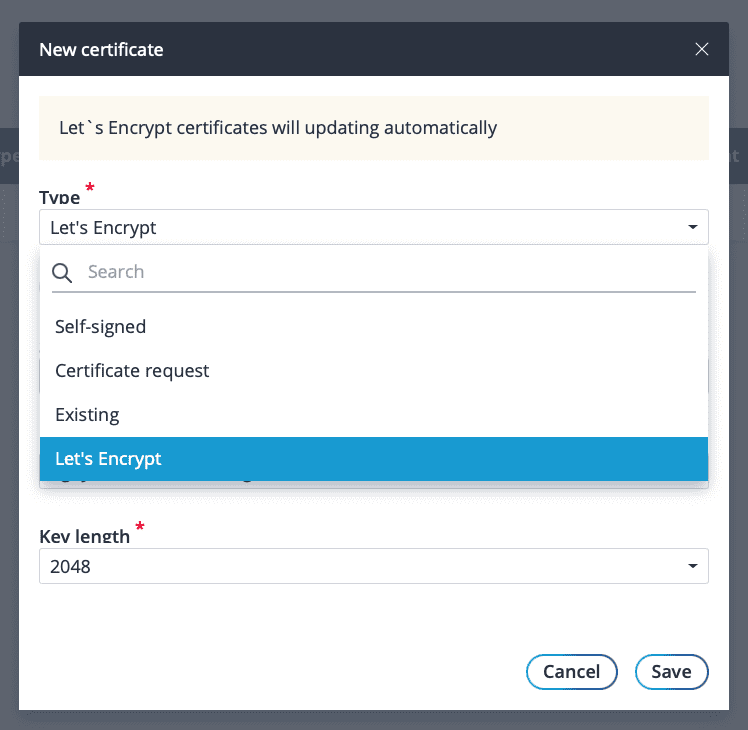
If you have multiple subdomains, you can choose to add Wildcard to install those domains.
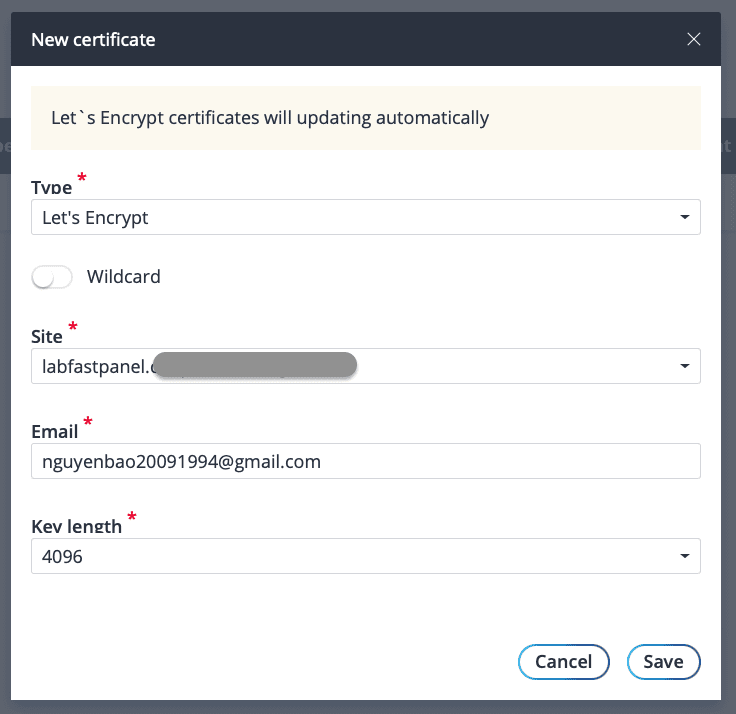
Then click Save to start the process of installing SSL Let’s Encrypt for the website on FASTPANEL.
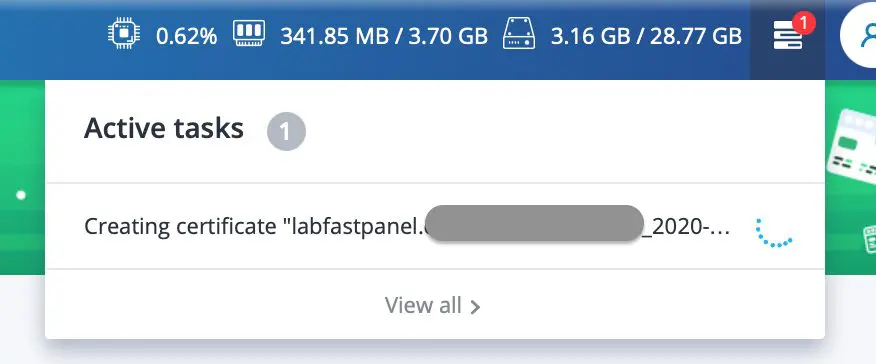
Please wait a moment for the installation to complete. We can recheck the log at the link https://IP:8888/#/tasks, remember to change the IP to the IP address of your VPS/server.

If an error or success is encountered, the log will show you a message.
Note: In the current version of FASTPANEL, you need to point to the domain name as well as the www subdomain of the domain name to be able to install SSL Let’s Encrypt. For example, if your subdomain is abc.domain.com, you must also point to the A record or the CNAME record www.abc.domain.com your VPS/server IP to install.
However, even when we receive the SSL certificate successfully, we still have to tweak a few more operations to use it.
We return to the FASTPANEL dashboard select the website to install SSL => select the Site card.
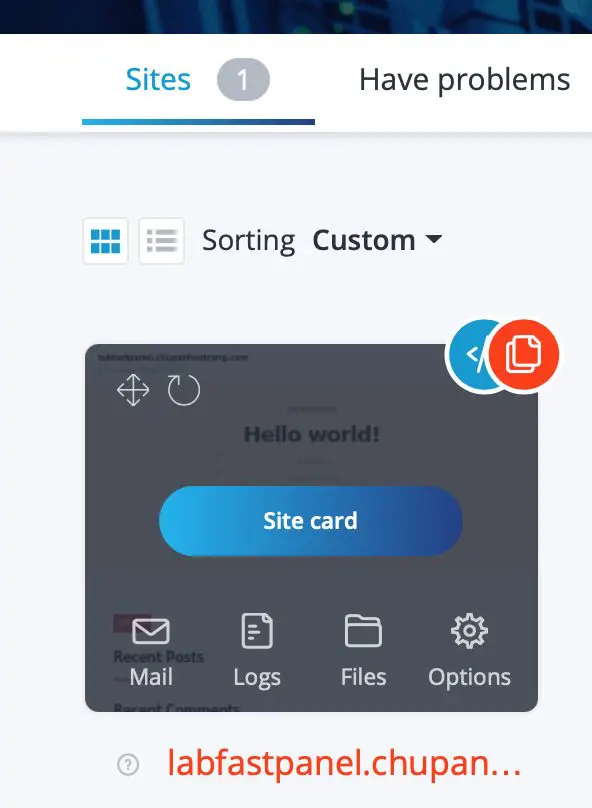
After entering this website management interface, select Settings.

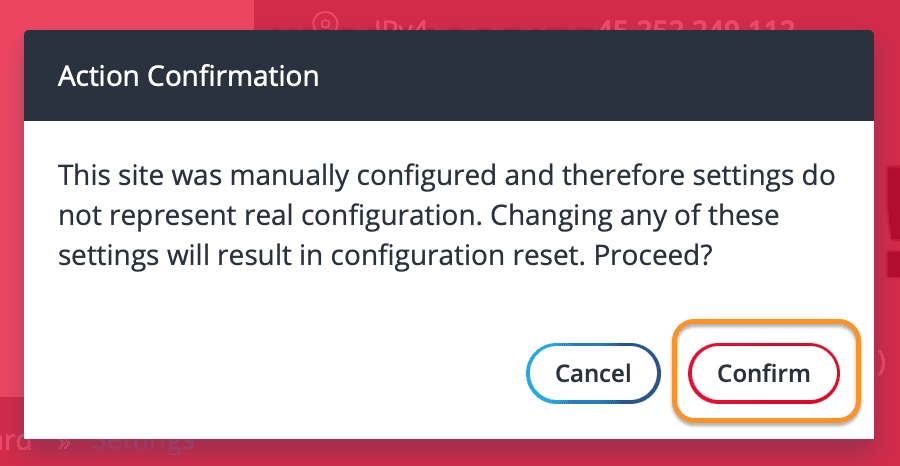
Then you will receive a warning that you are about to enter the manual configuration area so consider before proceeding => select Confirm to ignore this warning.
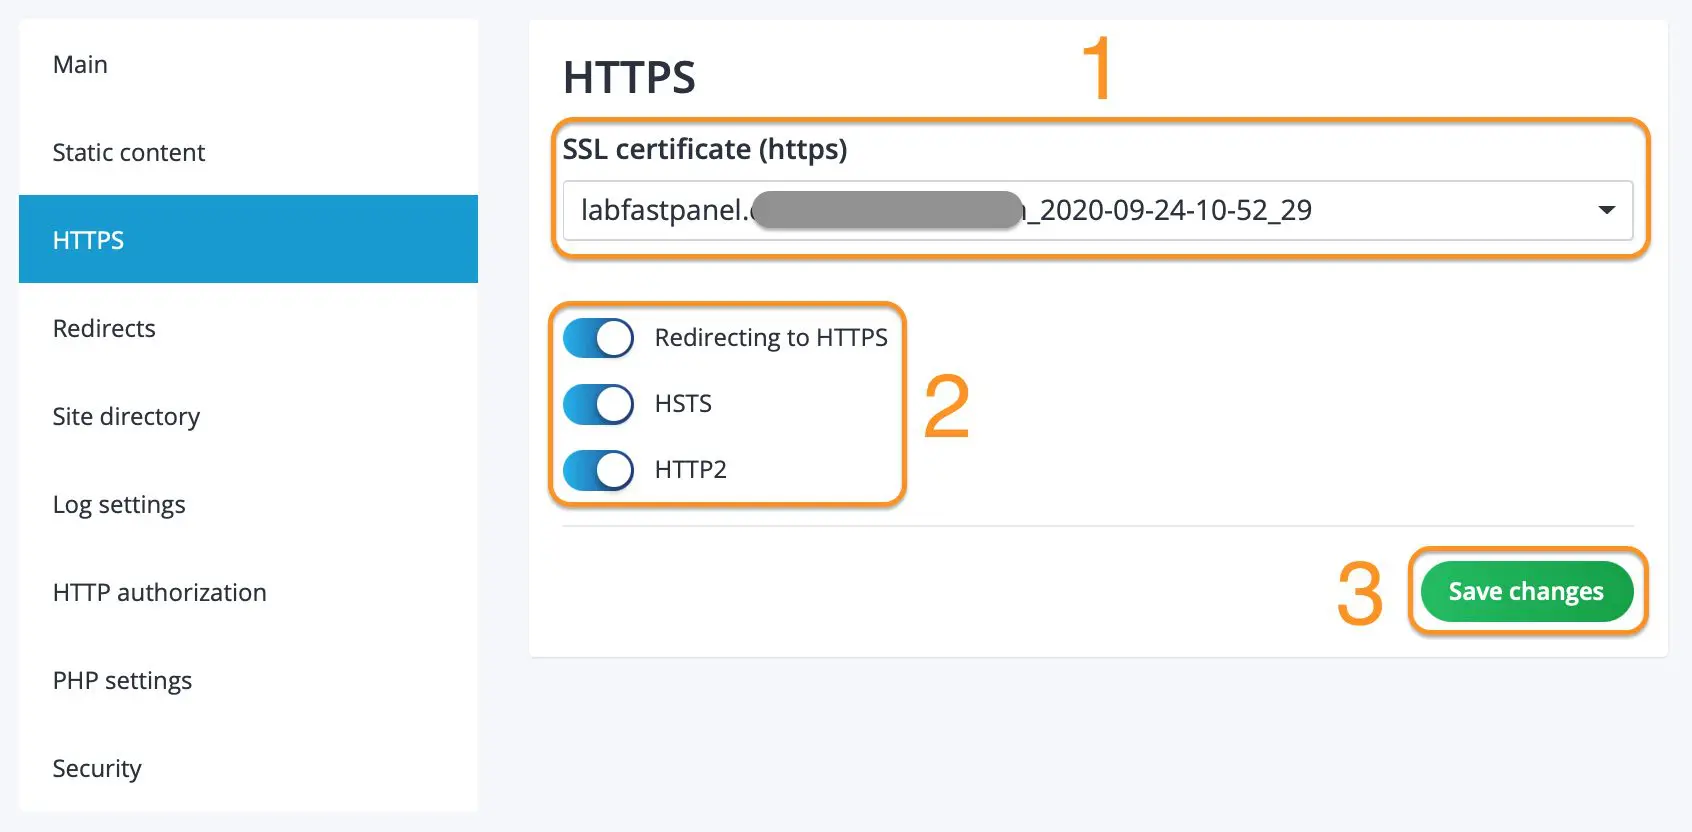
Next, select HTTPS settings and do as shown below:
Note:
- 1: Here you need to select the certificate that was initialized earlier.
- 2: Turn on redirect to HTTPS so that the website does not work in parallel with SSL and non-SSL versions, enable HSTS to improve security, turn on HTTP2 to increase website speed.
- 3: After tweaking, click Save changes.
Step 3: Check the certificate on the website
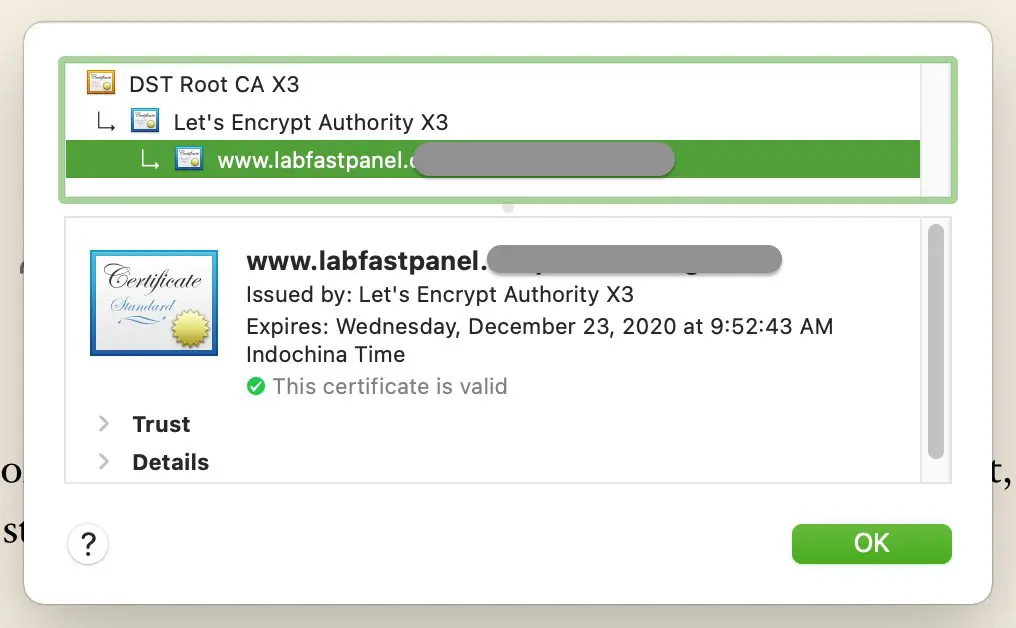
We try to access the newly installed website again, we will see the SSL padlock icon, when we click on the SSL details, we will see that the SSL is issued by Let’s Encrypt.
So we have completed the steps to install SSL Let’s Encrypt for the website on FASTPANEL.
III. Summary
Hopefully, this article will help you easily install SSL Let’s Encrypt for websites on FASTPANEL, as well as a few tweaks to improve your website, such as HTTPS redirects, HSTS enabled, and HTTP2 enabled.
If you find the article useful, don’t forget to rate 5 stars.
Wishing you success.
In addition, you can check out some other articles about FASTPANEL at the link below:
If you need assistance, you can contact support in the ways below:
- Hotline 247: 028 888 24768 (Ext 0)
- Ticket/Email: You use the email to register for the service and send it directly to: support@azdigi.com

