Nội dung
Welcome back to the AZDIGI documentation channel. If you are using the SEO Hosting service at AZDIGI, you will surely use the local Name Server (NS) pair according to the SEO server. This leaves the system to automatically point the IP and the corresponding Record. Using the local Name Server(NS) pair will help you manage DNS directly on your hosting package and not depend on DNS at the domain name registrar. In addition, it will help resolve DNS faster when using the same hosting.
And to use this new DNS, you can follow the steps below.
I. Conditions of Use
To manage DNS directly on the SEO hosting package at AZDIGI, it is imperative that you have the SEO package at AZDIDI and must update the domain name with the Name Server (NS) pair below.
Note: The domain name is still under the management of the domain name registrar and you still have to renew it at that domain registrar.
ns1-seohosting.azdigi.com
ns2-seohosting.azdigi.com.
II. How to manage DNS
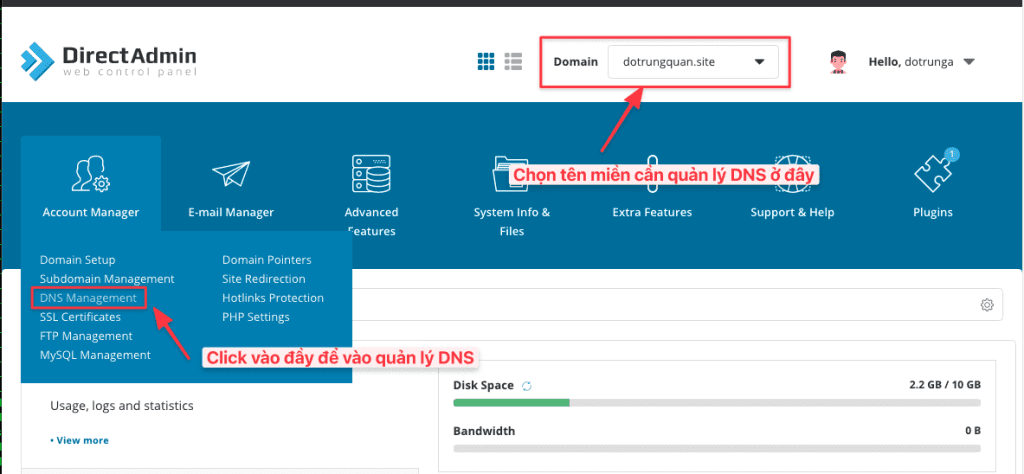
After meeting the Name Server(NS) condition, please log in to the SEO hosting service with the information that AZDIGI has granted you.
The usual login path would be:
- https://sh1.azdigi.com:2222/
- https://103.221.220.216:2222
- https://my-domain:2222
Below is the entire record available by the system:
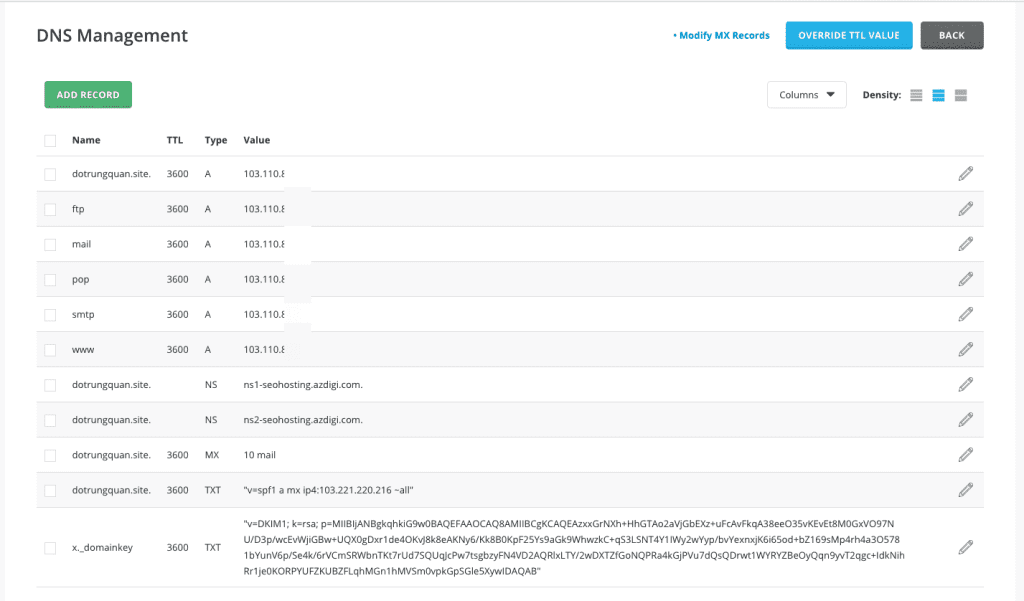
1. List of Most Used Records
- A Record: Map a domain name to a given IP address. It helps to point the website’s domain name to a specific IP address.
- CNAME Record: A DNS record specifies a domain name as an alias for another primary domain. A primary domain can have multiple CNAME aliases.
- MX Record: A DNS record that identifies the mail server to which the email will be sent. A domain name can have many MX records, which helps avoid receiving emails if one mail server goes down.
- TXT Record: A type of DNS record that helps organize the textual information of the domain name. A domain can have many TXT records, mainly used for Sender Policy Framework (SPF) codes, which help email servers determine whether incoming messages are from a trusted source. In addition, this type of DNS record is also used to authenticate the server of a domain name, verify SSL, etc.
2. Add a new Record
At the DNS Management interface, click ADD RECORD to start adding a new record.

Next, in the Record Type section, there will be many types of records, as I described in 1. Danh sách các Record thường dùng nhất. Next, in the Record Type section, there will be many types of records, as I described in part 1.
1. Create A record
- Record Type: A
- Name: Enter the domain name or the subdomain to point to
- TTL: Leave as the default
- Value: Enter the IP to point to

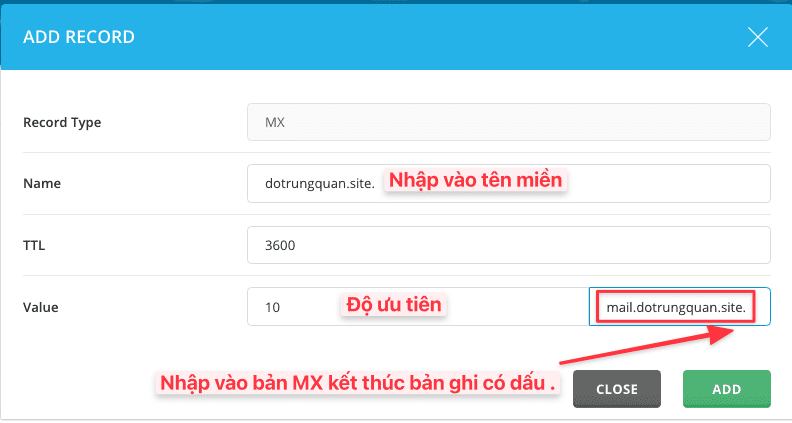
2. MX Record
- Record Type: MX
- Name: Enter the domain name or the subdomain to point to
- TTL: Leave as the default
- Value: Enter the priority and the MX record
3. CNAME record
- Record Type: CNAME
- Name: Enter the domain name or the subdomain to point to
- TTL: Leave as the default
- Value: Enter the information you need to CNAME.

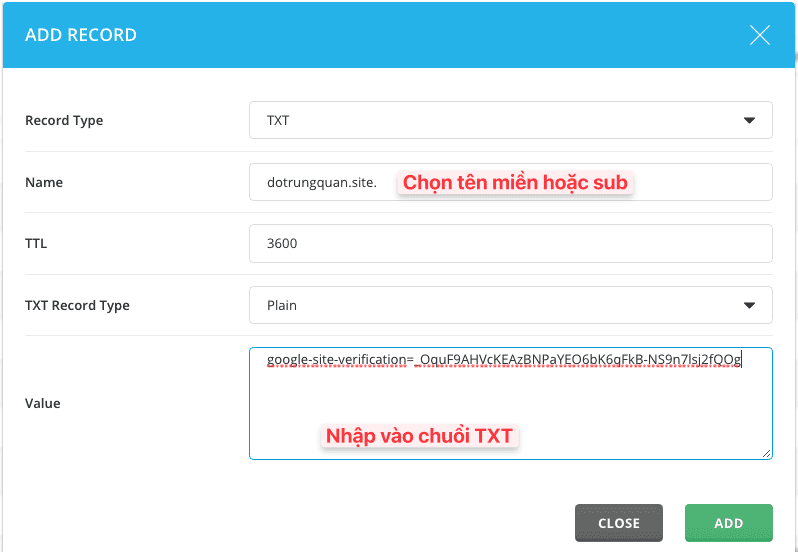
4. TXT record
- Record Type: TXT
- Name: Enter the domain name or the subdomain
- TTL: Leave as the default
- Value: Enter the TXT string you need to use.
3. Edit Record
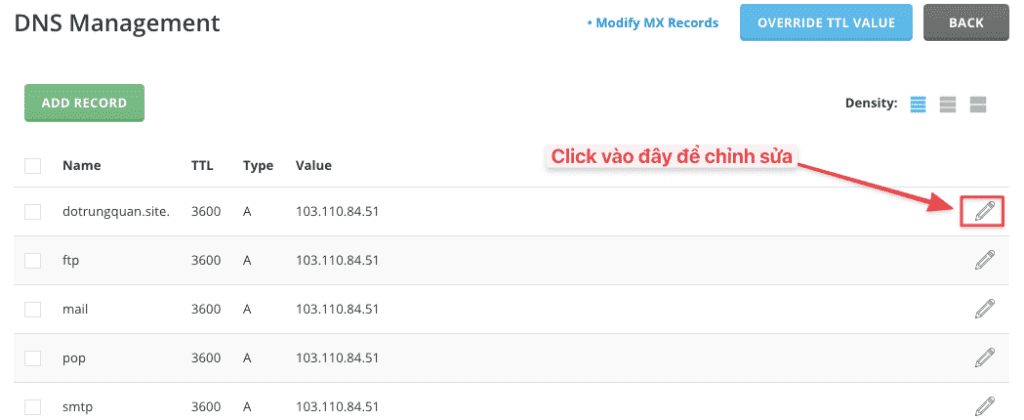
To edit any record, please click on the pen icon as shown below and edit the recording.
4. Delete Record
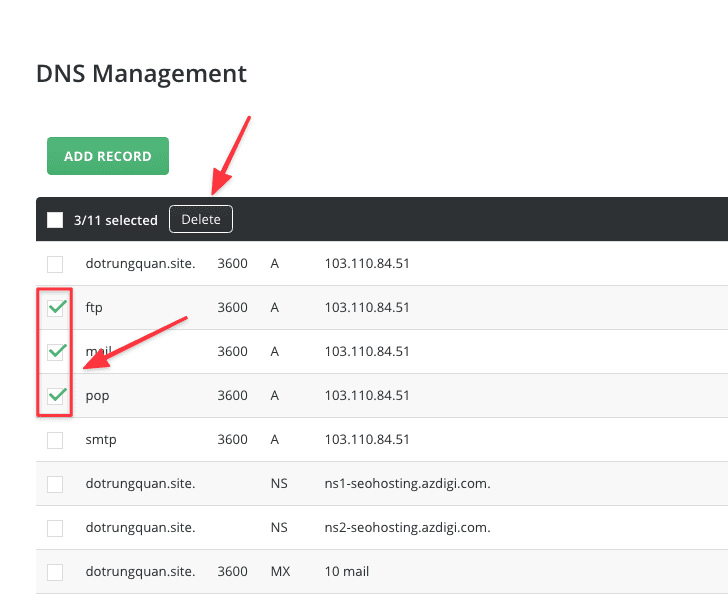
To delete one or more records, please tick the record you want to delete => press the Delete button.
5. Check the Record with the tool
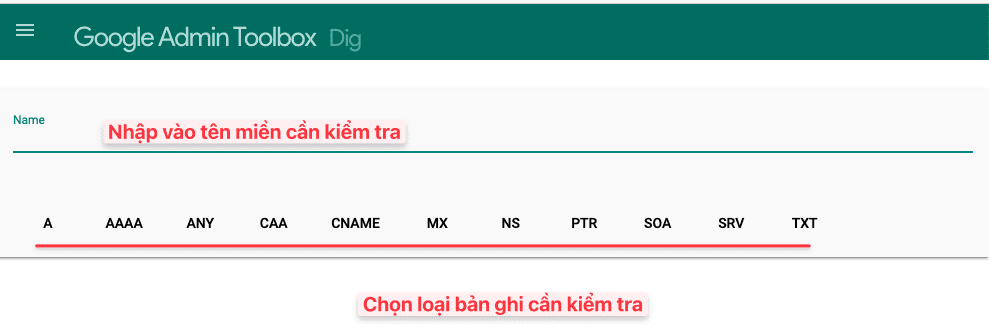
After you have pointed out the completed records and are wondering if it has been successful, you can use a third-party tool to check. I will use Google Admin Toolbox to check.
- NAME box: Please enter the domain name or subdomain to check.
- For the types of records below, please choose the type you need to check.
So AZDIGI has completed the steps of DNS Domain Management on SEO Hosting AZDIGI. Thank you for following up here. Hope this article will help you make the easiest record management.
See more useful articles about SEO Hosting at the following link:
If you need assistance, you can contact support in the ways below:
- Hotline 247: 028 888 24768 (Ext 0)
- Ticket/Email: You use the email to register for the service and send it directly to support@azdigi.com.

