

Nội dung
In this article, AZDIGI will guide you on how to install Redis on a server using aaPanel and how to configure Redis with WordPress Website to optimize, increase load capacity and help improve site loading speed better.
What is Redis?
Redis is an open-source software used to store structured data, which can be used as a database, cache, or message broker. It is a very powerful and popular KEY-VALUE data storage system today. Redis stands out because it supports many basic data structures such as hash, list, set, sorted set, string. All data is recorded and stored in RAM, so data read and write speed will be very fast. For details on installation and configuration steps, please see below.
Note: This Redis Socket feature is only available on DirectAdmin Pro Pack. Regular DirectAdmin licenses will not have this feature.
Enable Redis on SEO Hosting
To install Redis, you need to log in to your SEO Hosting, if you forget your information, you can reset the information according to the instructions below:
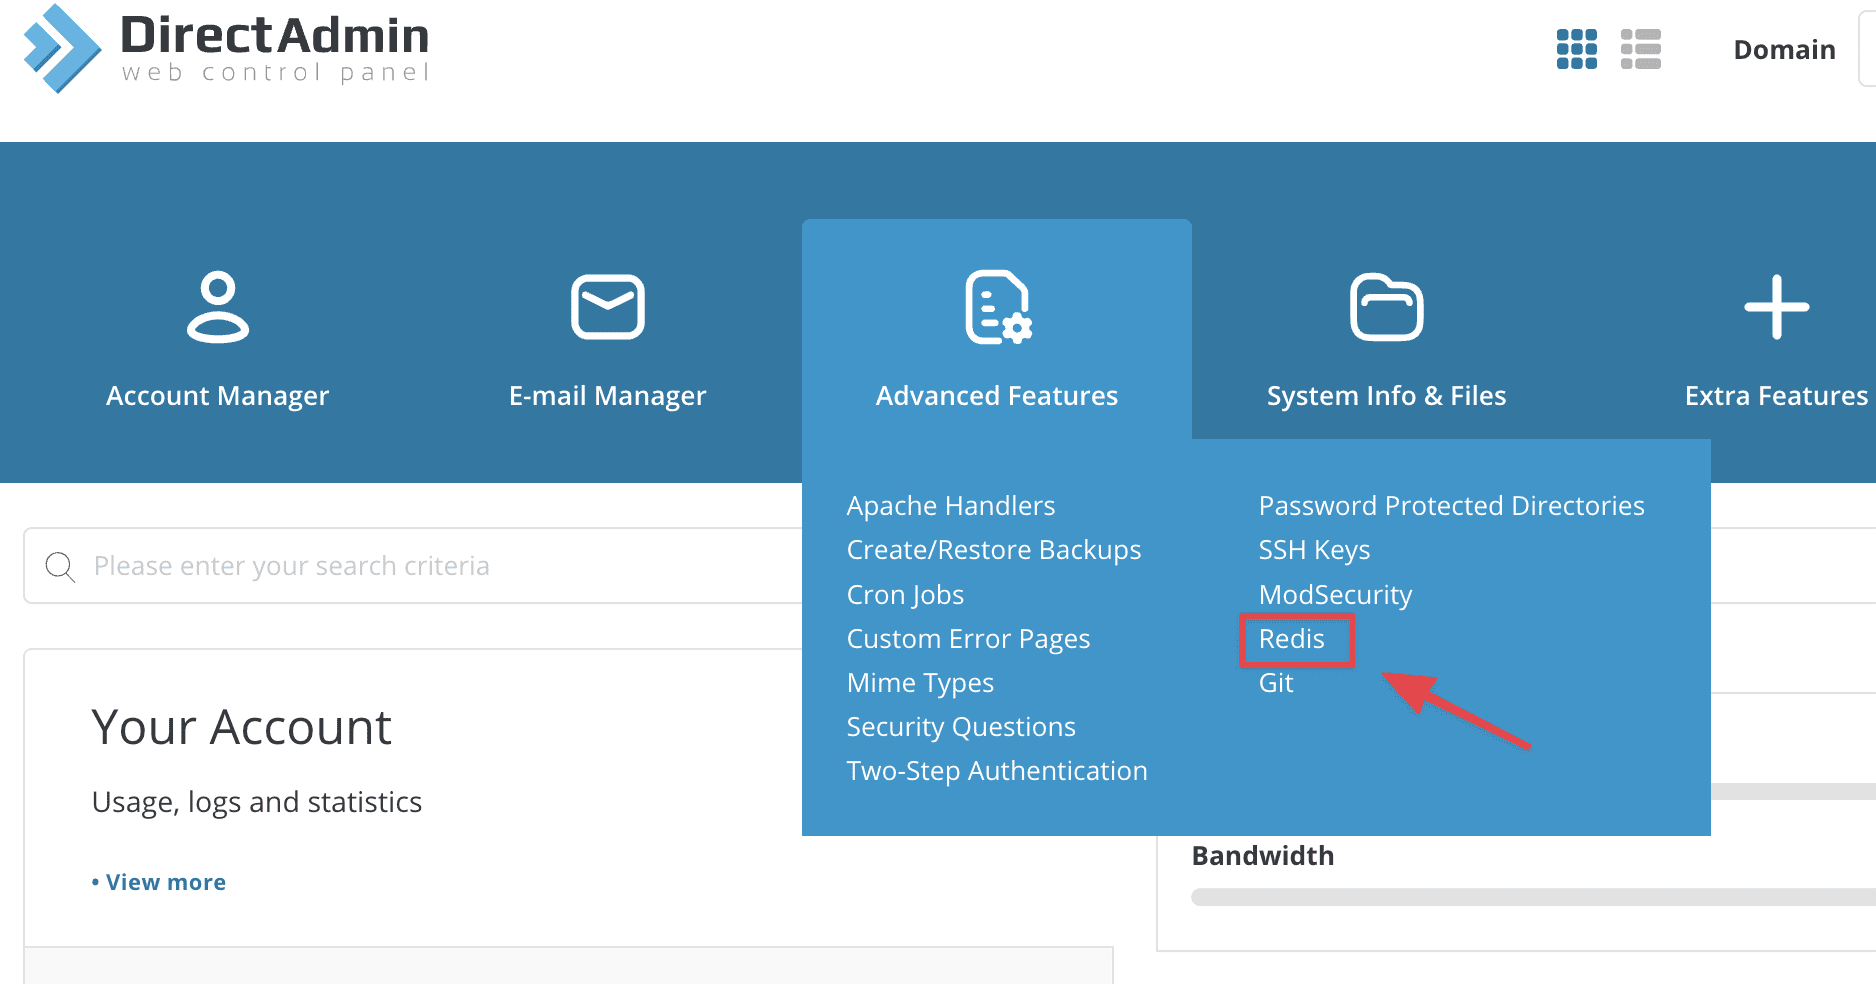
After successfully logging in to SEO Hosting, you access Advanced Features => Redis
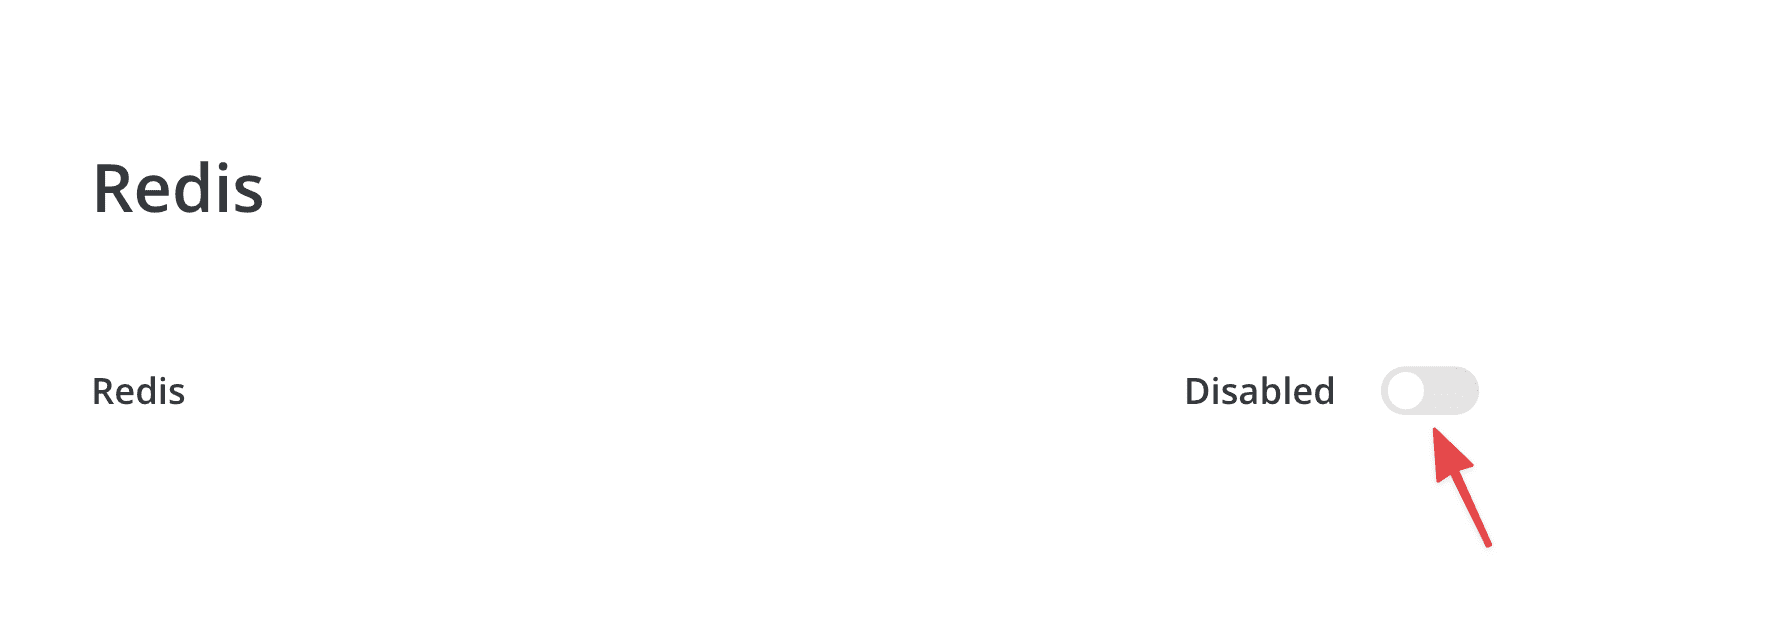
You will see the status is Disabled, you click this button to enable Redis.
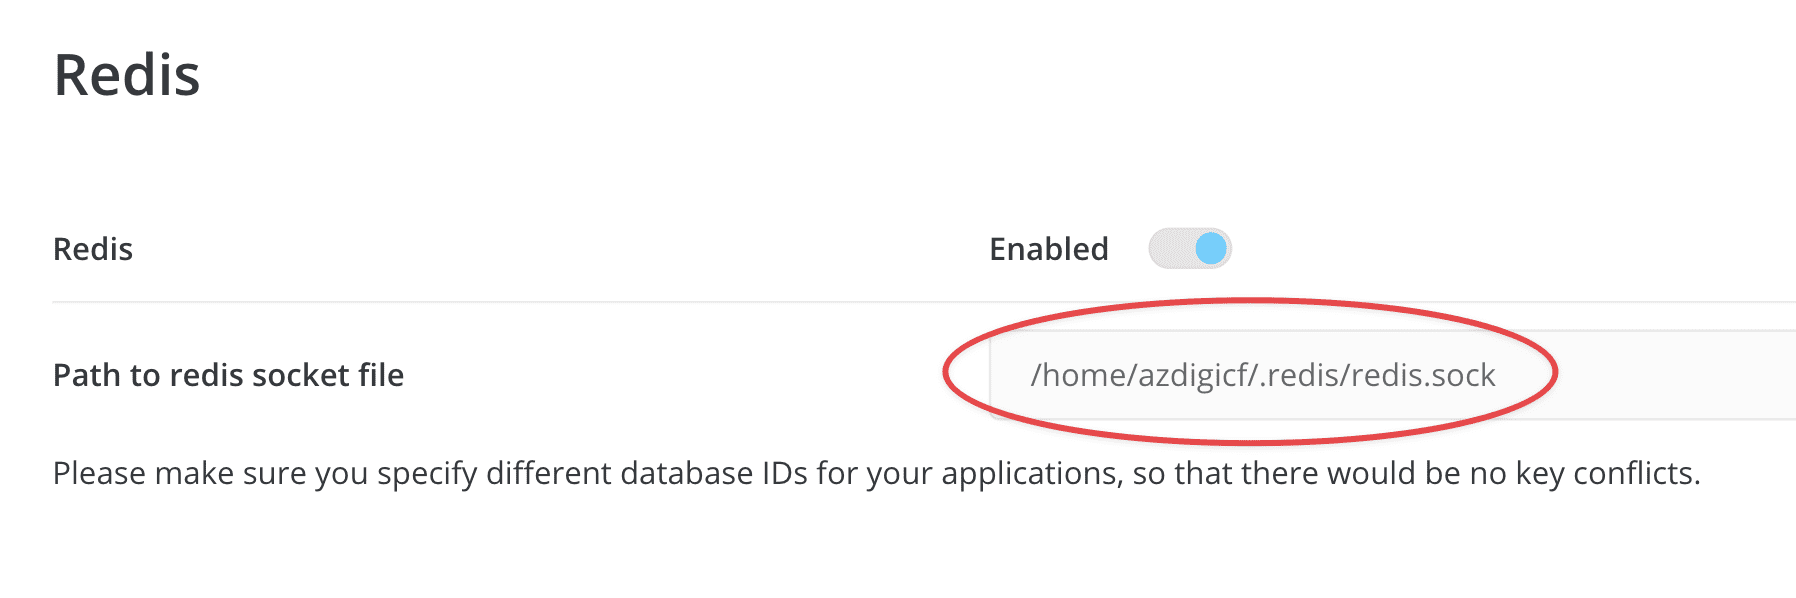
You wait a few seconds for the system to activate Redis, now you will see the system provides a socket segment (red circled)
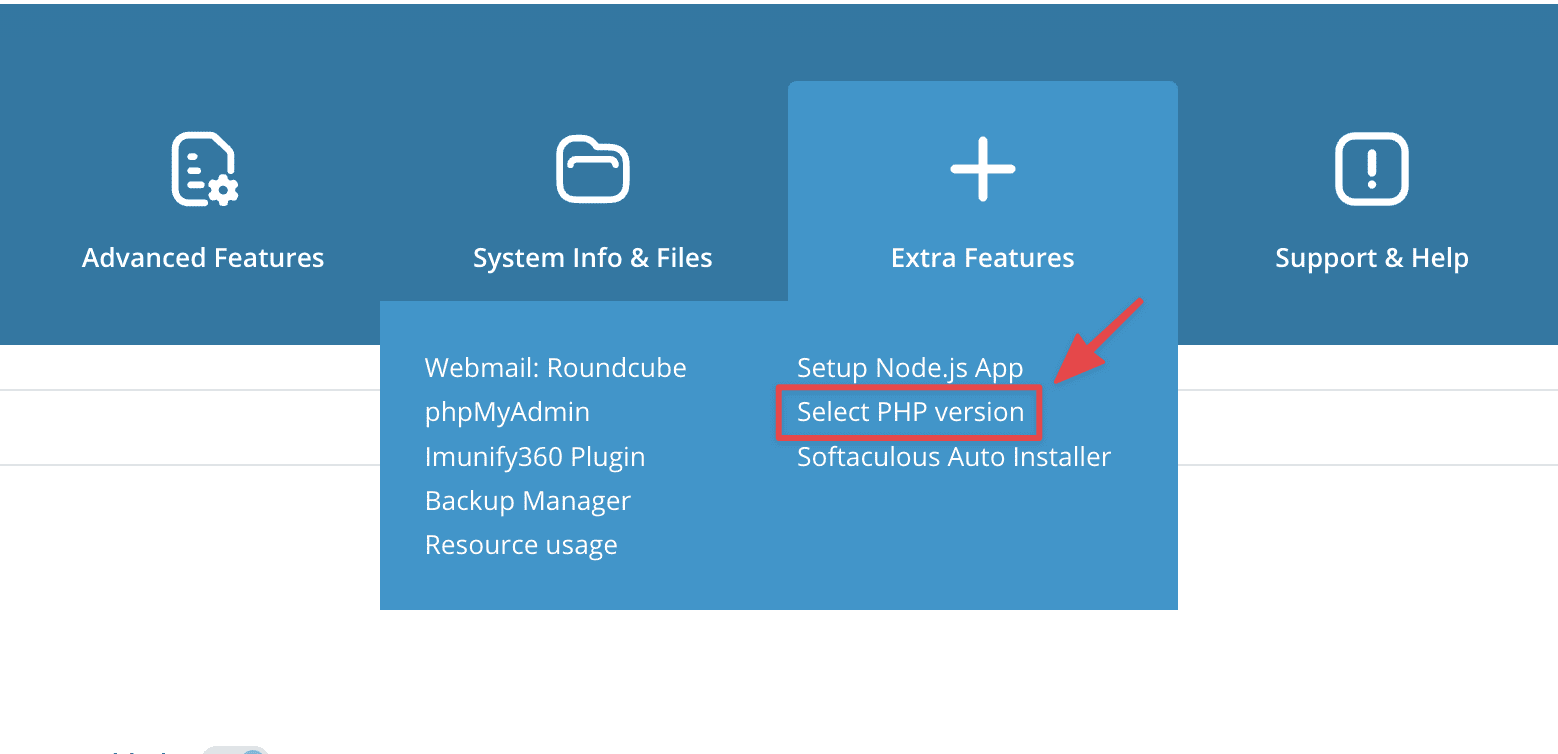
Next, go to Select PHP Version and make sure that Extension redis on PHP is enabled.

Configure Redis Cache to WordPress Website
Step 1: Add Redis Configuration
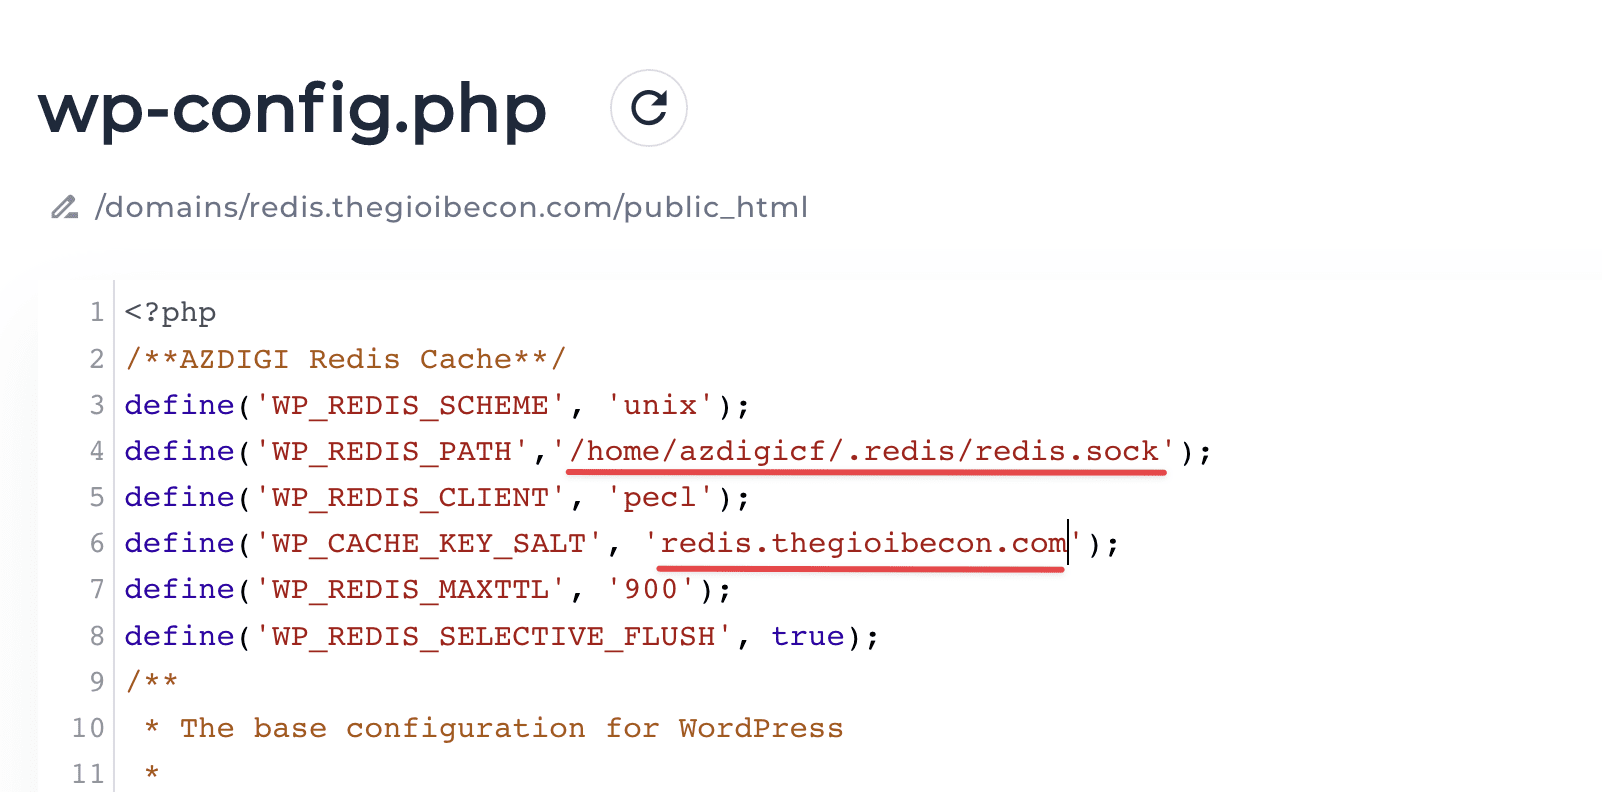
You need to open wp-config.php file and add below code below <?php
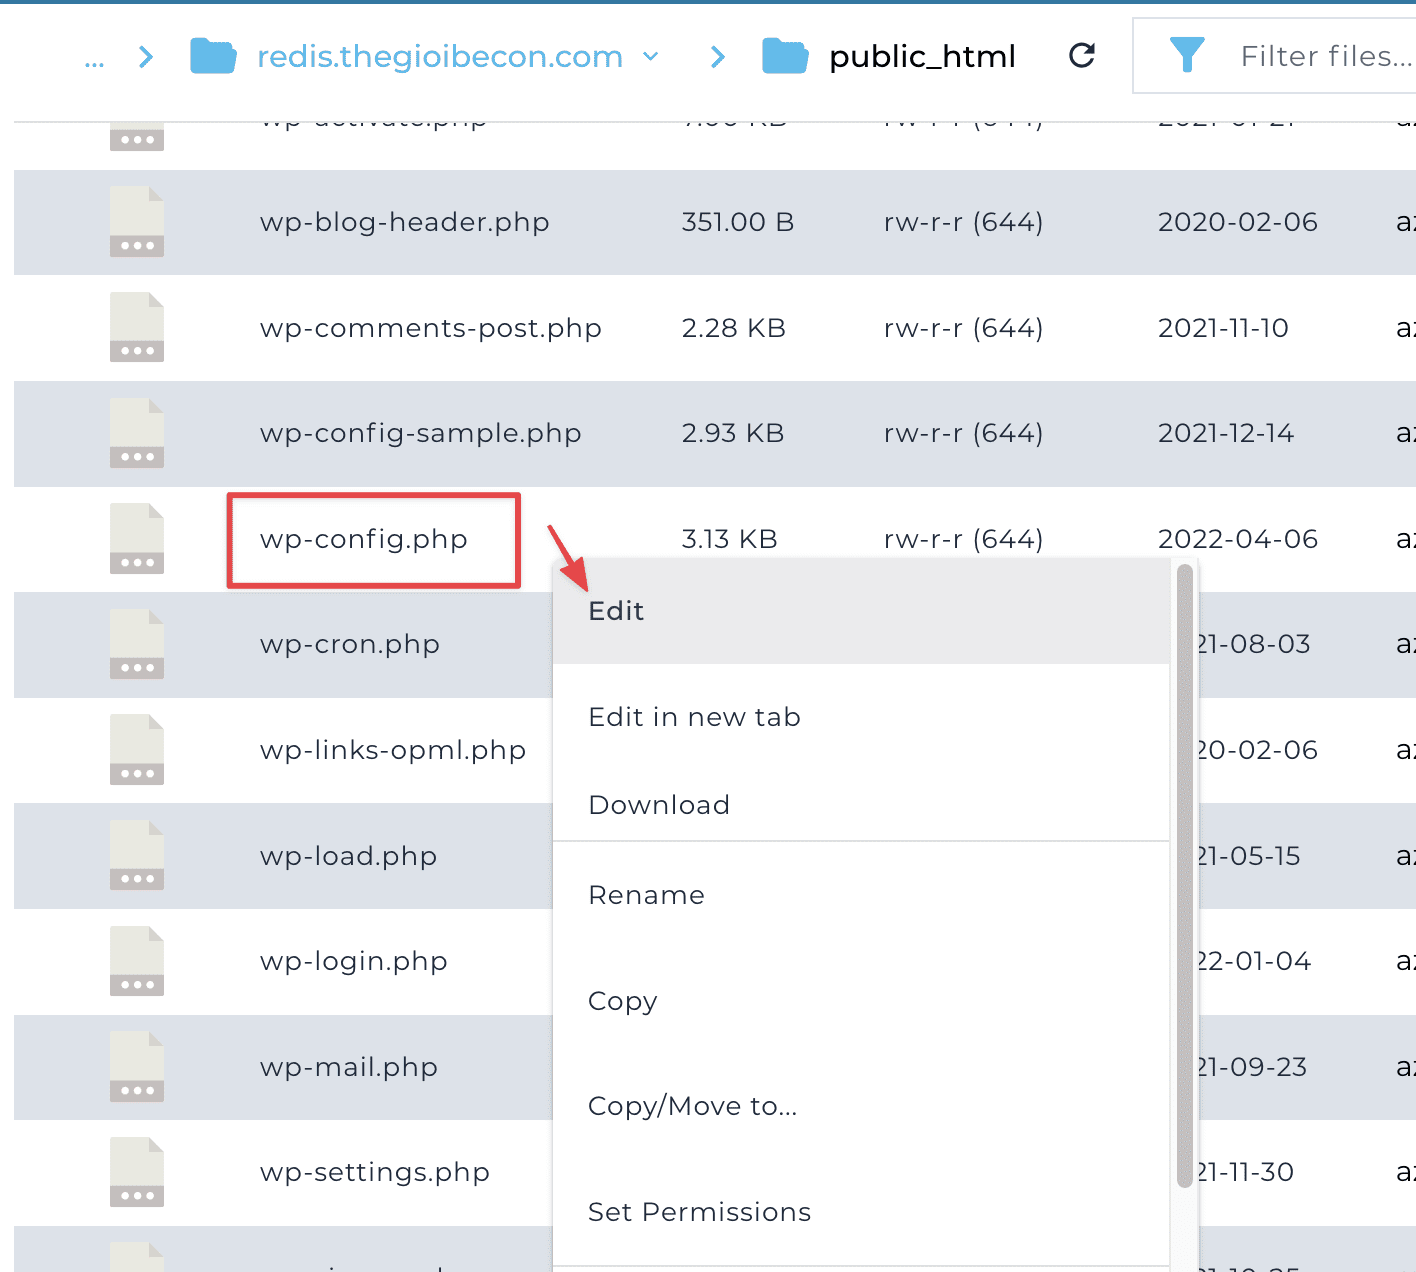
/**AZDIGI Redis Cache**/
define('WP_REDIS_SCHEME', 'unix');
define('WP_REDIS_PATH','/home/username/redis/redis.sock');
define('WP_REDIS_CLIENT', 'pecl');
define('WP_CACHE_KEY_SALT', 'nhập vào tên miền của bạn');
define('WP_REDIS_MAXTTL', '900');
define('WP_REDIS_SELECTIVE_FLUSH', true);
Remember to edit the two parts WP_REDIS_PATH and WP_CACHE_KEY_SALT to the path of your redis.sock file and your domain, as shown in the example below:
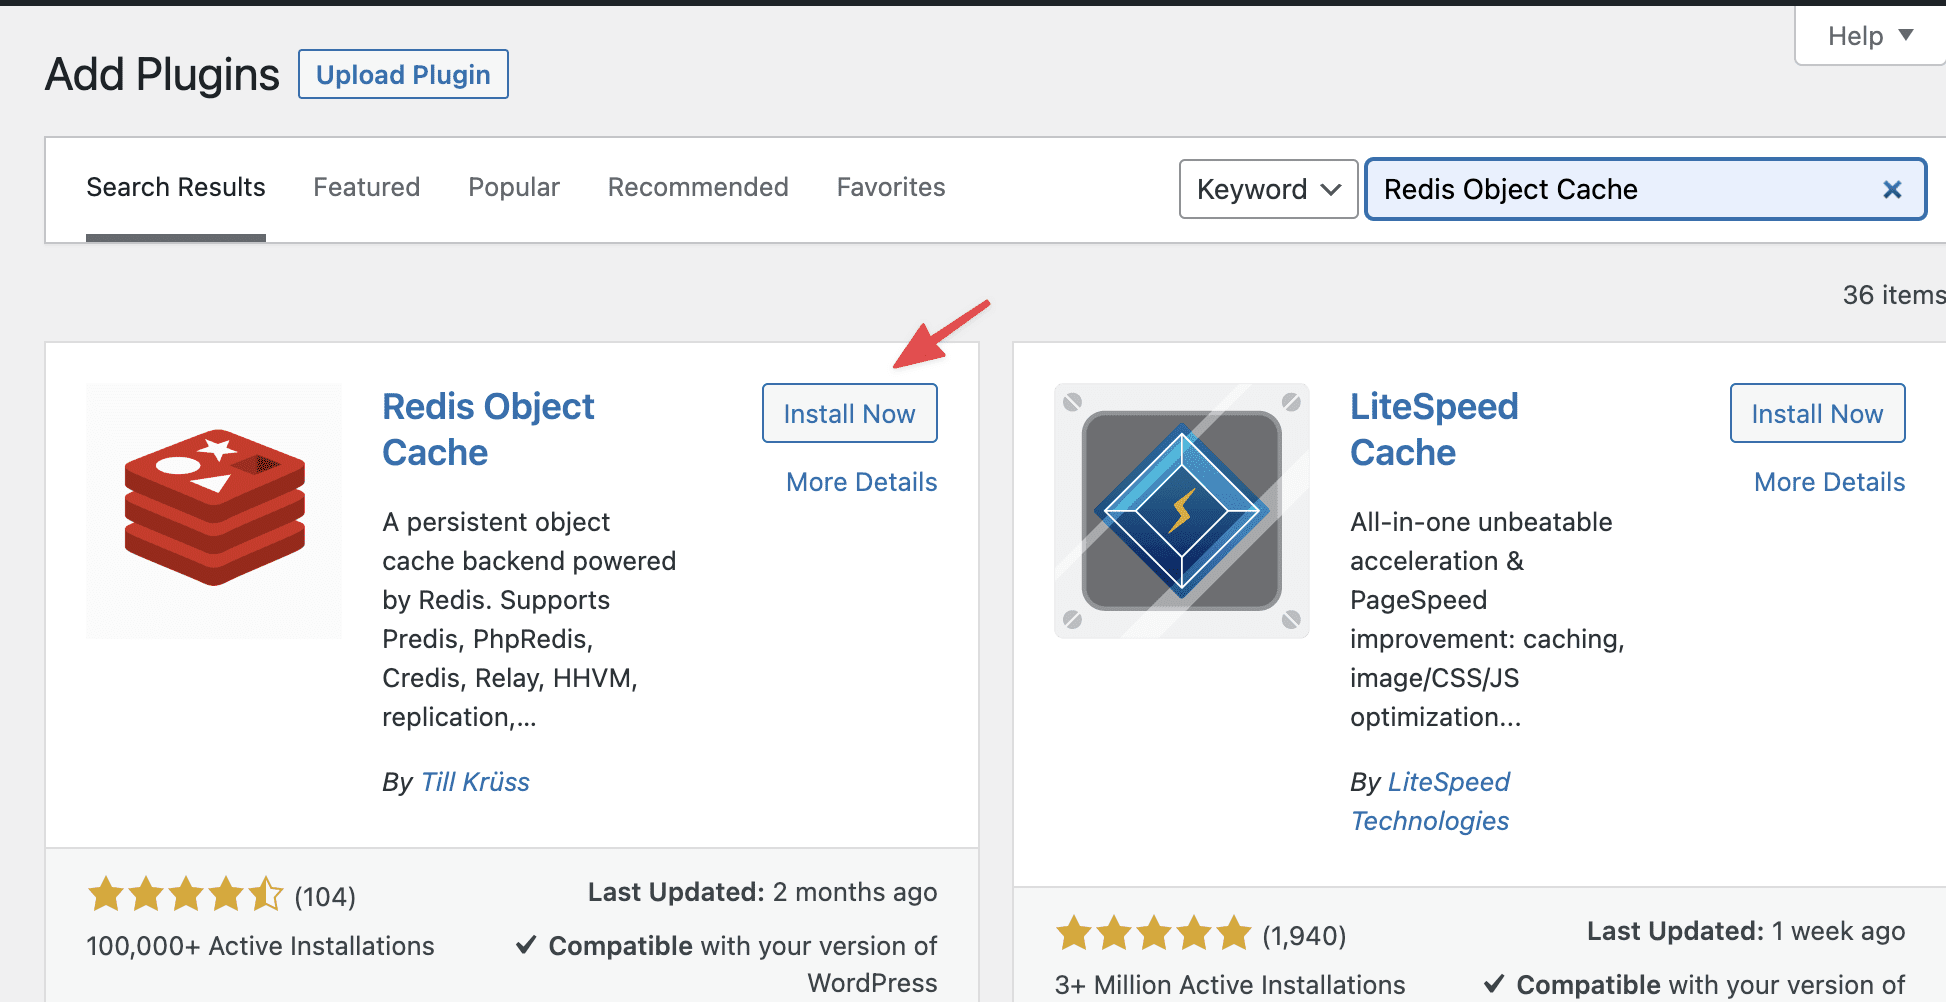
Step 2: Install the Plugin and Activate Redis
If you are using the free WP-Rocket plugin offered by AZDIGI (or cache plugins that don’t support Object Cache), you can add Redis by installing the Redis Object Cache plugin. AZDIGI recommends that you install the above Plugin to configure the Object Cache instead of configuring it directly into the Plugin (with Object Cache support), this will reduce some errors or warnings related to Memory.
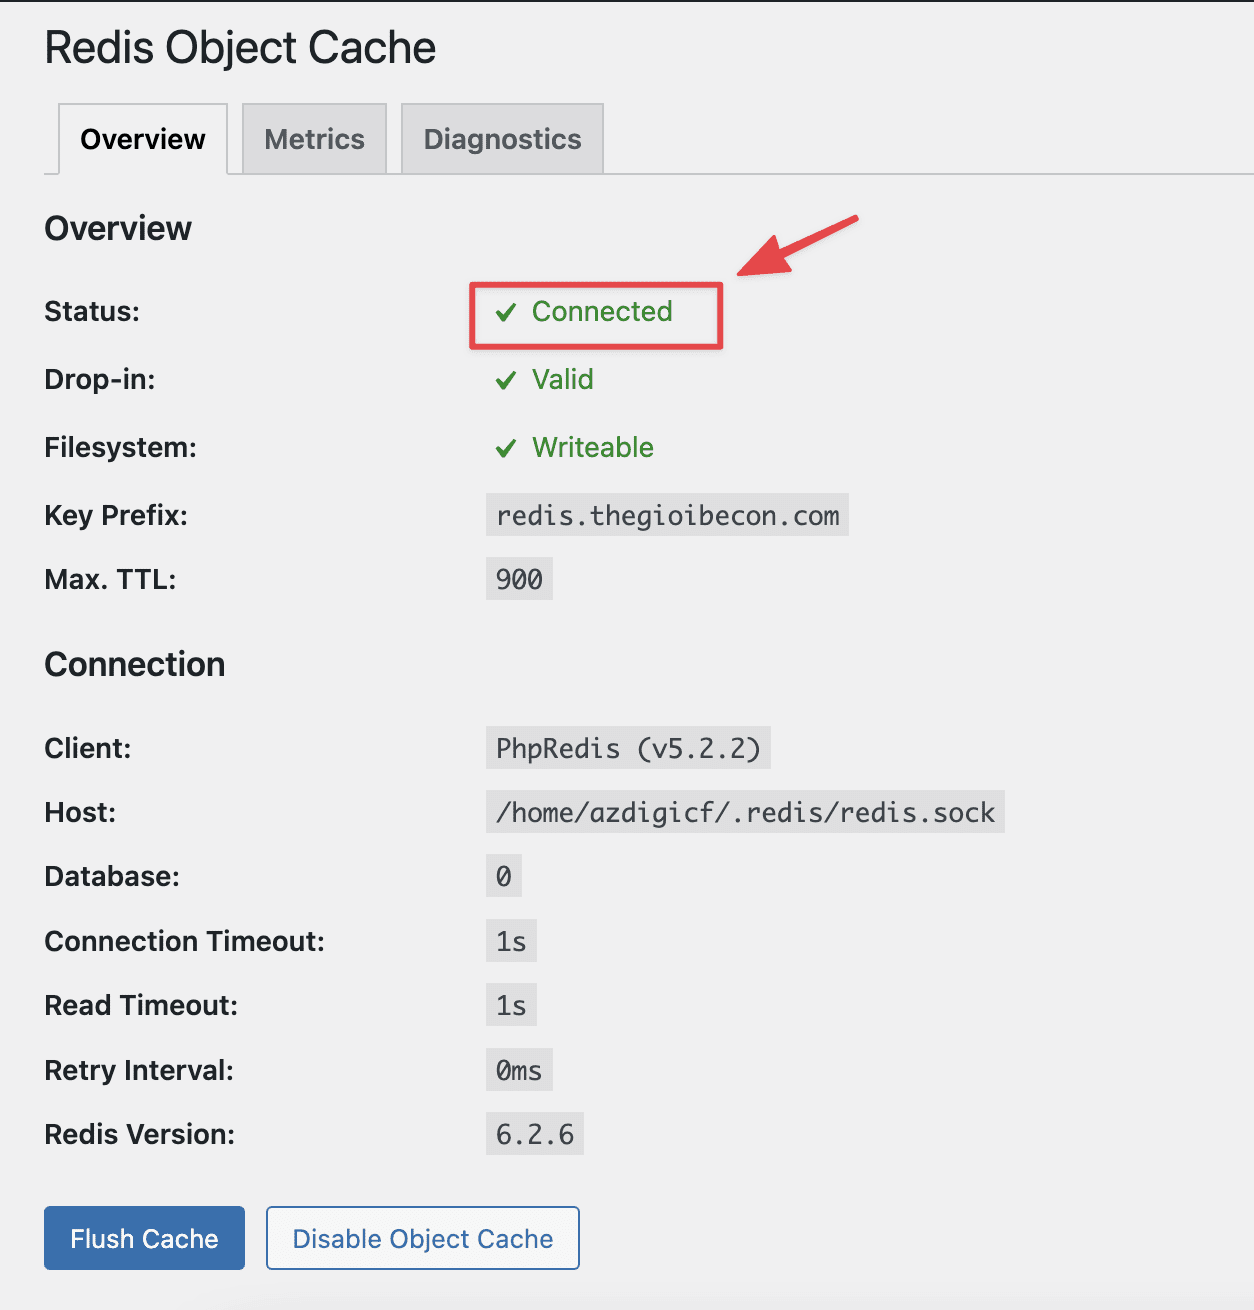
After installation is complete, go to Plugins => click Enable Object Cache to activate.

If the screen shown below, you have successfully activated Redis.
Thus, AZDIGI has shown you how to enable Redis cache on SEO Hosting service and connect to the WordPress website very simply. Configuring the use of Redis cache will help your website increase its load capacity, helping it operate stably and have a faster access speed.
You can refer to other instructions at the link below:
If you need assistance, you can contact support in the ways below:
- Hotline 247: 028 888 24768 (Ext 0)
- Ticket/Email: You use the email to register for the service and send it directly to: support@azdigi.com
