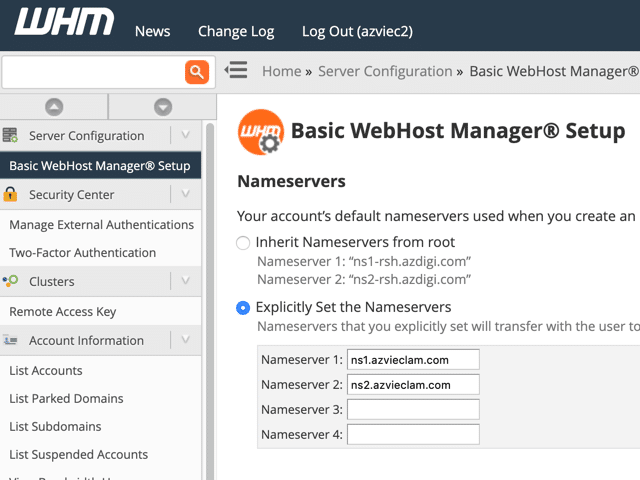
If you register the cPanel Reseller Hosting service, you can use your own Nameserver address as follows:
- ns1.your-domain.com
- ns2.your-domain.com
Once you have your own nameserver, you can point the customer’s domains to this nameserver pair to point the domain name to your Reseller Hosting service. In this article, AZDIGI will show you how to set up and configure your own nameserver address using the cPanel Reseller Hosting service.
Step 1. Check nameserver address
When the service is created, the system will automatically generate for you the nameserver pair according to the structure ns1, ns2. You can recheck by logging into the WHM control panel and looking for the Basic WebHost Manager® Setup, you will see your nameserver here.
You can change the nameserver structure to another form, but AZDIGI recommends you use the ns1, ns2 structures to make it easier to remember.
Step 2. Register Nameserver for domain name
To have a nameserver, you need to register a nameserver for the domain name. Depending on the domain registrar, there will be different ways to register nameservers, here are some instructions for registering nameservers of famous domain name registrars:
If you register a domain name at AZDIGI, you can register a Nameserver at Domains => Select the domain to register => Private Nameserver (Private Nameserver) or send a request to the Technical Department via email support@azdigi.com for assistance with nameserver registration.
When registering, you point the domain to the following IPs:
- ns1 – Point to IP 45.252.249.10
- ns2 – Point to IP 103.221.220.40
After registration is complete, you can proceed to point 2 more A records corresponding to ns1 and ns2 to the IP pair above.
So you have completed registering your own nameserver and can use it to point to customers. If you need help with this, please contact the Technical Department directly via email at support@azdigi.com for the fastest support.


