Nội dung
After receiving your SEO Hosting account information at AZDIGI via email, you can refer to the instructions below to learn how to use multiple IPs on your Hosting plan.
By default, each hosting package when created, will use the common IP of the server. To use a different IP for each website, you need to follow the instructions below.
Point the domain name to the nameserver of SEO Hosting
To ensure stable operation and if you want to change IP continuously, you should point the domain name to the nameserver pair of SEO Hosting service at AZDIGI as follows:
ns1-seohosting.azdigi.com
ns2-seohosting.azdigi.com
When you point the domain name to this nameserver pair, your website will automatically point to the new IP when you change the IP.
Change IP for main domain of hosting
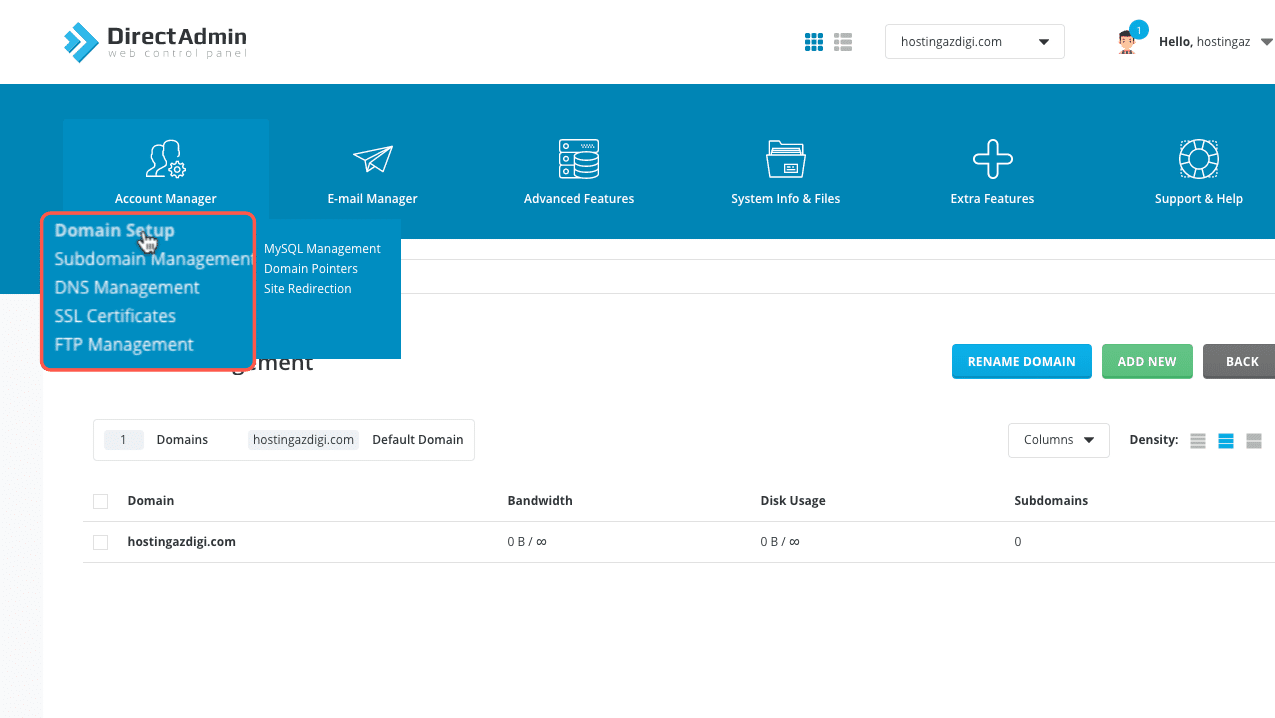
After logging in to DirectAdmin according to the information sent via email, you access Account Manager => Domain Setup.
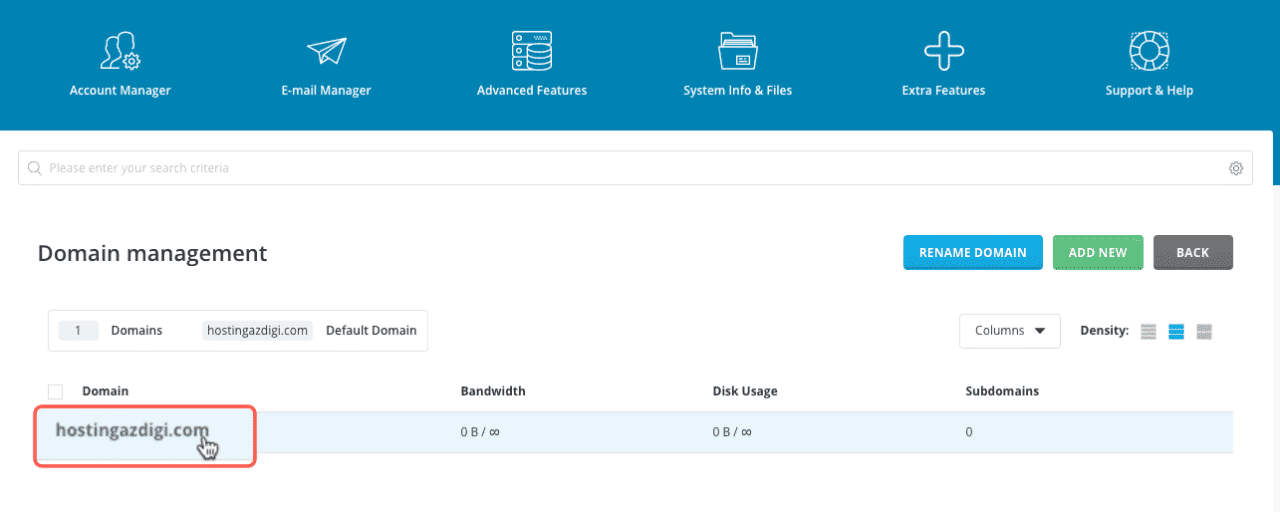
Then click on your domain.
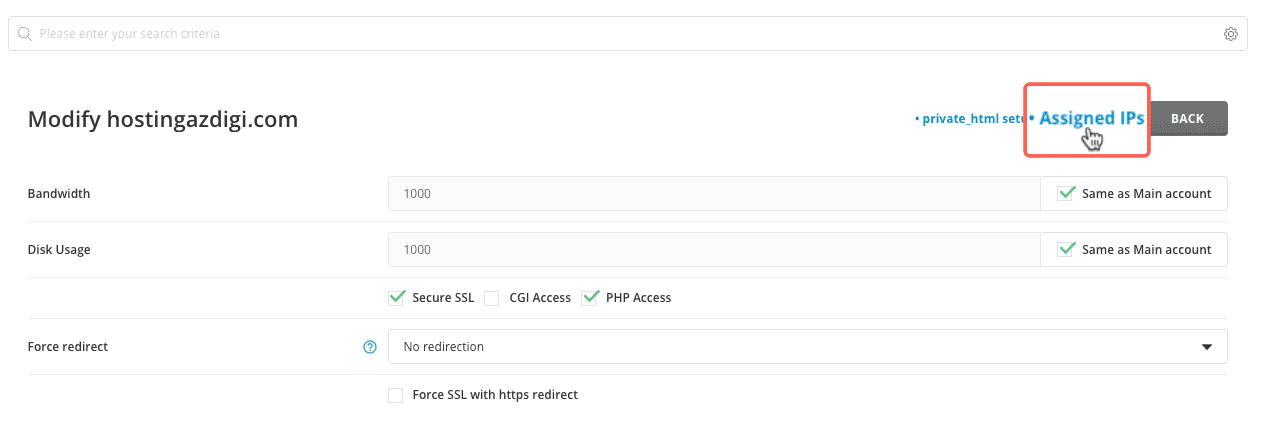
Select Assigned IPs to enter the IP management page of this domain.
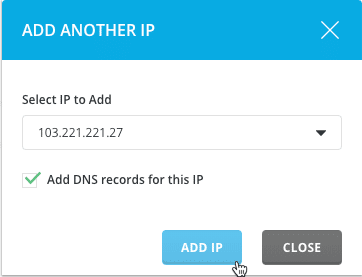
Click Add IP.
Next, choose an IP that you want to use for this domain. The number of IPs will depend on your service plan. After selecting an IP to use, you make sure to tick on the Add DNS records for this IP box and press the ADD IP button to add the domain name.
Then you can delete the old IP because a website can run 2 IPs but only the first resolved IP is used, so using multiple IPs for a domain will be no different.
Change IP for subdomain
To change the IP for the subdomain of the hosting package, you do the same as above. That is, first you need to access Account Manager => Domain Setup and press ADD NEW to add the domain name. Then perform the steps above.
So you have successfully changed the IP for the website. To recheck, you can visit https://www.dnswatch.info and enter the domain name you need to check to see if DNS returns your IP just changed or not.


