
How to use DNS on CloudFlare with 4 simple steps.
In the previous article, AZDIGI gave you a brief introduction to what CloudFlare is and some of the benefits, as well as the limitations of using CloudFlare. You can refer to that article at the link below:
And continuing with the articles on how to use CloudFlare, in this article AZDIGI will show you how to use and configure DNS on CloudFlare so that you can easily manage this DNS. Let’s get started!
What is DNS?
DNS stands for Domain Name System, a domain name resolution system. To make it easier to imagine, you can think of DNS as a giant directory of the Internet world. DNS is a system that converts the website domain names we are using, in the form of azdigi.com, to a numerical IP address corresponding to that domain name and vice versa.
When you enter the website domain name into the search bar on your browser, you can go directly to the website without going through the website’s IP address because DNS has handled resolving from domain names to IP addresses. As a result, users only need to remember the domain name, not the IP address of the website.
DNS Record types
Here are some essential DNS records that you need to pay attention to:
- CNAME Record: CNAME is a Canonical Name Record, also known as an Alias Record for a specific domain name. CNAME is interpreted as specifying a domain name as an alias of another canonical domain name.
- A Record: This record is commonly used to point the Website name to a specific IP address. This is the simplest DNS record, allowing you to add Time to Live, a new name, and Points To.
- MX Record: With this record, you can point Domain to Mail Server, set TTL, Priority. The MX Record specifies which Server manages that domain’s Email services.
- TXT Record: You can add TXT value, new Host, Points To, TTL… values to contain the text formatting information of the Domain. TXT is used a lot in authenticating with Google, verifying the reliability of emails with SPF, DKIM records…
- AAAA Record: To point the domain to the IPV6 Address, you need to use AAA Record. It allows you to add a new Host, TTL, IPv6.
- SRV Record: A record used to determine exactly which service runs on which Port. A record used to determine exactly which service runs on which Port. You can add Name, Priority, Port, Weight, Points to, TTL.
- NS Record: You can specify the NameServer for each sub-domain with this record. You can create NameServer, new Host, TTL.
Using DNS on CloudFlare
1. Sign in to CloudFlare
- First, to configure DNS, you need to access and log in to CloudFlare: https://dash.cloudflare.com/login.
2. Point DNS Records
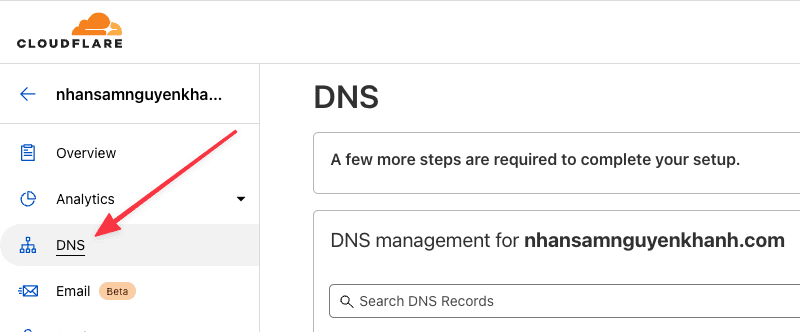
- At the CloudFlare interface, select the domain to configure, and go to the DNS:
- As below, I have some demo recordings with specific content below, I will make a demo and point it out according to that content for you to better visualize.
Note: the content below is just a demo example for you to understand, you need to replace this content with your exact content to point DNS.

- Below is a video on how to point DNS records on CloudFlare:

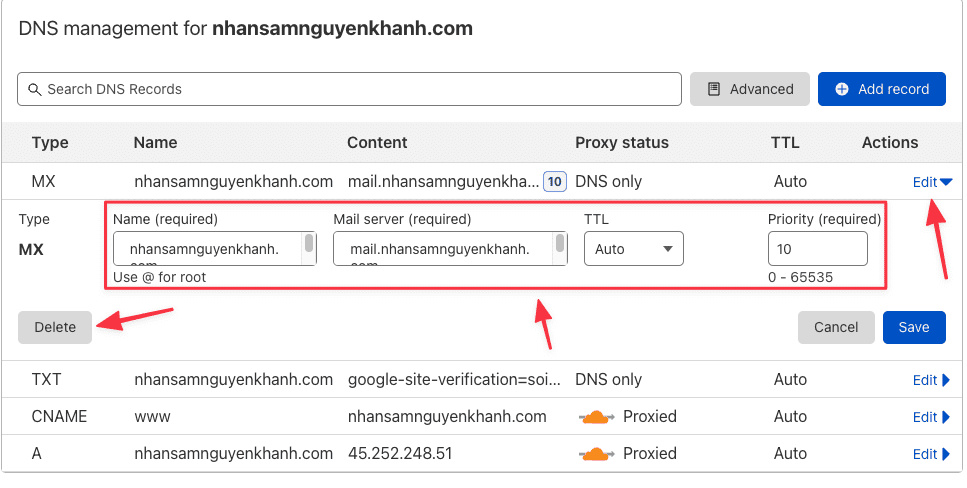
3. Edit DNS
To edit DNS, you can note some information below:
- To Edit the content or Delete DNS records, click Edit
4. Use Proxied
When using CloudFlare’s DNS, you will see a Proxy status section.
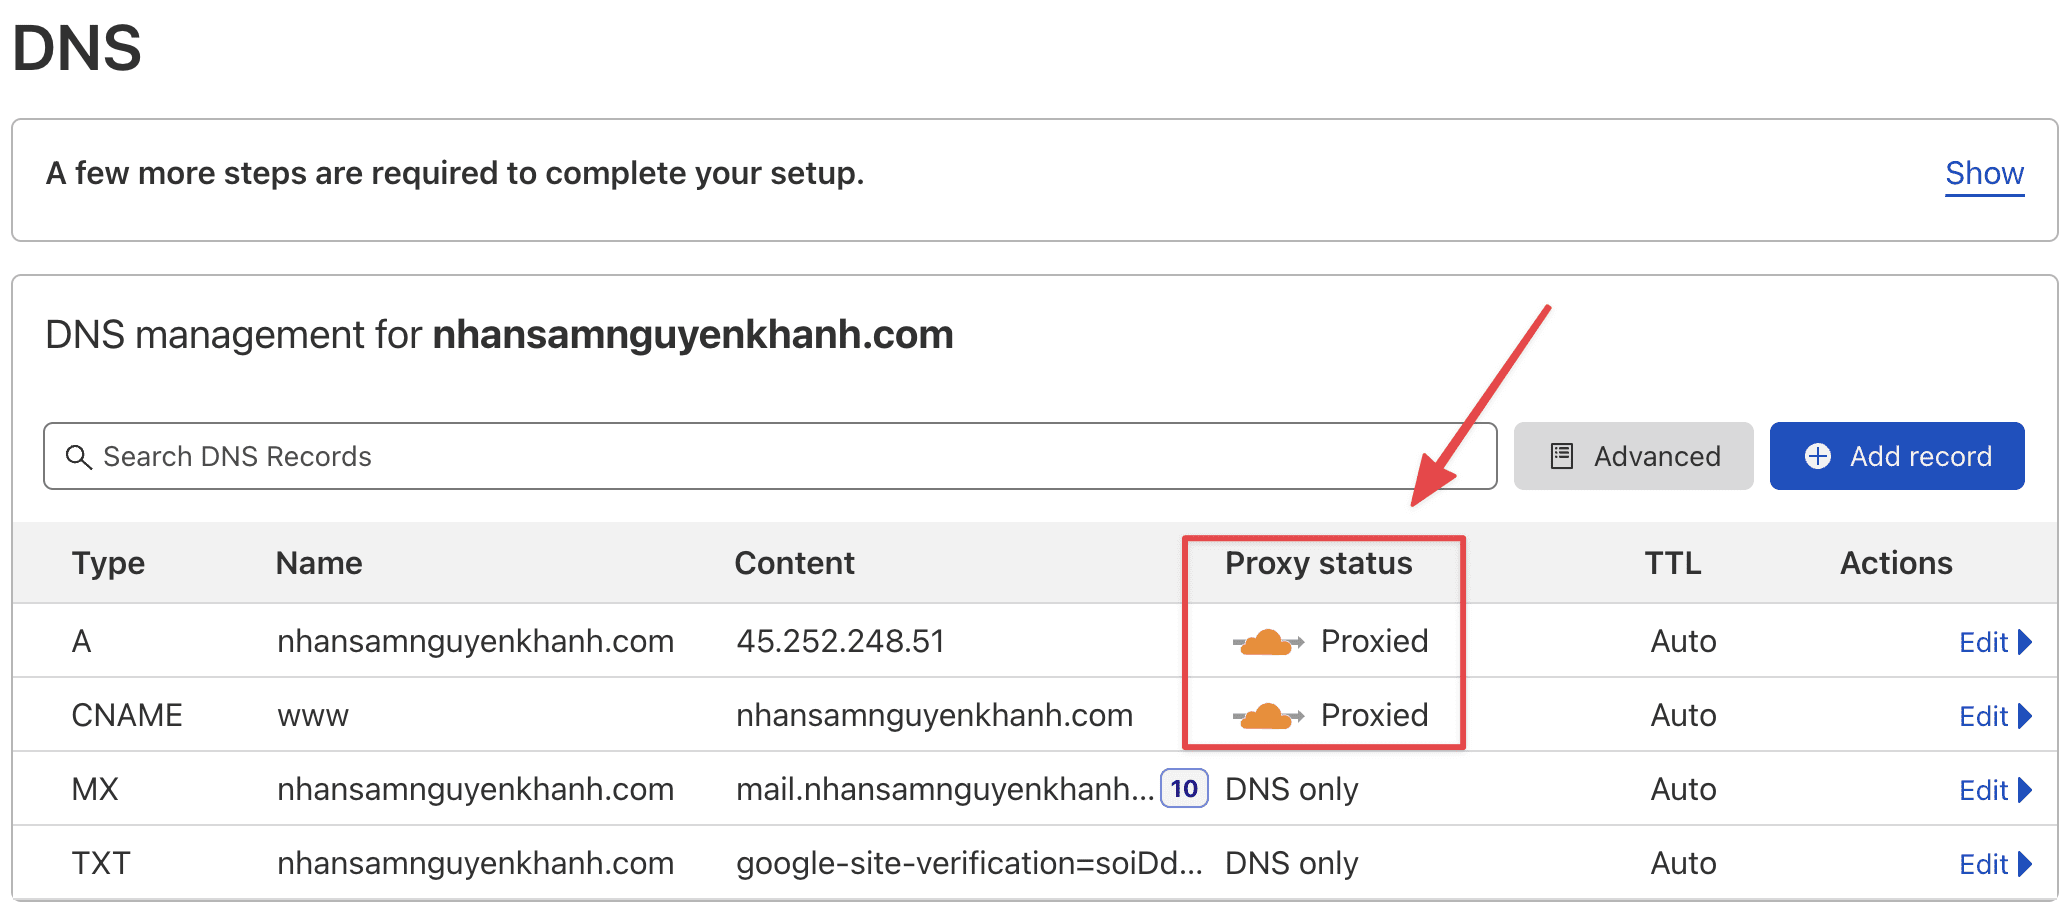
What is the feature of Proxy?
- Yellow Cloud <=> Proxied: Activate CloudFlare’s free functions such as CDN, hide original IP, Firewall against Spam/DDOS.
- Gray Cloud <=> DNS only: Disable all CloudFlare functionality, use only intermediate DNS.
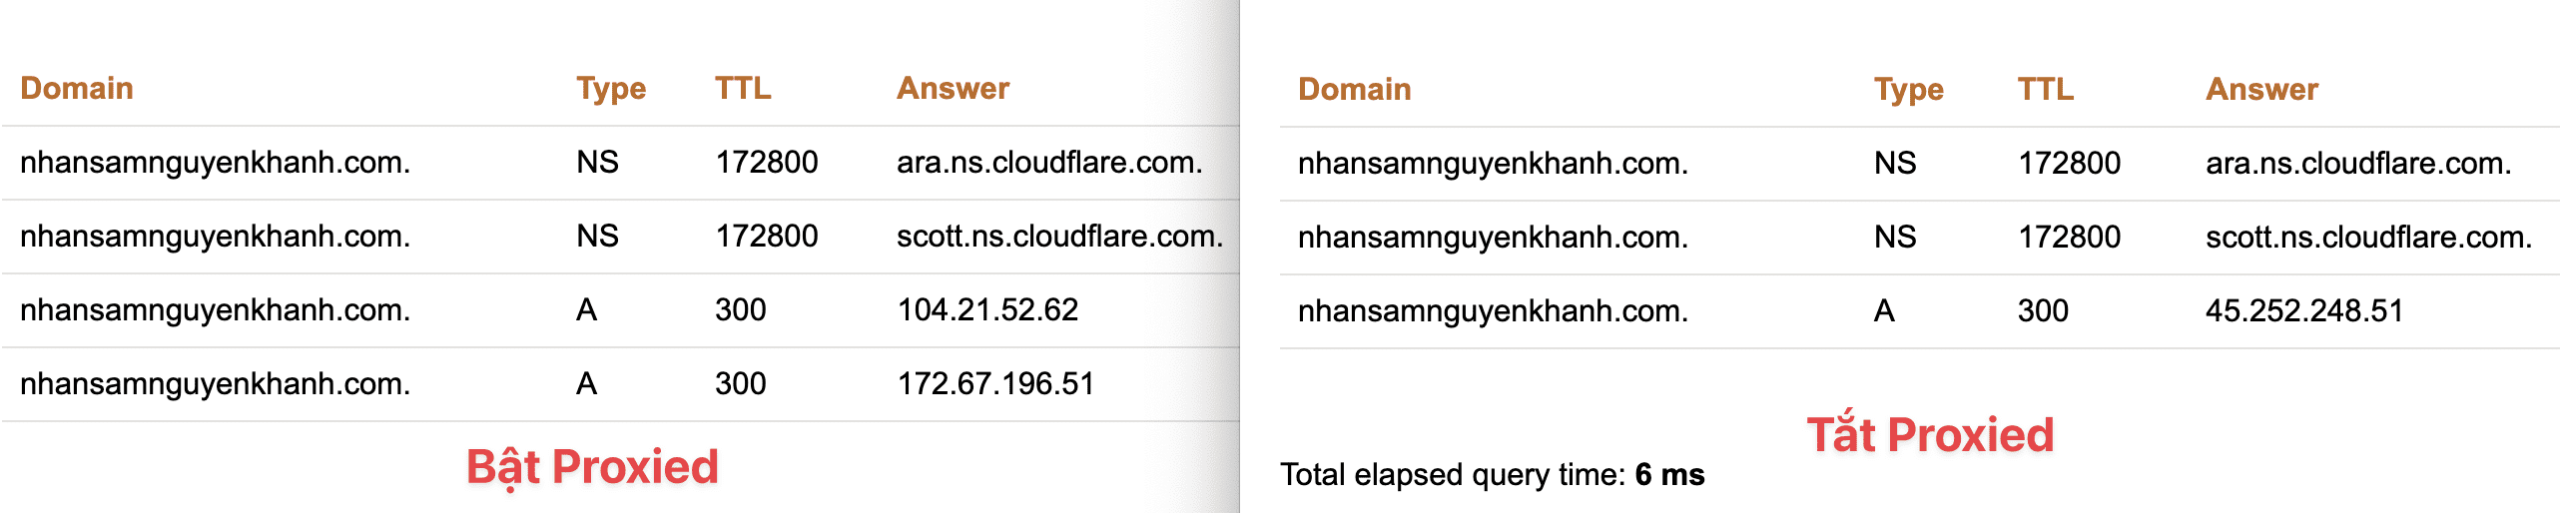
To enable/disable Proxied, click the Edit button corresponding to the record to be edited.
Below is the difference between enabling and disabling Proxy on CloudFlare. When you turn off Proxied, you can see that your website will display the server’s original IP instead of CloudFlare’s virtual IP.
To check DNS, you can check at the link: https://www.dnswatch.info/
Above is a detailed tutorial about the CloudFlare DNS feature. Hopefully, this article will better understand what DNS is and how to use CloudFlare’s DNS to manage DNS effectively. In the next articles, AZDIGI will introduce to you some other great features of CloudFlare. Let’s stay tuned!
You can refer to other instructions at the link below:
If you need assistance, you can contact support in the ways below:
- Hotline 247: 028 888 24768 (Ext 0)
- Ticket/Email: You use the email to register for the service and send it directly to: support@azdigi.com
You might also like
- DNS Domain management guide on SEO Hosting AZDIGI.
- Cloudflare Tunnel: Access Your Home Computer Remotely Without Port Opening
- Learn about CloudFlare & How to connect CloudFlare to the website
- How to configure DDNS aaPanel to CloudFlare
- AZDIGI Tools User Guide - Free DNS, Network, SSL Checker Toolkit
- Setting up DKIM and SPF for Email Hosting
About the author

Thạch Phạm
Đồng sáng lập và Giám đốc điều hành của AZDIGI. Có hơn 15 năm kinh nghiệm trong phổ biến kiến thức liên quan đến WordPress tại thachpham.com, phát triển website và phát triển hệ thống.