Nội dung

If you have installed WordPress through WordPress Manager in the article: Install WordPress automatically with Softaculous on cPanel. Then in this article, AZDIGI will show you how to manage general information of your WordPress website on WordPress Manager.
Step 1: Access to WordPress Manager
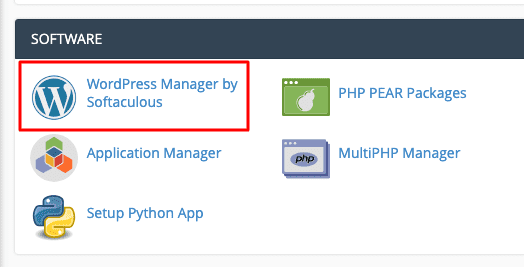
Access to WordPress Manager application in the SOFTWARE section on cPanel. Click to go inside the app.
Next, in the Current Installations section, you will see all the existing websites. Note: it only shows the list of websites that you previously installed from Softaculous, manually installed websites will not be displayed. Annotate the options buttons:

- WordPress Icon: To view the information of the website and also the main feature in this article
- 3 Computer Icon: Staging WordPress feature
- File icon: used to clone website
- Pen icon: used to edit website information
- Trash icon: used to delete WordPress website
Step 2: Manage WordPress Website with WordPress Manager
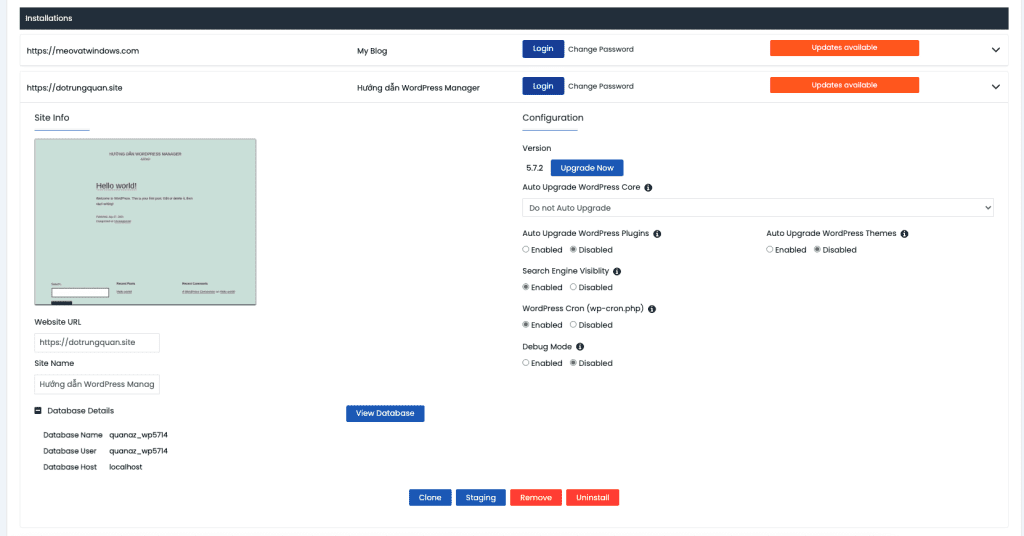
First, I will go into the WordPress management section. I will introduce you to each feature as follows:
1. Login to WordPress directly on WordPress Manager
With WordPress Manager, now you don’t need to remember your WordPress password, you don’t need to access wp-admin on the browser. Instead, you can log in directly to WordPress through this app.
On the Topbar, click on the WordPress icon to access it.

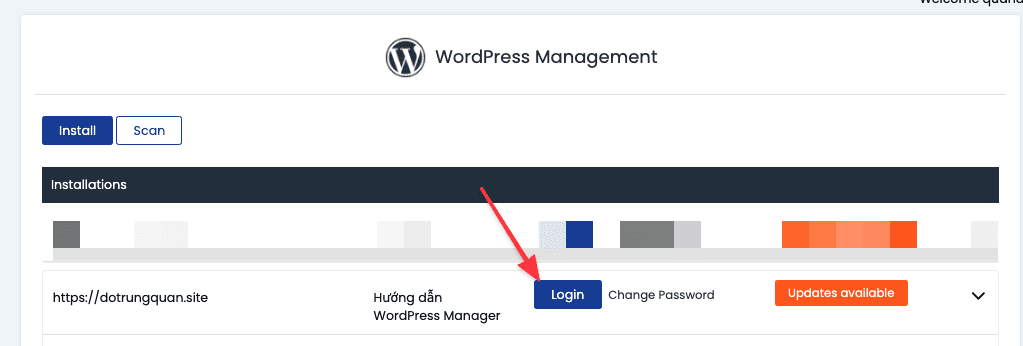
Or, select the website you want to log in to and click Login. The system will redirect you to the admin page of that website.
2. Change WordPress Admin Password
Also at this interface, click Change Password to change the admin password as quickly as possible.
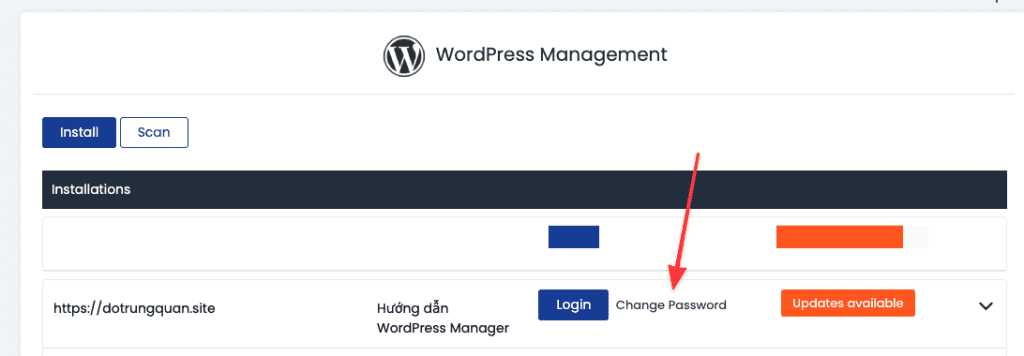
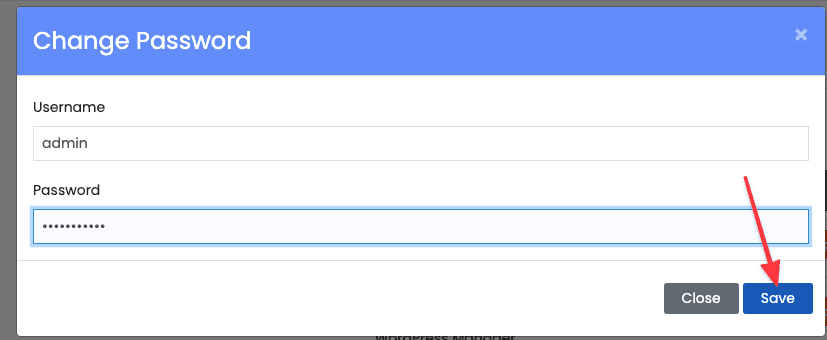
Then, the screen will display the password change window, enter the Username to change and the new Password. Finally, you click Save to apply the changes.
3. Update WordPress to the new version
There are many ways to update WordPress to the new version, but if you are using WordPress Manager you can upgrade here quickly and safely.
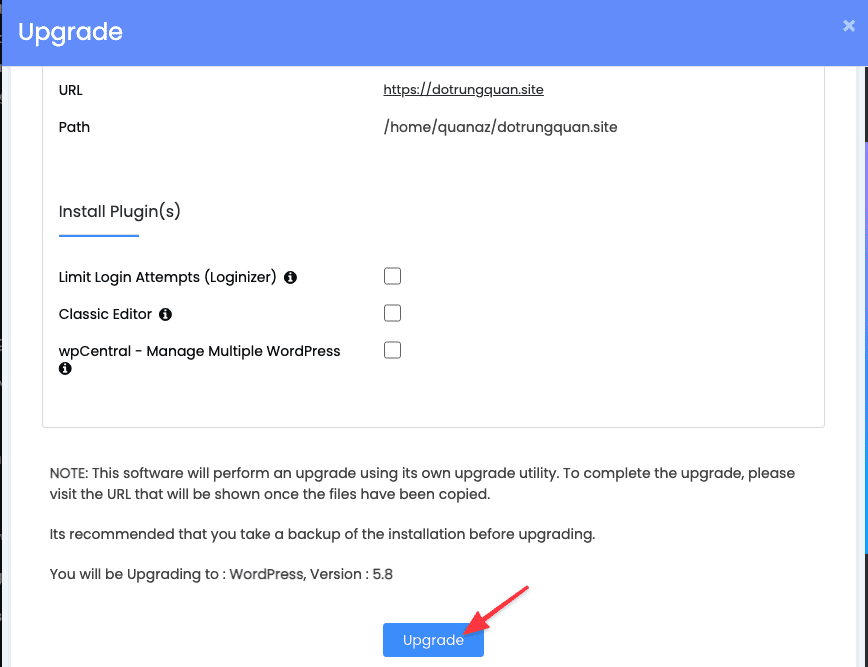
In the Configuration section, you will see the configuration information of the website, click Upgrade Now to update to the new version.

Next, click Upgrade to start upgrading to the latest version of WordPress.
4. Some other extra features
In addition to the main features above, there are additional features as follows:
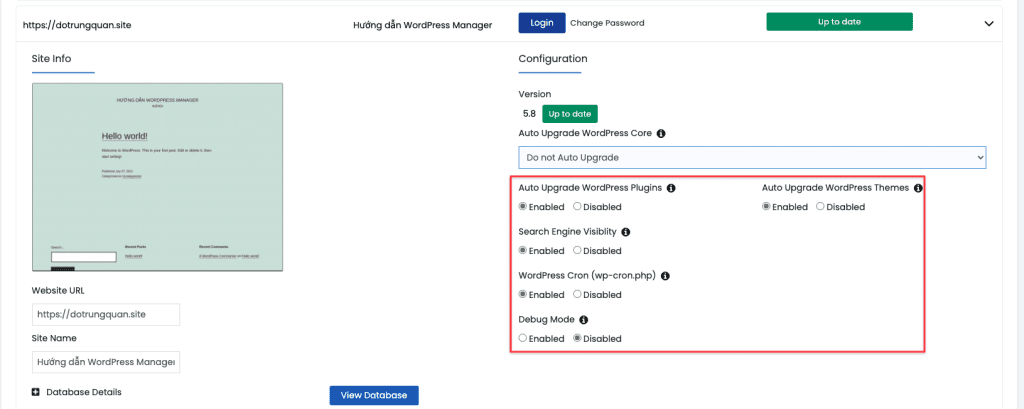
- Auto Upgrade WordPress Plugins: The feature automatically upgrades Plugins when a new version is available. Click Enabled or Disabled to use it.
- Auto Upgrade WordPress Themes: The feature automatically upgrades the Theme when a new version is available. Click Enabled or Disabled to use it.
- Search Engine Visibility: Search engine visibility and you can see it in Settings in WordPress
- WordPress Cron (wp-cron.php): Automatic Cron of WordPress. Click Enabled or Disabled.
- Debug Mode: Feature to display website log when there is an error.
- Website URL: You can modify the website’s URL directly here
- Site Name: You can edit the website name directly here
- Database Details: This feature will check what is the website you are using with the database name. Please click on View Database to login directly to phpMyAdmin.
5. Clone Website
This is a powerful and useful feature of WordPress. With this feature, you can clone a website to a new website.
- See more details:[WordPress Manager] Guide for Clone WordPress Website
6. WordPress Staging
The second helpful feature that cannot be ignored is WordPress Staging. With this feature, you can orchestrate a new environment for the website for editing. After editing, you can update the old Web without affecting it.
- See more details here:[WordPress Manager] How to use WordPress Staging on Softaculous
7. Remove WordPress
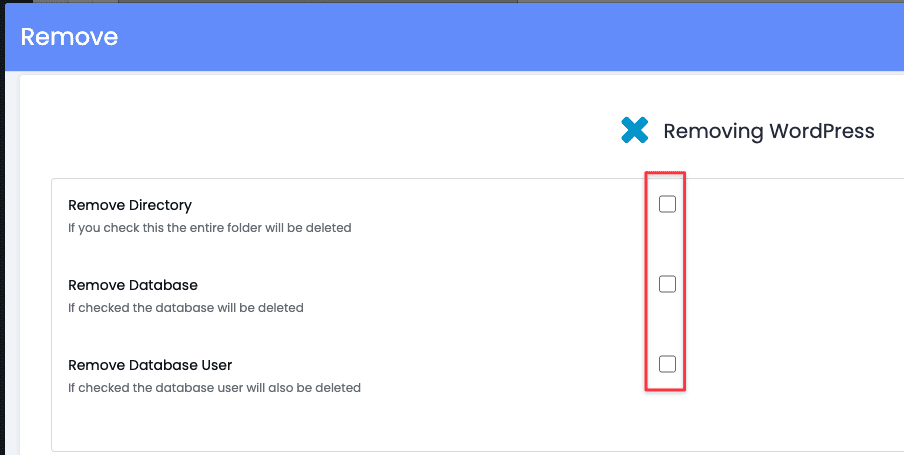
To remove WordPress from Softaculous, you can do as below. If you do not check these options, the data will still be kept.
8. Uninstall
This feature helps to remove a WordPress website from the cPanel system. When you choose this feature, it will delete all data related to that website.

Hopefully, the WordPress Manage tool will help you manage your website more conveniently and easily.
If you need assistance, you can contact support in the ways below:
- Hotline 247: 028 888 24768 (Ext 0)
- Ticket/Email: You use the email to register for the service and send it directly to: support@azdigi.com .
- Click on the AZDIGI website to refer to the best Hosting/VPS service in Vietnam.

