Nội dung
How to install WordPress on Centmin Mod for newbie
I. OVERVIEW
Hi guys, welcome back to AZDIGI’s documentation channel. If you have seen the article how to install and use Centmin Mod in the previous post, then continue the article about Centmin Mod, then in this article, AZDIGI will guide you to install WordPress in extreme detail for newbies. Let’s follow along.
Why does AZDIGI guide to install WordPress and not other source code? Currently, the website market in Vietnam is almost all built by WordPress, the most popular and popular open source in the world. Up to more than 63.5% worldwide (updated September 3, 2020), you can see it directly by searching for the keyword “WordPress market share” on Google.
The WordPress source code will help a newbie who doesn’t know about programming, doesn’t know about coding, doesn’t know about database management systems can still create a beautiful, full-featured website from a news website to a professional sales website. WordPress helps you save a lot of costs from renting a hosting server, domain name and copyright theme repository that AZDIGI offers to all customers at AZDIGI.
Go back to the content of installing WordPress on Centmin Mod. Let’s do the installation with the following steps.
II. INSTALL WORDPRESS ON CENTMIN MOD
Step 1: SSH into the server
To install WordPress on Centmin Mod, we first need to SSH into your VPS/server as root. If you don’t know how to SSH into your VPS/Server, you can refer to the following tutorial:
Step 2: Create a database
Unlike other localized scripts or beautiful panels, with Centmin Mod, you will do it using the command line. But it will help your server be compact, light, and perform better.
To create the database, execute the following command:
/usr/local/src/centminmod/addons/mysqladmin_shell.sh createuserdb tendatabase tenuser matkhau
Command annotation:
- /usr/local/src/centminmod/addons/mysqladmin_shell.sh createuserdb: The command executes the command to create the database. In this line, you do not change and copy/paste as it is.
- tendatabase: This is the name of the database that will be created and you enter your corresponding name (Should enter by domain name for easy management)
- tenuser: This is the name User DB will create and you enter your corresponding name (Should enter by the domain name for easy management)
- matkhau: Please enter the password to connect the user to the database. You should create a password of high complexity, such as
X96G0ORgnWez.
Illustrative example:

Step 3: Upload the WordPress source code to the server
To install WordPress, you need to download the WordPress source code to the correct public directory of the domain to install it. For example, in the previous post, after I addon the domain quanaz.azdigi.info, the file path will be/home/nginx/domains/quanaz.azdigi.info/public. ou would use the cd command to move:
Note: Please replace quanaz.azdigi.info with your domain name.
cd /home/nginx/domains/quanaz.azdigi.info/public
Once you’ve moved to the domain’s public directory, download the source code with the following command. With this command, you will download and install the latest version of WordPress.
wget https://wordpress.org/latest.tar.gz
Extract the downloaded file
The file you just downloaded is a compressed file in tar.gz format, so you have to decompress it to use it. Please enter the following command to extract:
tar -xvf latest.tar.gz
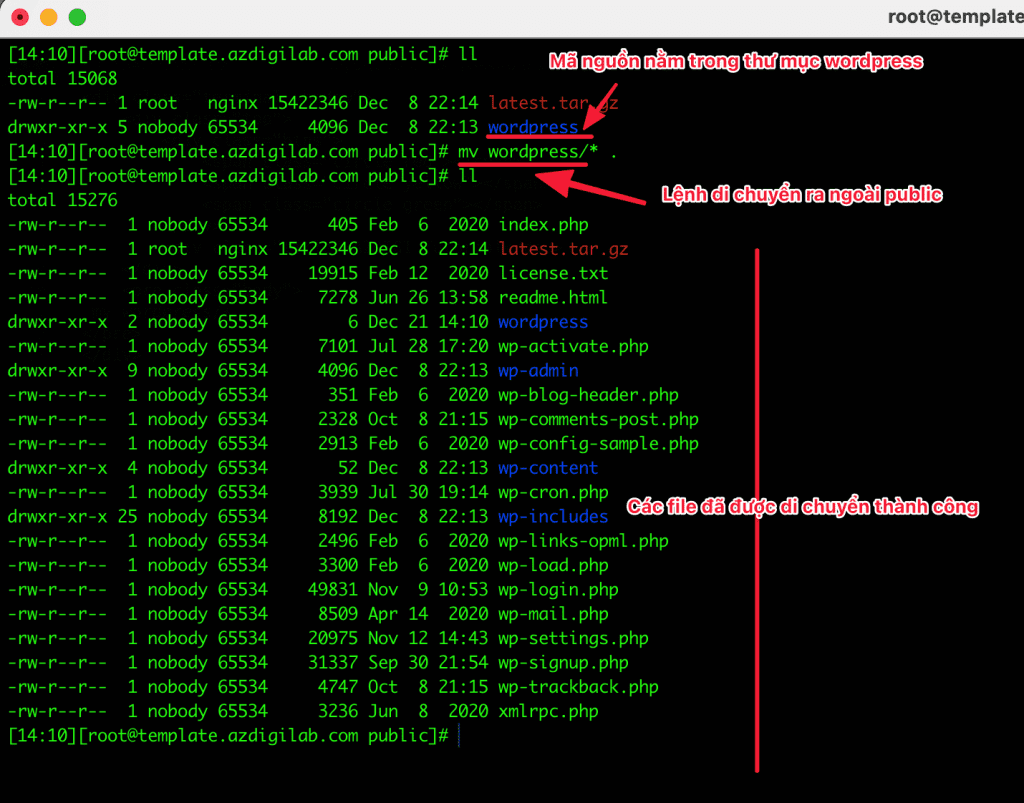
After extracting, you will see a folder named wordpress. This folder will contain the source code of WordPress or in other words Core WordPress, and you must move all the folders/files in this wordpress folder to the public folder to work.

You can move by entering the following command:
mv wordpress/* .
Step 4: Customize the owner
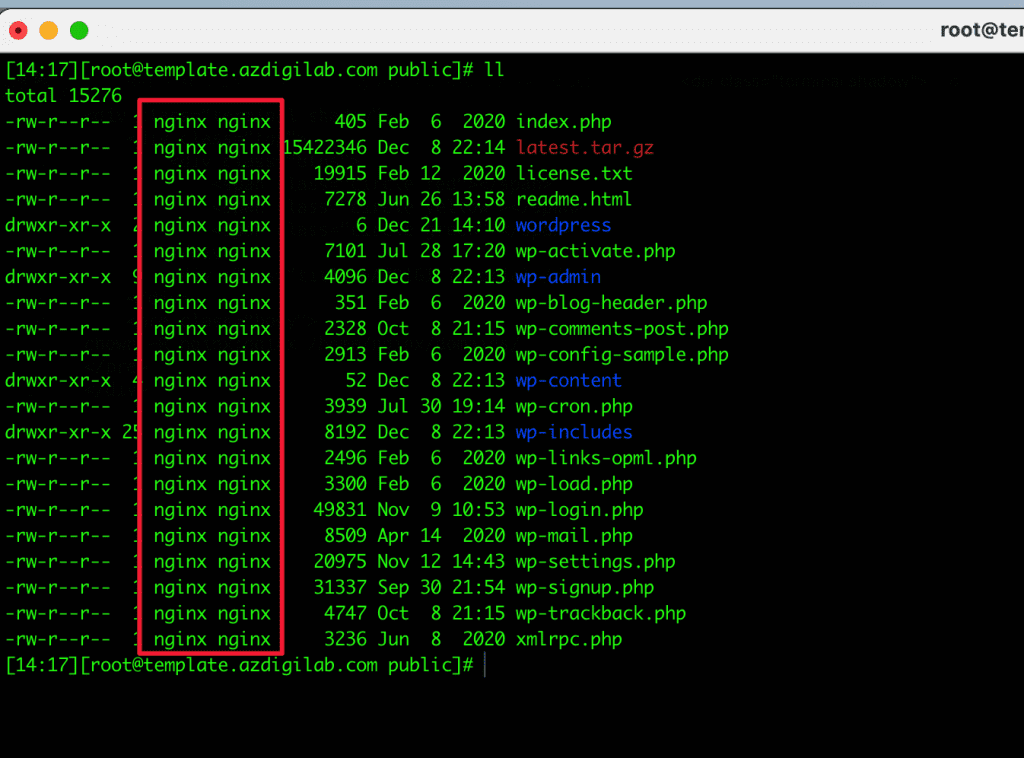
The image above shows nobody:65534. If you do not adjust the owner, you will get an error that you cannot install the Theme, Plugin or upload images to the website because the user and group permissions are incorrect. And with centmin mod, you must permit nginx:nginx to own that web directory. Please use the following command to customize.
chown -R nginx:nginx /home/nginx/domains/
After customizing the permissions, execute the ll command to see the files already under nginx permissions.
Step 5: Install WordPress
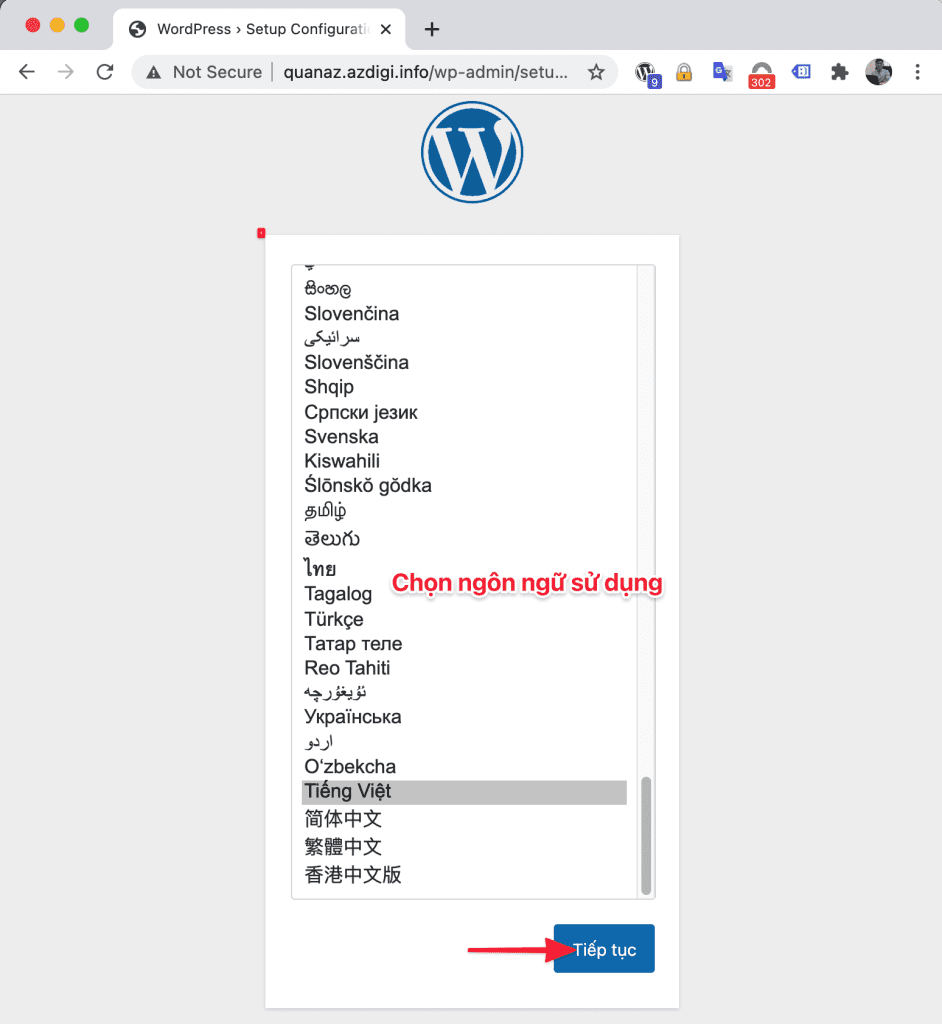
This is the final step to setting up a WordPress Website. Open your browser, then go to your domain name and a WordPress setup interface will appear as shown below => select the language you want to use => click Continue.
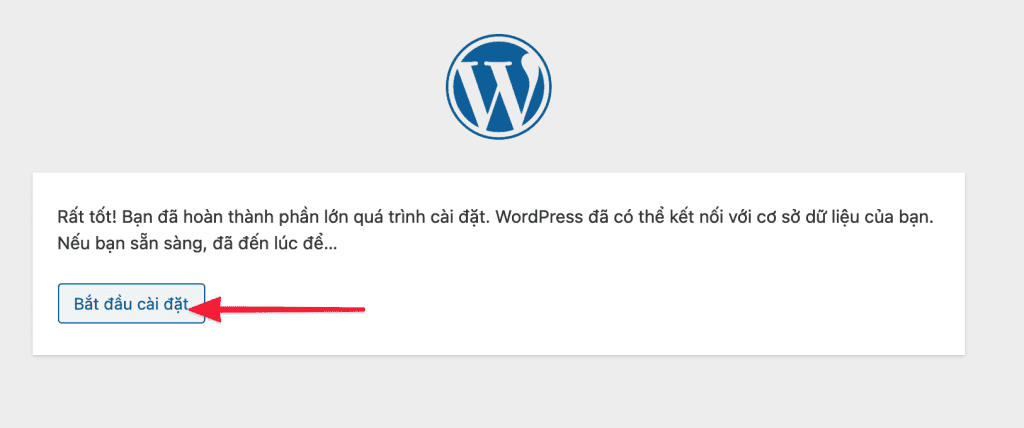
At the next interface, click Done now! to go to the information entry page.
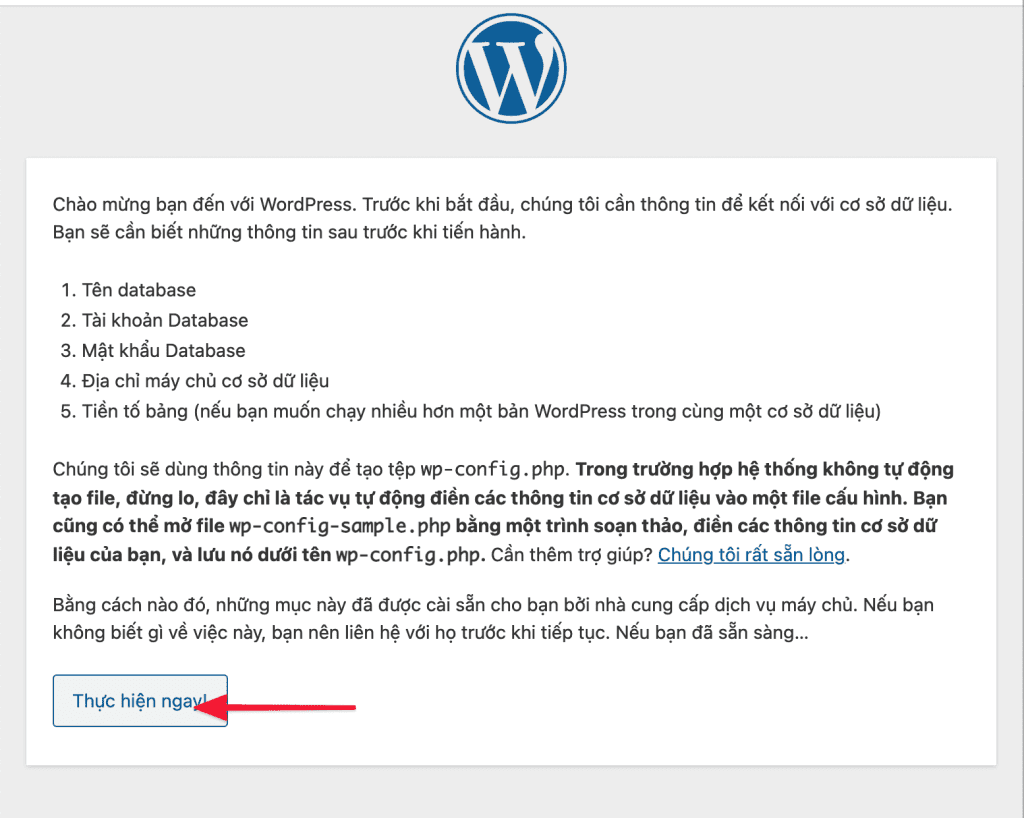
In this step, please enter the Database information, Username and Password created in STEP 2.
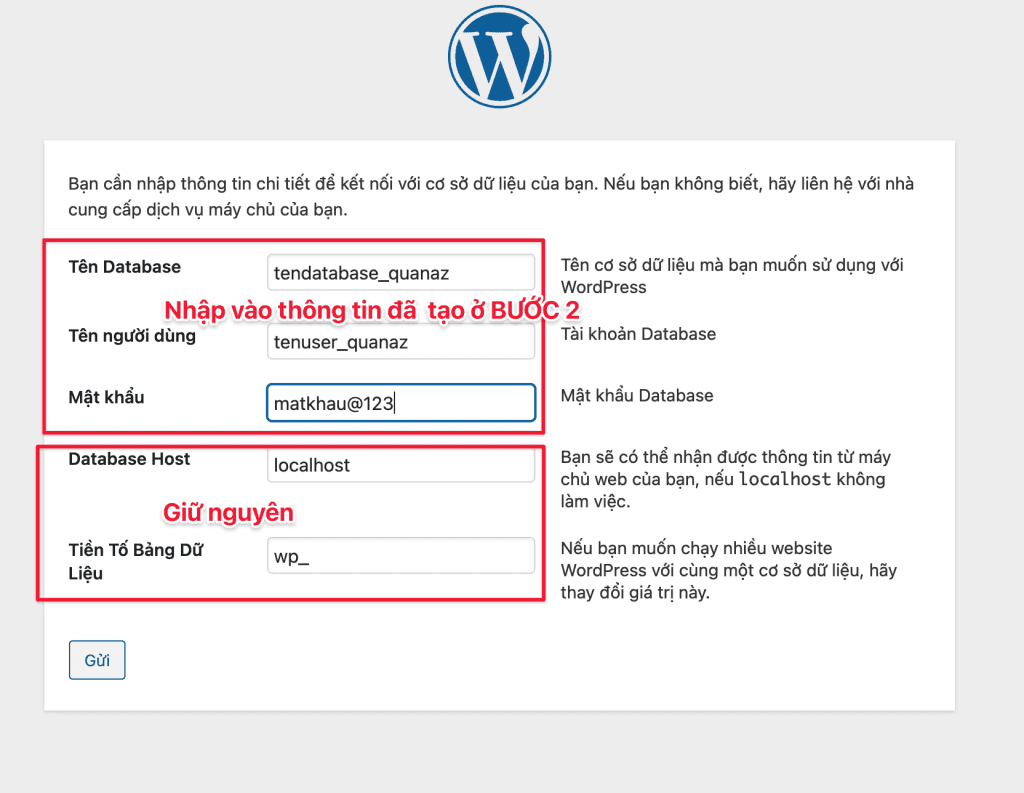
=> Click Start Installation to continue.
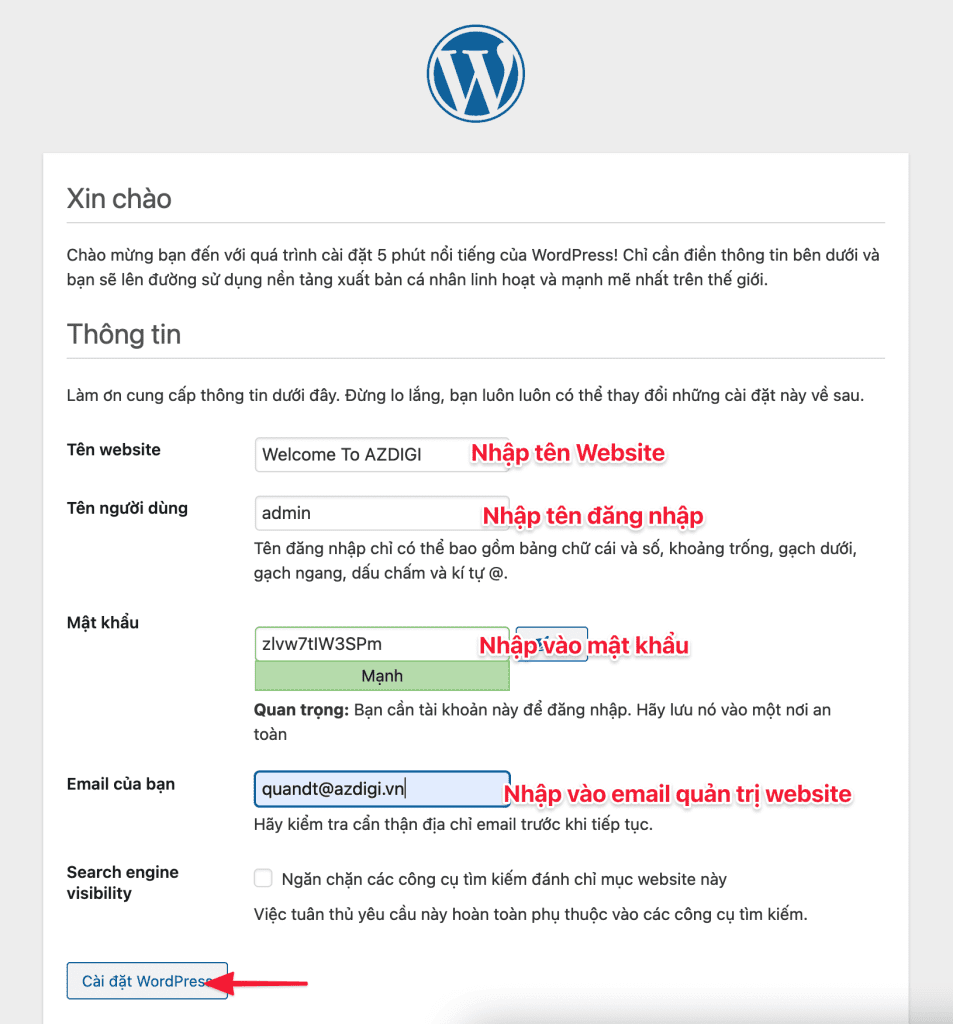
A Hello box appears and you enter your website information including (Website Name, Username, Password and Email). Once the import is complete, click Install WordPress to confirm the installation.
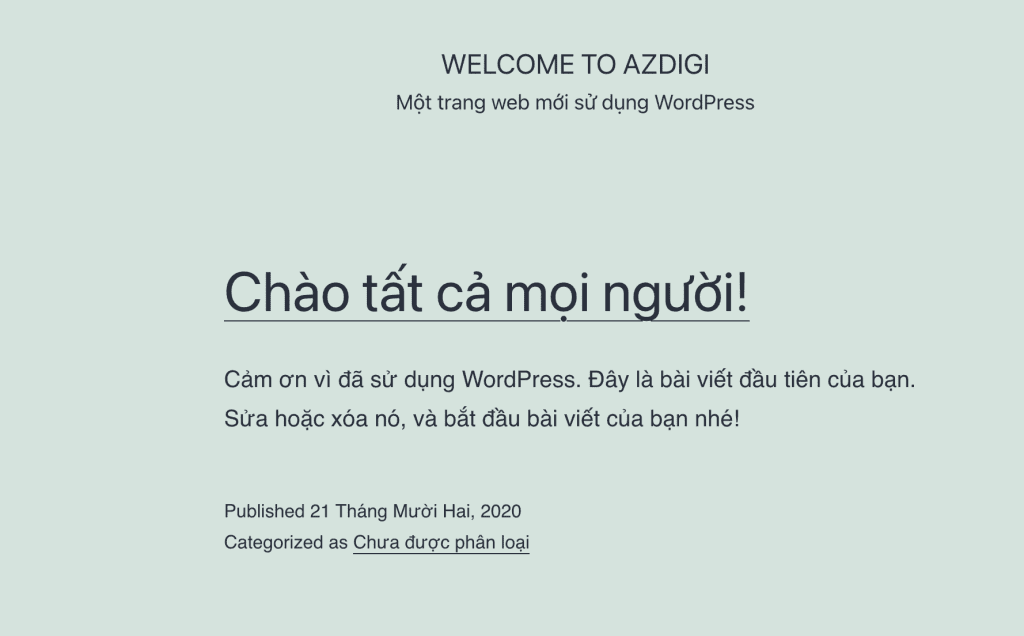
After the installation is complete, please visit the website to check the results. So you have successfully installed WordPress on Centmin Mod.
Thus, AZDIGI has completed the tutorial on installing WordPress on Centmin Mod. Now you can log in and install Theme, Plugin to build a website:
Wishing you success!
If you need assistance, you can contact support in the ways below:
- Hotline 247: 028 888 24768 (Ext 0)
- Ticket/Email: You use the email to register for the service and send it directly to: support@azdigi.com .

