
How to install and use Centmin Mod for newbie
Welcome back to the documentation channel at AZDIGI. In today’s article, AZDIGI will guide you to install and use Centmin Mod. This is a bash script that allows users to install WebServer automatically, PHP, MariaDB… through a very convenient display menu, because it’s a script, so Centmin Mod uses fewer resources compared to GUI-based control panels.
However, for users who are used to using the panel when switching to the centmin mod script, it won’t be easy to use and manage because this script will be managed through the command line. But don’t worry because this article will help you get acquainted and use it from basic to advanced.
In this article, I will divide it into 2 main parts: introduction & installation and usage. So let’s get started with us.

Part 1: Introduce and install Centmin Mod
1. Some features on Centmin Mod
Once using Centmin Mod, it is impossible to ignore some outstanding features of this script. Therefore, I will introduce some of the most outstanding features as follows:
- NGINX: A powerful open-source web server. Nginx uses single-threaded, event-driven architecture, making it more efficient than Apache server. It can also do other important things, such as load balancing, HTTP caching, or use as a reverse proxy. Nginx is indispensable knowledge for a web developer, system administrator or DevOps.
- PHP (PHP-FPM): Short for FastCGI Process Manager, is a program that interprets PHP when running web pages for web servers. PHP-FPM was formed based on the extension of CGI and is currently chosen by many users. PHP-FPM optimizes the information processing of web servers, supporting the fastest processing of information from many websites in the same period.
- MariaDB/MySQL: MariaDB is a free database management system developed from the open-source MySQL database management system. MariaDB was developed to replace MySQL database technology, but both have different advantages and disadvantages.
- Nginx Vhost Setup: Support setup vhost NGINX and create directory path completely automatically,
- Nginx PageSpeed: PageSpeed applies some optimization techniques (such as reducing HTML size, reducing the number of HTTP requests, reducing ping latency, reducing DNS queries) by using filters to handle requests.
- Nginx Lua: Nginx is compiled with support for Nginx modules based on OpenResty Lua & Cloudflare Lua along with LuaJIT 2.1. Additional Nginx Lua modules can be added as needed.
- Nginx SPDY & HTTP/2 SSL + LibreSSL: Statically compiled Nginx HTTPS SPDY/3.1 / HTTP/2 SSL support via OpenSSL fork, LibreSSL 2.2 for native support for new TLS/SSL ciphers like chacha20_poly1305.
- Nginx Vhost Statistics: Nginx is compiled with the Nginx Vhost traffic statistics module to provide statistics on each website domain, including cache statistics.
- Nginx OpenResty Modules: The Nginx web server is compiled with additional Nginx modules from OpenResty to extend Nginx’s feature set.
- Centmin Mod Addons: The official Centmin Mod Addon will provide standalone bash shell scripts to install additional features and may also be open to third-party developers.
- Memcached Server: When you first install Centmin Mod via the menu option. The Memcached server will automatically be installed and started. You can start in
/etc/init.d/memcached
- CSF Firewall: The CSF (firewall) software is automatically installed and configured for better security.
- OpenLiteSpeed Integration: According to the developer, OpenLiteSpeed will soon be deployed and supported on the next Centmin.
- Third Party YUM Repos: Many 3rd party YUM repositories are included in the Centmind Mod installation. These include EPEL, RPMForge, Remi, Axivo, Percona, Varnish YUM repositories. Centmin Mod uses the YUM Priorities plugin to manage third-party YUM repo.
2. Centmin Mod Installation Guide
System Requirements
- CentOS 7 or later (Since CentOS 6 stopped supporting on 11/30/2020 and CentOS 8 will also end in 2021)
- RAM: 1GB
- Disk: 20GB
Step 1: SSH into the server
To install Centmin Mod, we first need to SSH into your VPS/server as root. If you don’t know how to SSH into your VPS/Server, you can refer to the following tutorial:
Step 2: Install Centmin Mod
At the time of writing this article, there is already PHP 8.0, but this script only supports PHP 7.4 and before installing, please refer to the default PHP versions when installing to suit each need.
Some beta releases are as follows, you can choose the default PHP version on initial installation. And below are suggested options for you.
- If using PHP 5.6, run the command:
yum -y update; curl -O https://centminmod.com/betainstaller.sh && chmod 0700 betainstaller.sh && bash betainstaller.sh
- If using PHP 7.0, run the command:
yum -y update; curl -O https://centminmod.com/betainstaller7.sh && chmod 0700 betainstaller7.sh && bash betainstaller7.sh
- If using PHP 7.1, run the command:
yum -y update; curl -O https://centminmod.com/betainstaller71.sh && chmod 0700 betainstaller71.sh && bash betainstaller71.sh
- If using PHP 7.2, run the command:
yum -y update; curl -O https://centminmod.com/betainstaller72.sh && chmod 0700 betainstaller72.sh && bash betainstaller72.sh
- If using PHP 7.3, run the command:
yum -y update; curl -O https://centminmod.com/betainstaller73.sh && chmod 0700 betainstaller73.sh && bash betainstaller73.sh
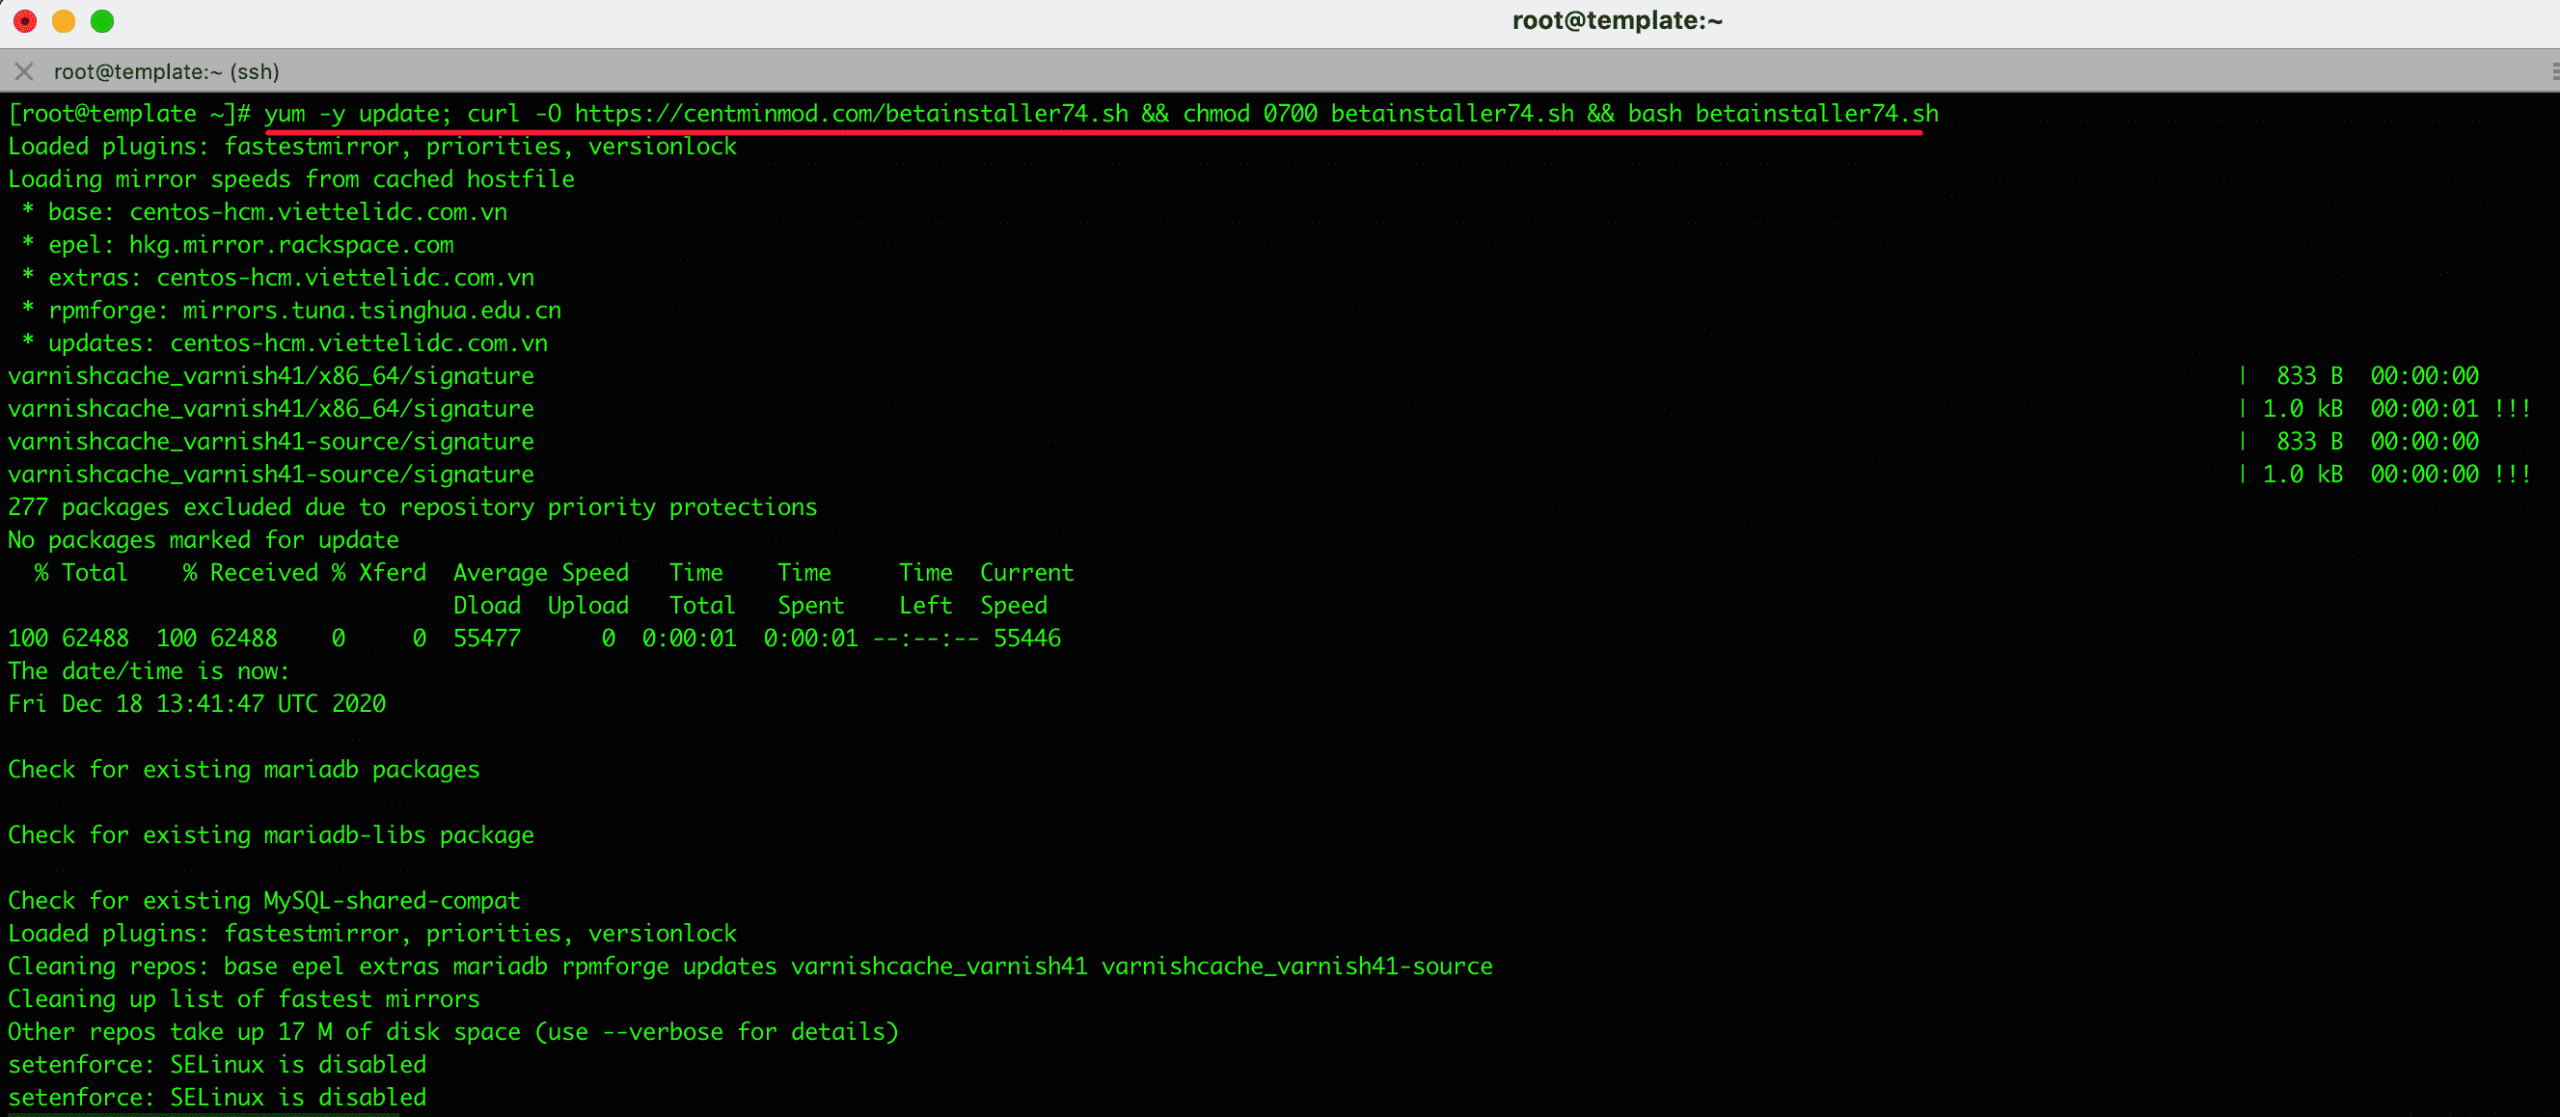
- If using PHP 7.4, run the command:
yum -y update; curl -O https://centminmod.com/betainstaller74.sh && chmod 0700 betainstaller74.sh && bash betainstaller74.sh
Because PHP 7.4 is also quite stable and almost compatible with the source code used, I will install PHP 7.4 version:
yum -y update; curl -O https://centminmod.com/betainstaller74.sh && chmod 0700 betainstaller74.sh && bash betainstaller74.sh
The installation takes quite a while and will depend on your server configuration, it will normally take at least 20-30 minutes to complete. After completion, you will receive a successful installation message and below is the important information you need to pay attention to the MySQL root password information, the file path centmin.sh. This is the file you will often use in operating Centmin Mod.
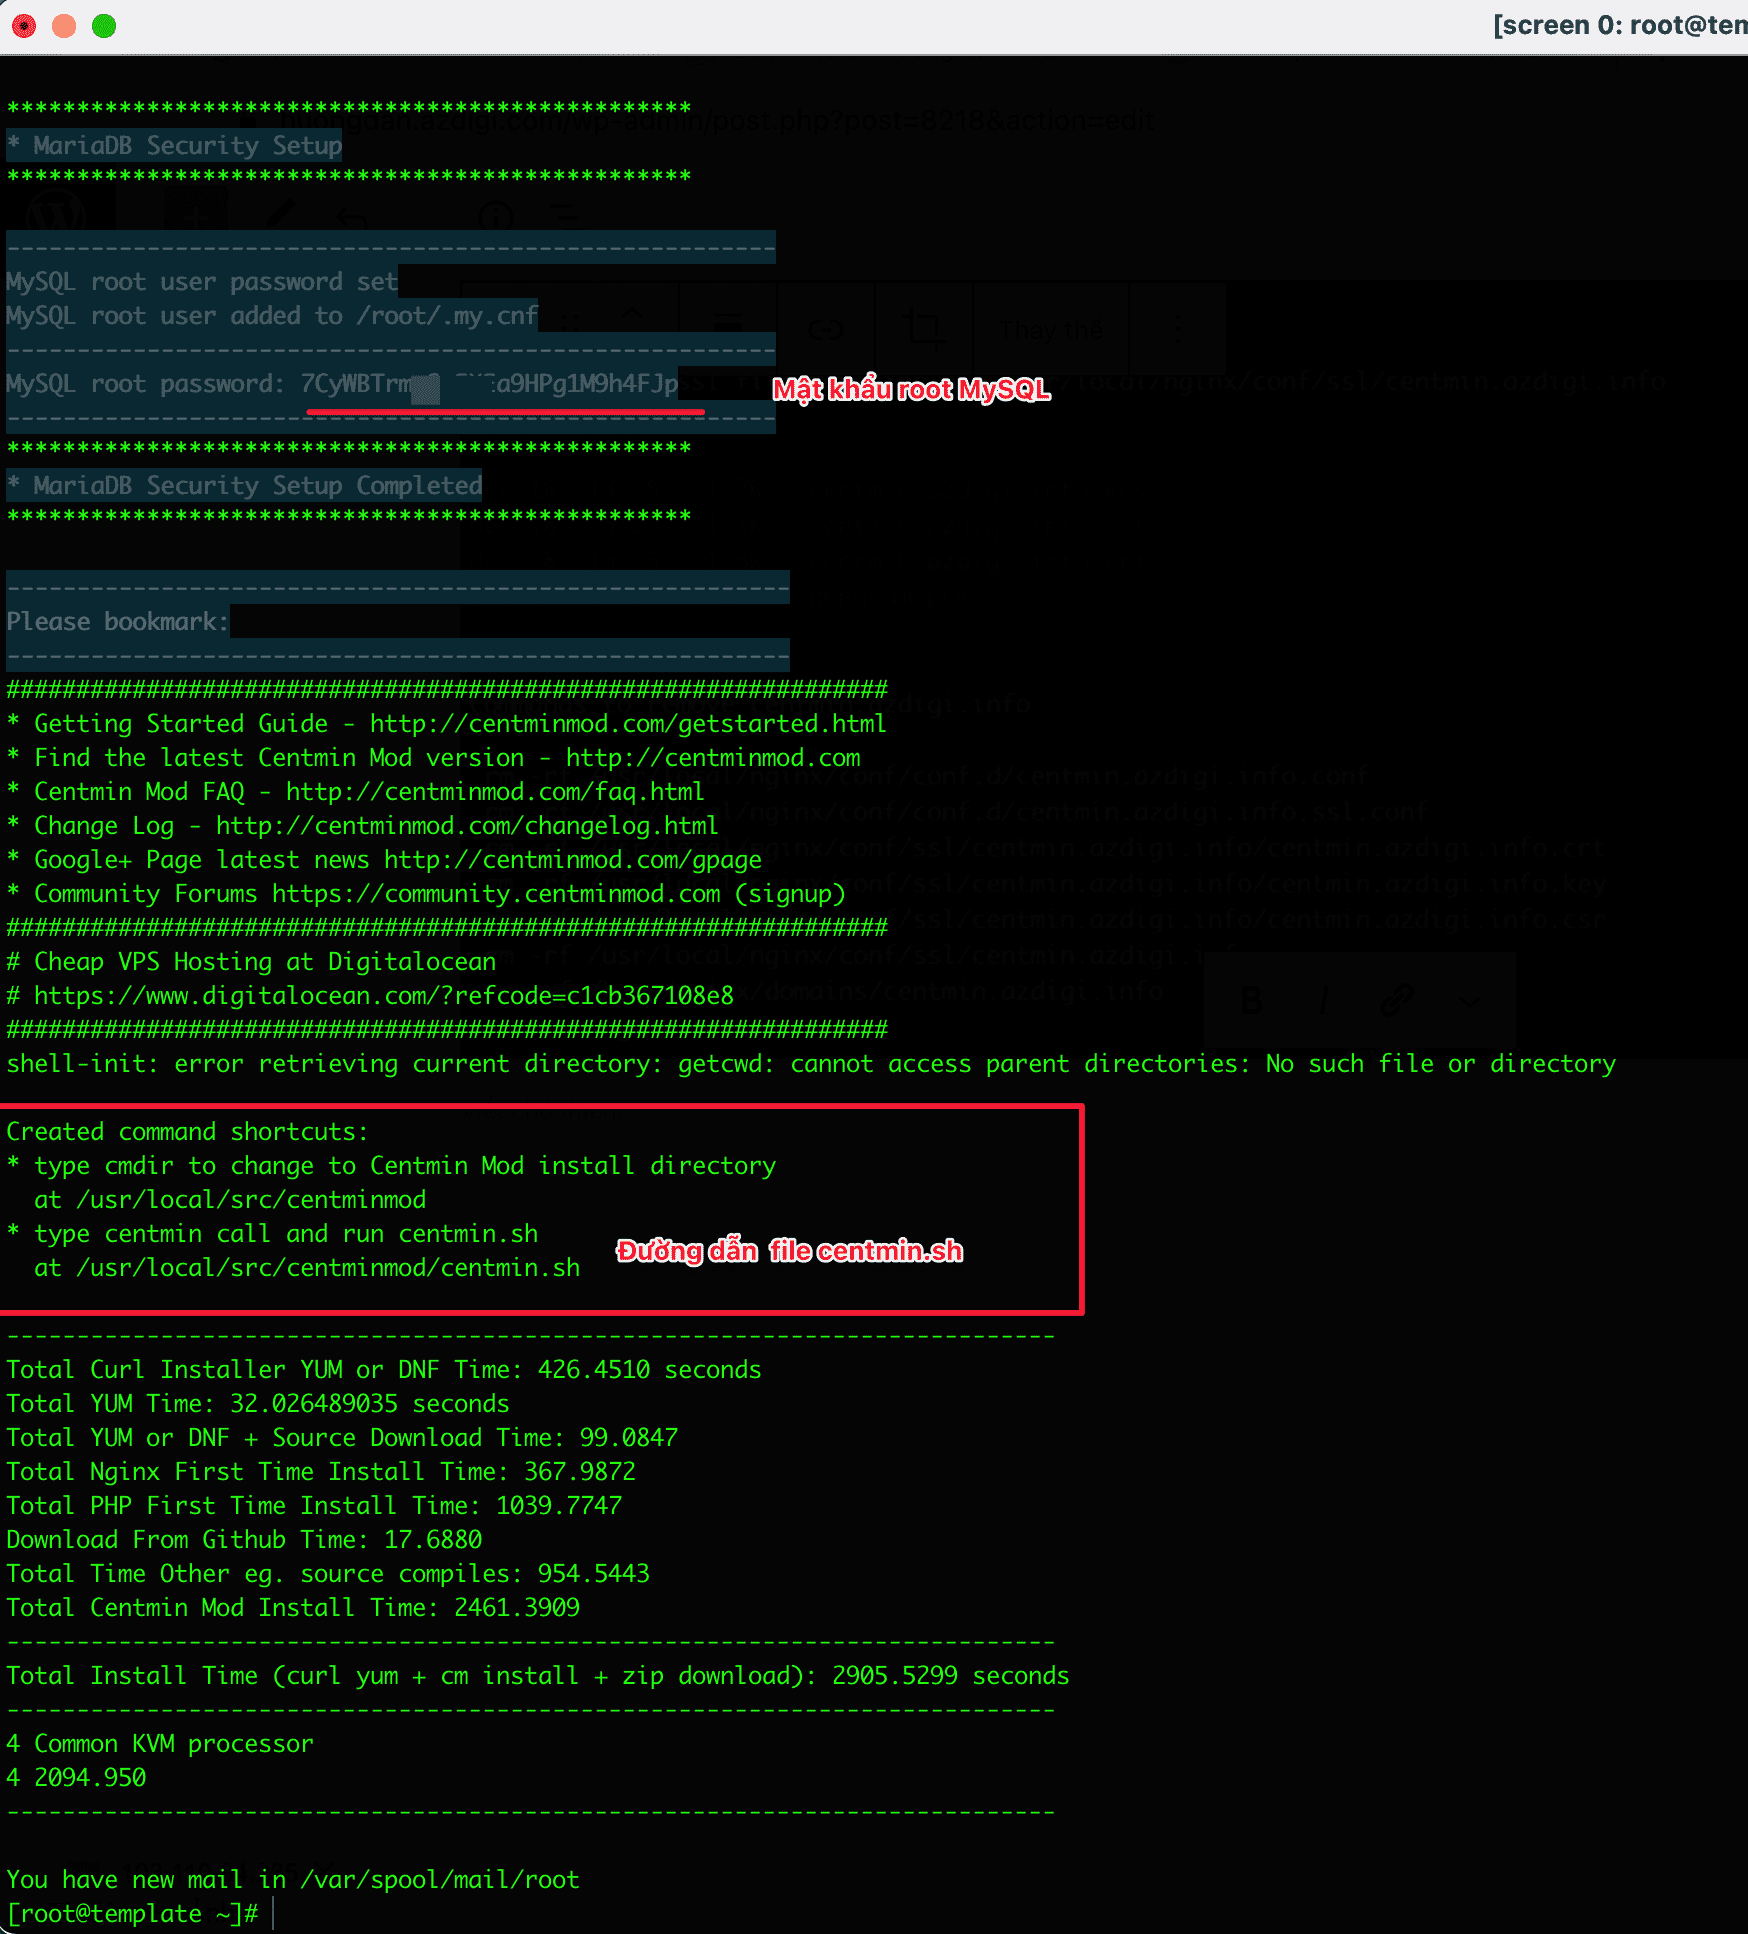
So in this Part 1, I have guided you to complete the installation of Centmin Mod. Let’s go to Part 2 to use and set up the domain.
Part 2: How to use Centmin Mod
In Part 2, I will dive into how to use it after the installation is complete. To open the menu panel, in SSH, enter the command centmin to set up the admin email and the menu panel will appear as below:
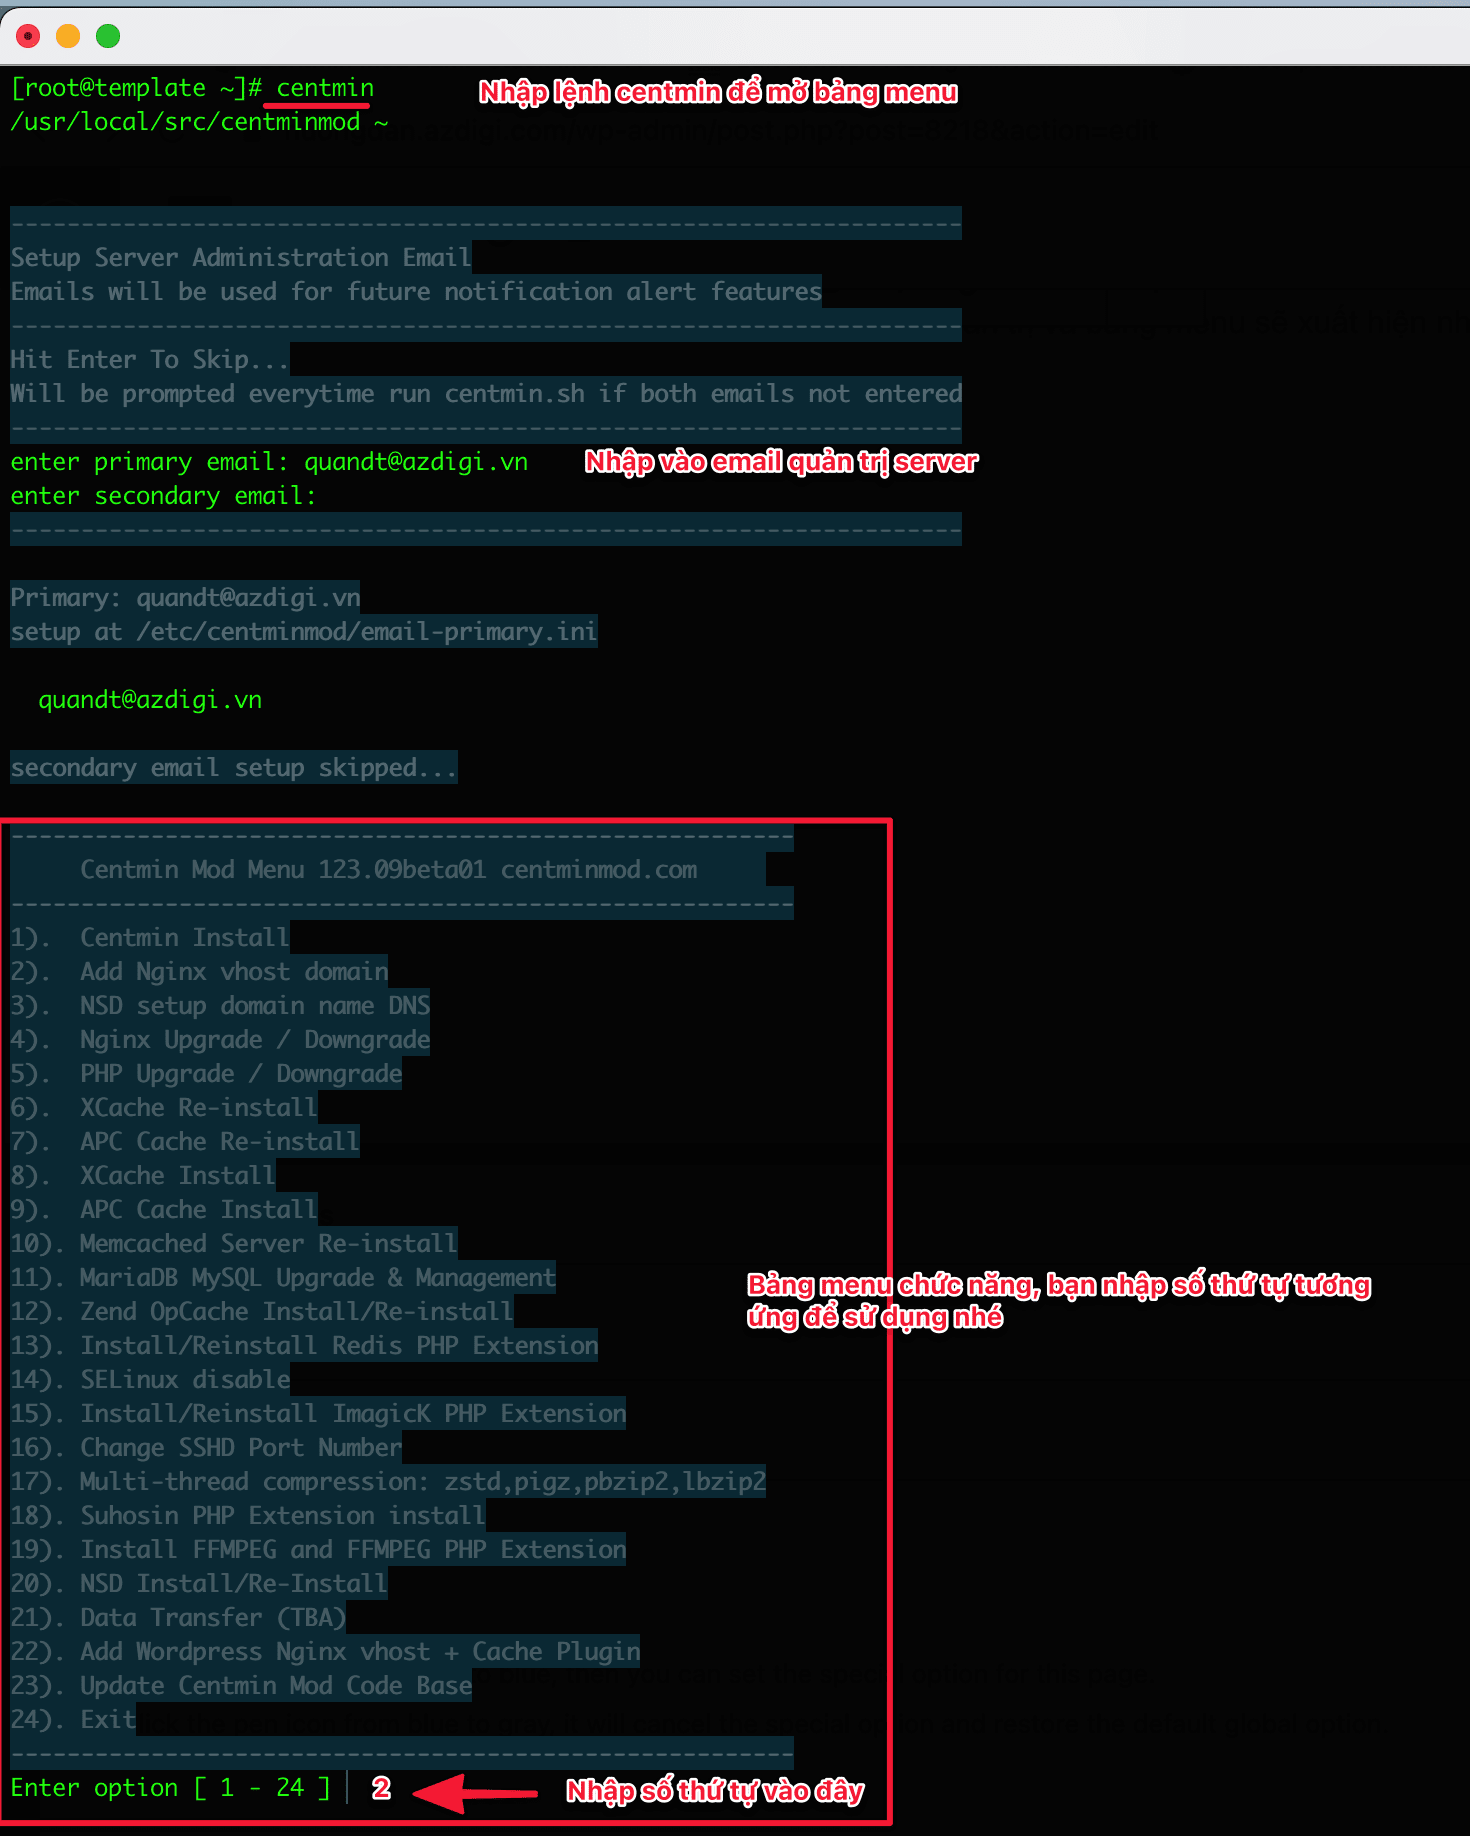
1. Introduction to Menu panel
At the menu panel, you will see 24 functions corresponding to the number from 1 to 24: Note:
- Centmin install: Install centmin but already installed, when you enter it, it will show the message
Centmin Mod previous installation detected. - Add Nginx vhost domain: Add a new domain to the NGINX vhost, to add a new domain, you will select this option.
- NSD setup domain name DNS
- Nginx Upgrade / Downgrade
- PHP Upgrade / Downgrade
- XCache Re-install
- APC Cache Re-install
- XCache Install
- APC Cache Install
- Memcached Server Re-install
- MariaDB MySQL Upgrade & Management
- Zend OpCache Install/Re-install
- Install/Reinstall Redis PHP Extension
- SELinux disable
- Install/Reinstall ImagicK PHP Extension
- Change SSHD Port Number
- Multi-thread compression: zstd,pigz,pbzip2,lbzip2
- Suhosin PHP Extension install
- Install FFMPEG and FFMPEG PHP Extension: if you make videos or mp3s, you can’t ignore this install.
- NSD Install/Re-Install
- Data Transfer (TBA)
- Add WordPress Nginx vhost + Cache Plugin
- Update Centmin Mod Code Base
- Exit
After you have mastered all the features in the menu, now let’s create your first website domain.
2. Add domain to server and install SSL automatically
2.1. Enable SSL Let’s Encrypt auto-install
With Centmin Mod 123.09beta01 , there is an additional feature to support SSL Let’s Encrypt installation when you add a website to Centmin Mod. But provided that your domain name must be pointed to the Centmin Mod server IP, the new SSL certificate issuance will be successful. After the domain name has been successfully pointed, please turn on the automatic SSL installation feature, you only do it once, the next steps will be used forever.
You can use the command vi vim or nano to open the vi etc/centminmod/custom_config.inc file and add the following line:
LETSENCRYPT_DETECT='y'
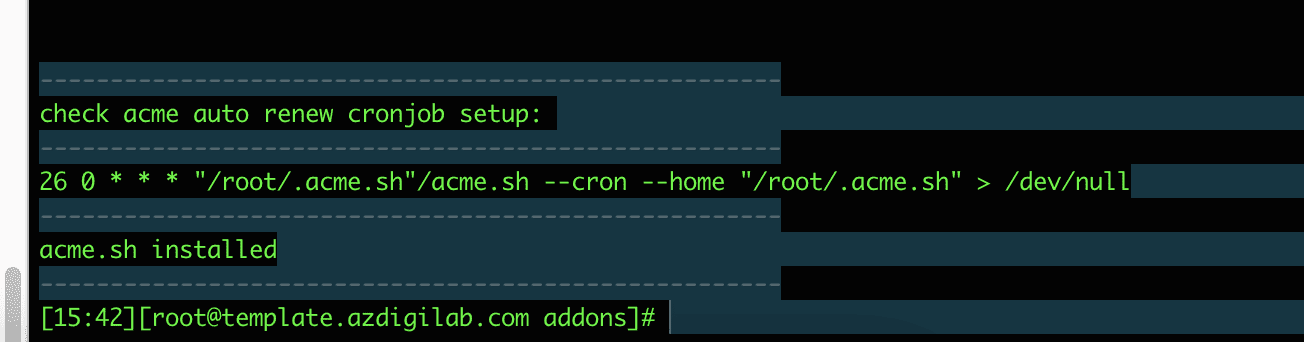
Next, run these 2 commands to install the newly added feature.
cd /usr/local/src/centminmod/addons
./acmetool.sh acmeinstall
2.2. Add domain to Centmin Mod server
Following this step, I will guide you through adding a domain name in Centmin Mod. Enter the command centmin to open the menu panel. Then you choose 2). Add Nginx vhost domain to add it.
A short video on how to do it:
After choosing, the system will display some information for you to enter: I will annotate the list of required lines below.
Do you want to continue with Nginx vhost site creation? [y/n] y <= Chọn Y để tiếp tục Enter vhost domain name to add (without www. prefix): quanaz.azdigi.info <= Enter your domain Create a self-signed SSL certificate Nginx vhost? [y/n]: y <= Select Y to generate a self-signed certificate Get Letsencrypt SSL certificate Nginx vhost? [y/n]: y <= Select Y to generate the Let's Encrypt certificateTo get Letsencrypt SSL certificate, you must already have updated intended domain vhost name's DNS A record to this server's IP addresss. If top level domain, DNS A record is needed also for www. version of domain otherwise, Letsencrypt domain name validation will fail. continue [y/n] ? y <= Select Y to continue quanaz.azdigi.info is not a top level domain your server IPv4 IP address: 45.252.249.100 current DNS A record IPv4 address for quanaz.azdigi.info is: 45.252.249.100 Do you want to continue [y/n]: y <= Select Y to continue
You have 4 options: 1. issue staging test cert with HTTP + HTTPS (untrusted) 2. issue staging test cert with HTTPS default (untrusted) 3. issue live cert with HTTP + HTTPS (trusted) 4. issue live cert with HTTPS default (trusted) Enter option number 1-4: 3 <= Select number 3 to issue certificates directly (Trust) Create FTP username for vhost domain (enter username): quanazdigi <= Enter to create FTP User Auto generate FTP password (recommended) [y/n]: y <= Choose Y to randomize the password FTP username you entered: quanazdigi FTP password auto generated: v!!8:ev/n]Y'Zgq=xR-w, Password Enter it again: SSL Vhost Setup…
Next, when asked for options, choose Y to agree. And it will take a few minutes to complete the vhost setup and SSL and domain certificate configuration paths. Once completed, you will receive the following information:
## Your FTP account information FTP hostname : 45.252.249.100 FTP port : 21 FTP mode : FTP (explicit SSL) FTP Passive (PASV) : ensure is checked/enabled FTP username created for quanaz.azdigi.info : quanazdigi FTP password created for quanaz.azdigi.info : v!!8:ev/n]Y'Zgq=xR-w,## The path of the domain name's vhost configuration file just added vhost for quanaz.azdigi.info created successfully domain: http://quanaz.azdigi.info vhost conf file for quanaz.azdigi.info created: /usr/local/nginx/conf/conf.d/quanaz.azdigi.info.conf vhost ssl for quanaz.azdigi.info created successfully domain: https://quanaz.azdigi.info
## SSL certificate configuration file path vhost ssl conf file for quanaz.azdigi.info created: /usr/local/nginx/conf/conf.d/quanaz.azdigi.info.ssl.conf /usr/local/nginx/conf/ssl_include.conf created Self-signed SSL Certificate: /usr/local/nginx/conf/ssl/quanaz.azdigi.info/quanaz.azdigi.info.crt SSL Private Key: /usr/local/nginx/conf/ssl/quanaz.azdigi.info/quanaz.azdigi.info.key SSL CSR File: /usr/local/nginx/conf/ssl/quanaz.azdigi.info/quanaz.azdigi.info.csr Backup SSL Private Key: /usr/local/nginx/conf/ssl/quanaz.azdigi.info/quanaz.azdigi.info-backup.key Backup SSL CSR File: /usr/local/nginx/conf/ssl/quanaz.azdigi.info/quanaz.azdigi.info-backup.csr letsdebug API check log: /root/centminlogs/letsdebug-quanaz.azdigi.info-181220-160444.log upload files to /home/nginx/domains/quanaz.azdigi.info/public vhost log files directory is /home/nginx/domains/quanaz.azdigi.info/log
Current vhost listing at: /usr/local/nginx/conf/conf.d/
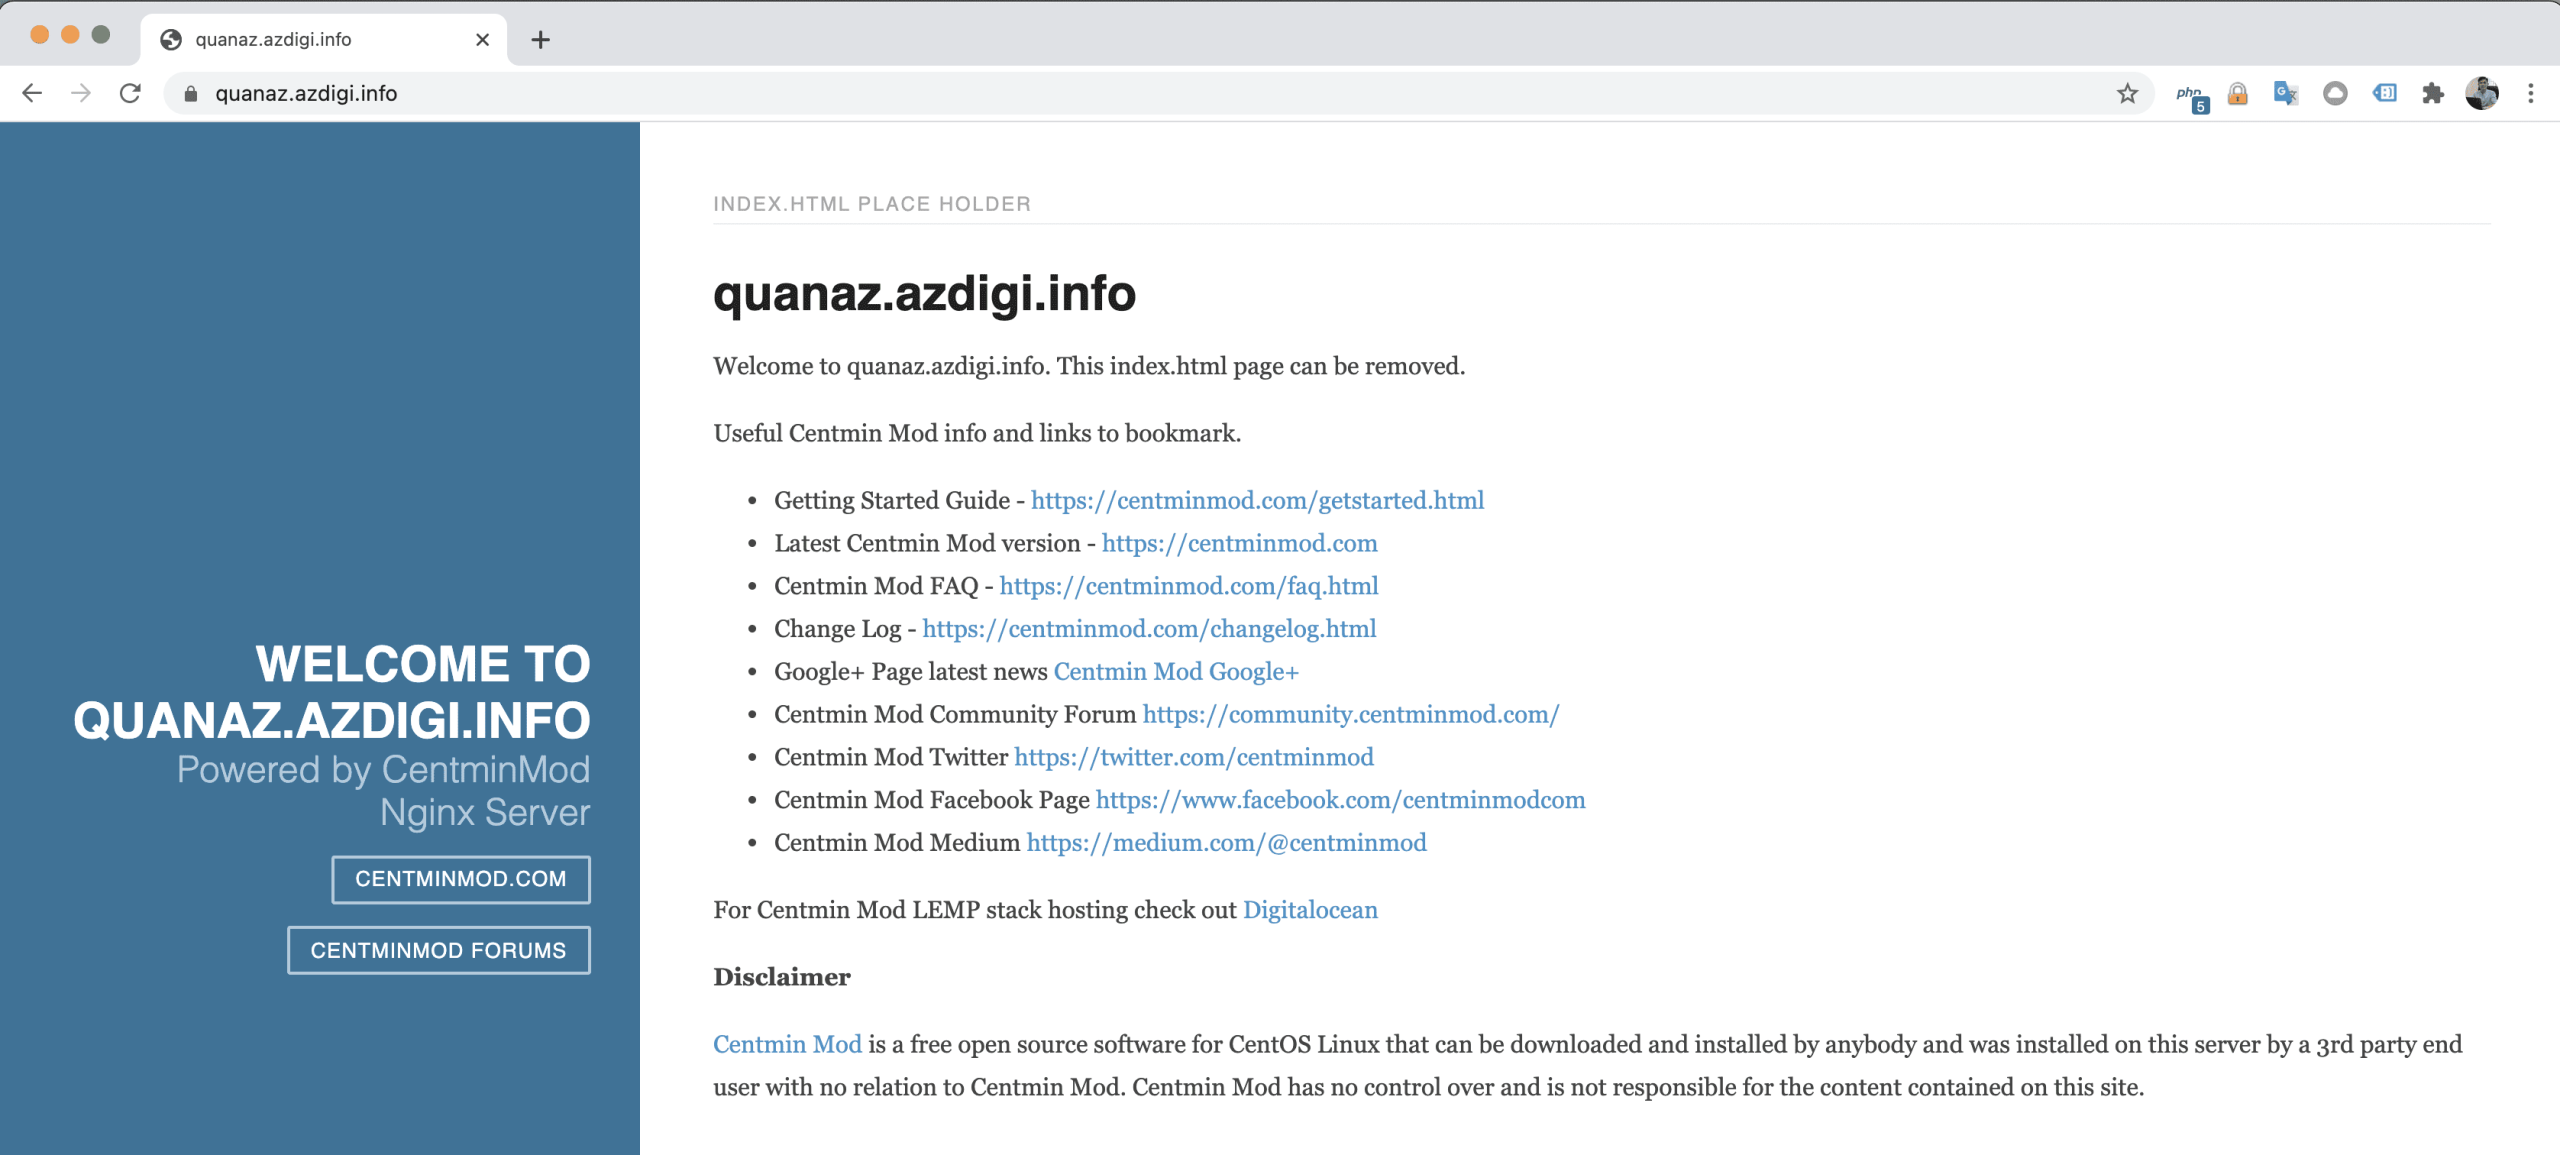
After completing the step of adding the domain name and SSL, you choose the number 24 corresponding to Exit the control panel. You can now access the domain name to check if it’s up and running.
So you have completed the step of adding a domain name, now you can log in with the created FTP account and access /home/nginx/domains/my-domain/public to upload the source code.
Summary
Hopefully, this article will help you to install and manage this script successfully. In the next articles of Centmin Mod, AZDIGI will guide you to install the source code and create a database .
Wishing you success!
If you need assistance, you can contact support in the ways below:
- Hotline 247: 028 888 24768 (Ext 0)
- Ticket/Email: You use the email to register for the service and send it directly to: support@azdigi.com .
About the author

Thạch Phạm
Đồng sáng lập và Giám đốc điều hành của AZDIGI. Có hơn 15 năm kinh nghiệm trong phổ biến kiến thức liên quan đến WordPress tại thachpham.com, phát triển website và phát triển hệ thống.