

Nội dung
What is Let’s Encrypt?
Let’s Encrypt is an SSL certificate validation organization like Comodo, GeoTrust, Symantec but different in that it is a non-profit organization established with the patronage of significant organizations in the world: Cisco, Akamai, Mozilla, Facebook, etc., with the purpose of providing free SSL certificates to users, helping all websites to be encrypted, creating a safer internet environment. The SSL certificate at Let’s Encrypt is only different from other types of SSL certificates in that the term of each installation will be 90 days, after 90 days you need to continue to renew it to be able to continue using it.
Why should you use SSL Let’s Encrypt?
The reasons that Let’s Encrypt is currently the most used SSL certificate in the world:
- Completely free.
- Certificate issuance time is fast.
- Easy to install.
- Trusted by most of the major browsers.
- It can automatically renew.
- Integrated on most control panels today.
In this article, AZDIGI will guide you on how to install Let’s Encrypt on a server using WHM/cPanel in the most detail. Please follow the steps below.
Implementation guide
Step 1: Check Let’s Encrypt is installed on your server or not
You access WHM by the link: https://IPVPS:2087/ and login with the root information of your VPS. At WHM, go to the Manage AutoSSL section to see if Let’s Encrypt has been integrated into your WHM. As shown below, Let’s Encrypt has not been installed, but only the SSL of cPanel (Sectigo) is available.
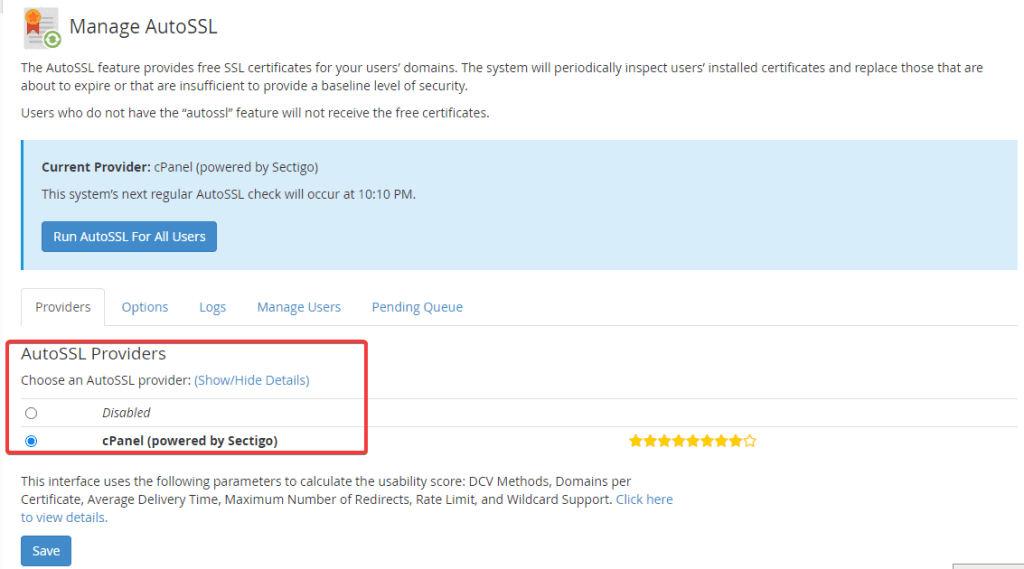
So now we start to install SSL Let’s Encrypt.
Step 2: Install SSL Let’s Encrypt
First, you need to SSH into your VPS as root, if you don’t know how to SSH into your VPS, you can refer to the instructions below:
Once you have SSH into VPS, you need to run the command below to install SSL Let’s Encrypt on VPS:
/scripts/install_lets_encrypt_autossl_provider
The installation process will be as follows:
info [install_lets_encrypt_autossl_provider] Starting yum execution “--assumeyes --color=never --config /etc/yum.conf --downloadonly --downloaddir /tmp/ukID3QpACi install cpanel-letsencrypt-v2”.
Loaded plugins: fastestmirror, universal-hooks
Loading mirror speeds from cached hostfile
 * EA4: 203.174.85.202
 * cpanel-plugins: 203.174.85.202
 * base: mirror.horizon.vn
 * extras: mirror.horizon.vn
 * updates: mirror.horizon.vn
Resolving Dependencies
--> Running transaction check
---> Package cpanel-letsencrypt-v2.noarch 0:1.01-13.1 will be installed
--> Finished Dependency Resolution


Total download size: 31 k
Installed size: 86 k
Background downloading packages, then exiting:
exiting because "Download Only" specified
info [install_lets_encrypt_autossl_provider] Completed yum execution “--assumeyes --color=never --config /etc/yum.conf --downloadonly --downloaddir /tmp/ukID3QpACi install cpanel-letsencrypt-v2”: in 3.531 second(s).
Preparing...                          ################################# [100%]
Updating / installing...
   1:cpanel-letsencrypt-v2-1.01-13.1  ################################# [100%]
Initial cpanel-letsencrypt-v2 install detected …
Starting rebuild of web server configuration & restart …
Id: TQ:TaskQueue:1235
Id: TQ:TaskQueue:1236
NOTE: To activate Let’s Encrypt, you MUST accept the terms of service
in WHM’s “Manage AutoSSL” interface.
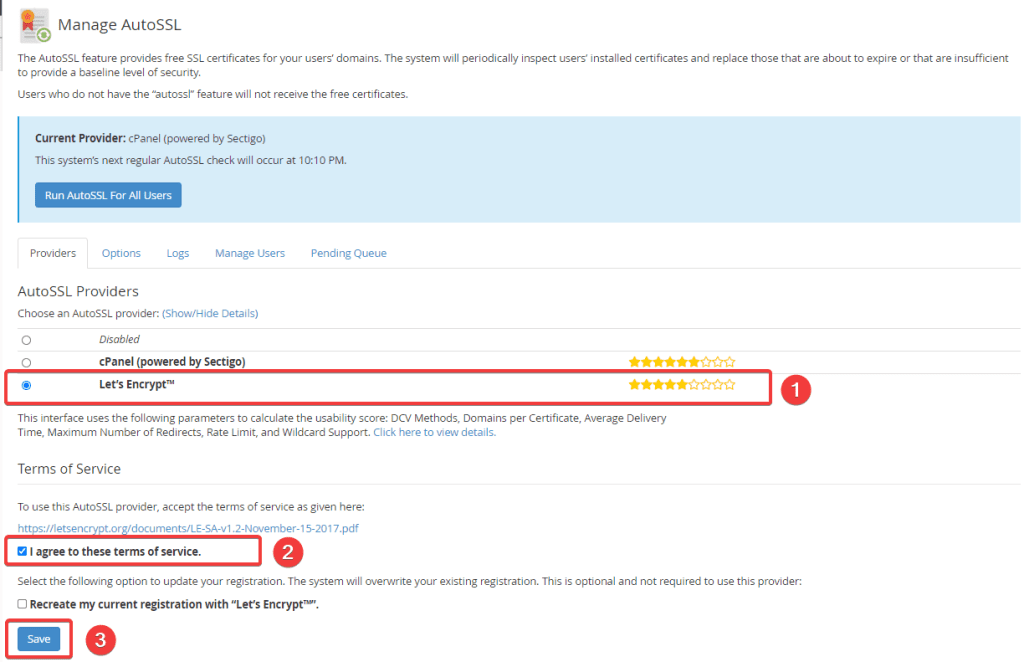
The installation process takes only a few minutes, when finished, please check SSL Let’s Encrypt on the WHM interface.
As shown, Let’s Encrypt has been successfully installed and integrated into WHM. Now, if you want to set Let’s Encrypt as the default SSL that will be installed on websites, you just need to tick Let’s encrypt (1) => I agree to these terms of service (2) => Save (3).
Summary
So in this article, AZDIGI showed you how to install Let’s Encrypt and integrate it into WHM/cPanel with just a command. With Let’s Encrypt, you will easily install SSL on your websites, help websites have better security and optimize the website for SEO. If you find the article helpful, you can share it widely.
You can refer to some other tutorials about cPanel below:
Wishing you success!
If you need assistance, you can contact support in the ways below:
- Hotline 247: 028 888 24768 (Ext 0)
- Ticket/Email: You use the email to register for the service and send it directly to: support@azdigi.com
