Nội dung
How to install WordPress on LarVPS for newbie.
I. Overview
Continuing with the series on LarVPS, today AZDIGI will guide you how to install Wordpress source code on VPS using LarVPS Script.
What is WordPress?
WordPress is an open-source software written in PHP programming language for websites and uses MySQL database management system. It is also the most commonly used pair of web development languages nowadays. WordPress was first launched on May 27, 2003, by the authors’ Matt Mullenweg and Mike Little.
WordPress is an open-source code written in PHP to support creating personal blogs, and it is highly favored by many users for its ease of use and useful features. WordPress has been considered a superior Content Management System (CMS – 2) to assist users in creating various types of websites such as blogs, news/magazine websites, business introduction, e-commerce websites, and almost any small and medium-sized websites can be deployed on the WordPress platform.
Reasons you should use WordPress.
- Easy to use.
- Huge supportive community.
- Many Theme packs are available.
- Many plugins support this.
- Ease of development for programmers.
- Supports multiple languages.
- Can build many types of websites.
II. Implementation guide
To install WordPress, you can install it with the following 2 steps.
Note: Before doing this, you need to make sure that the domain has been successfully pointed to the server’s IP.
Step 1: SSH into your LarVPS server
First, you need to SSH into your VPS as root, if you don’t know how to SSH, you can see the instructions below:
Step 2: Install WordPress on LarVPS
Method 1: Add a new Domain and install from the beginning
After SSH is successful, you proceed to install WordPress as follows, you need to create a website into LarVPS before installing WordPress.
You type larvps to enter the Menu of LarVPS, then you press the 1 key corresponding to the Domain Management function as shown below:
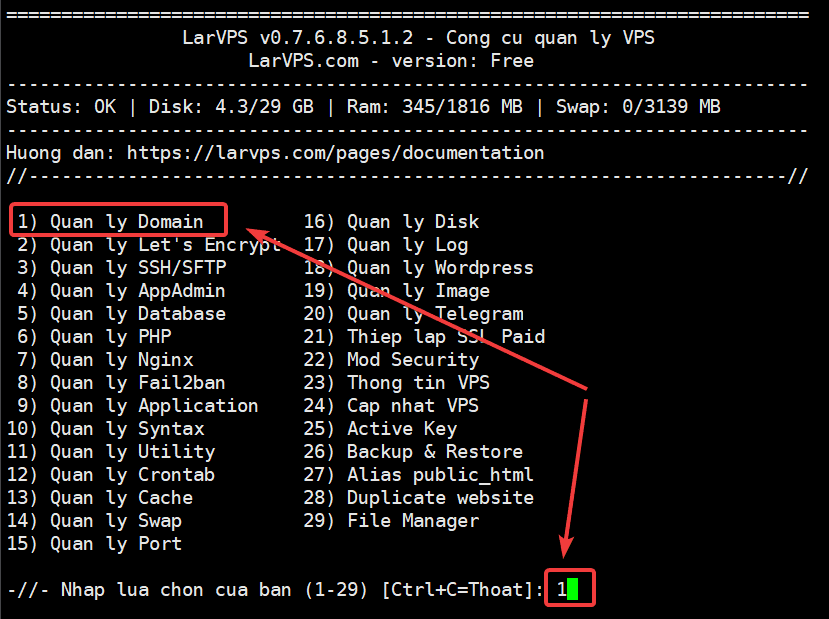
After entering the Domain Management section, you continue to press the 2 key corresponding to Add – Domain/SubDomain
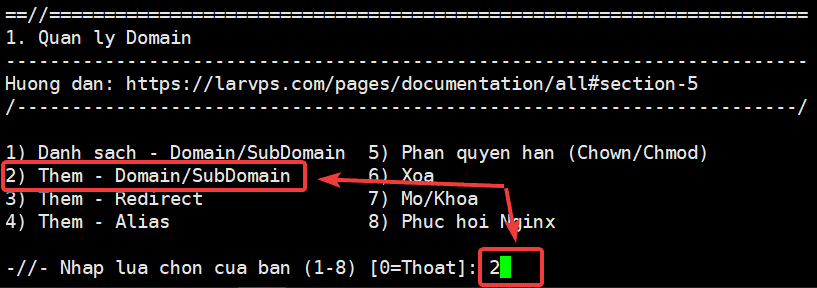
Here you fill in the website information you need to add and confirm some settings such as SSL, WordPress, Database…
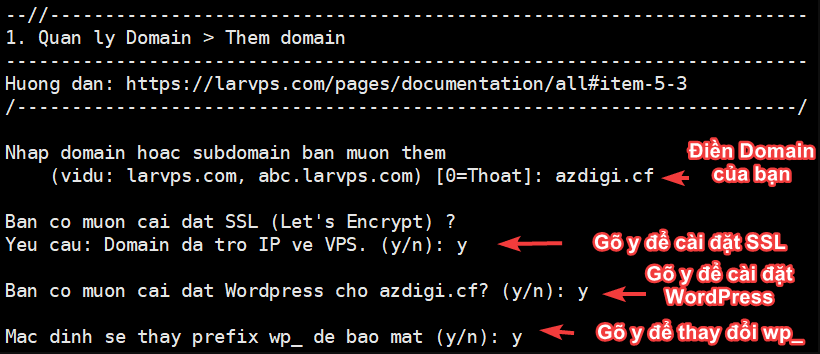
The installation process only takes a few seconds to complete.
Method 2: Install to an existing Domain
You type larvps to enter the Menu of LarVPS, then you press the 9 key corresponding to the Application Management function.
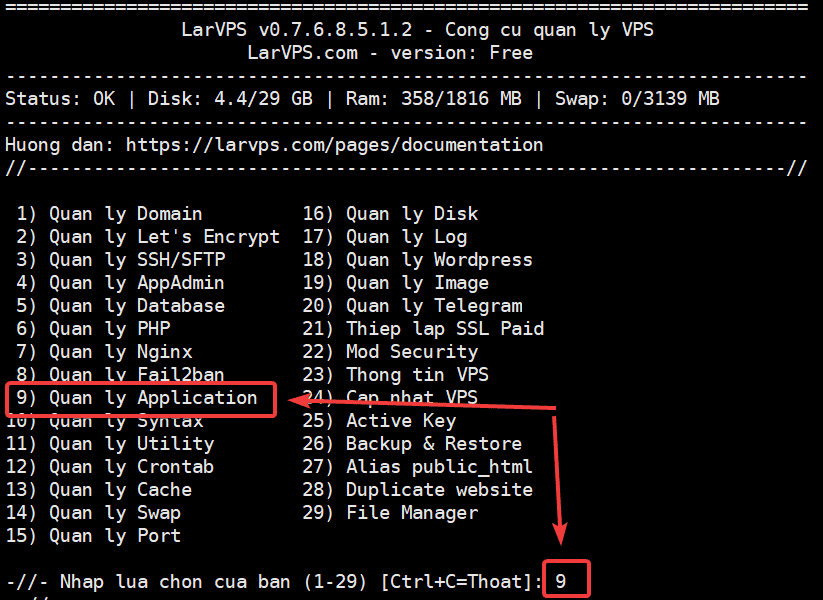
After entering the Application Management section, continue to press the 1 key corresponding to Install WordPress.

Next, you choose the number corresponding to the Domain you need to install WordPress, here I install it on the domain azdigi.cf, then I type the number 1.


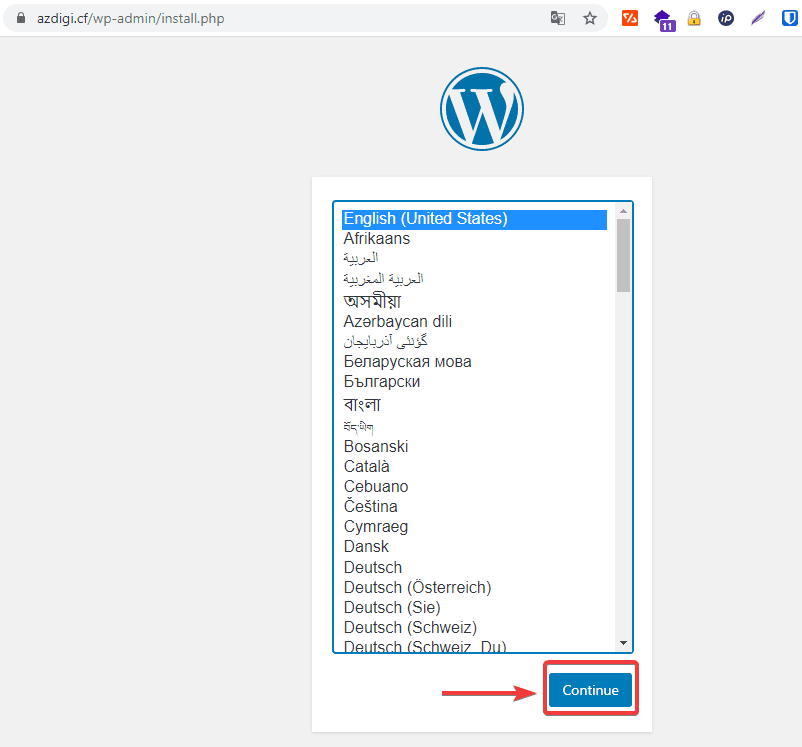
After you complete the installation of WordPress in Method 1 or Method 2, you need to go to any browser and type the website name to set up the rest. In this section, you choose the language for the website and click Continue.
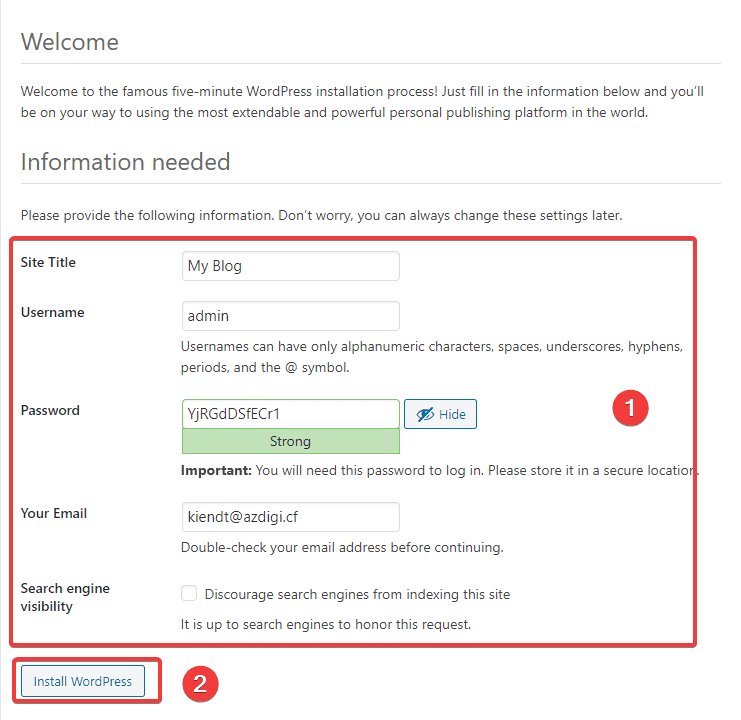
At the next interface, you fill in the website information as follows:
In there:
- Site Title
- Username
- Password
- Your Email
After filling in all the information, click Install WordPress to complete the installation process.
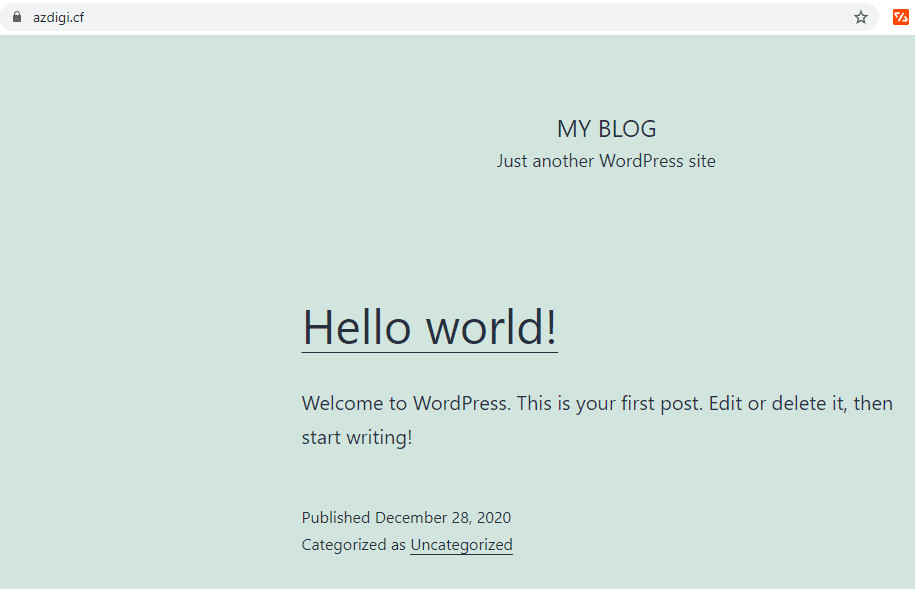
The website interface after the installation is complete will look like this:
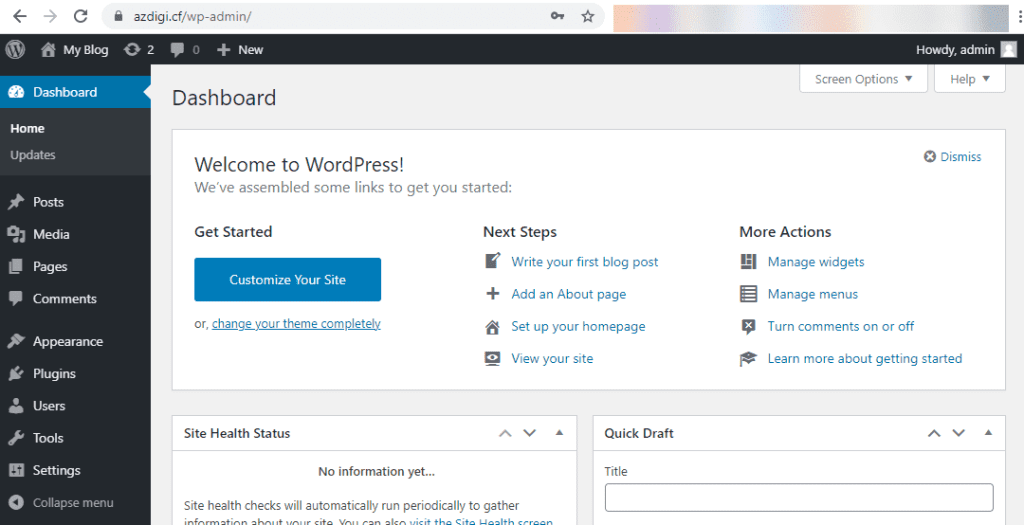
To access the Admin page, go to http://yourdomain.com/wp-admin and the interface will look like this:
So we have completed the WordPress installation.
III. Summary
In this article, AZDIGI has provided you with the most detailed instructions on how to install WordPress on LarVPS. Although this installation process requires a few more steps, once successfully set up, you will have a better website experience than any other automatic WordPress installation methods you may have used before. If you find the article useful, please share it widely!
Wishing you success!
If you need assistance, you can contact support in the ways below:
- Hotline 247: 028 888 24768 (Ext 0)
- Ticket/Email: You use the email to register for the service and send it directly to: support@azdigi.com .

