Installing WordPress with OpenLiteSpeed using Docker Compose on Ubuntu 22.04 with 8 steps.
Introduction
In this article, we will proceed to create a WordPress website through Docker Compose with OpenLiteSpeed, MariaDB, PHPMyAdmin services on Ubuntu 22.04. And before going into the installation, you need to make sure that the server conditions need to be met below:
Conditions the server needs to meet:
- Install Docker on Ubuntu 22.04
- Install Docker Compose on Ubuntu 22.04.
- The domain must be pointed to the server IP
Please ensure that you have fulfilled the above conditions.
If the above conditions are met, we will proceed to install and configure the WordPress website.
Step 1: Download ols-docker-env
Now we will install and use the ols-docker-env package from litespeedtech (it is the company that makes LiteSpeed, OpenLiteSpeed and LiteSpeed Cache)
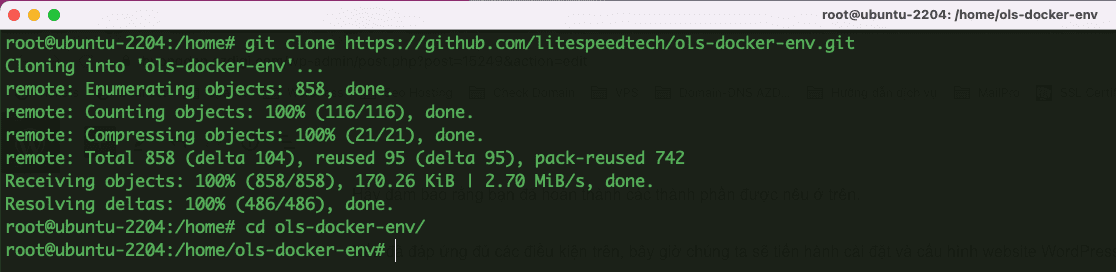
cd /home
git clone https://github.com/litespeedtech/ols-docker-env.git
Then you move into the ols-docker-env directory with the command:
cd ols-docker-env

Step 2: Learn the directory structure
The directory structure will look like this:
├── acme
├── bin
│   └── container
├── data
│   └── db
├── logs
│   ├── access.log
│   ├── error.log
│   ├── lsrestart.log
│   └── stderr.log
├── lsws
│   ├── admin-conf
│   └── conf
├── sites
│   └── localhost
├── LICENSE
├── README.md
└── docker-compose.yml- acme: contains SSL certificates generated by Let’s Encrypt
- bin: contains CLI codes to create virtual hosts, install applications, etc.
- data: contains the MySQL database
- logs: contains log files of web server and virtual hosts
- lsws: contains web server configuration files
- sites: contains the content of the website
Step 3: Activate Container
Before going into activating the Container, we will need to edit a bit of information.
- Edit the content of the .env file
nano .env
This is the default content of the file:
TimeZone=America/New_York
OLS_VERSION=1.7.15
PHP_VERSION=lsphp80
MYSQL_DATABASE=wordpress
MYSQL_ROOT_PASSWORD=password
MYSQL_USER=wordpress
MYSQL_PASSWORD=password
DOMAIN=localhost
And you will correct and replace the old information with your information, specifically:
- TimeZone: You changed it to Asia/Ho_Chi_Minh
- PHP_VERSION: You will enter the PHP version you want to install, for example, PHP 7.4, then enter lsphp74
- In the database information section, you can name and password depending on your needs.
New information after my correction will be as follows:
TimeZone=Asia/Ho_Chi_Minh
OLS_VERSION=1.7.15
PHP_VERSION=lsphp74
MYSQL_DATABASE=azdigi_db
MYSQL_ROOT_PASSWORD=azdigi_root
MYSQL_USER=azdigi_db
MYSQL_PASSWORD=azdigi_2022
DOMAIN=localhost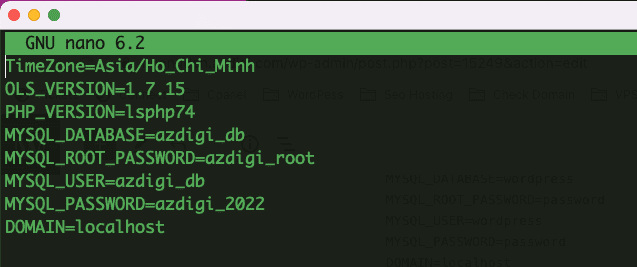
- After editing the information, now activate the container with the command:
docker-compose up -d
After the run is complete, the result will be as shown below:

Now you can go to the browser and type the server IP name to see the results, if you access the image below, you have successfully installed it. And the 404 error is because the folder containing the website data has nothing, so it will display like that, you don’t need to worry.
Step 4: Configure OpenLiteSpeed
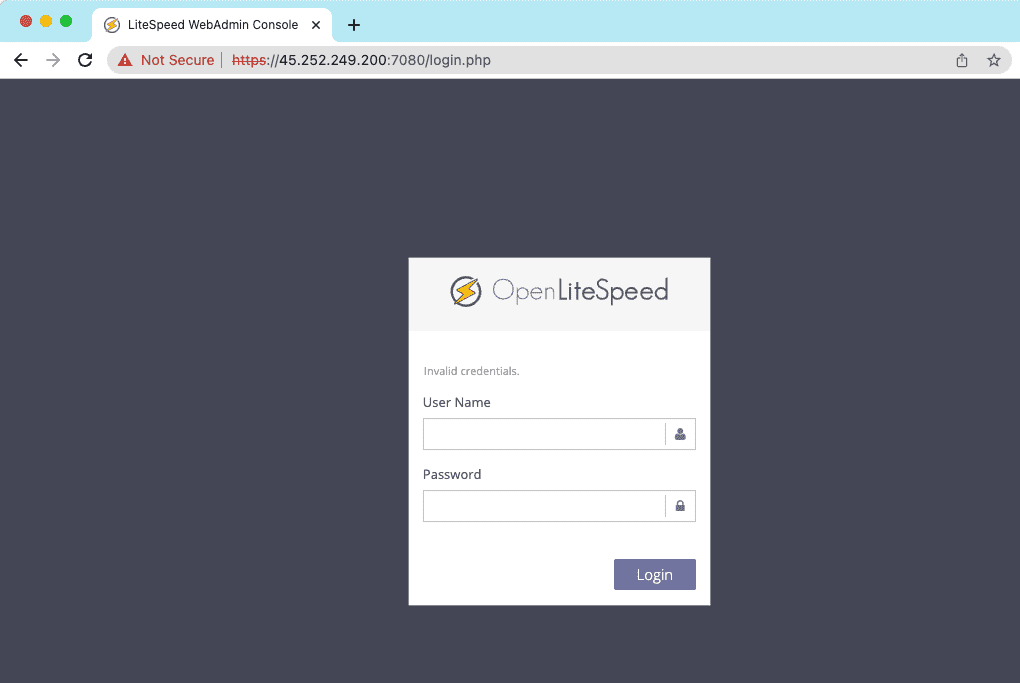
To change the configuration of OpenLiteSpeed, you access Wedadmin at the following address:
https://<IP-Address>:7080The Webadmin interface will display as shown below:
To log in to Wedadmin, the default user is admin, and you can reset the password with the command below:
bash bin/webadmin.sh matkhaumoi
Note: Remember to replace newpassword with your password.
Next, you use the information just reset to log in to Webadmin. After successful login, you will get the interface as shown below:
Now install OWASP ModSecurity to increase the security of OpenLiteSpeed with the command:
bash bin/webadmin.sh --mod-secure enable
If the installation is successful, the results will return as follow:
Step 5: Add domain name and virtual hosts
- To add a new domain name, use the command below:
bash bin/domain.sh -add azdigi.space
Note: Replace azdigi.space with your domain name.
- And to delete an added website, you can use the command:
bash bin/domain.sh -del azdigi.space
Step 6: Install a Free SSL Certificate
Before installing SSL for your website, you need to make sure that the website has been pointed A record to the correct server IP with the conditions at the beginning of the article. If you have completed this section, continue to install the SSL certificate by following the command below:
- Install ACME, the free SSL certificate generator from Let’s Encrypt.
./bin/acme.sh --install --email kiendt@azdigi.com
Note: Replace kiendt@azdigi.com with your email.

- Generate SSL certificate for domain azdigi.space
./bin/acme.sh --domain azdigi.space
By default, ACME will use ZeroSSL’s certificate system instead of Let’s Encrypt. After the installation is successful, the system will display the following results:
Step 7: Install WordPress
Before installing WordPress, you need to create a database for your domain name in one of two ways:
- Automatically create the database
bash bin/database.sh --domain azdigi.space
The system will automatically create a database for you and provide the same information as below:

- Manually create the database
If you want to actively set the Database name, Username and Password, you need to type a long command and fill in the Database information you need to enter.
bash bin/database.sh --domain azdigi.space --user USERNAME --password PASSWORD --database DATABASE_NAME
After creating the database, now we install WordPress with the command:
./bin/appinstall.sh --app wordpress --domain azdigi.space

Next, open your browser and visit the website to complete the final WordPress installation step. Go to the database setup section, enter the database information created above.

Step 8: Access PHPMyAdmin
To access PHPMyAdmin, you can go to the browser and access the following path:
http://<IP-Address>:8080Next, enter the root user and enter the password in the step of editing the .env file (the MYSQL_ROOT_PASSWORD section) in step 3.
So above are all the steps to install a complete WordPress website with OpenLiteSpeed on Ubuntu 22.04 via Docker Compose. Hopefully, this article will help you better understand the working mechanism of installing and running a complete website through Docker Compose. Wishing you success!
You can refer to other instructions at the link below:
If you need support, you can contact support in the ways below:
- Hotline 247: 028 888 24768 (Ext 0)
- Ticket/Email: You use the email to register for the service and send it directly to: support@azdigi.com .
You might also like
- How to install WordPress with Docker Compose, Nginx, Apache and SSL
- How to change php.ini parameters on OpenLiteSpeed using Docker Compose
- Install and use Docker Compose on Ubuntu 22.04
- How to install Nginx Proxy Manager with Docker Compose on Ubuntu 22.04
- How to create a WordPress website with LEMP on Ubuntu 22.04
- How to install LOMP Stack on Ubuntu 20.04
About the author

Thạch Phạm
Đồng sáng lập và Giám đốc điều hành của AZDIGI. Có hơn 15 năm kinh nghiệm trong phổ biến kiến thức liên quan đến WordPress tại thachpham.com, phát triển website và phát triển hệ thống.