
Change Webserver on Centos Web Panel.
In this article, AZDIGI will show you how to Rebuild the default Apache web server on CWP to another web server on the CWP admin page. For example, I will perform Rebuild Apache => Nginx & Apache in this article.
I. Overview
Apache has been around since 2006 and is currently the most used web server worldwide, followed by Nginx. Each web server has its advantages, Apache with powerful processing capabilities, and Nginx has outstanding speed, especially with static files.
Although we can now completely replace Nginx with Apache, for some special reasons, many people are still required to use Apache. And the optimal solution now is to use Nginx as a Reverse Proxy for Apache. At this point, Nginx is the front end handling static files, and Apache is the back end handling dynamic content.
So you can see that the combination of Nginx and Apache is powerful and extremely optimal. In this article, AZDIGI will guide you on switching CWP’s default Apache to> Nginx & Apache to improve your server’s performance. Please continue to see the actual installation below.
II. Implementation guide
To rebuild the web server on CWP, you can follow these 3 steps:
Step 1: Check the web server in use
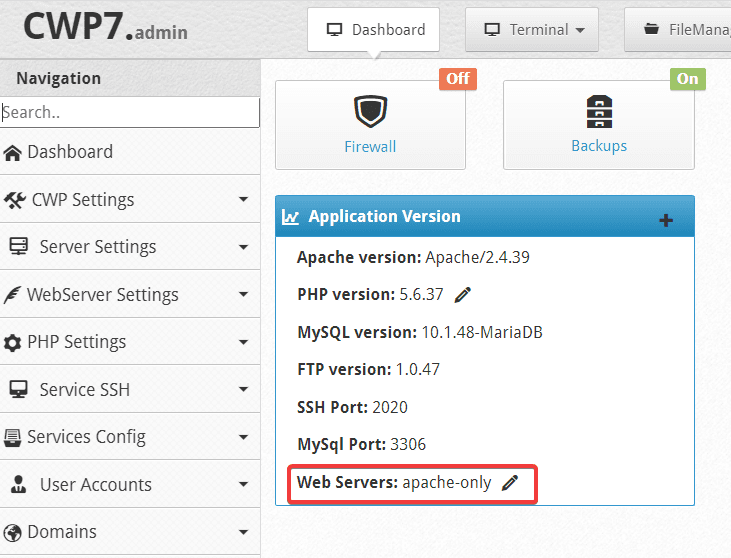
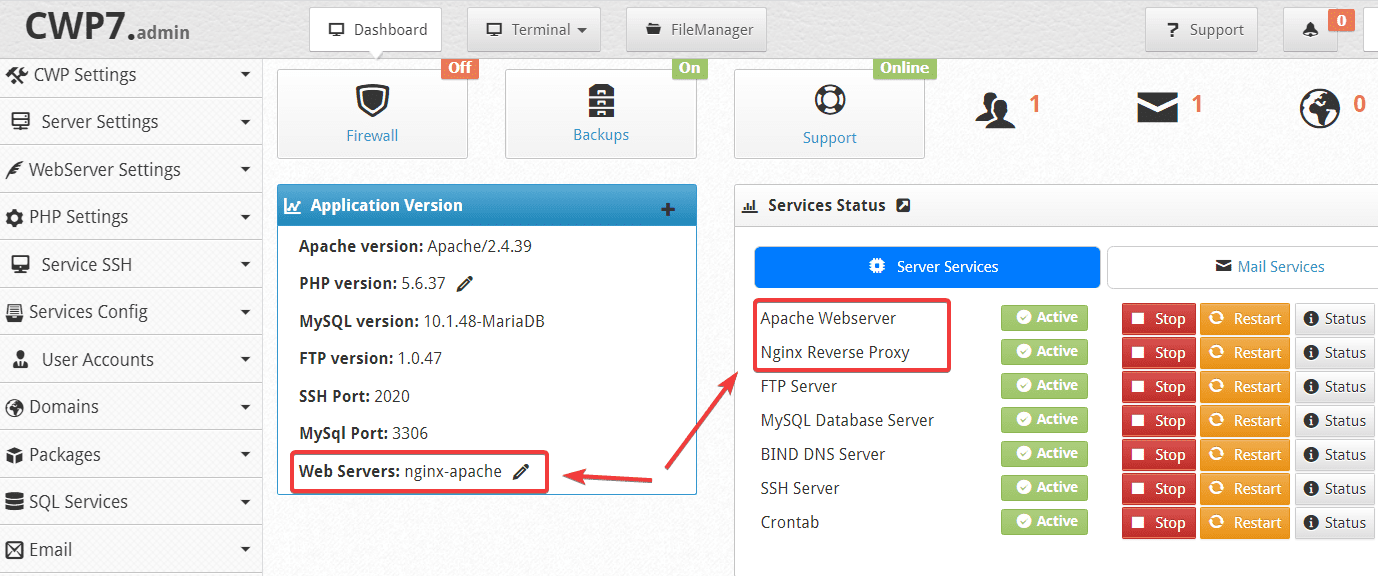
Currently, the web server I am using is Apache and this is also the default web server of CWP, you can see it in the Application Version section.
Step 2: Rebuild Apache => Nginx & Apache
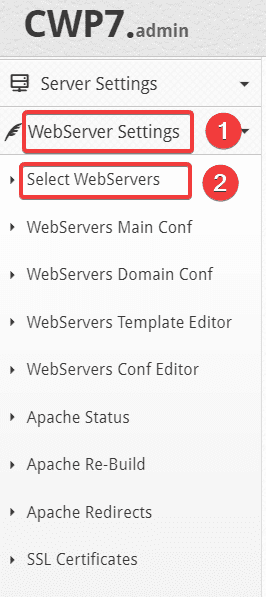
At the CWP interface, you access WebServer Settings => Select WebServers.
At the next interface, you tick the Web Server to rebuild. For example, I want to rebuild with Nginx & Apache
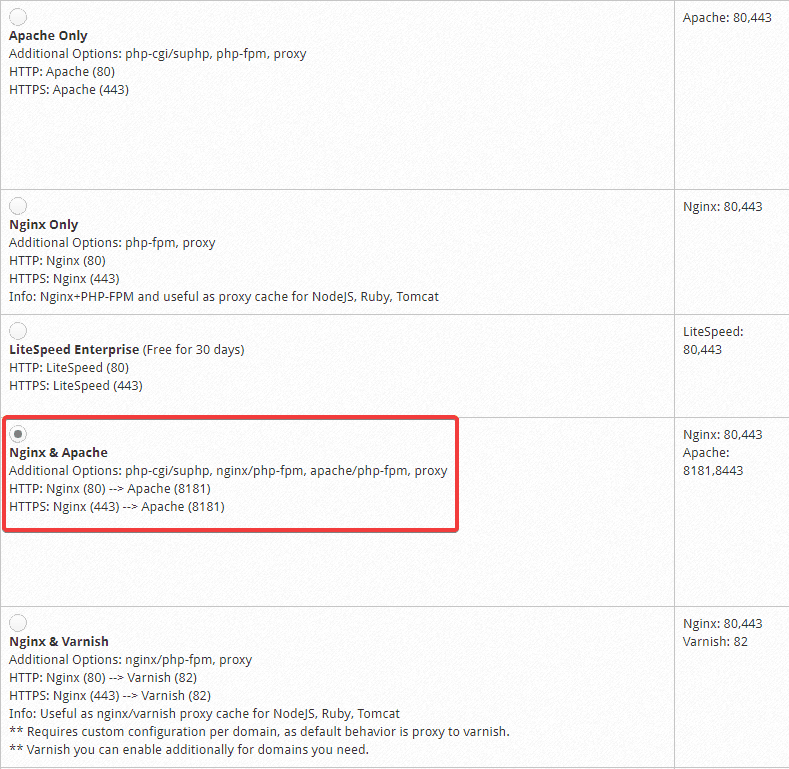

After selecting the new Web Server, click Save & Rebuild Configuration to start the rebuild process.
The installation process only takes a few minutes. After the installation is complete, you will receive the following message:
Installing nginx : Loaded plugins: fastestmirror Loading mirror speeds from cached hostfile * base: centos-hcm.viettelidc.com.vn * epel: hkg.mirror.rackspace.com * extras: centos-hcm.viettelidc.com.vn * updates: centos-hcm.viettelidc.com.vn Resolving Dependencies --> Running transaction check ---> Package nginx.x86_64 1:1.18.0-2.el7.ngx will be installed --> Finished Dependency ResolutionDependencies Resolved
================================================================================ Package Arch Version Repository Size ================================================================================ Installing: nginx x86_64 1:1.18.0-2.el7.ngx nginx 769 k
Transaction Summary ================================================================================ Install 1 Package
Total download size: 769 k Installed size: 2.7 M Downloading packages: Running transaction check Running transaction test Transaction test succeeded Running transaction Installing : 1:nginx-1.18.0-2.el7.ngx.x86_64 1/1 ----------------------------------------------------------------------
Thanks for using nginx!
Please find the official documentation for nginx here: * http://nginx.org/en/docs/
Please subscribe to nginx-announce mailing list to get the most important news about nginx: * http://nginx.org/en/support.html
Commercial subscriptions for nginx are available on: * http://nginx.com/products/
---------------------------------------------------------------------- Verifying : 1:nginx-1.18.0-2.el7.ngx.x86_64 1/1
Installed: nginx.x86_64 1:1.18.0-2.el7.ngx
Complete! Nginx installation Done Loaded plugins: fastestmirror Loading mirror speeds from cached hostfile * base: centos-hcm.viettelidc.com.vn * epel: hkg.mirror.rackspace.com * extras: centos-hcm.viettelidc.com.vn * updates: centos-hcm.viettelidc.com.vn Package apr-devel-1.6.2-1.x86_64 already installed and latest version Package apr-util-devel-1.6.0-1.x86_64 already installed and latest version Package libuuid-devel-2.23.2-65.el7.x86_64 already installed and latest version Nothing to do /usr/lib64/apr/build-1/libtool --mode=install install mod_rpaf.la /usr/local/apache/modules/ libtool: install: install .libs/mod_rpaf.so /usr/local/apache/modules/mod_rpaf.so libtool: install: install .libs/mod_rpaf.lai /usr/local/apache/modules/mod_rpaf.la libtool: install: install .libs/mod_rpaf.a /usr/local/apache/modules/mod_rpaf.a libtool: install: chmod 644 /usr/local/apache/modules/mod_rpaf.a libtool: install: ranlib /usr/local/apache/modules/mod_rpaf.a libtool: finish: PATH="/usr/local/sbin:/usr/local/bin:/usr/sbin:/usr/bin:/sbin:/bin:/sbin" ldconfig -n /usr/local/apache/modules ---------------------------------------------------------------------- Libraries have been installed in: /usr/local/apache/modules
If you ever happen to want to link against installed libraries in a given directory, LIBDIR, you must either use libtool, and specify the full pathname of the library, or use the `-LLIBDIR' flag during linking and do at least one of the following: - add LIBDIR to the `LD_LIBRARY_PATH' environment variable during execution - add LIBDIR to the `LD_RUN_PATH' environment variable during linking - use the `-Wl,-rpath -Wl,LIBDIR' linker flag - have your system administrator add LIBDIR to `/etc/ld.so.conf'
See any operating system documentation about shared libraries for more information, such as the ld(1) and ld.so(8) manual pages. ----------------------------------------------------------------------
Step 3: Check Web Server
After the Rebuild is complete, you need to recheck your web server to see if the switch has been successful. As shown below, I checked the admin page and successfully switched to Nginx & Apache.
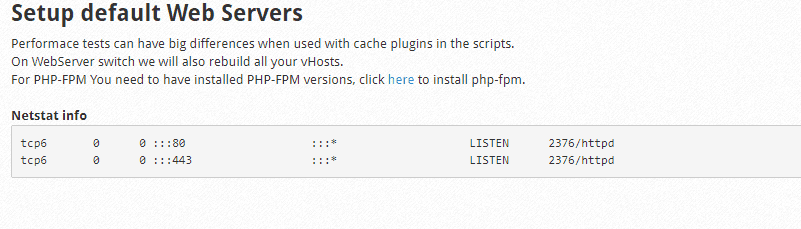
In addition, you can SSH into the VPS and use the netstat command to check the connection port.
Before
tcp6       0      0 :::80                 :::*                    LISTEN      2376/httpd
tcp6       0      0 :::443                :::*                   LISTEN     2376/httpd
After
tcp        0      0 45.252.249.104:80       0.0.0.0:*               LISTEN      10903/nginx: master
tcp        0      0 45.252.249.104:443      0.0.0.0:*               LISTEN      10903/nginx: master
tcp6       0      0 :::8181                 :::*                    LISTEN      10813/httpd
tcp6       0      0 :::8443                 :::*                    LISTEN      10813/httpd
III. Summary
So AZDIGI has completed showing you how to convert Web Server Apache => Nginx & Apache quickly with just a few clicks, for other web servers, you can do the same. Hopefully, with the above article, you can install the web server you want to bring better performance to your server and websites.
If you find the article helpful, please share it widely! You can refer to other articles about CWP at the link below:
If you need assistance, you can contact support in the ways below:
- Hotline 247: 028 888 24768 (Ext 0)
- Ticket/Email: You use the email to register for the service and send it directly to: support@azdigi.com
You might also like
About the author

Thạch Phạm
Đồng sáng lập và Giám đốc điều hành của AZDIGI. Có hơn 15 năm kinh nghiệm trong phổ biến kiến thức liên quan đến WordPress tại thachpham.com, phát triển website và phát triển hệ thống.