Nội dung
In this tutorial, AZDIGI will help you backup CyberPanel to Google Drive using Rclone. This will help you keep your data safe.
I. Introduction
At the present time, CyberPanel already supports backing up data to Google Drive or in the CyberPanel interface. However, I have encountered a few cases where this feature failed to be used anymore.
And my solution is to use a 3rd party software called Rclone to upload previously backed-up data to Google Drive.
II. Backup CyberPanel on Google Drive with Rclone
To back up CyberPanel to Google Drive with Rclone, we need to do these 4 steps.
Step 1: SSH into your CyberPanel system
To back up CyberPanel to Google Drive using Rclone, we first need to SSH or access your VPS/server with root privileges. If you don’t know how to SSH into your VPS/Server, you can refer to the following tutorial:
After successfully SSH, we continue with step 2 to configure CyberPanel backup every day.
Step 2: Configure CyberPanel Backup Every Day
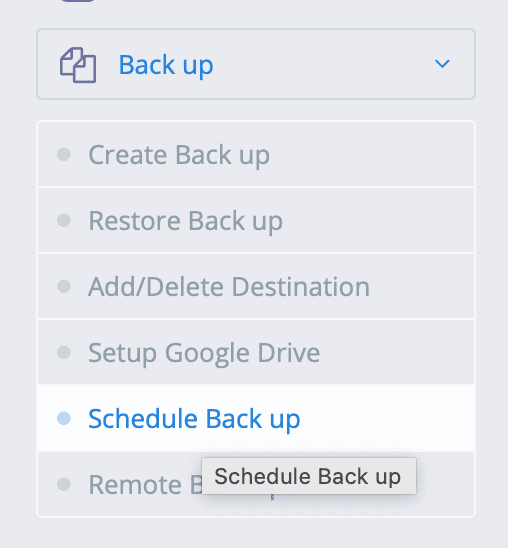
In your CyberPanel interface, select Back up Back up > Schedule Back up to schedule data backup. Please select Schedule Back up as shown below:
At the backup scheduler interface, you need to configure it as a daily or weekly backup, depending on your needs, and the path to save the backup file should be at “/home/backup“. Because in the following steps, we will need to configure the command to upload data to Google Drive related to this path.
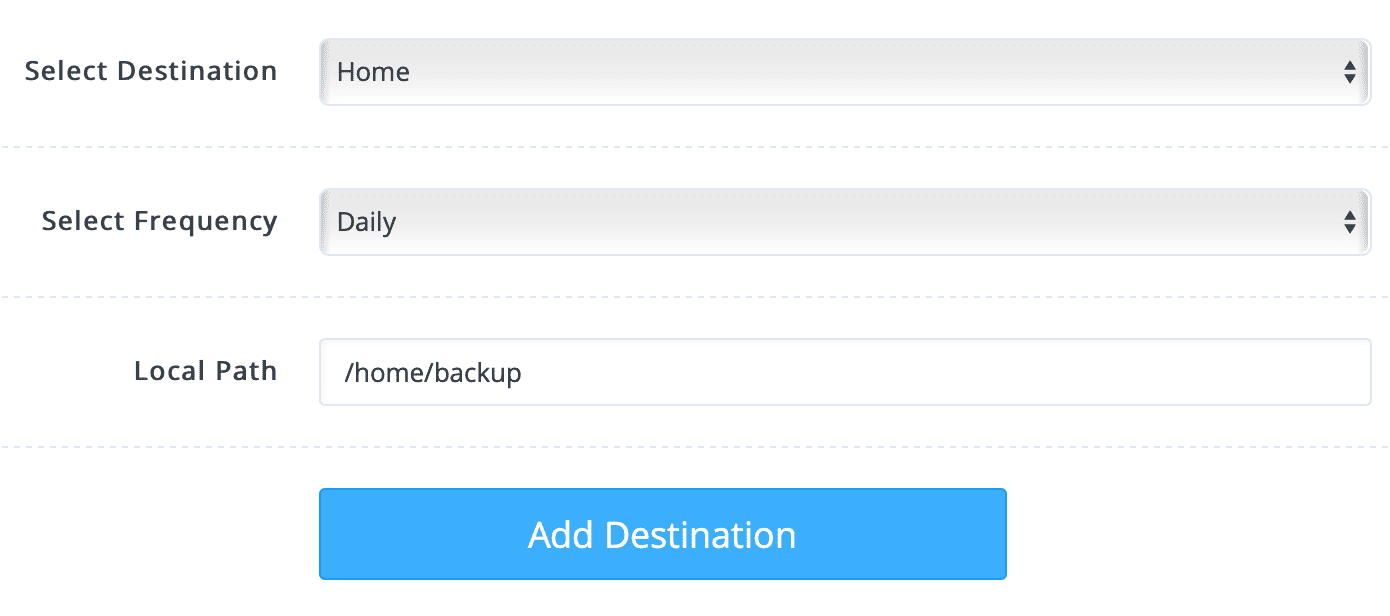
Then select Add Destination to complete the CyberPanel backup configuration every day. After successfully adding, you will see a backup schedule as follows: If you want to delete this backup schedule, just select the red X.

So every time CyberPanel backs up all your websites to the /home/backup path and the backup log will be saved at the /usr/local/lscp/logs/back_log.x.x.x path.
We continue to step 3 to install Rclone on the server.
Step 3: Install Rclone into the Linux server
To install Rclone on the Linux server, we need to execute the following commands:
cd /root/
wget https://downloads.rclone.org/v1.53.3/rclone-v1.53.3-linux-amd64.zip
unzip rclone-v*.zip
cp rclone-v*-linux-amd64/rclone /usr/sbin/
Explanation of the above commands:
- Command 1: Move to the root directory
- Command 2: Download Rclone version 1.53.3 for Linux. You can see more versions at the link
https://downloads.rclone.org. - Command 3: Extract the downloaded Rclone file.
- Command 4: Copy the rclone file to the sbin directory so that the rclone command can be used directly later.
Step 4: Configure Rclone with the Drive account
First, run the following command to launch the Rclone configurator:
rclone config
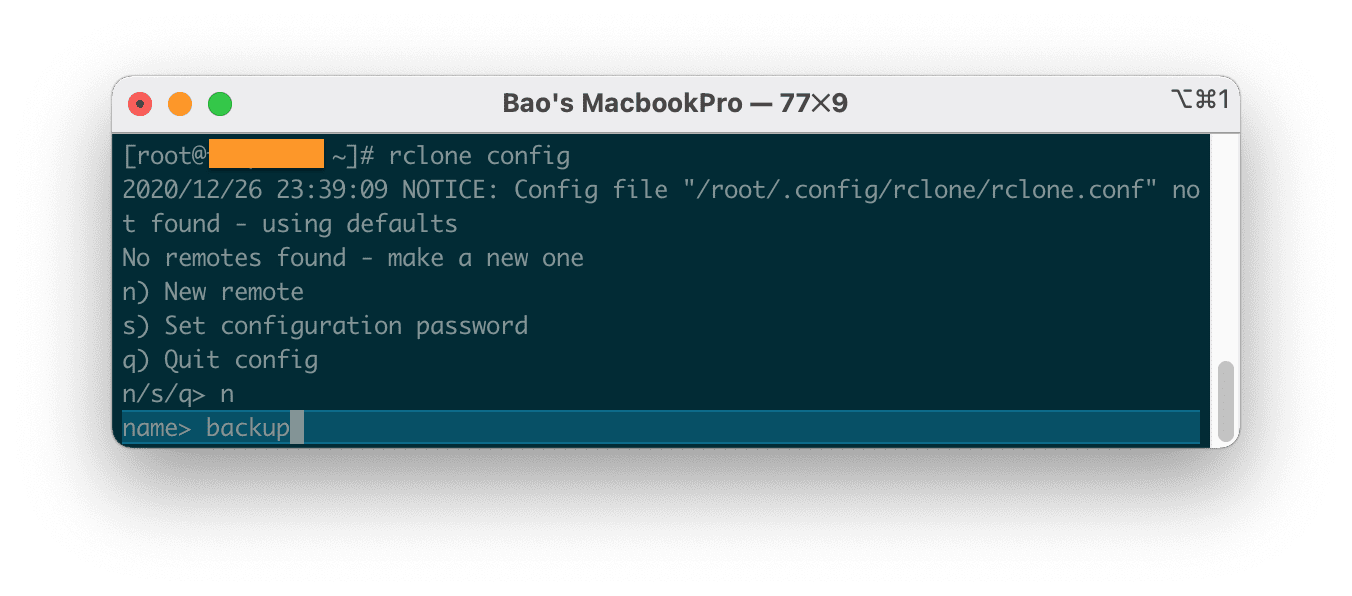
In the first step, you choose n and name this connection backup, this name you can completely change if you want, but the following steps need to follow your name.
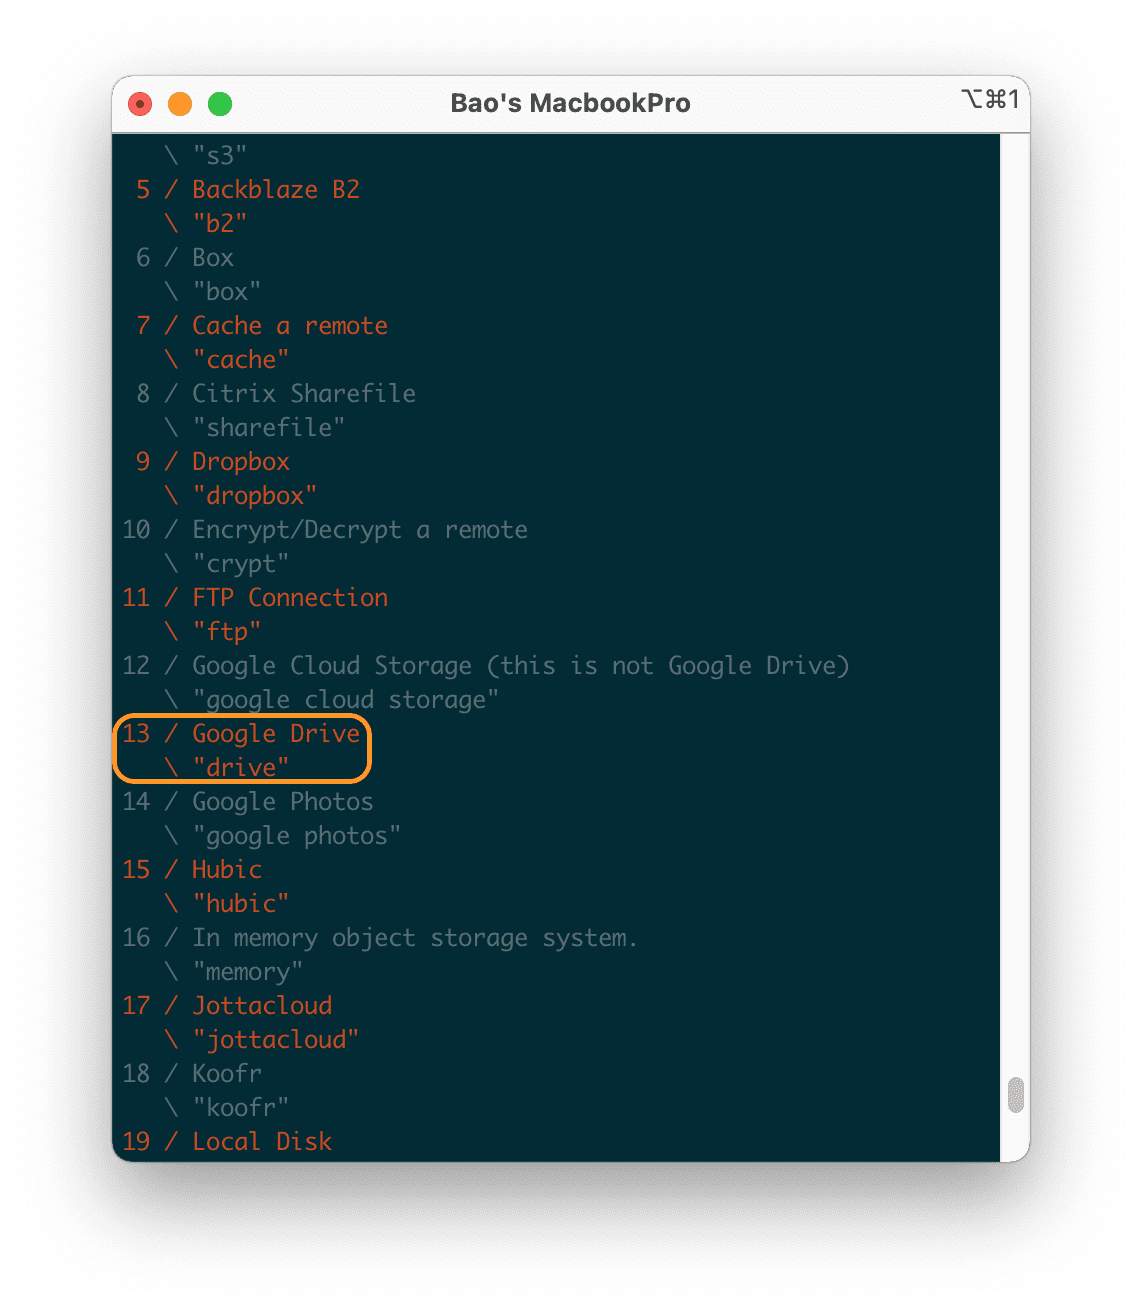
After entering the name and selecting Enter, to continue, we will have a list of many hosting providers that you can choose from. But here we are working on Google Drive, so I will choose ID 13.
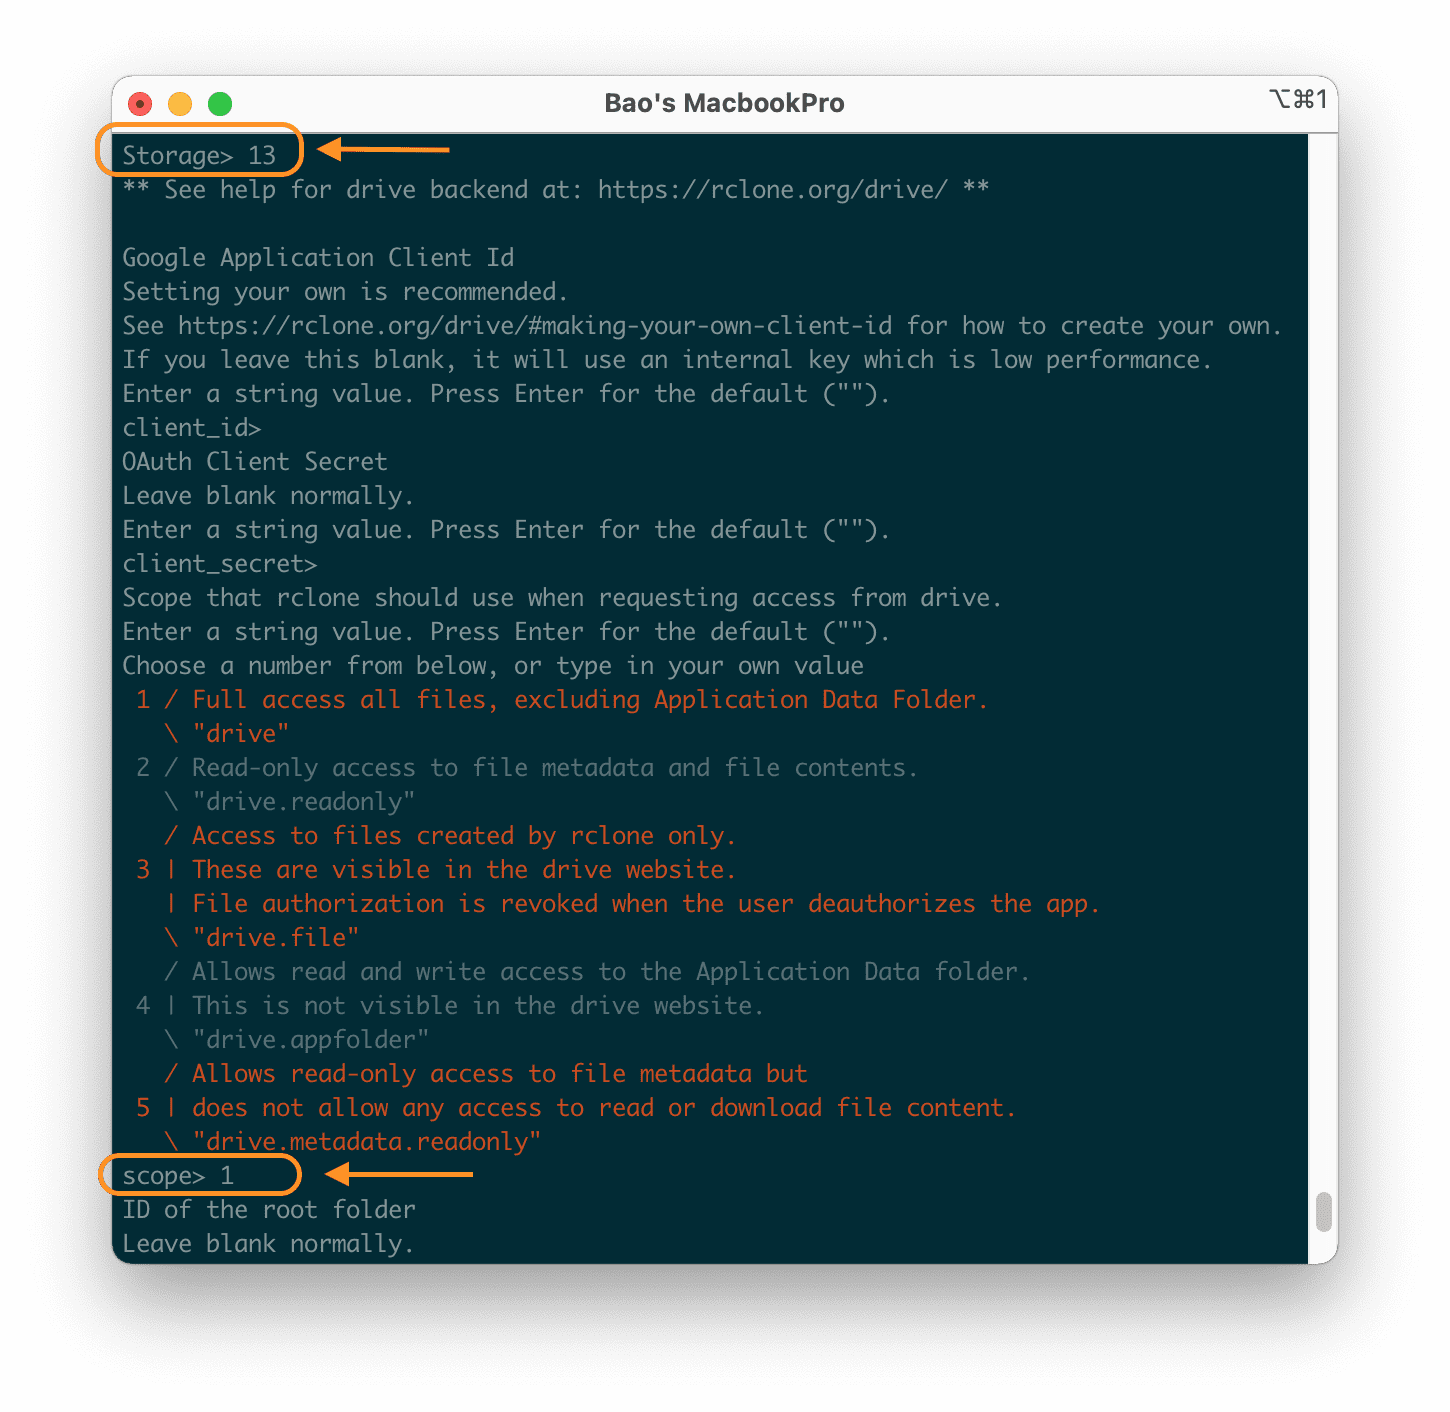
In the following items, you should Enter to ignore it so that Rclone uses the default configuration.
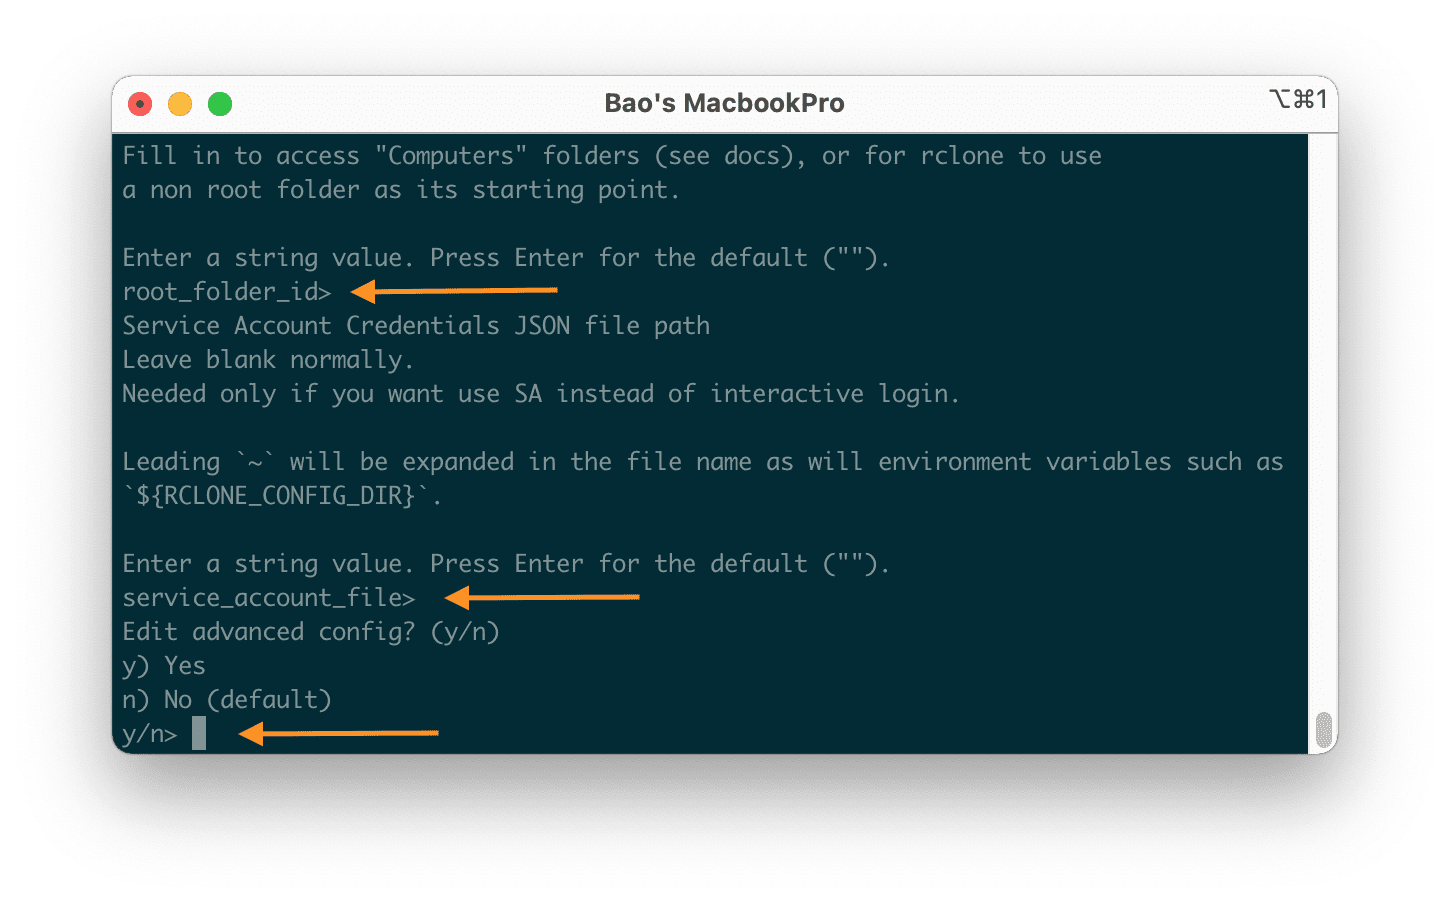
The next options are similar, you should leave the default. Next, you will receive an access link. Please use this link to access your Google Drive account.
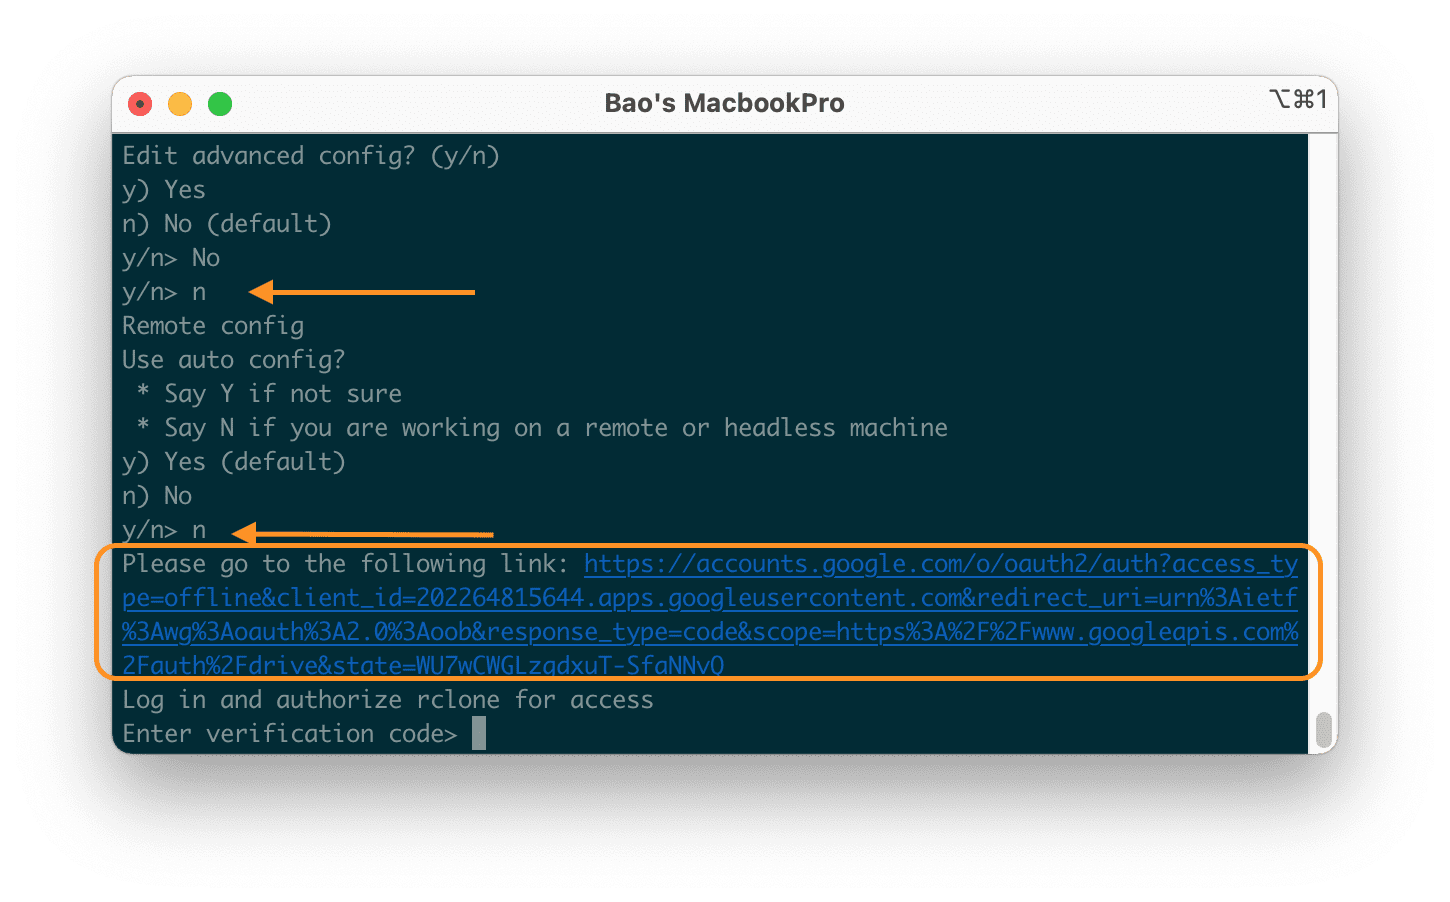
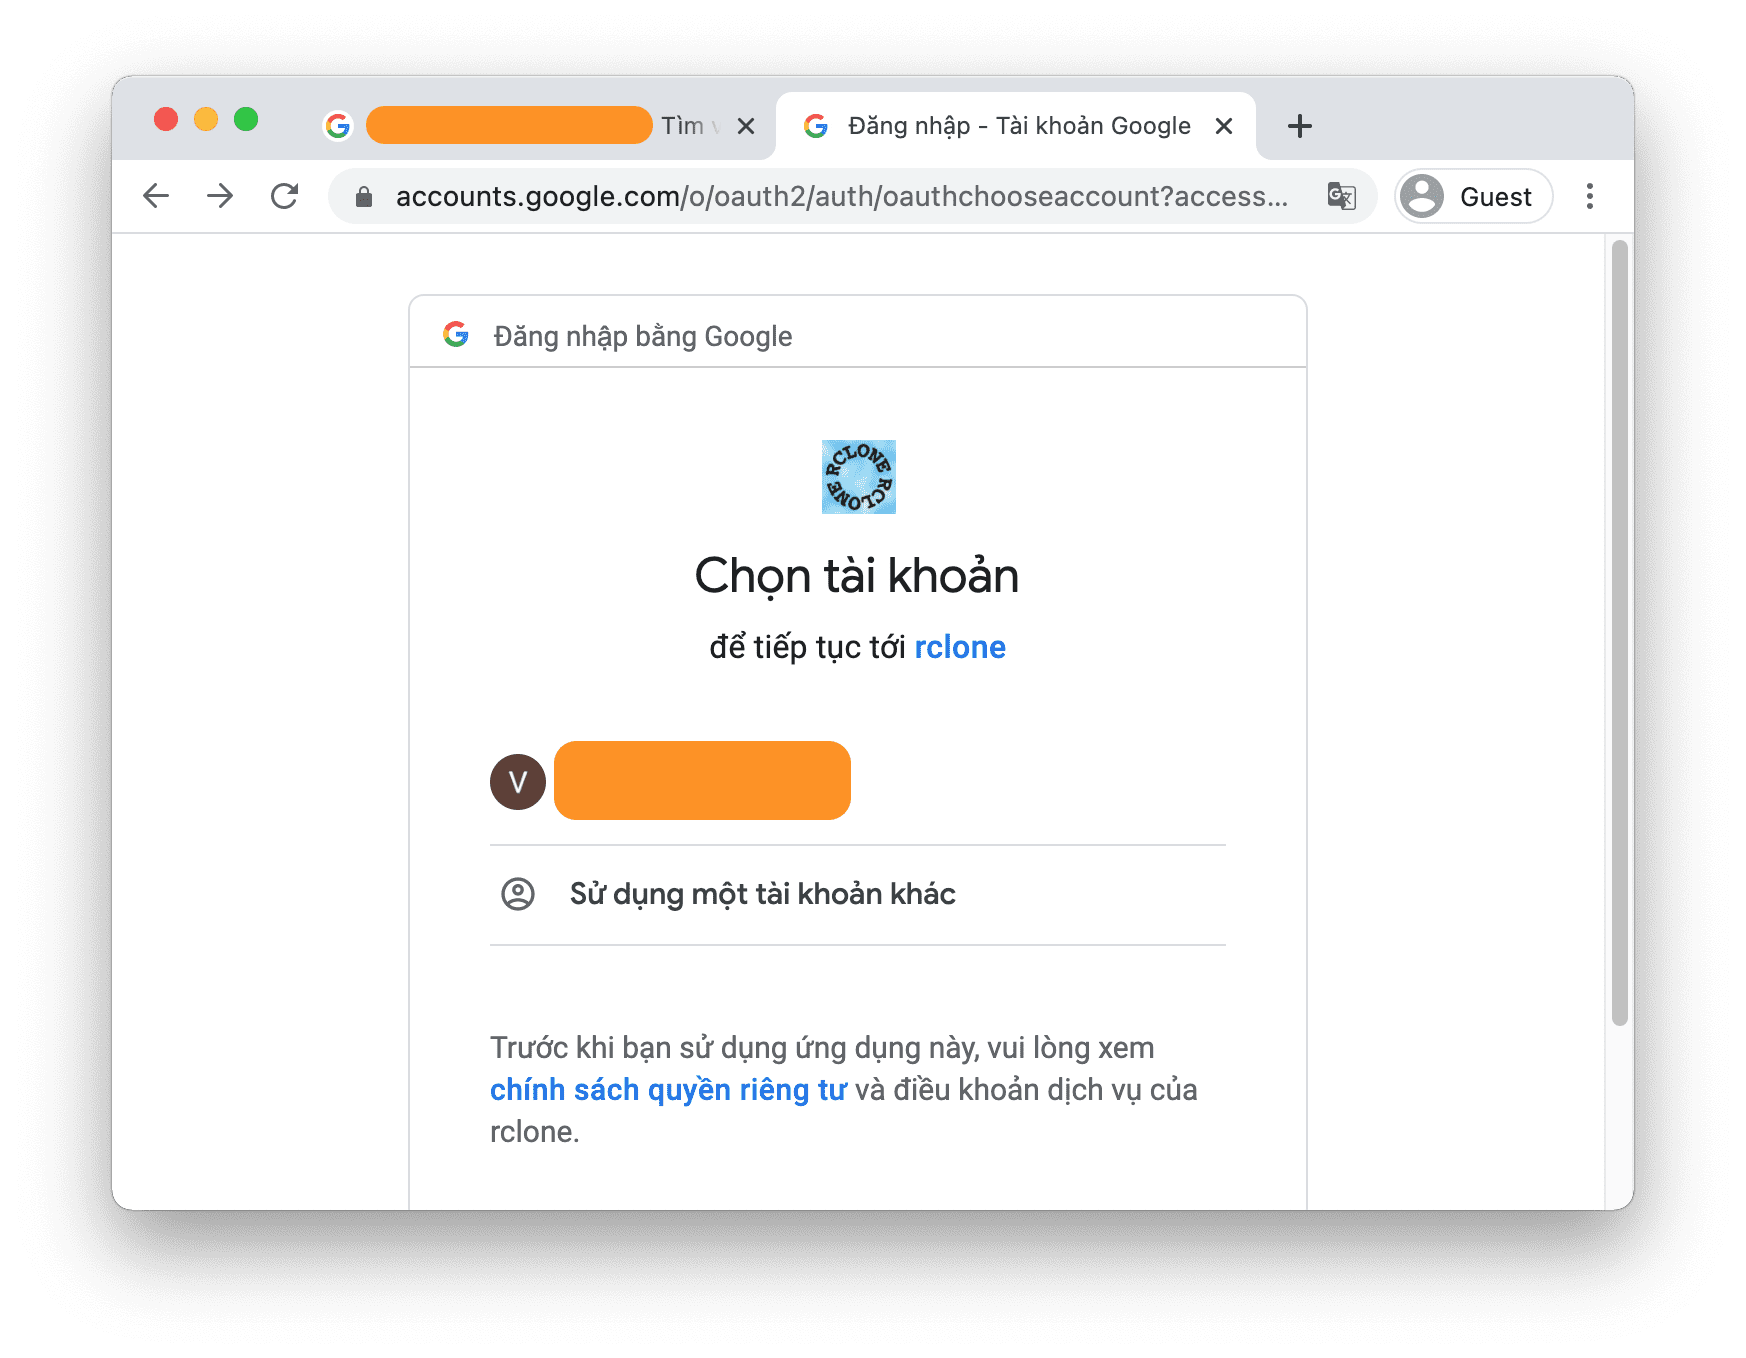
When accessing that link, remember to choose the correct account that you need to link.
Then you choose to allow Rclone to access Drive as shown below:

After authorizing, you will receive an authentication code.
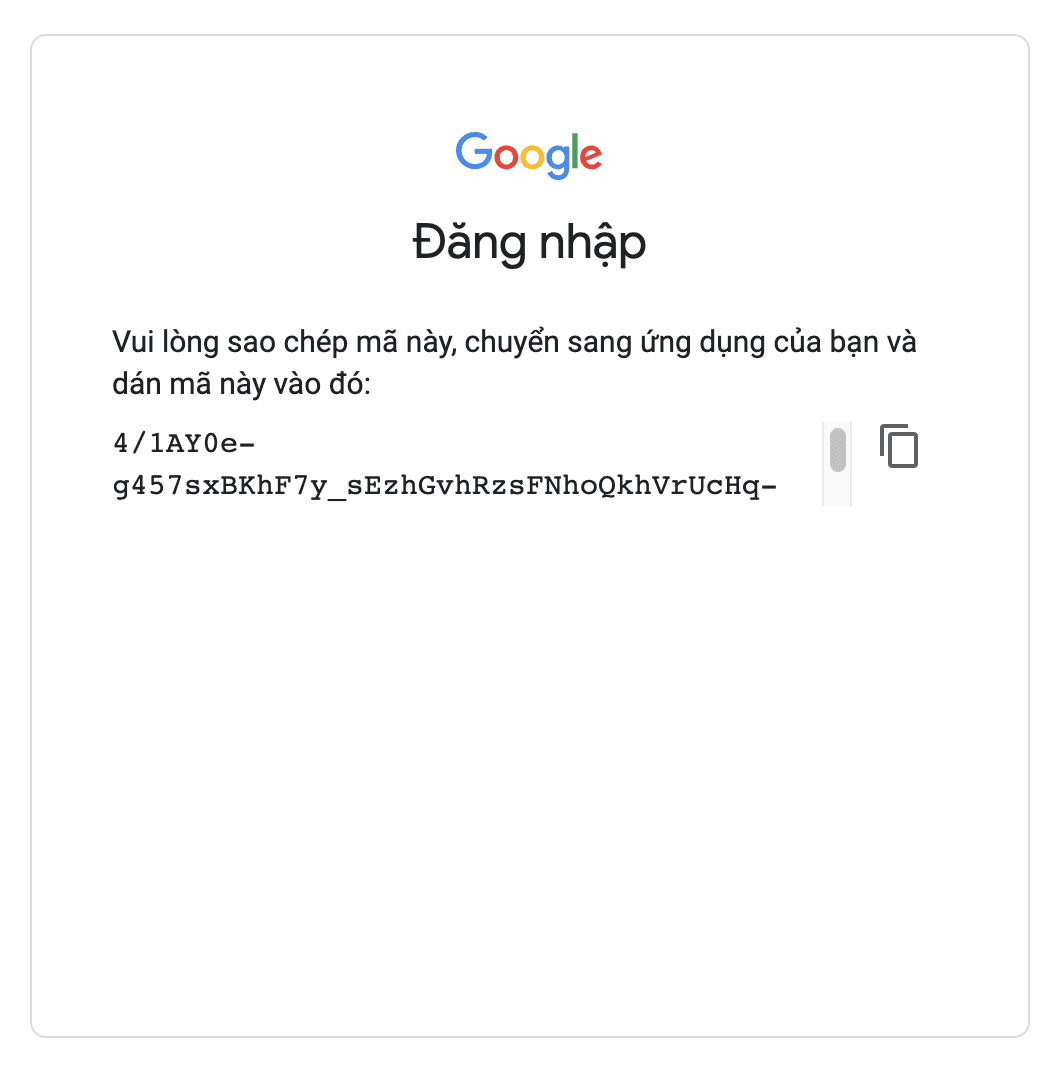
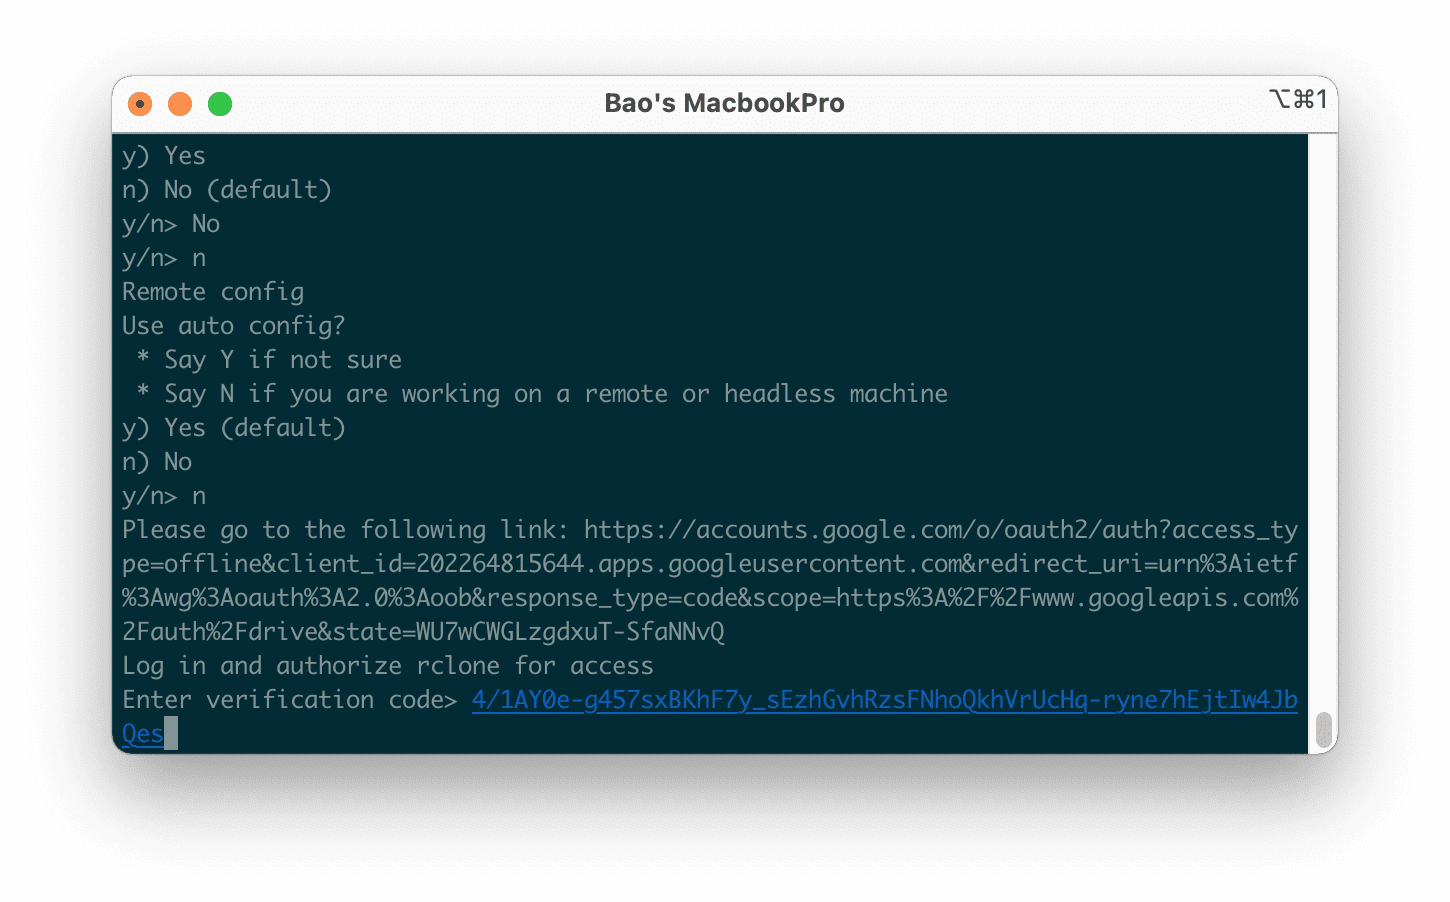
Please copy this code and paste it in the Verification code of Rclone as shown below:
Rclone will then ask if you are using shared memory. If yes, then you just need to select y, and then a list of shared memories will be displayed for us to choose with the corresponding number.
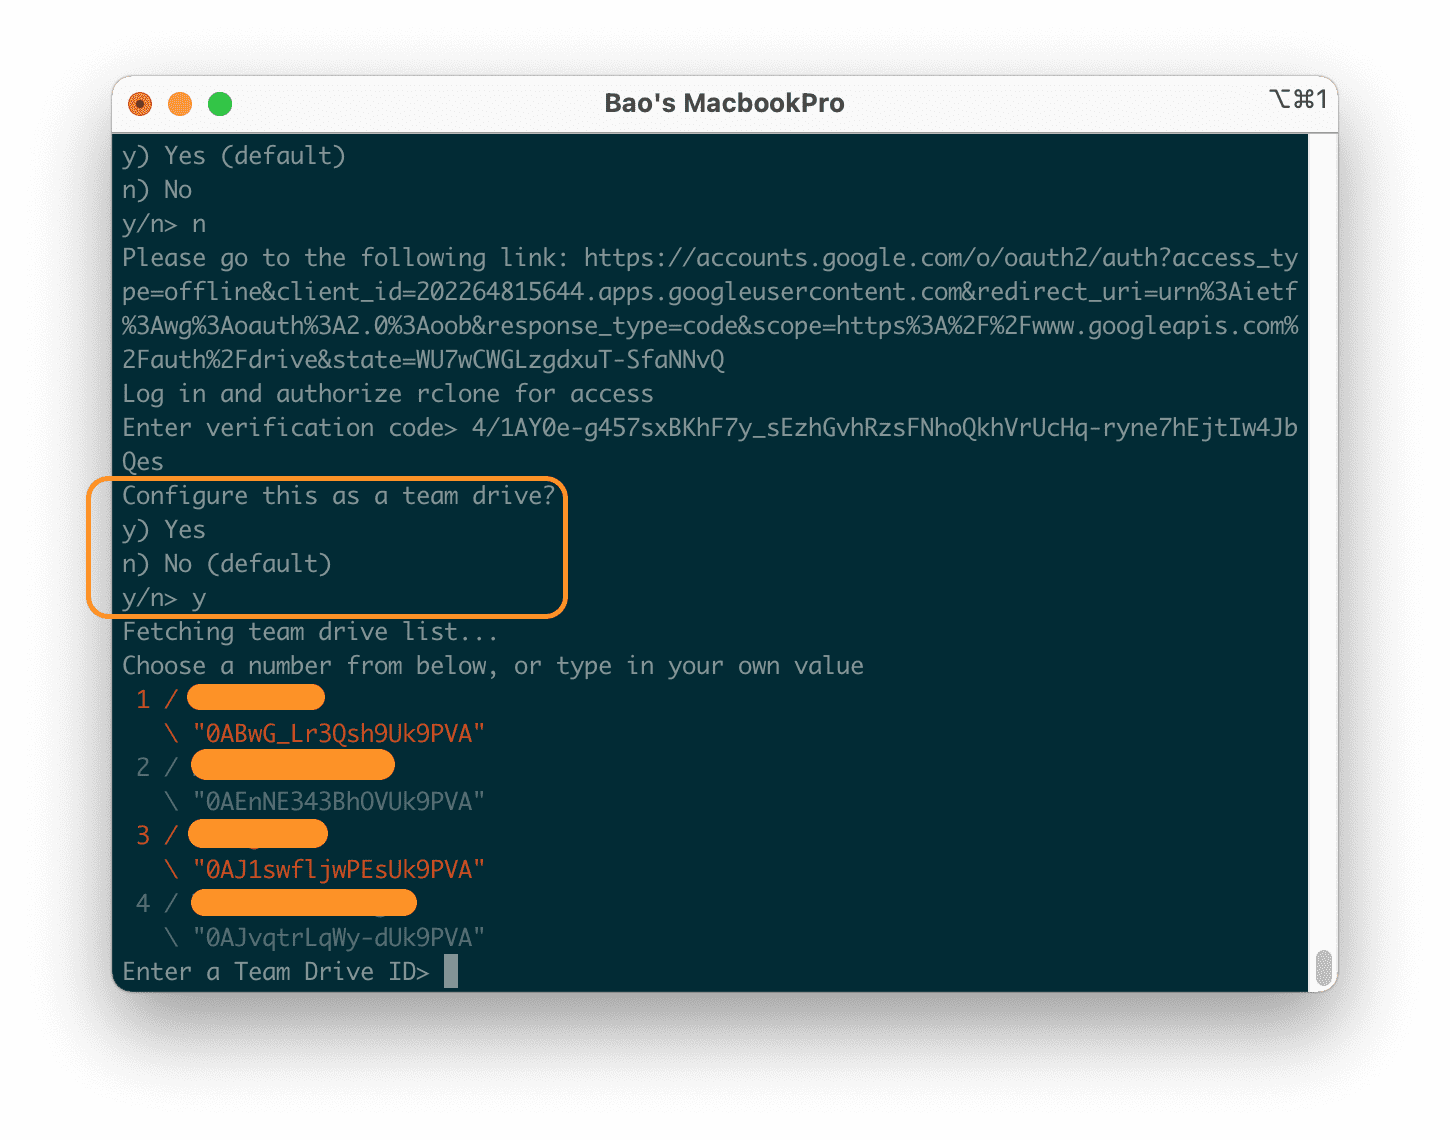
If you are backing up to a personal account, just select n and the following steps are similar to configuring shared storage.
In the next step, we continue to Enter to use the default configuration and finally select q to complete the Rclone configuration process.
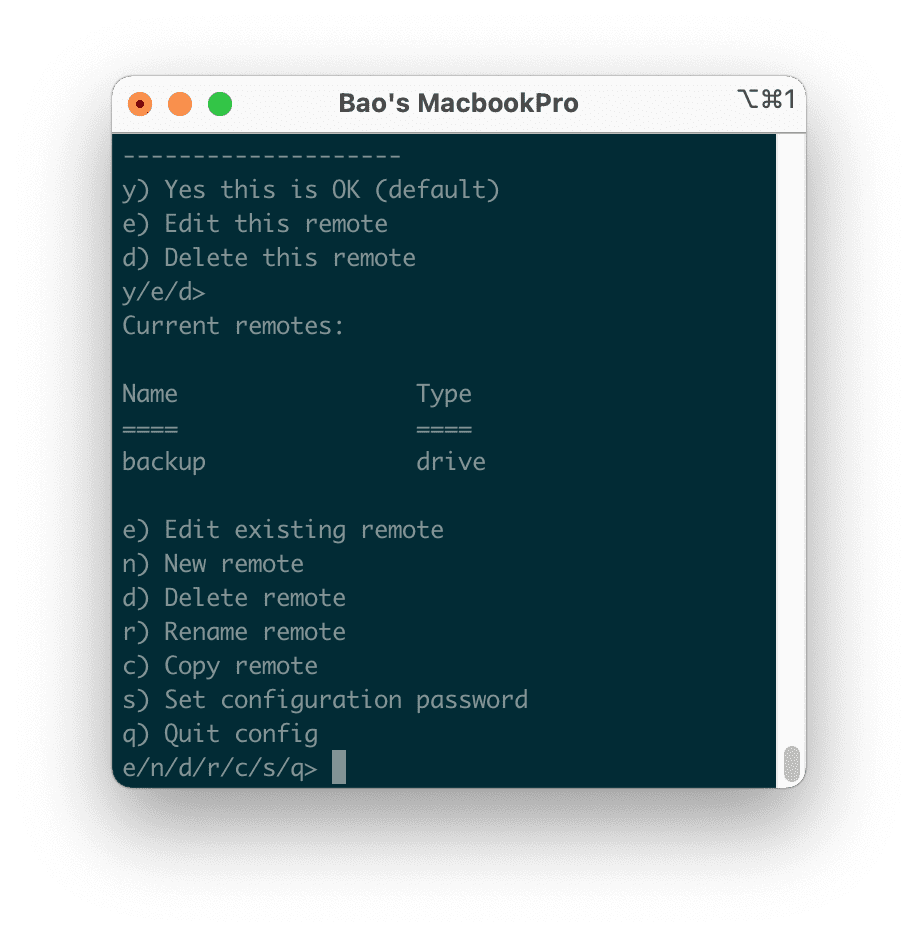
So the Rclone configuration process is done, now we only have the last step to check if the file upload to Gdrive is working with the following step:
Step 4: Check to upload files to Google Drive
To check, you just need to create a random file in the /home/backup directory and then run the following command:
/usr/sbin/rclone moveto /home/backup/ backup:TENTHUMUC/
Here TENTHUMUC will be the name of the folder you create on your personal Google Drive or Group Drive.
Below I have created a file called test.txt, and then I run the push command to Google Drive, the file no longer exists there but has been successfully uploaded to Google Drive.


After the test is successful, we just need to add that command to the crontab.
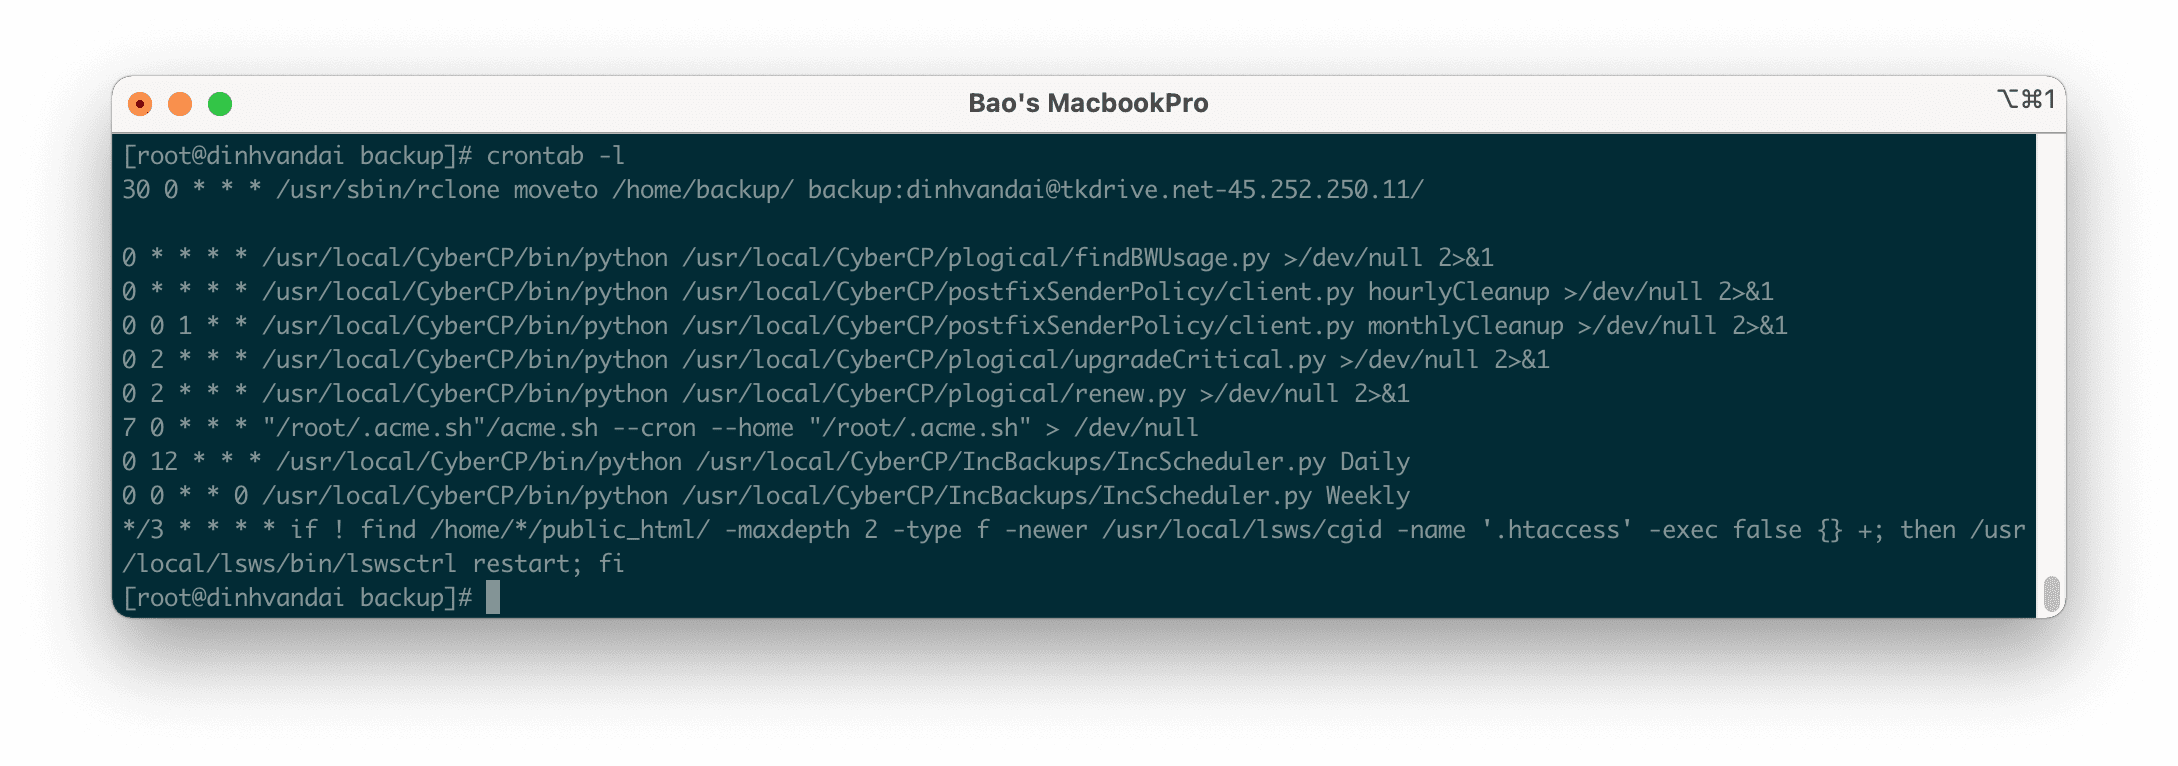
Here I will order Crontab to run at 0:30 am to make sure CyberPanel has fully backed up data.
III. Summary
With just the above 4 steps, we have successfully backed up CyberPanel to Google Drive with Rclone.
Hopefully, this article backing up CyberPanel to Google Drive will help you solve your problem.
Wishing you success.
- See also: The general guide of CyberPanel.
If you need assistance, you can contact support in the ways below:
- Hotline 247: 028 888 24768 (Ext 0)
- Ticket/Email: You use the email to register for the service and send it directly to: support@azdigi.com .

