This tutorial guides you through installing Coolify on an Ubuntu VPS, from running the installation command to creating an admin account and completing the setup. The entire process was performed and screenshotted on a real VPS.
📖 Previous article: Part 1, What is Coolify?
I. VPS Preparation
Minimum Requirements
- OS: Ubuntu 22.04 or 24.04 LTS (recommended). Also supports Debian, CentOS, Alpine, Arch
- RAM: 2 GB minimum, 4 GB recommended
- CPU: 2 cores or more
- Disk: 30 GB or more
- Permissions: Root access (mandatory)
💡 Tip: Use a fresh VPS (fresh install) to avoid conflicts with existing software. Coolify will automatically install Docker if not already present.
Required Open Ports
- 22: SSH
- 80: HTTP (for Lets Encrypt and web traffic)
- 443: HTTPS
- 8000: Coolify dashboard (default)
II. Installing Coolify
SSH into your VPS as root and run one single command:
curl -fsSL https://cdn.coollabs.io/coolify/install.sh | bashThe script will automatically:
- Install required packages (curl, wget, git, jq, openssl)
- Install Docker Engine (v27+) if not already installed
- Configure Docker daemon (logging, network pool)
- Create
/data/coolifydirectory - Generate SSH key for server management
- Pull Docker images (Coolify, PostgreSQL, Redis, Realtime)
- Start all containers
On my VPS (Ubuntu 24.04, 4GB RAM), the entire process took approximately 2-3 minutes:
==========================================
   Coolify Installation
==========================================
| Operating System  | ubuntu 24.04
| Docker            | 27.0
| Coolify           | 4.0.0-beta.468
| Helper            | 1.0.12
| Realtime          | 1.0.11
==========================================
Step 1/9: Installing required packages... Done.
Step 2/9: Checking OpenSSH server... Done.
Step 3/9: Installing Docker... Done.
Step 4/9: Configuring Docker... Done.
Step 5/9: Downloading files... Done.
Step 6/9: Setting up environment... Done.
Step 7/9: Checking variables... Done.
Step 8/9: Generating SSH key... Done.
Step 9/9: Installing Coolify... Done.
Coolify is ready!
Your instance: http://YOUR_IP:8000
🚨 Important: After installation completes, access immediately http://IP:8000 to create the admin account. If someone else accesses it first, they could take control of your server!
III. Creating Admin Account
Open your browser and navigate to http://VPS_IP:8000. Coolify will display the registration form:
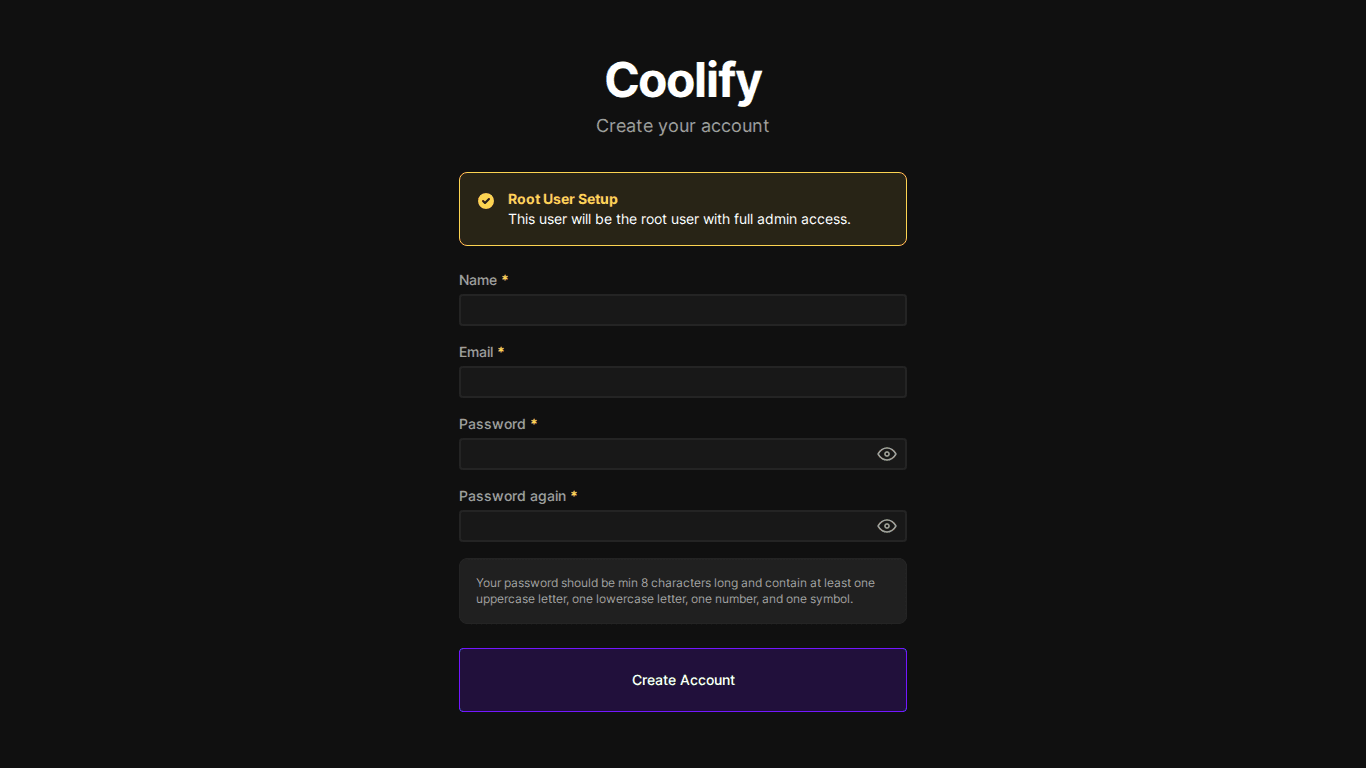
Fill in Name, Email, Password → click Register.
IV. Onboarding – Initial Setup
After registration, Coolify guides you through setup in 3 steps:
Step 1: Choose Server Type
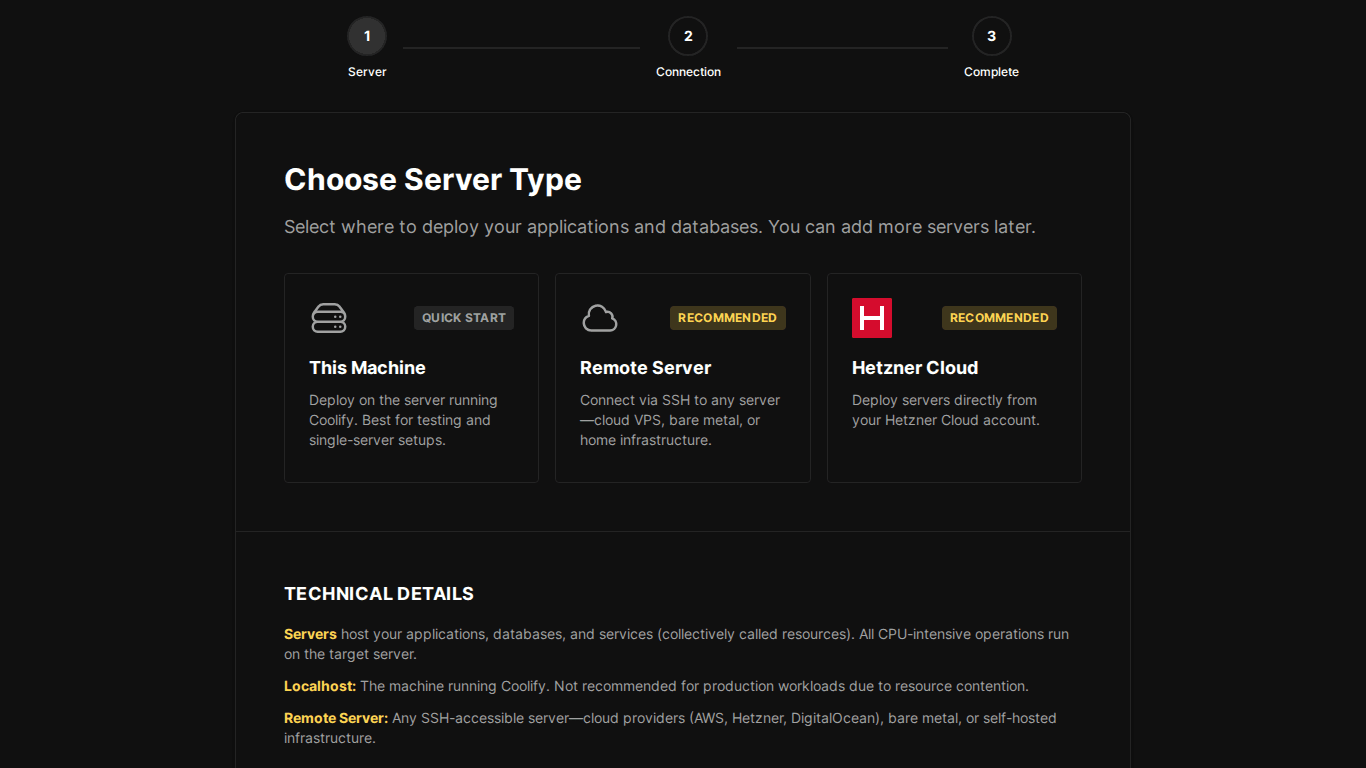
There are 2 options:
- Quick Start (recommended): Use the same server that runs Coolify to deploy apps. Suitable for most users.
- Recommended: Connect to a separate remote server via SSH. Use when you want to separate Coolify from production servers.
Step 2: SSH Authentication
Select Use Existing Key. Coolify already generated an SSH key during installation (step 8/9), so you just need to select the existing key.
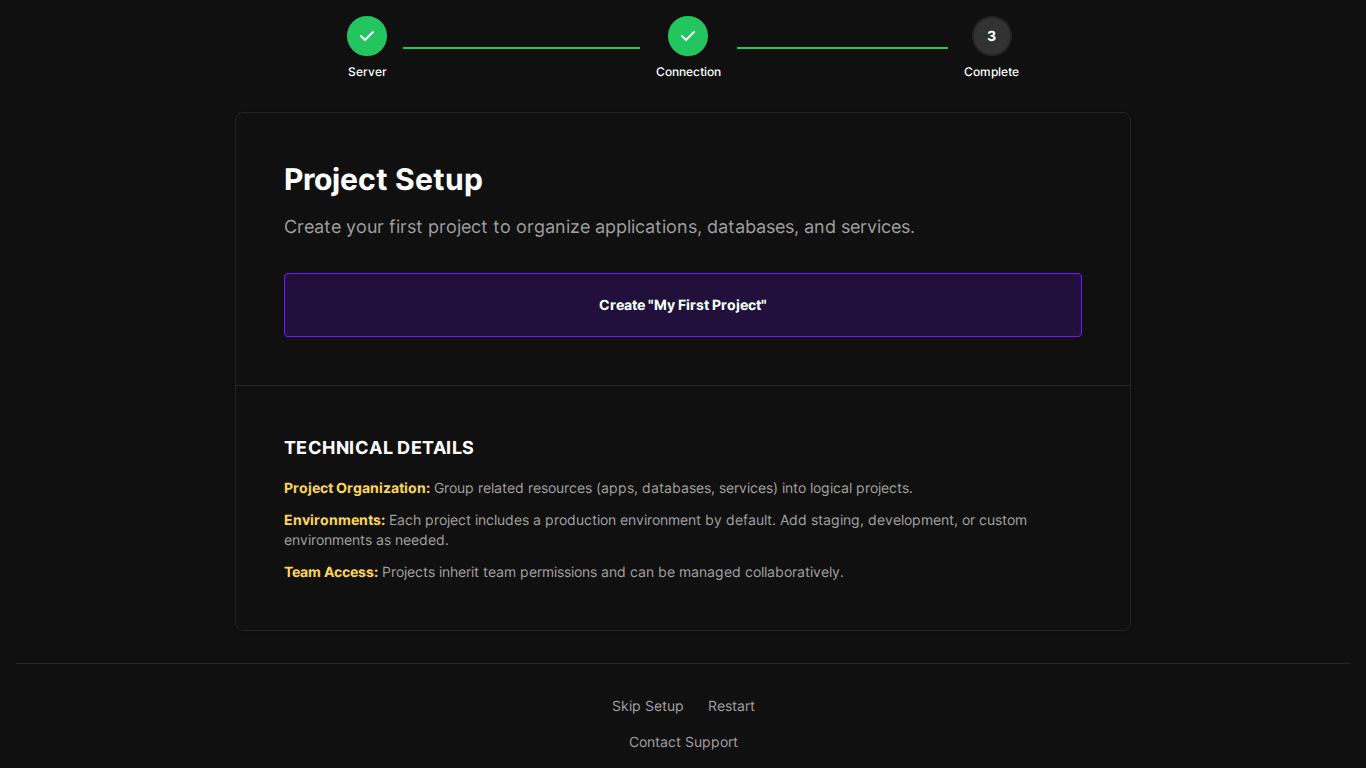
Step 3: Create Project
Click Create “My First Project”. Projects help group related applications together.
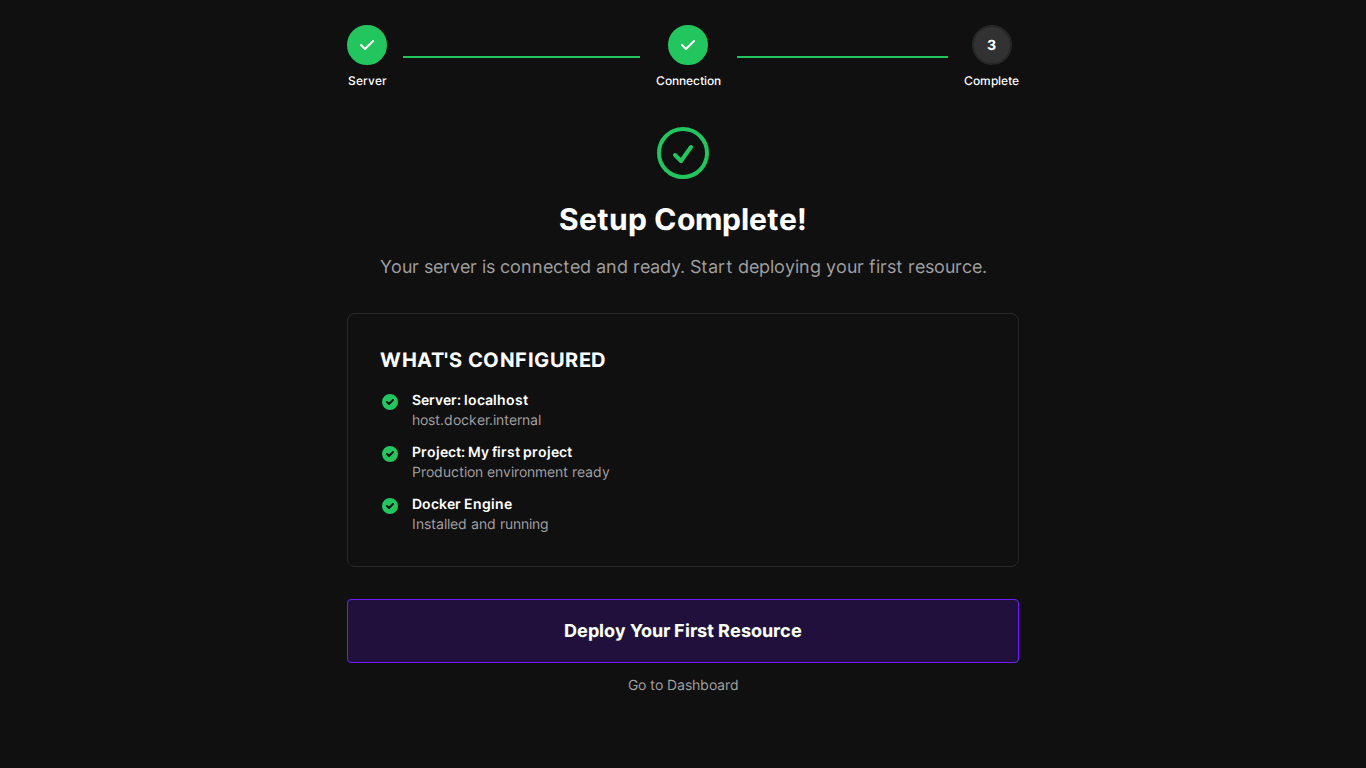
Setup Complete!
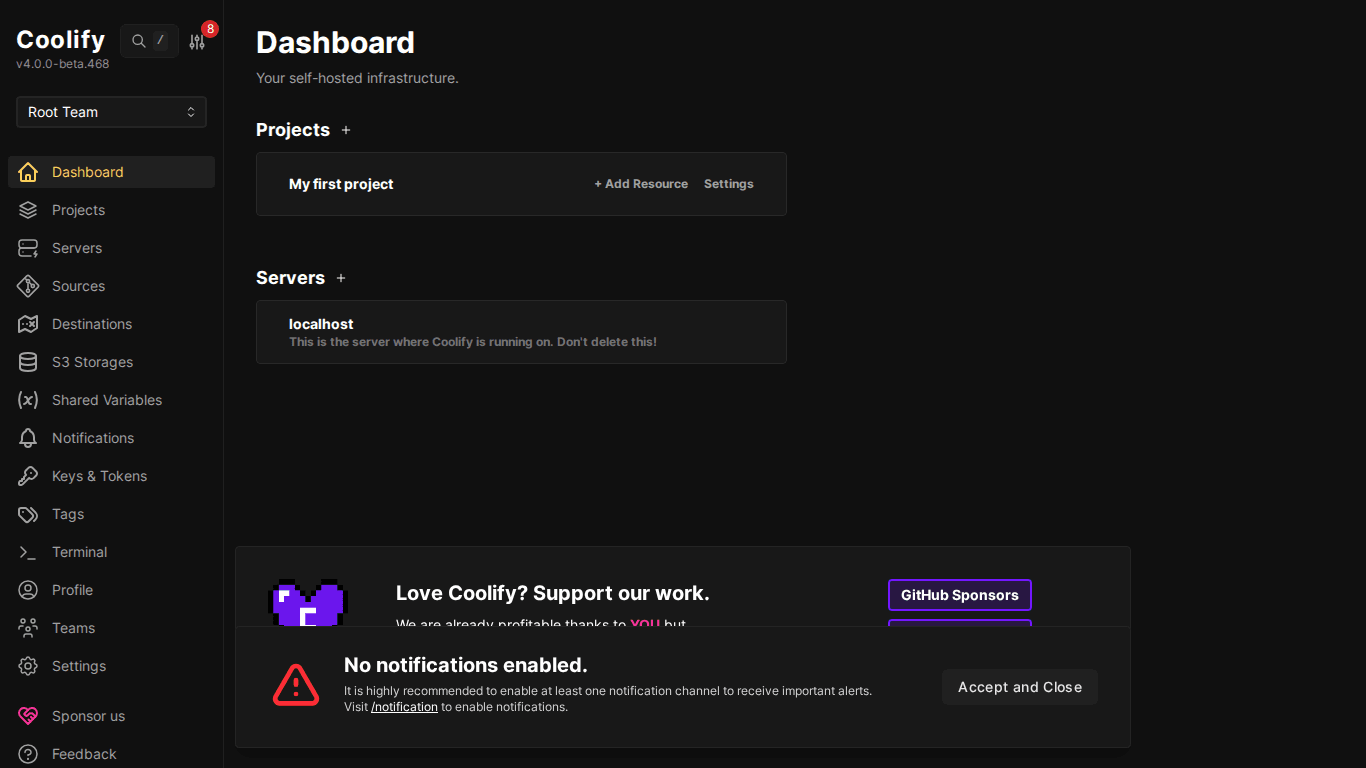
V. Exploring the Dashboard
After onboarding, Coolify takes you to the main dashboard:

Main sections of the dashboard:
- Projects: List of projects with “Add Resource” button to deploy apps/databases/services
- Servers: “localhost” server already connected: this is the VPS running Coolify
- Sidebar: Navigation menu to Projects, Servers, Keys, Sources, Teams, Settings
VI. Post-Installation Configuration
1. Backup .env file
The file /data/coolify/source/.env contains all credentials (database passwords, app keys, pusher secrets). Backup this file to a safe location (password manager, another machine):
cat /data/coolify/source/.env2. Set up domain for Coolify
By default, Coolify runs on http://IP:8000. To use a domain (e.g. coolify.yourdomain.com):
- Point DNS: create A record
coolify.yourdomain.com→ VPS IP - Go to Settings in Coolify → enter domain
- Coolify will automatically provision SSL certificate
3. Enable Notifications
Go to Settings → Notifications → enable at least 1 channel (Email, Discord, Telegram, Slack) to receive alerts when deployments fail or server encounters issues.
VII. Verifying Installation
SSH into the server and check running containers:
docker ps --format "table {{.Names}}\t{{.Status}}\t{{.Image}}"The output should show 5 containers:
NAMES              STATUS          IMAGE
coolify            Up 10 minutes   ghcr.io/coollabsio/coolify:4.0.0-beta.468
coolify-db         Up 10 minutes   postgres:15-alpine
coolify-redis      Up 10 minutes   redis:7-alpine
coolify-realtime   Up 10 minutes   ghcr.io/coollabsio/coolify-realtime:1.0.11
coolify-proxy      Up 10 minutes   traefik:v3.x
VIII. Common Issues & Solutions
- Cannot access port 8000: Check firewall (
ufw allow 8000) and security groups on cloud provider - Install script fails: Re-run the installation command: script will auto-detect and skip completed steps
- Docker pull slow/timeout: Could be server network: try again or switch VPS to different location
- SSH blocked after install: Docker daemon restart may change iptables: use VNC console to run
iptables -I INPUT -p tcp --dport 22 -j ACCEPT
IX. Summary
Installing Coolify takes just one command and a few minutes of waiting. After installation, you have a complete PaaS platform with web dashboard, Docker environment, and automatic SSL. The next article will guide you through deploying your first application to Coolify.
You might also like
- Coolify Interface - Detailed Dashboard Usage Guide
- Databases on Coolify — MySQL, PostgreSQL, Redis, MongoDB
- One-Click Services on Coolify — Deploy 294+ services with just 1 click
- Multi-Server & Scaling on Coolify — Expanding Your System
- What is Coolify? - Self-hosted alternative to Vercel, Heroku for free
- Coolify Production - Backup, Security
About the author

Trần Thắng
Expert at AZDIGI with years of experience in web hosting and system administration.