

Like OpenVPN or IPSec, WireGuard is a free VPN system that helps you establish an encrypted connection between the client and the server via an Internet connection. WireGuard operates at layer 3, designed as a virtual network interface of the Kernel for Linux. WireGuard was created as an alternative to IPSec in most use cases and relied on TLS-based solutions like OpenVPN, while WireGuard is more secure, faster, and easier to use.
In this article, AZDIGI will guide you to install WireGuard on Ubuntu 20.04, please follow along.
Requirements:
- Linux server (In this article, I will install on Ubuntu version 20.04)
- Public IP
WireGuard installation steps
Step 1: Update the system
Before installing, update your system to the latest version with the following command:
apt update && sudo apt upgrade -y
Step 2: Install WireGuard with the script
After updating the system, create a new folder and download the Wireguard script.
mkdir vpn && cd vpn
wget https://git.io/wireguard -O install.sh
chmod +x install.sh
./install.sh
After running the script, you will get the message below, please enter the following information:
Welcome to this WireGuard road warrior installer!
What port should WireGuard listen to?
Port [51820]: <= Nhấn Enter để thiết lập Port mặc định Enter a name for the first client: Name [client]: azdigi <= Tạo User bất kỳ Select a DNS server for the client: 1) Current system resolvers 2) Google 3) 1.1.1.1 4) OpenDNS 5) Quad9 6) AdGuard DNS server [1]: 3 <= Chọn loại máy chủ DNS, Ở đây mình chọn 1.1.1.1 (CloudFlare) WireGuard installation is ready to begin. Press any key to continue... <= Nhập phím bất kỳ để tiếp tục
Step 4: Download the WireGuard configuration file to your server
With step 3, you can connect and use WireGuard. However, I will write this extra step to help you download the configuration file directly from the browser to the client’s computer. To do this, please run the following command:
root@vpn:~# cd /root && python3 -m http.server
Serving HTTP on 0.0.0.0 port 8000 (http://0.0.0.0:8000/) ...
Then you access the browser, enter server-ip:8000 to view the configuration file and download it. If you do not have access to port 8000, then the port is not open on the firewall system. Please refer to the following article to open it:
Step 5: Setup & use WireGuard
1. Set up & use WireGuard on the computer
Before setting up, you need to have the WireGuard application. And you can download WireGuard from the WireGuard homepage for operating system platforms:
After downloading and installing the WireGuard software application on the client computer, click the + sign => select Import Tunnel(s) from File to add configuration.
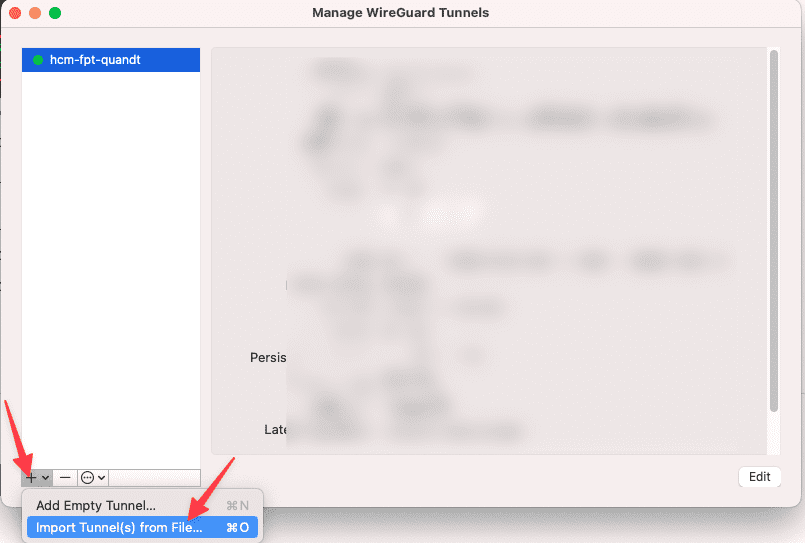
And to use it, you just need to click
- Activate: Activate use
- Deactivate: Deactivate use
2. Set up & use WireGuard on mobile
WireGuard is also available on mobile devices. To download, please visit the corresponding link below:

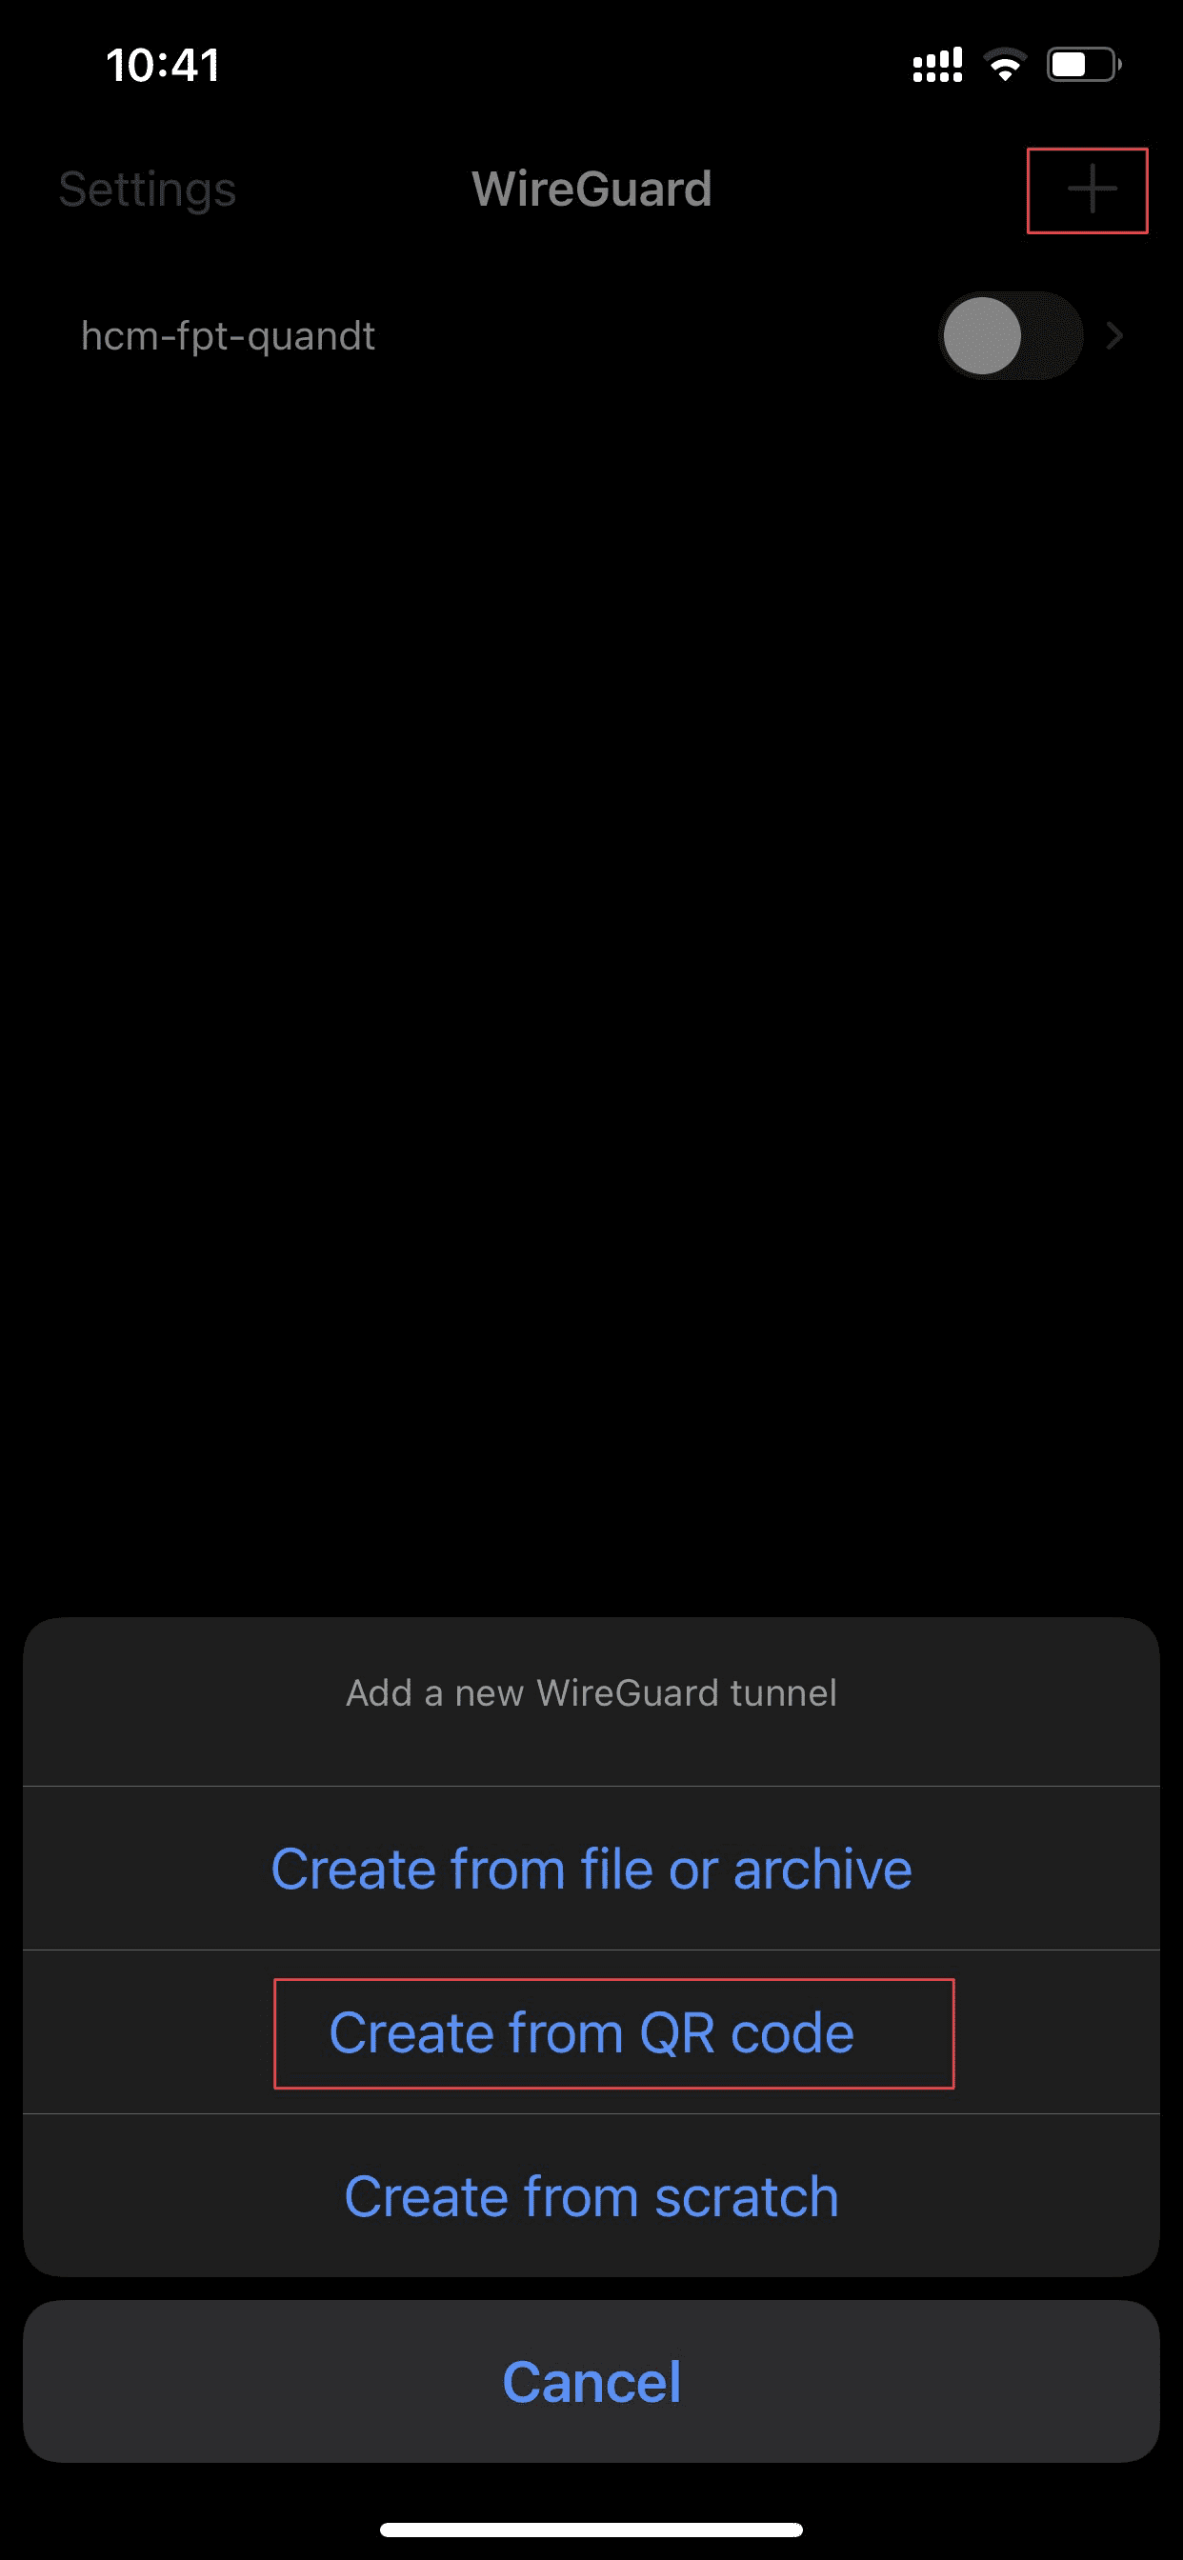
Next, open the WireGuard mobile application and select the + sign. Then you choose configuration options such as:
- Create from QR code: Scan the QR code as in Step 3
- Create from file or archive: Import the configuration file as in Step 4
Step 6: Check the internet connection
After the connection is complete, I will access the Internet to check if it works and if the IP is correct.
- IP check page: viewip.info
So AZDIGI has completed the steps to install WireGuard on Ubuntu 20.04. Wishing you success!
You can refer to other user manuals at the link below
If you need assistance, you can contact support in the ways below:
- Hotline 247: 028 888 24768 (Ext 0)
- Ticket/Email: You use the email to register for the service and send it directly to: support@azdigi.com
You might also like
- How to install WireGuard with Docker Compose on Ubuntu 22.04
- Instructions for installing OpenVPN on Linux server
- Install VPN Server on VPS with Outline VPN
- How to install Portainer to Manage Docker on Ubuntu 22.04
- Install the GNOME interface on Ubuntu 20.04 and Remote Desktop
- How to install NextCloud on Ubuntu 20.04 with NGINX
About the author

Thạch Phạm
Đồng sáng lập và Giám đốc điều hành của AZDIGI. Có hơn 15 năm kinh nghiệm trong phổ biến kiến thức liên quan đến WordPress tại thachpham.com, phát triển website và phát triển hệ thống.