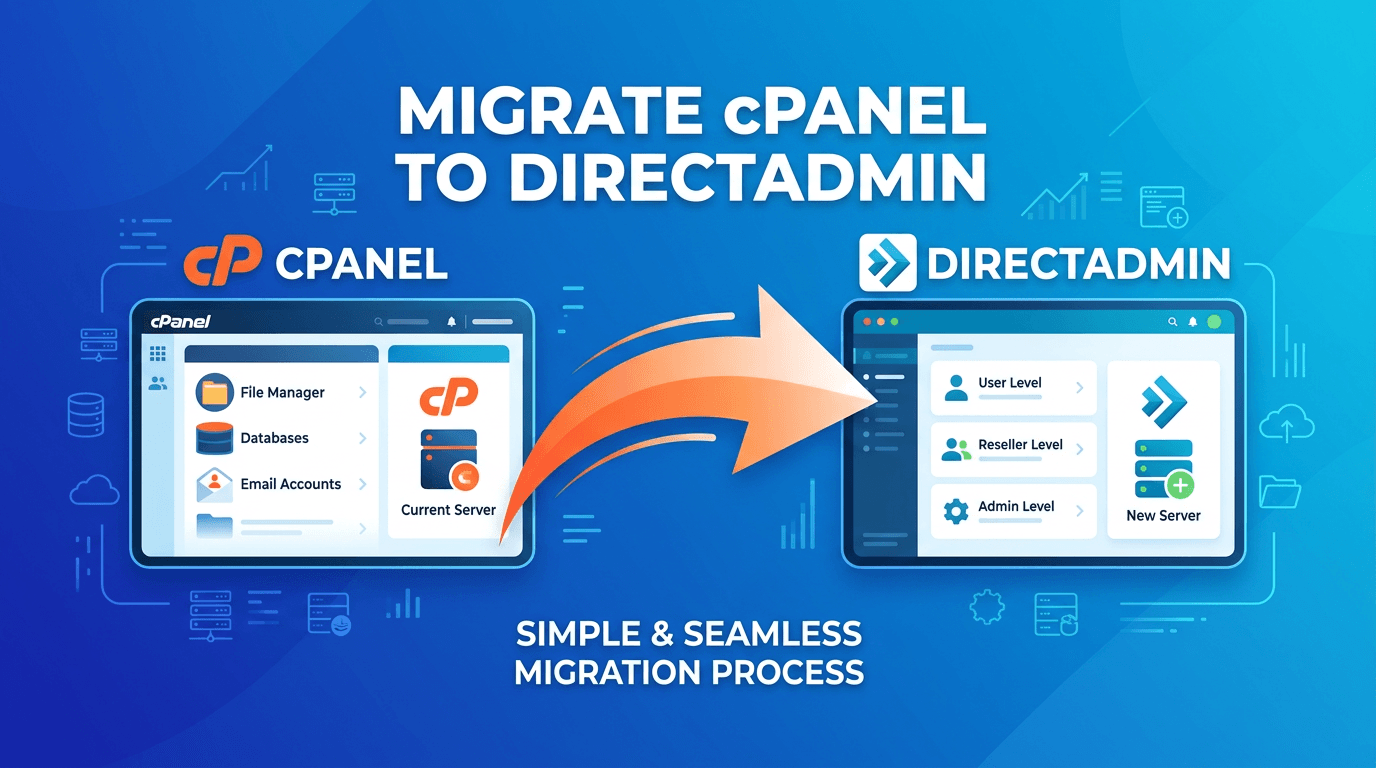
The most efficient and fastest way to migrate cPanel to DirectAdmin.
Terms used in the article:
- Restore
- Backup
I. Overview
When the cost of cPanel increases, DirectAdmin is a new choice and alternative solution for today’s Web Host administrators. DirectAdmin, a strong competitor to cPanel, has developed many features, advantages and greatly improved performance.
In environments like cPanel, migrating user data in the same Control is very simple. But what if a different control panel and specifically cPanel to DirectAdmin? The good news for administrators is that from the version 1.57.4 onwards, DirectAdmin has been supported to restore cPanel files on DirectAdmin. To do this, please go through the following steps.
II. Steps to migrate the cPanel user to DirectAdmin
2.1 Prerequisites
To migrate cPanel users to DirectAdmin smoothly without errors, your file and server need to meet the following mandatory conditions:
- The maximum character length for mysql users on cPanel is 16 characters. And the maximum character length for mysql user on DirectAdmin is 10 characters, so you need to check before migrating to avoid loss of database when migrating.
- The User name length in cPanel and DirectAdmin must match to avoid conflicts when creating databases, you can check with the following command:
On cPanel (run command as root)
ls /var/cpanel/users | awk ‘{print length, $0}’ | sort -nr | head -n1
On DirectAdmin (run as root in SSH)
/usr/local/directadmin/directadmin set max_username_length 16 restart
- DirectAdmin version must be 1.57.4 or higher, check the version with the command:
/usr/local/directadmin/directadmin v
2.2 Migration steps
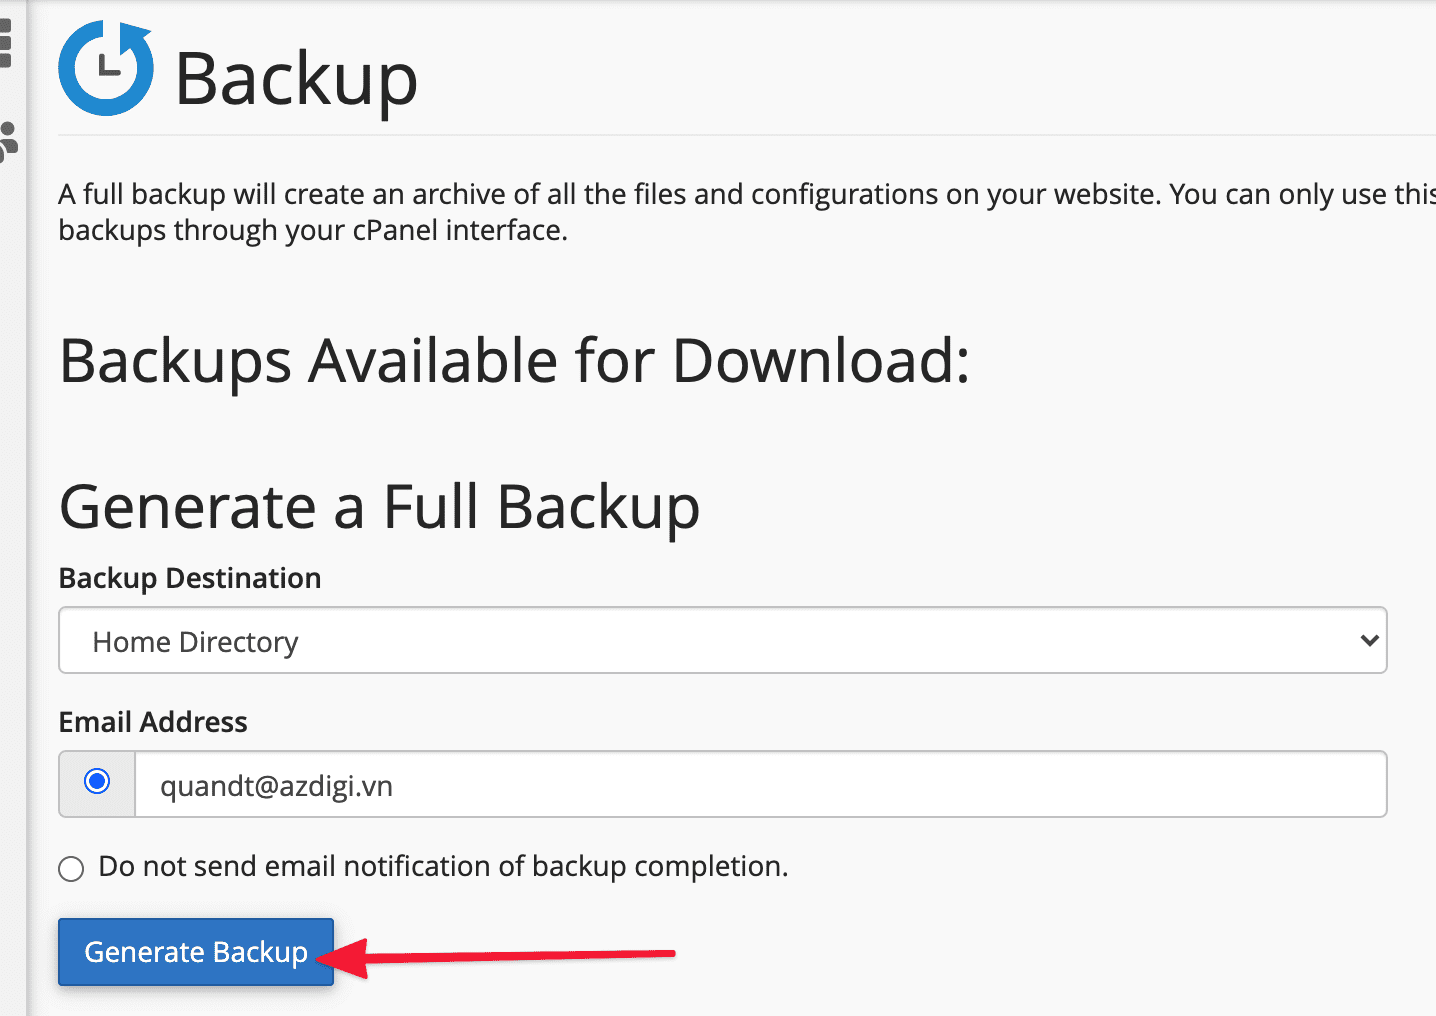
Step 1: Backup Full Account on cPanel
Backup with cPanel User’s right
At the cPanel interface of the user, you perform a Full Account Backup to the tar.gz file. To backup, click Backup as shown below:

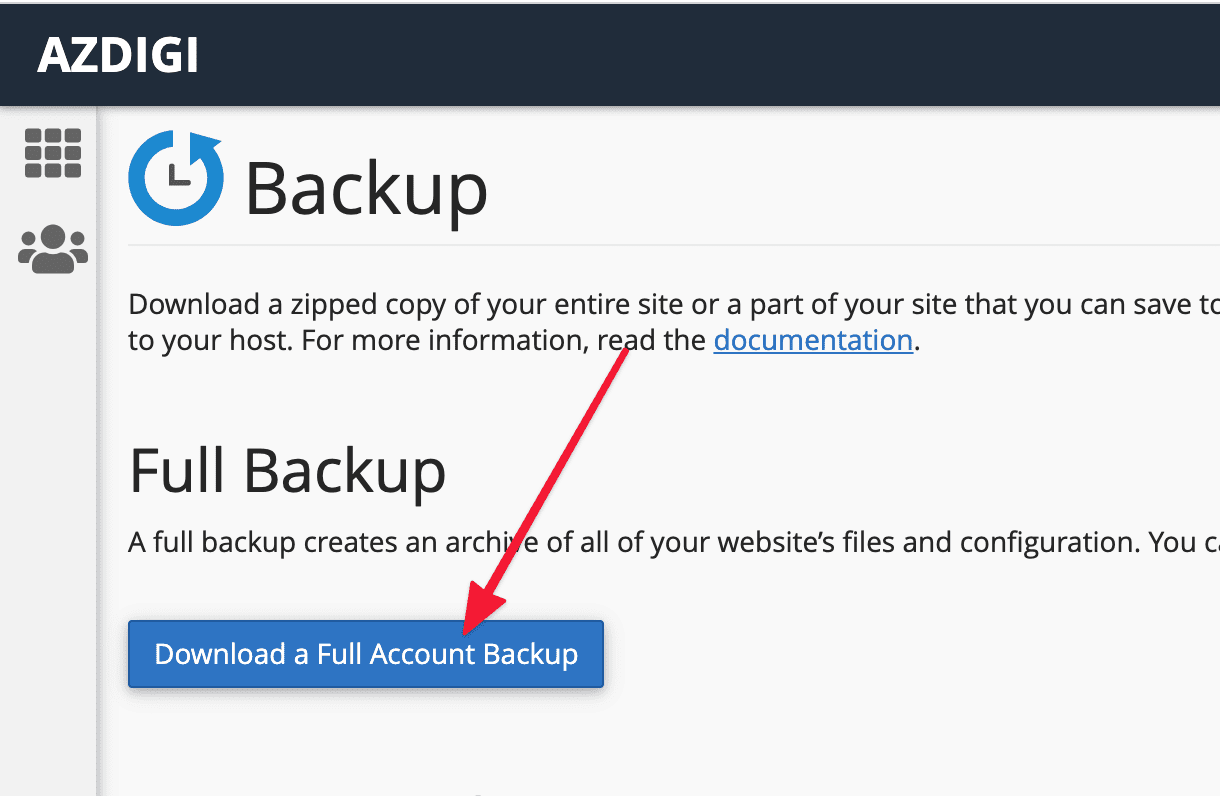
Next, click Download a Full Account Backup as shown below. The process will start backing up and backup time depending on the size of your data.
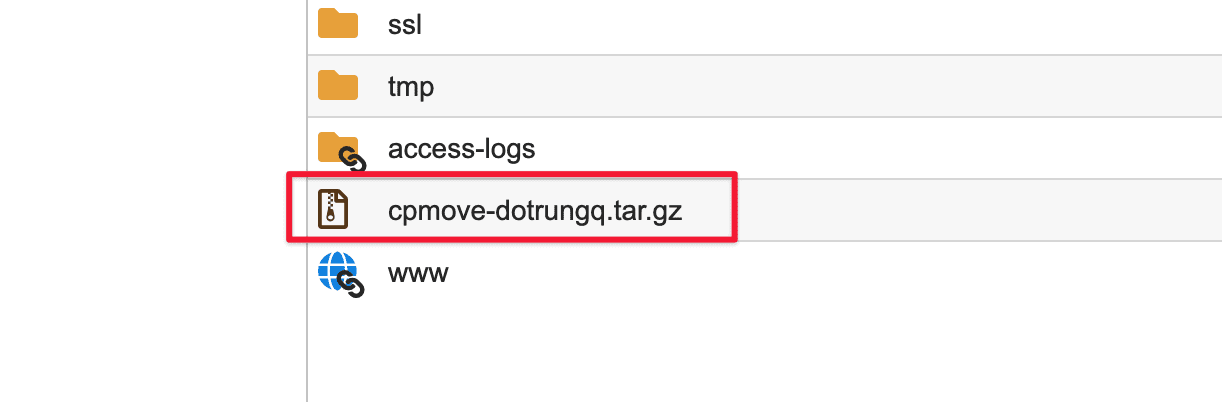
When the backup is complete, you access the File Manager and you will see a file in the format backup-date-time_user.tar.gz. You need to rename this file to cpmove-user.tar.gz format to perform the migration to DirectAdmin.
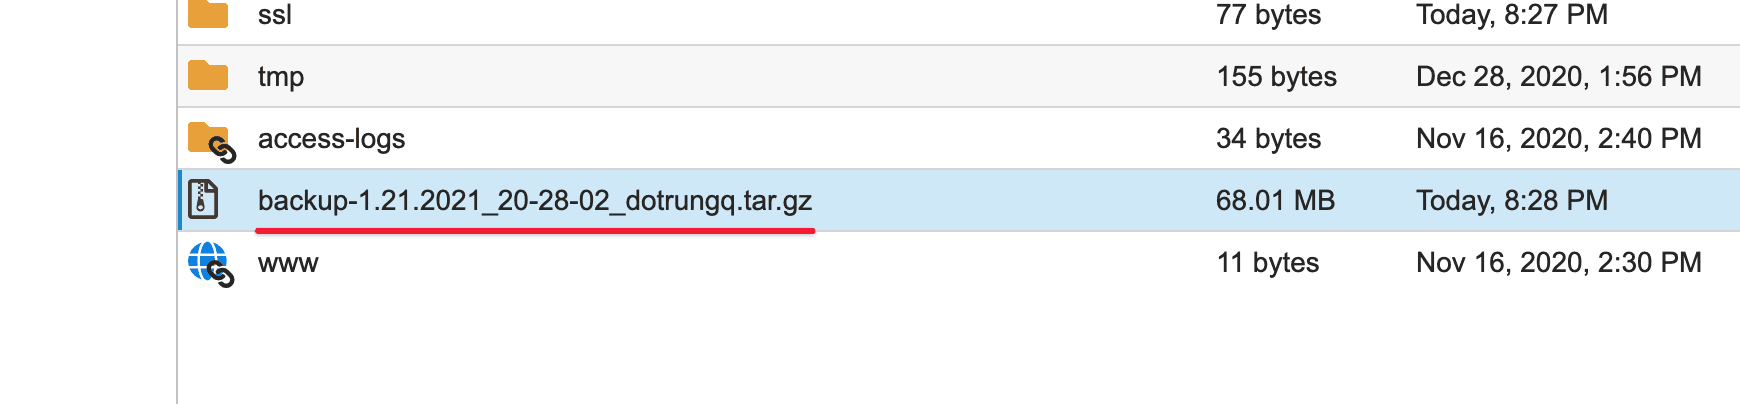
Below is I have changed the name to cpmove-user.tar.gz. In which dotrungq is the user of the cPanel account and cannot renamed this user.
Backup by command in SSH as root
If you have ssh access to the server as root, you can do a quick backup with the following command: (replace $username with your username)
script /scripts/pkgacct $username
- See also: Summary of scripts on cPanel
Step 2: Build the environment to migrate cPanel to DirectAdmin
Next, SSH into the DirectAdmin server and execute the following commands: Explanation of commands:
cd /usr/local/directadmin/custombuild
./build update
./build cpanel_to_da
In there:
- Command 1: Move into CustomBuild folder
- Command 2: Latest Update
- Command 3: Build cPanel options to DirectAdmin
Practical examples
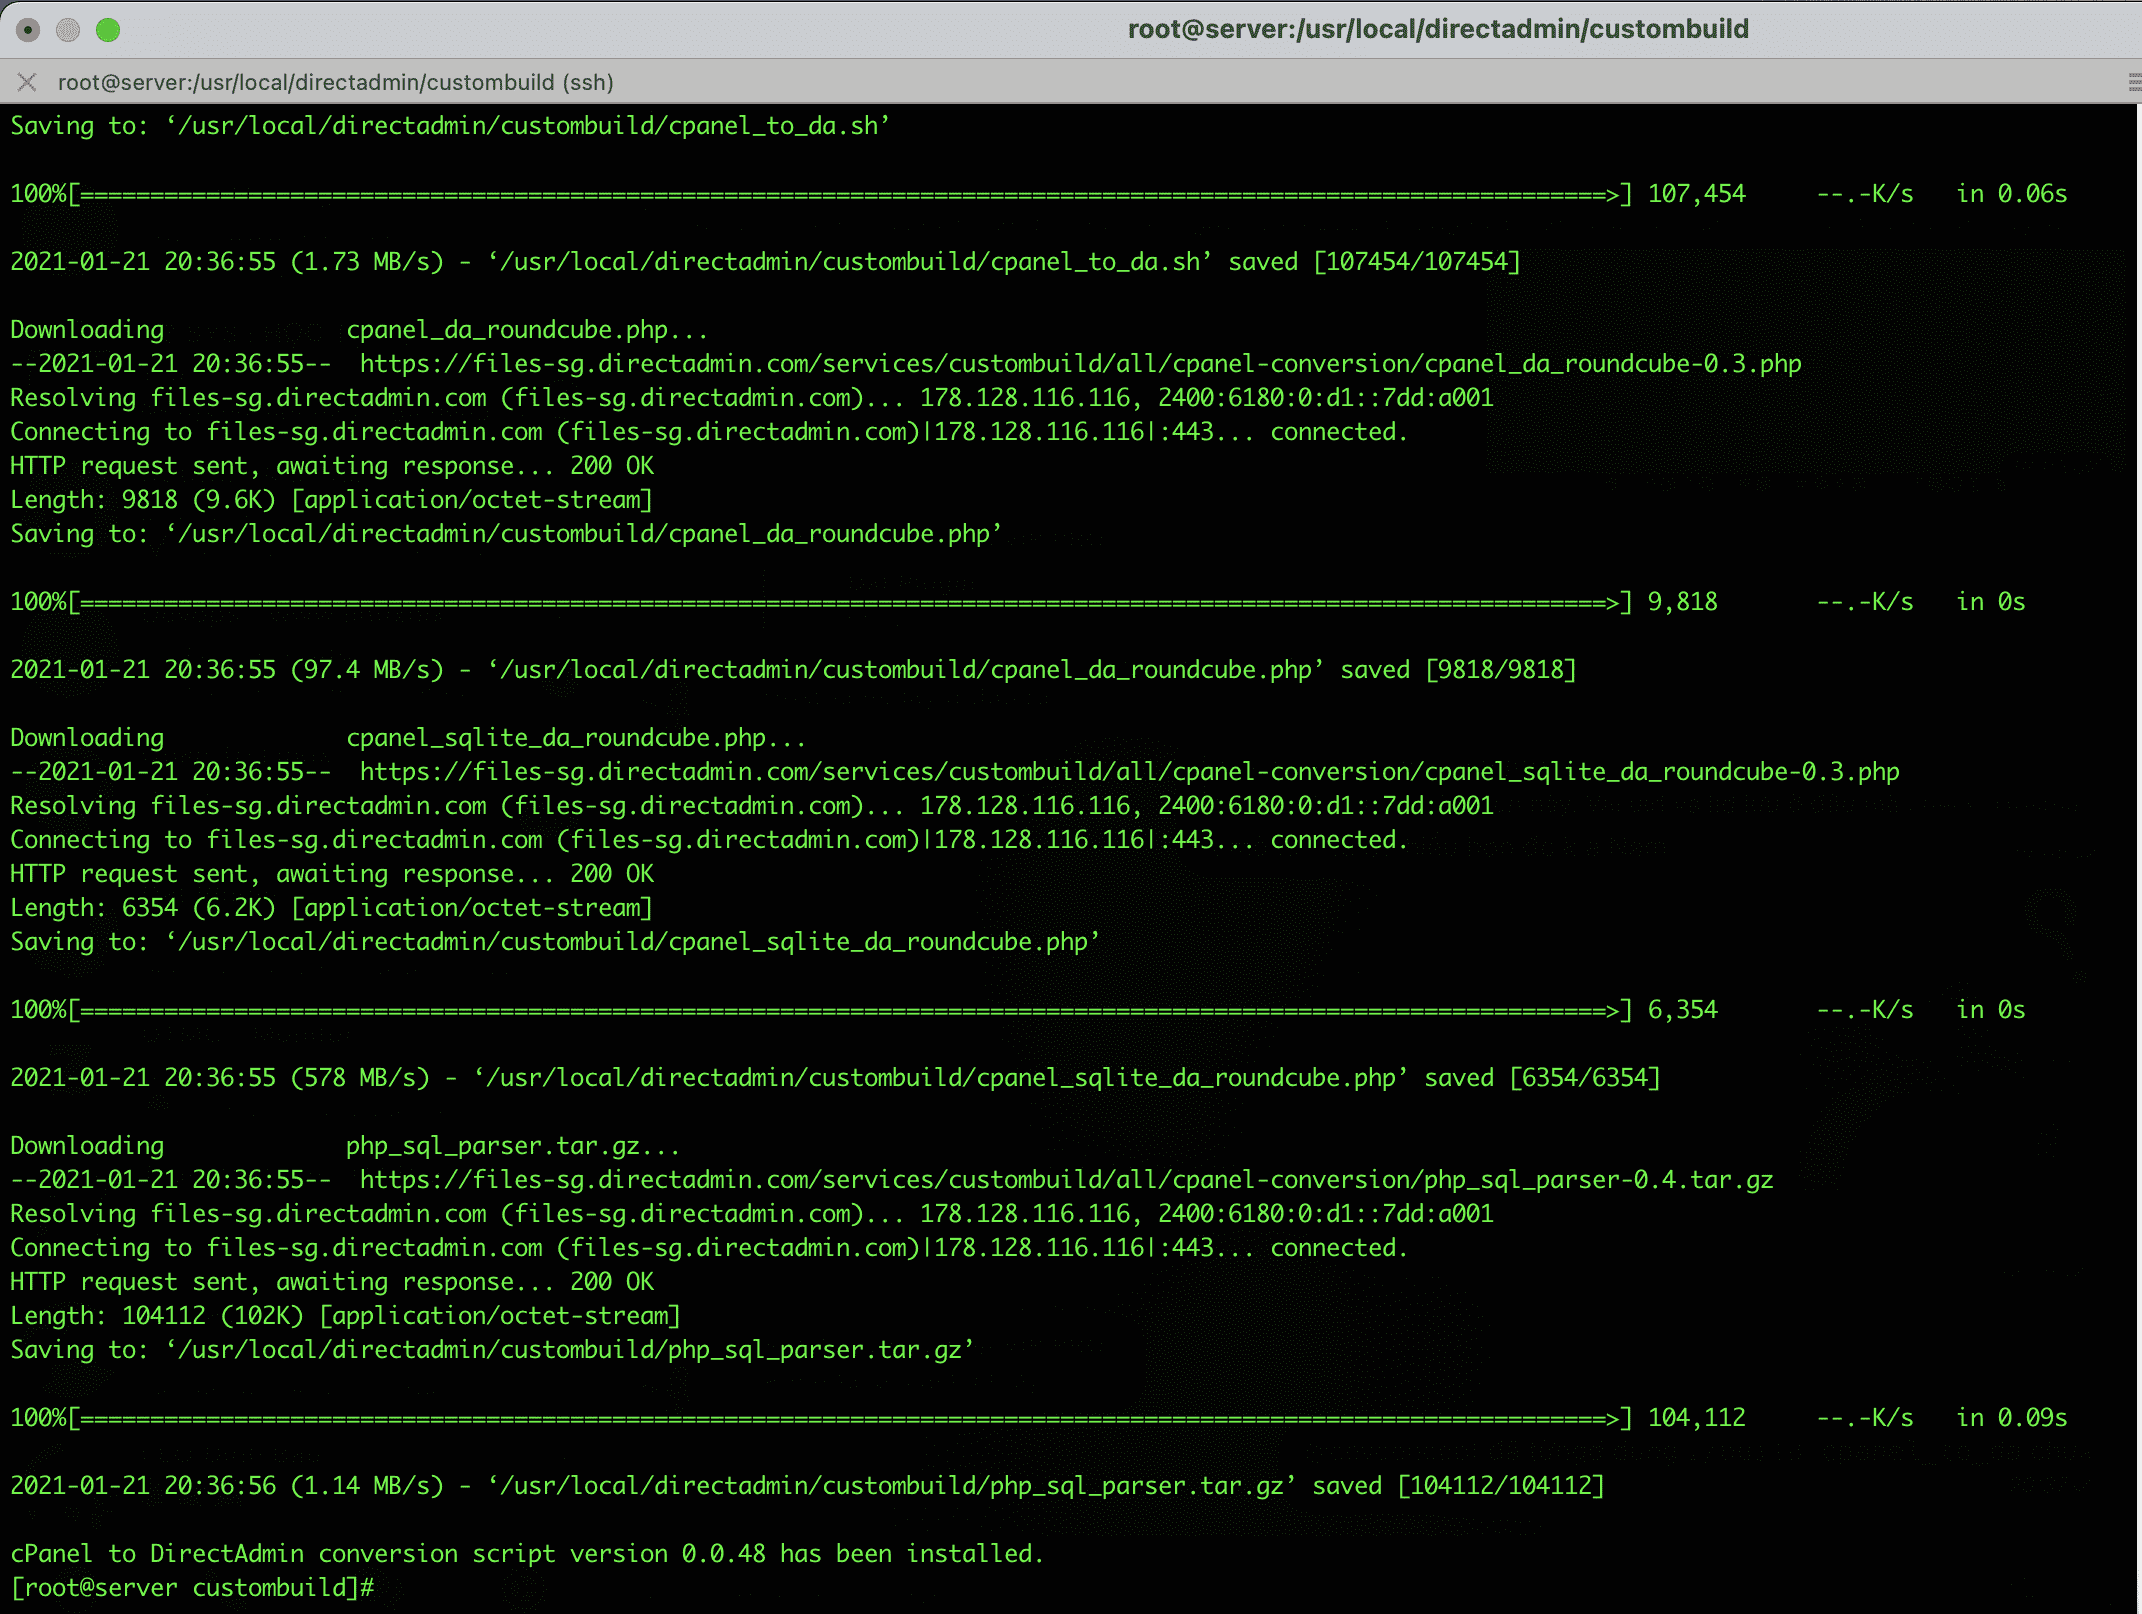
Once you have completed the cPanel to DirectAdmin build, there should be no configuration conflicts when migrating cPanel to DirectAdmin.
Step 3: Upload the Backup cPanel file to DirectAdmin
On DirectAdmin, you create a new folder to save the backup file of cPanel with the following command:
mkdir -p /home/admin/backup_files
After creating the backup_files folder, upload the cPanel backup file to this folder. There are many methods for you to migrate files directly from cPanel to DirectAdmin, such as SCP or Rsync, or you can download and upload the file directly to DirectAdmin in the /home/admin/backup_files directory. After uploading the file, you need to assign the file and folder permissions to admin for DirectAdmin to execute.
You can use the command:
chown -R admin. /home/admin/backup_files/
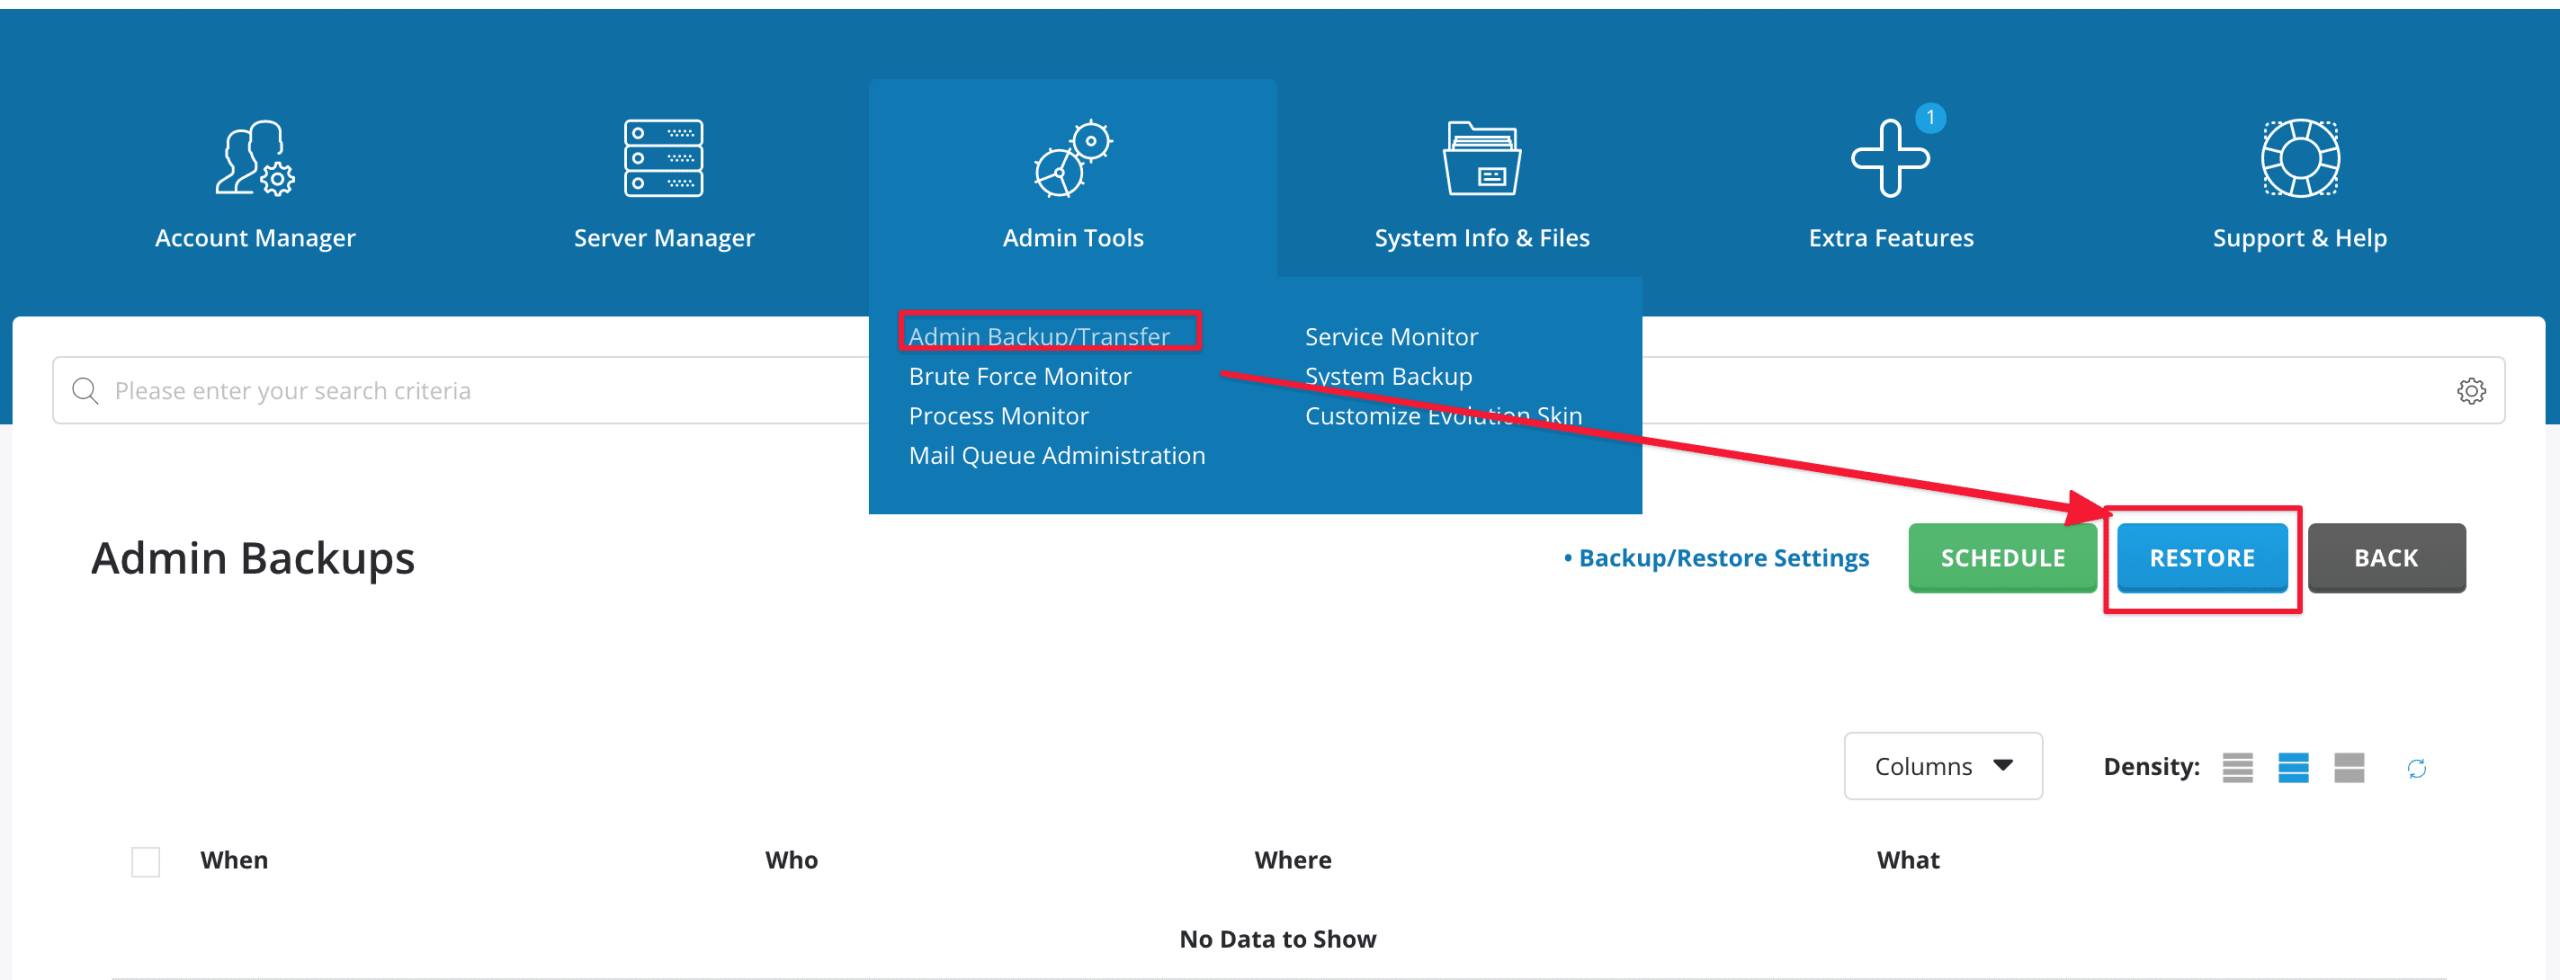
Step 4: Restore the cPanel backup file on DirectAdmin
Please log in to DirectAdmin’s admin interface with http://ip:2222, the access DirectAdmin => Admin tools => Admin Backup/Transfer => Restore
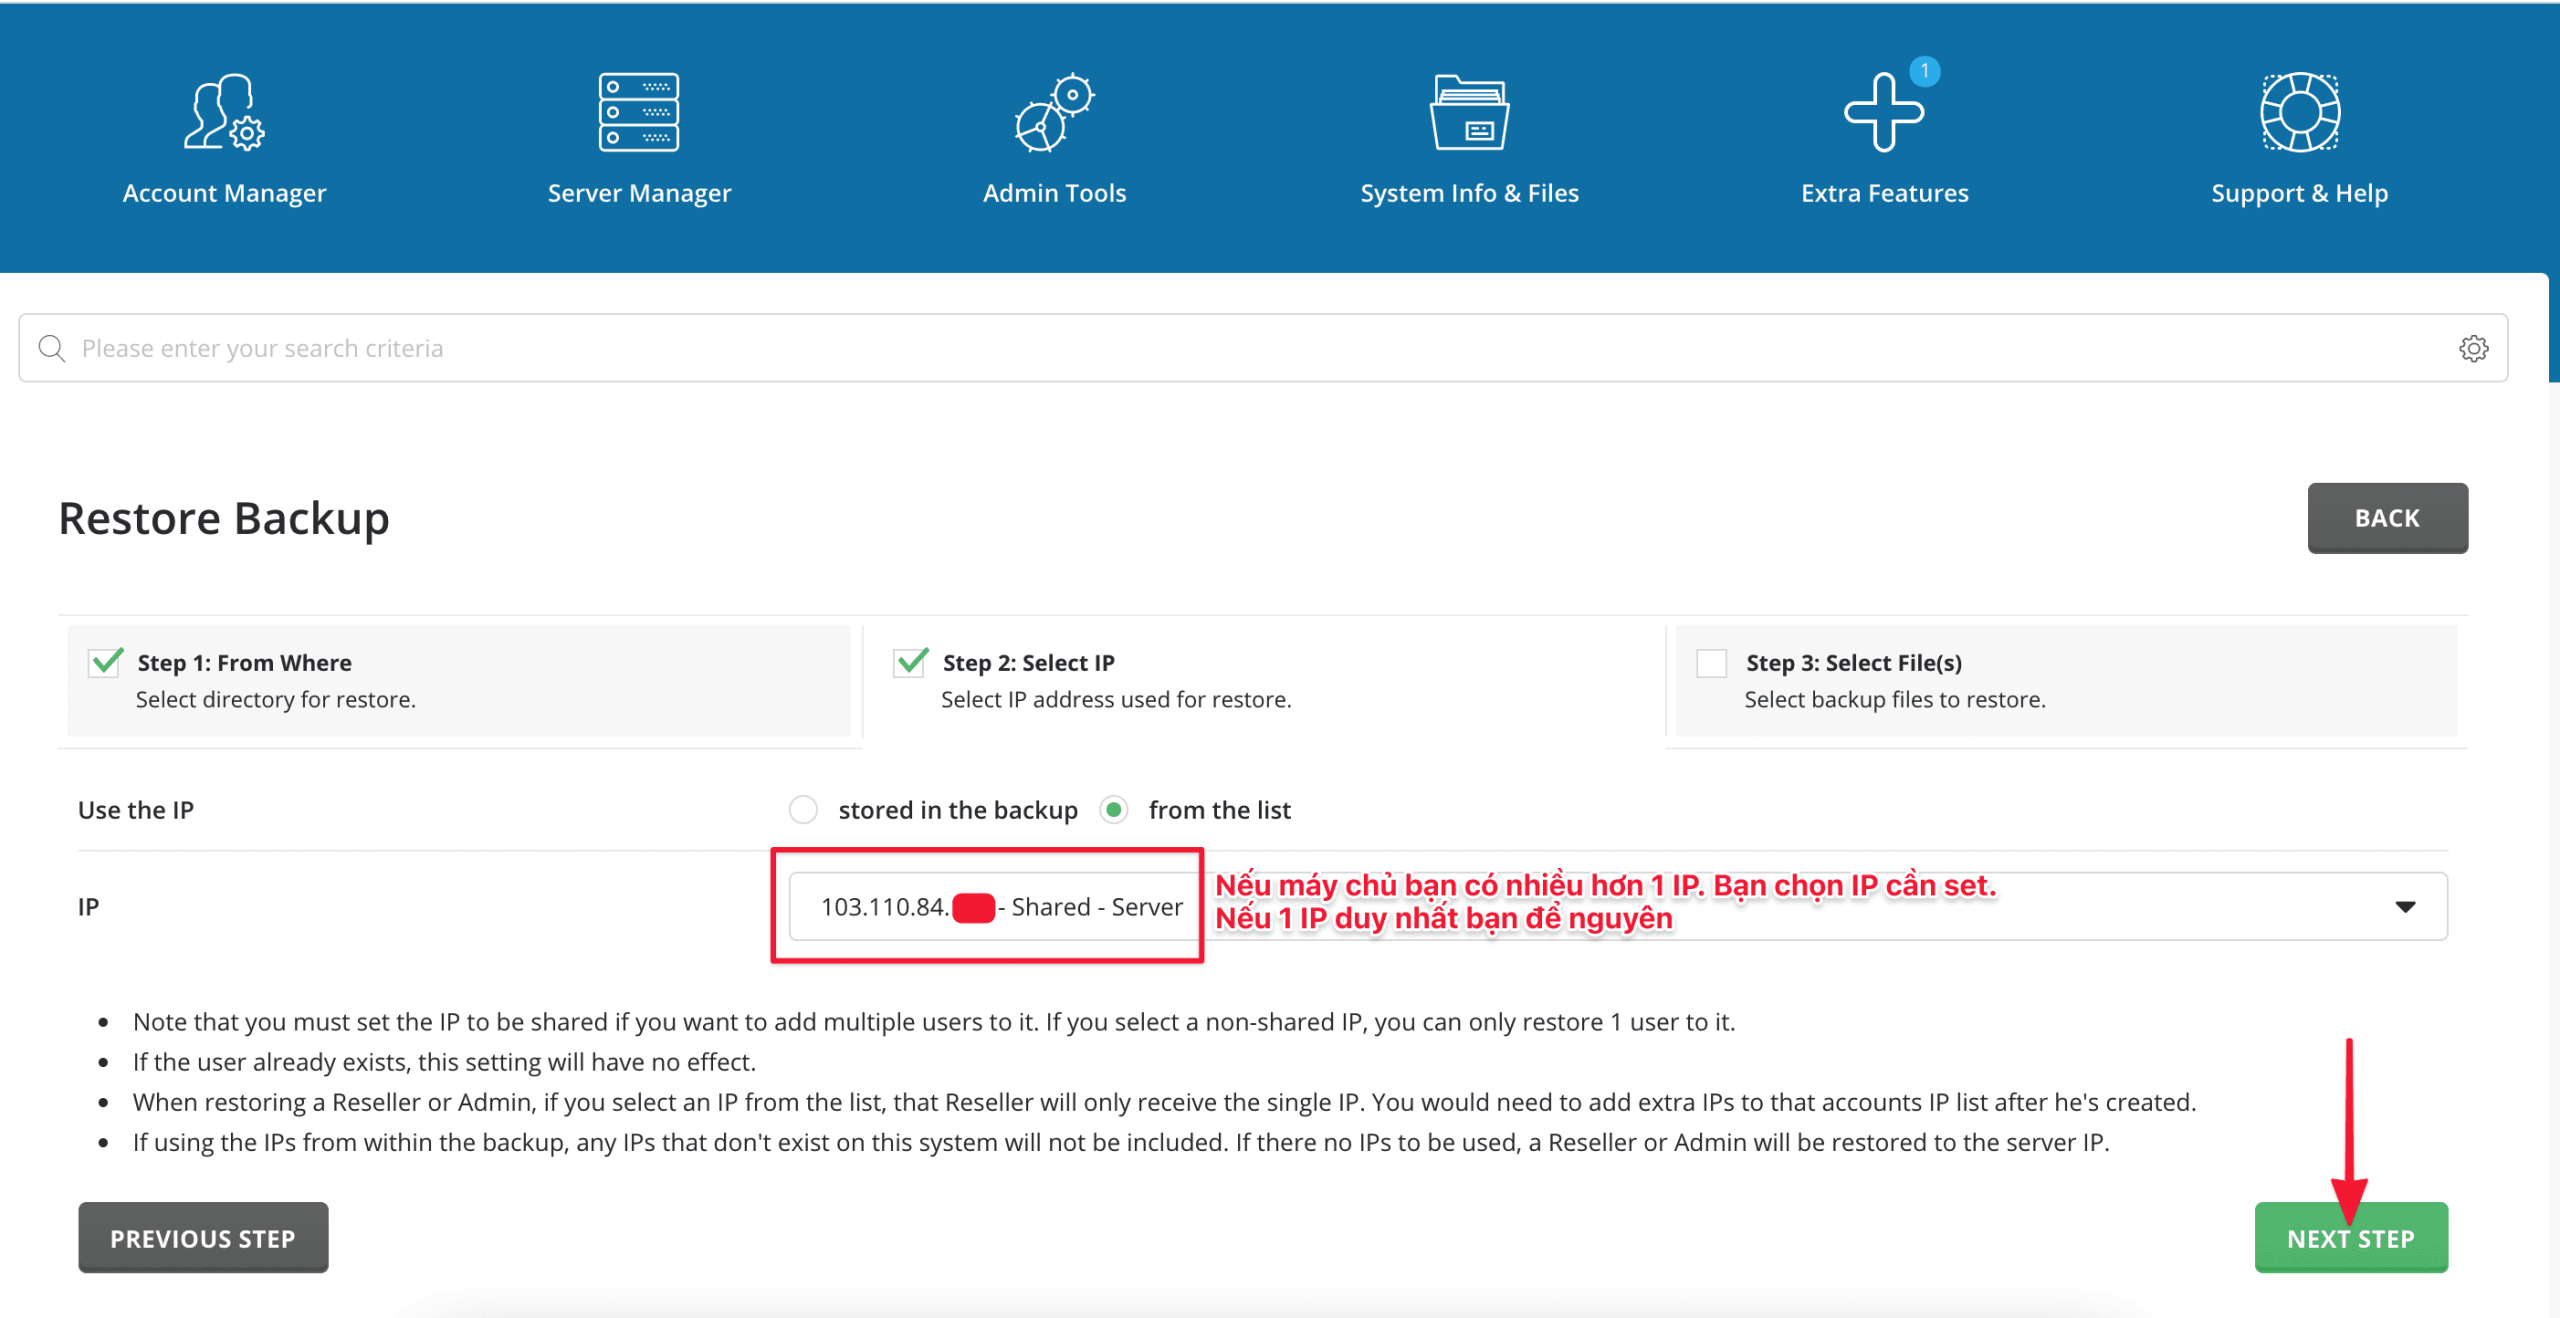
Next, in the Path line, enter the backup path created in Step 3 => click NEXT STEP

At this interface, if your server has more than 1 IP, you can choose to assign that user with the IP to assign. But if your server only has 1 IP, click NEXT STEP.
With Step 3 in the Files section, select the uploaded cPanel backup file and RESTORE to start the Restore process.
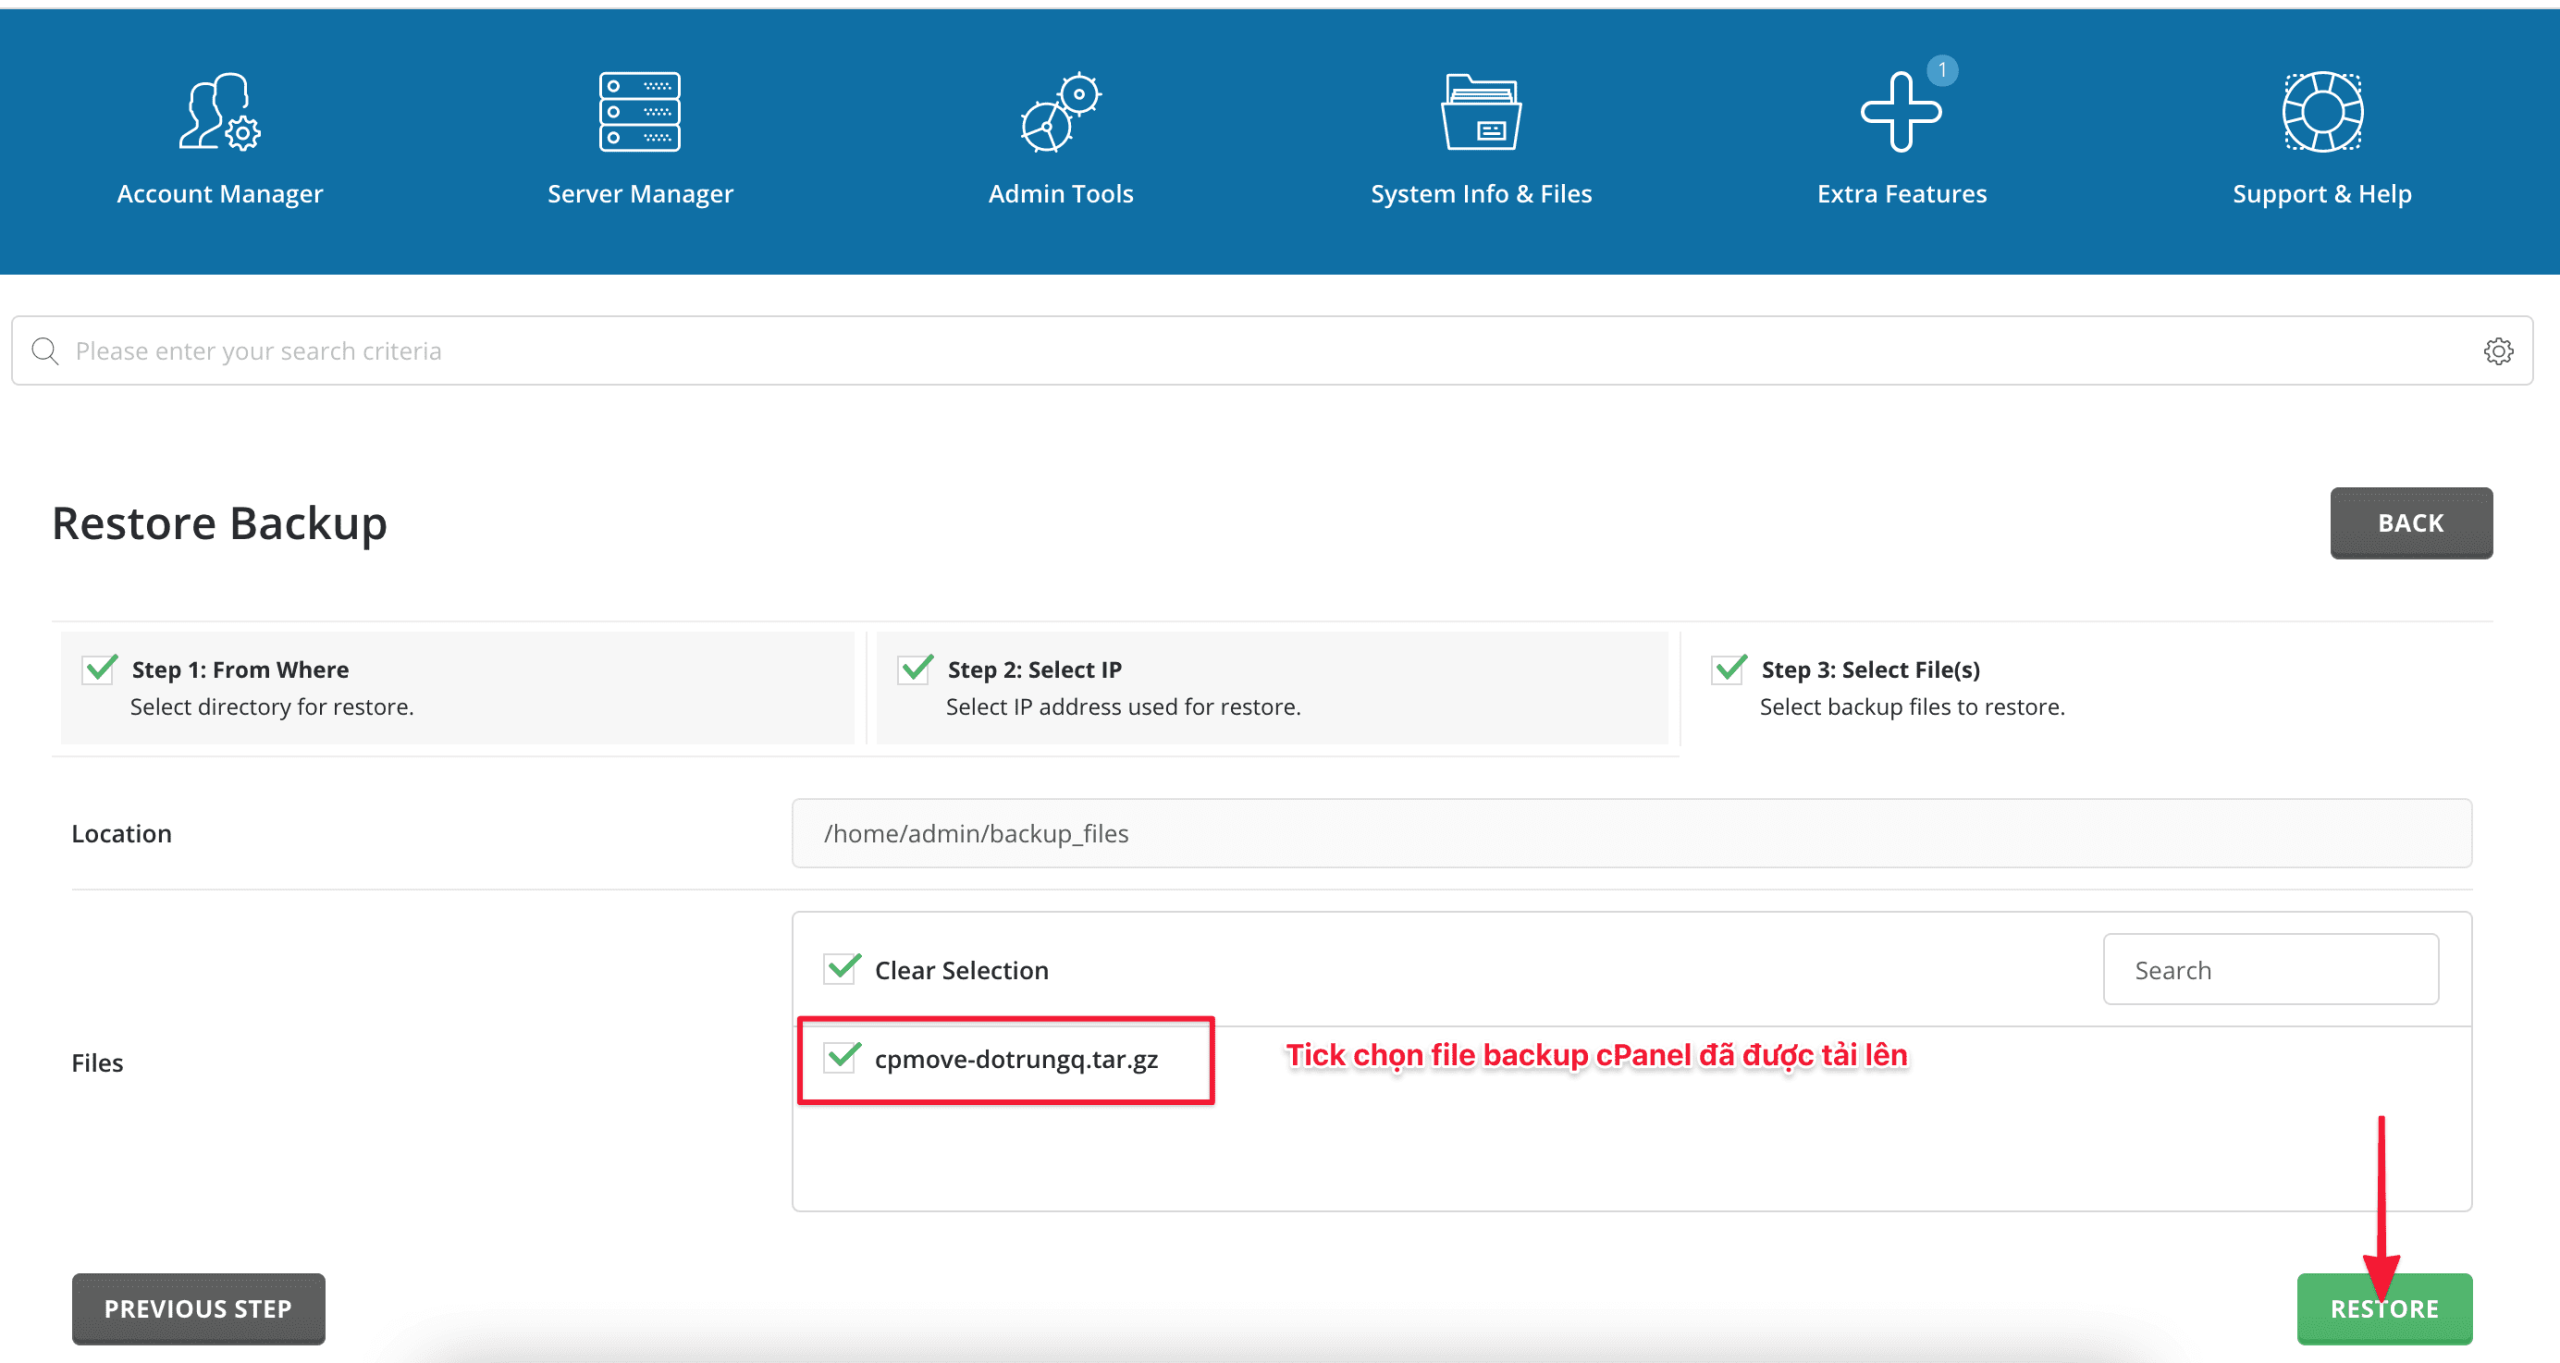
After clicking, you will receive a notification and this process will run in the background and you can completely turn off this window. Restore time will depend on data size, system configuration and resource usage at that time.
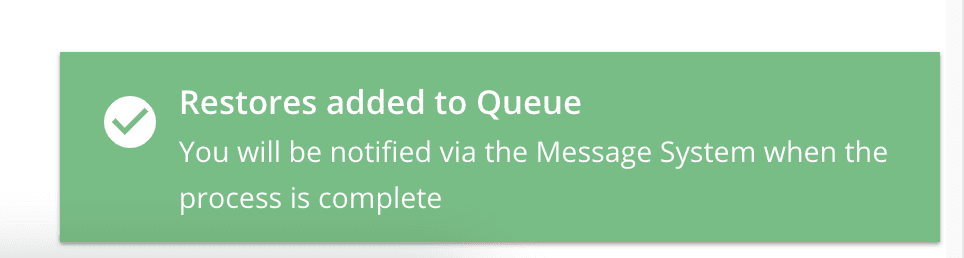
Actual image after successful restore:
III. Summary
Thus, AZDIGI has guided you to complete migrating cPanel User to DirectAdmin quickly and safely, saving you more time than doing it manually.
See more useful articles about DirectAdmin at the following link:
If you need assistance, you can contact support in the ways below:
- Hotline 247: 028 888 24768 (Ext 0)
- Ticket/Email: You use the email to register for the service and send it directly to: support@azdigi.com .
About the author

Thạch Phạm
Đồng sáng lập và Giám đốc điều hành của AZDIGI. Có hơn 15 năm kinh nghiệm trong phổ biến kiến thức liên quan đến WordPress tại thachpham.com, phát triển website và phát triển hệ thống.