

Nội dung
The HestiaCP User Guide is the next article in the HestiaCP series. In this article, AZDIGI will guide you to use HestiaCP in detail.
I. OVERVIEW
After successfully installing HestiaCP on the Linux server, to be able to launch a website you will need to create each small component inside such as User, Package, Domain to be able to upload the source code.
You can refer to how to install HestiaCP on Linux in the article below:
II. ỊMPLEMENTATION GUIDE
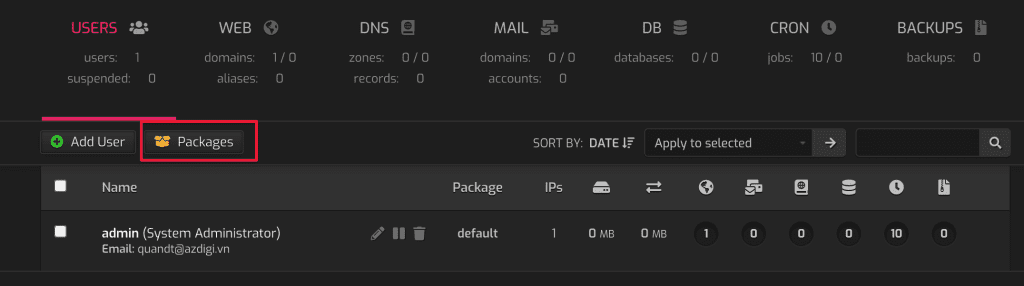
1. Create a Package
First, create a Package to split the packages. Assuming you are a reseller to users or want to divide resources, creating a Package will help you manage resources well.
Click Package => Add Package
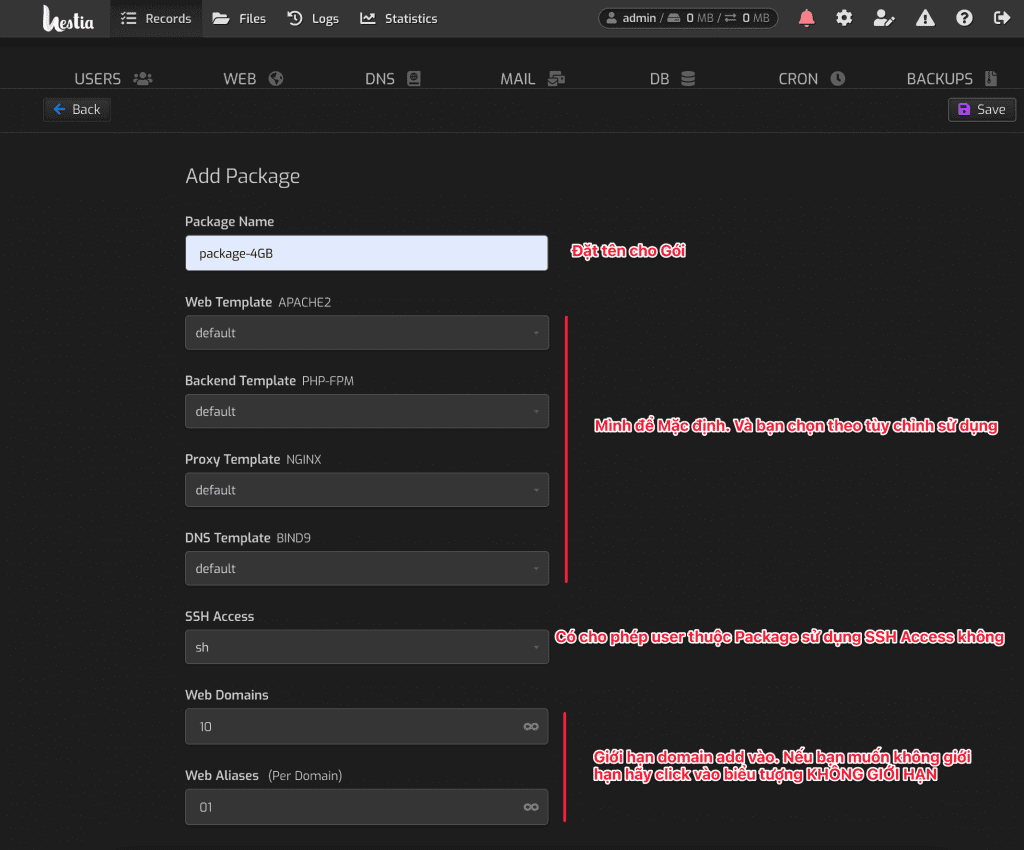
At the Add Package interface, enter and optionally the following information:
- Package Name
- Web TemplateAPACHE2: Default
- Backend TemplatePHP-FPM: Default
- Proxy TemplateNGINX: Default
- DNS TemplateBIND9: Default
- SSH Access: Option to use SSH for users on Package
- Web Domains: Number of allowed addon domains
- Web Aliases (Per Domain): Number of using alias domains
- DNS Zones
- DNS Records (Per Domain)
- Mail Domains
- Mail Accounts (Per Domain)
- Databases
- Cron Jobs
- Backups
- Quota
- Bandwidth
- Name Server(NS)
After entering the information, click Save to save the package.
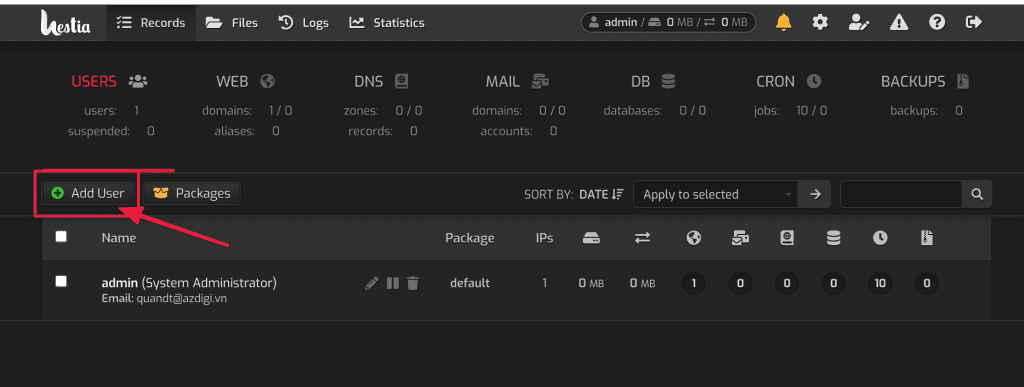
2. Create a User on HestiaCP
To create a User, click Add User as shown below.
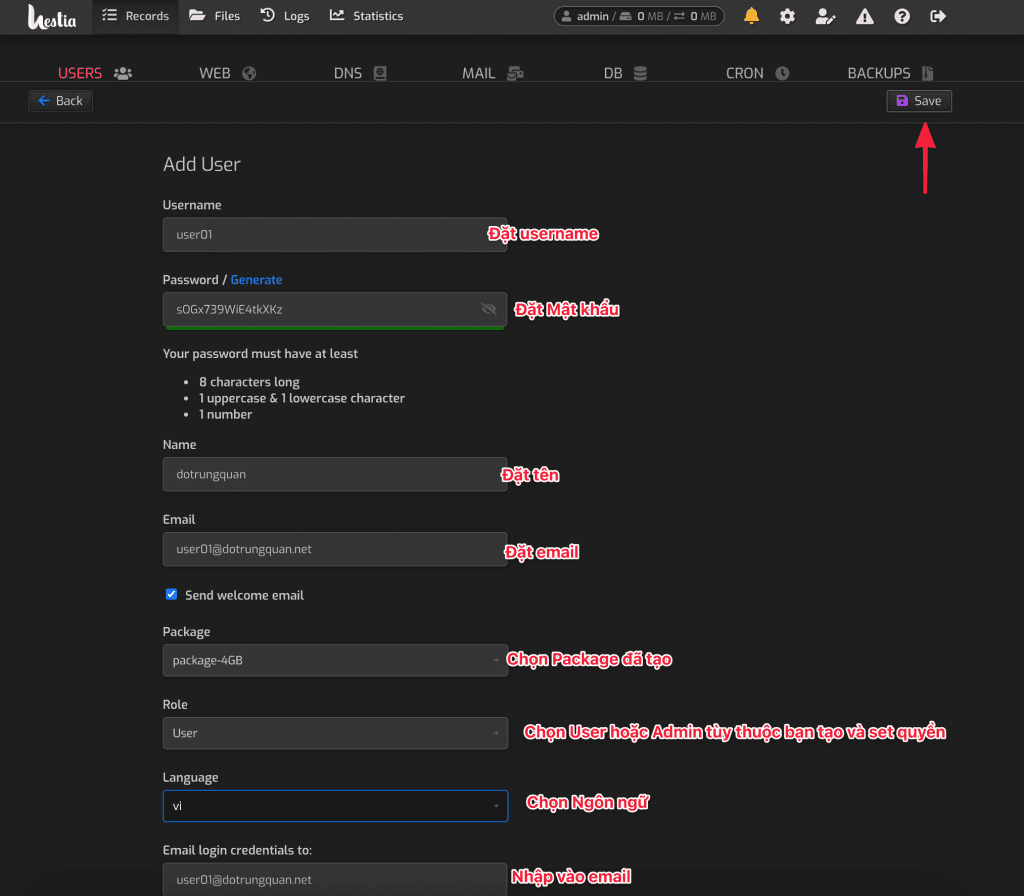
Enter the following information:
- Username: Enter the user you want to create.
- Password/Genarate: Enter the Password for the user
- Name: Set display name
- Email: Enter the email for the user
- Package: Select the Package created
- Role: Select permissions for the user being created (With user or admin rights)
- Language: Choose a language. Support multiple languages
After entering the information, click Save to save it.
3. Add Web Domain
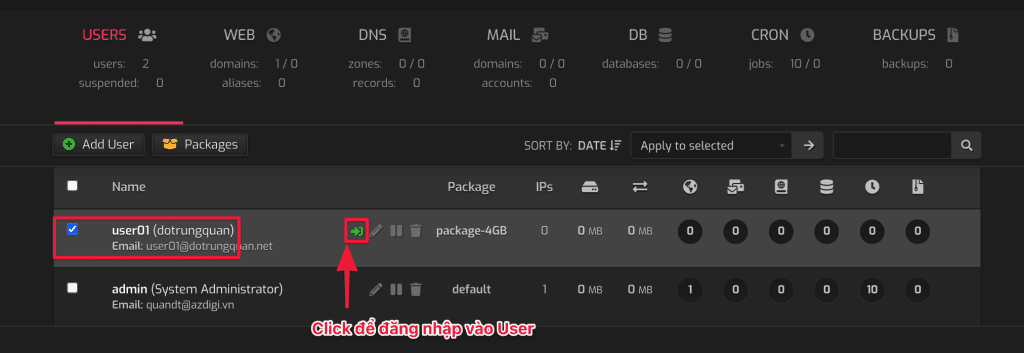
To create a website, you log in to the previously created User to create a website. Click USERS => Select > to Login
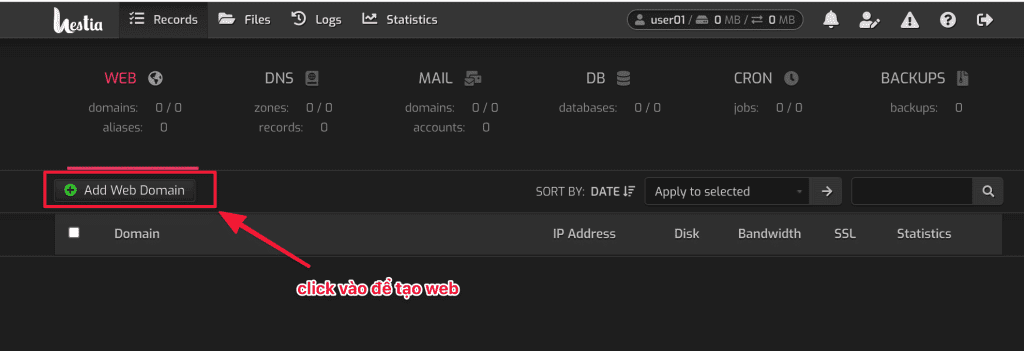
Next, you click Add Web Domain to add a new website.
In the next interface, enter the following information:
- Domain: enter your domain name
- IP Address: If VPS has more than 1 IP you choose the corresponding IP here. If you have 1 IP, you keep it.
- Create DNS zone: If you need to create a DNS zone, check this box.
- Enable mail for this domain

For advanced options, you can click Advanced Option
- Aliases: This function allows 2 websites to use the same source code (please enter www.my-domain)
- Proxy Support
- Web Statistics
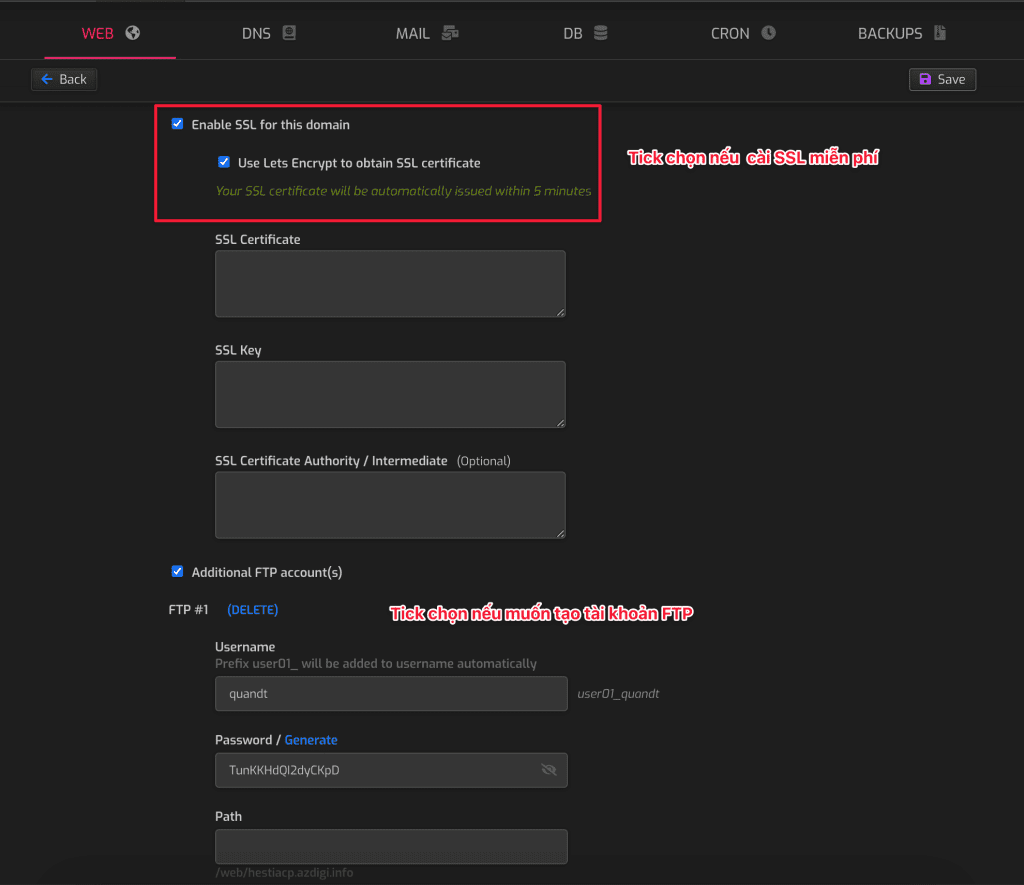
- Enable SSL for this domain: Tick it if you want to install SSL Let’s Encrypt for free (To install, you must point the domain/subdomain to the server IP)
- Use Lets Encrypt to obtain SSL certificate
- Force SSL/HTTPS
- Enable HTTP Strict Transport Security (HSTS)
- Additional FTP account(s): Tick it if you want to create FTP attached
After the customization is complete, click Save to apply.
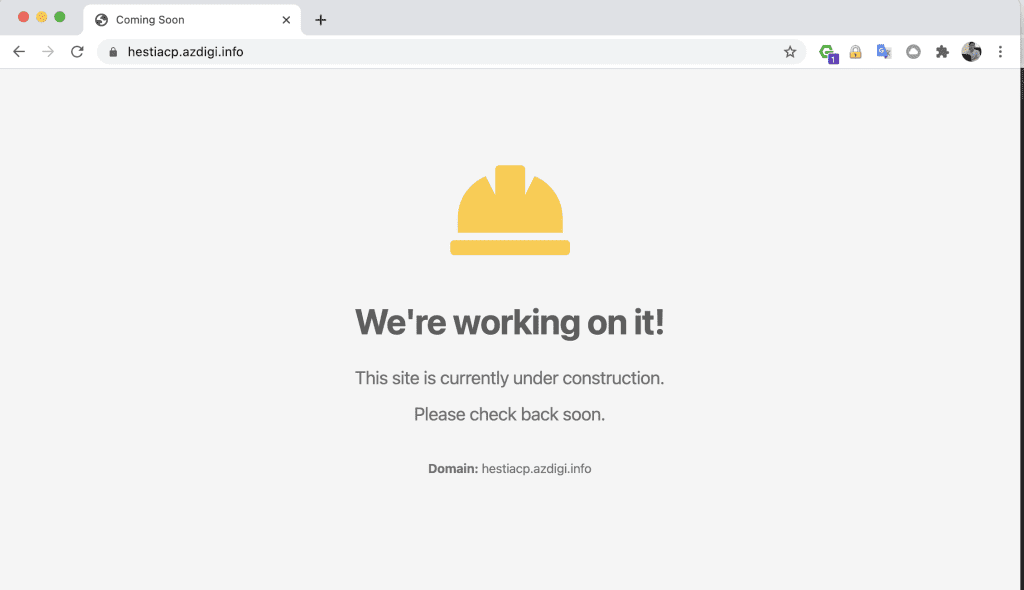
Now go to the website to check the result. The default interface is also quite nice.
III. Summary
Thus, AZDIGI has just completed the tutorial on using HestiaCP. Hopefully, this article will help you get acquainted with this free Control Panel, this is a control that brings full features to serve in website administration.
In the following articles, AZDIGI will go into detail on how to create a website and some other in-depth settings. Let’s stay tuned!
If you need assistance, you can contact support in the ways below:
- Hotline 247: 028 888 24768 (Ext 0)
- Ticket/Email: You use the email to register for the service and send it directly to: support@azdigi.com .
