
Ở Bài 10, bạn đã setup Nginx Proxy Manager làm reverse proxy, mỗi container có domain riêng, HTTPS tự động, không cần expose port lung tung. VPS của bạn giờ đã khá “pro” rồi.
Nhưng từ đầu serie đến giờ, chúng ta chủ yếu chạy các app có sẵn: WordPress, Uptime Kuma, Portainer… Bài này sẽ khác. Bạn sẽ học cách đóng gói và deploy ứng dụng do chính mình viết : cụ thể là app Node.js và Python , với Docker Compose, kèm database, health check, và các best practices cho production.
Tại sao nên deploy app Node.js / Python bằng Docker?
Nếu bạn từng deploy app Node.js hay Python trực tiếp lên VPS, chắc hẳn đã gặp những vấn đề quen thuộc:
- Xung đột version: App A cần Node 18, app B cần Node 20. Python thì còn loạn hơn: Python 2 vs 3, virtualenv chồng chéo.
- “Ở máy tao chạy được mà”: Kinh điển. Máy dev chạy ngon, lên server thì lỗi vì thiếu thư viện, khác OS, khác version.
- Khó scale: Muốn chạy thêm 1 instance? Phải cài lại từ đầu, config lại từ đầu.
- Dọn dẹp khó: Gỡ app nhưng dependencies vẫn nằm rải rác trên hệ thống.
Docker giải quyết tất cả:
- Consistent environment: Dev, staging, production chạy cùng một image. Hết cái vụ “ở máy tao chạy được”.
- Không xung đột: Mỗi app chạy trong container riêng, muốn Node 18 hay Node 22 đều được, không ảnh hưởng nhau.
- Dễ scale: Cần thêm instance?
docker compose up --scale app=3. Done. - Clean: Gỡ app = xoá container + image. Không rác.
OK, đủ lý thuyết. Bắt tay vào làm thôi.
Phần 1: Deploy ứng dụng Node.js với Docker Compose
Mình sẽ tạo một Express API đơn giản, đóng gói bằng Docker, kết nối với MongoDB, có health check đàng hoàng.
Bước 1: Tạo Express app
Tạo thư mục project:
mkdir ~/node-docker-app && cd ~/node-docker-app
npm init -y
Cài dependencies:
npm install express mongooseTạo file src/index.js:
const express = require('express');
const mongoose = require('mongoose');
const app = express();
const PORT = process.env.PORT || 3000;
const MONGO_URI = process.env.MONGO_URI || 'mongodb://mongo:27017/myapp';
// Middleware
app.use(express.json());
// Schema đơn giản
const TaskSchema = new mongoose.Schema({
  title: { type: String, required: true },
  done: { type: Boolean, default: false },
  createdAt: { type: Date, default: Date.now }
});
const Task = mongoose.model('Task', TaskSchema);
// Routes
app.get('/', (req, res) => {
  res.json({ message: 'Node.js Docker App is running!', timestamp: new Date() });
});
app.get('/health', (req, res) => {
  const mongoStatus = mongoose.connection.readyState === 1 ? 'connected' : 'disconnected';
  res.json({ status: 'ok', mongo: mongoStatus, uptime: process.uptime() });
});
app.get('/tasks', async (req, res) => {
  const tasks = await Task.find().sort({ createdAt: -1 });
  res.json(tasks);
});
app.post('/tasks', async (req, res) => {
  const task = new Task({ title: req.body.title });
  await task.save();
  res.status(201).json(task);
});
// Graceful shutdown
process.on('SIGTERM', () => {
  console.log('SIGTERM received. Shutting down gracefully...');
  mongoose.connection.close();
  process.exit(0);
});
process.on('SIGINT', () => {
  console.log('SIGINT received. Shutting down gracefully...');
  mongoose.connection.close();
  process.exit(0);
});
// Connect DB & Start server
mongoose.connect(MONGO_URI)
  .then(() => {
    console.log('Connected to MongoDB');
    app.listen(PORT, '0.0.0.0', () => {
      console.log(`Server running on port ${PORT}`);
    });
  })
  .catch(err => {
    console.error('MongoDB connection error:', err);
    process.exit(1);
  });
App này có 4 endpoint: trang chủ, health check, list tasks, tạo task. Đơn giản nhưng đủ để minh hoạ mọi thứ cần thiết.
Bước 2: Viết Dockerfile với multi-stage build
Đầu tiên, tạo file .dockerignore để Docker bỏ qua những thứ không cần thiết:
node_modules
npm-debug.log
.git
.gitignore
.env
README.md
docker-compose*.yml
Dockerfile*
Tại sao cần .dockerignore? Vì khi build image, Docker gửi toàn bộ thư mục (build context) vào Docker daemon. Nếu không ignore node_modules (có thể vài trăm MB), build sẽ chậm vô nghĩa.
Giờ tạo Dockerfile:
# ============================================
# Stage 1: Build — cài dependencies
# ============================================
FROM node:20-alpine AS builder
WORKDIR /app
# Copy package files trước (tận dụng Docker cache)
COPY package*.json ./
# Chỉ cài production dependencies
RUN npm ci --only=production
# ============================================
# Stage 2: Runtime — image chạy thật
# ============================================
FROM node:20-alpine
# Tạo non-root user
RUN addgroup -S appgroup && adduser -S appuser -G appgroup
WORKDIR /app
# Copy dependencies từ builder stage
COPY --from=builder /app/node_modules ./node_modules
# Copy source code
COPY src/ ./src/
COPY package.json ./
# Đổi ownership cho non-root user
RUN chown -R appuser:appgroup /app
# Chuyển sang non-root user
USER appuser
# Expose port
EXPOSE 3000
# Health check
HEALTHCHECK --interval=30s --timeout=5s --start-period=10s --retries=3 \
  CMD wget --no-verbose --tries=1 --spider http://localhost:3000/health || exit 1
# Start app
CMD ["node", "src/index.js"]
Giải thích vài điểm quan trọng:
- Multi-stage build: Stage 1 (builder) cài dependencies, stage 2 chỉ copy kết quả. Nếu sau này bạn có bước build (TypeScript, webpack…), stage 1 sẽ chứa build tools, stage 2 chỉ chứa output. Image nhẹ hơn nhiều.
- node:20-alpine: Alpine image chỉ ~50MB thay vì ~350MB (Debian). Nhẹ, nhanh, ít lỗ hổng.
- npm ci thay vì
npm install:cicài chính xác theopackage-lock.json, nhanh hơn và deterministic. - Non-root user: Mặc định container chạy bằng root (nguy hiểm!). Tạo user riêng để giảm rủi ro.
- HEALTHCHECK: Docker sẽ tự gọi endpoint
/healthmỗi 30 giây để biết container có khoẻ không.
Bước 3: Viết docker-compose.yml
services:
  app:
    build: .
    container_name: node-app
    restart: unless-stopped
    ports:
      - "3000:3000"
    environment:
      - NODE_ENV=production
      - PORT=3000
      - MONGO_URI=mongodb://mongo:27017/myapp
    depends_on:
      mongo:
        condition: service_healthy
    networks:
      - app-network
mongo:
    image: mongo:7
    container_name: node-mongo
    restart: unless-stopped
    volumes:
      - mongo-data:/data/db
    healthcheck:
      test: ["CMD", "mongosh", "--eval", "db.adminCommand('ping')"]
      interval: 10s
      timeout: 5s
      retries: 5
      start_period: 20s
    networks:
      - app-network
volumes:
  mongo-data:
networks:
  app-network:
Mấy điểm đáng chú ý:
- depends_on + condition: service_healthy: App sẽ chỉ start SAU KHI MongoDB đã healthy. Không còn lỗi “connection refused” khi app start trước DB.
- MongoDB không expose port: Chỉ app mới cần kết nối MongoDB thông qua internal network. Bên ngoài không ai access được.
- Volume
mongo-data: Dữ liệu MongoDB persist qua các lần restart.
Chạy thử:
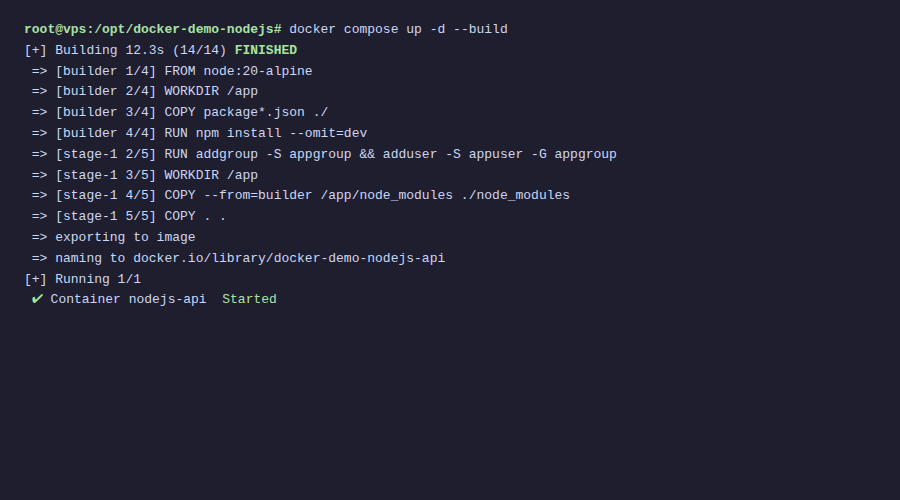
docker compose up -d --buildKiểm tra:
# Xem status
docker compose ps
# Test API
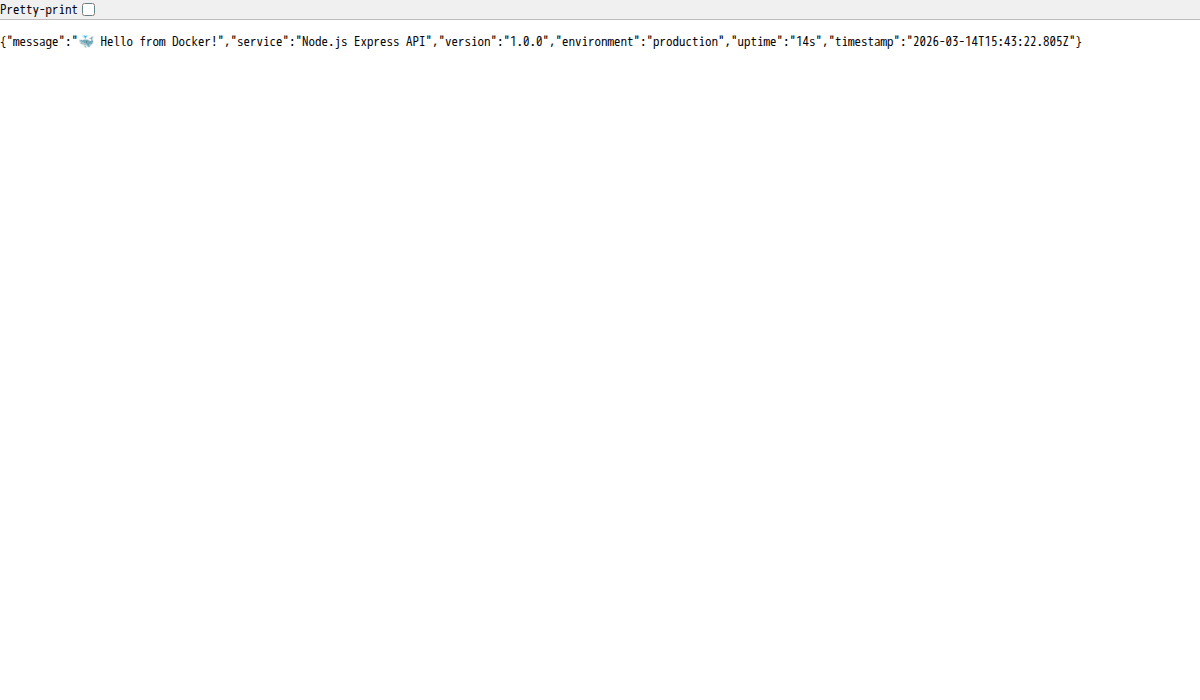
curl http://localhost:3000/
curl http://localhost:3000/health
# Tạo task
curl -X POST http://localhost:3000/tasks \
-H "Content-Type: application/json" \
-d '{"title": "Learn Docker"}'
# Xem tasks
curl http://localhost:3000/tasksNếu mọi thứ OK, bạn sẽ thấy output JSON cho mỗi endpoint. Cột STATUS trong docker compose ps phải hiện healthy.
Hot reload cho development
Ở production, mỗi lần sửa code phải rebuild image. Nhưng lúc dev thì ai mà chịu nổi? Mình cần hot reload: sửa code, app tự restart.
Cài nodemon làm devDependency:
npm install --save-dev nodemonThêm script vào package.json:
{
  "scripts": {
    "start": "node src/index.js",
    "dev": "nodemon src/index.js"
  }
}
Tạo file docker-compose.dev.yml:
services:
  app:
    build:
      context: .
      dockerfile: Dockerfile.dev
    container_name: node-app-dev
    restart: unless-stopped
    ports:
      - "3000:3000"
      - "9229:9229"  # Debug port
    environment:
      - NODE_ENV=development
      - PORT=3000
      - MONGO_URI=mongodb://mongo:27017/myapp
    volumes:
      - ./src:/app/src          # Bind mount source code
      - /app/node_modules       # Không ghi đè node_modules
    depends_on:
      mongo:
        condition: service_healthy
    networks:
      - app-network
mongo:
    image: mongo:7
    container_name: node-mongo-dev
    restart: unless-stopped
    ports:
      - "27017:27017"  # Expose cho GUI tools (Compass, etc.)
    volumes:
      - mongo-dev-data:/data/db
    healthcheck:
      test: ["CMD", "mongosh", "--eval", "db.adminCommand('ping')"]
      interval: 10s
      timeout: 5s
      retries: 5
      start_period: 20s
    networks:
      - app-network
volumes:
  mongo-dev-data:
networks:
  app-network:
Và Dockerfile.dev:
FROM node:20-alpine
WORKDIR /app
COPY package*.json ./
RUN npm install  # Cài cả devDependencies
COPY . .
EXPOSE 3000 9229
CMD ["npm", "run", "dev"]
Chạy ở chế độ dev:
docker compose -f docker-compose.dev.yml up -d --buildGiờ bạn sửa bất kỳ file nào trong src/, nodemon sẽ tự detect và restart app trong container. Không cần rebuild image.
Mấy điểm cần nhớ:
./src:/app/src: Bind mount thư mục source code từ host vào container. Sửa ở host, container thấy ngay./app/node_modules: Anonymous volume ngăn không cho bind mount ghi đènode_modulestrong container.- Port 9229: Port debug của Node.js. Bạn có thể attach debugger từ VS Code.
Phần 2: Deploy ứng dụng Python với Docker Compose
Tương tự phần Node.js, mình sẽ tạo một FastAPI app kết nối PostgreSQL và Redis. FastAPI nhanh, hiện đại, rất phổ biến cho Python backend.
Bước 1: Tạo FastAPI app
Tạo thư mục project:
mkdir ~/python-docker-app && cd ~/python-docker-app
mkdir app
Tạo file requirements.txt:
fastapi==0.115.6
uvicorn[standard]==0.34.0
sqlalchemy==2.0.36
psycopg2-binary==2.9.10
redis==5.2.1
gunicorn==23.0.0
Tạo file app/main.py:
import os
import logging
import signal
import sys
from datetime import datetime
from fastapi import FastAPI, HTTPException
from pydantic import BaseModel
from sqlalchemy import create_engine, Column, Integer, String, Boolean, DateTime
from sqlalchemy.orm import sessionmaker, declarative_base
import redis
# Logging
logging.basicConfig(
    level=logging.INFO,
    format="%(asctime)s [%(levelname)s] %(message)s",
    handlers=[logging.StreamHandler(sys.stdout)]
)
logger = logging.getLogger(__name__)
# Config
DATABASE_URL = os.getenv("DATABASE_URL", "postgresql://appuser:secret@postgres:5432/myapp")
REDIS_URL = os.getenv("REDIS_URL", "redis://redis:6379/0")
# Database setup
engine = create_engine(DATABASE_URL)
SessionLocal = sessionmaker(bind=engine)
Base = declarative_base()
class TaskModel(Base):
    __tablename__ = "tasks"
    id = Column(Integer, primary_key=True, index=True)
    title = Column(String, nullable=False)
    done = Column(Boolean, default=False)
    created_at = Column(DateTime, default=datetime.utcnow)
# Redis
redis_client = redis.from_url(REDIS_URL, decode_responses=True)
# FastAPI app
app = FastAPI(title="Python Docker App")
class TaskCreate(BaseModel):
    title: str
class TaskResponse(BaseModel):
    id: int
    title: str
    done: bool
    created_at: datetime
class Config:
        from_attributes = True
@app.on_event("startup")
def startup():
    Base.metadata.create_all(bind=engine)
    logger.info("Database tables created")
    logger.info("App started successfully")
@app.on_event("shutdown")
def shutdown():
    logger.info("Shutting down gracefully...")
    engine.dispose()
    redis_client.close()
@app.get("/")
def root():
    # Đếm số lần truy cập bằng Redis
    visits = redis_client.incr("visit_count")
    return {
        "message": "Python Docker App is running!",
        "visits": visits,
        "timestamp": datetime.now().isoformat()
    }
@app.get("/health")
def health():
    # Check DB
    try:
        db = SessionLocal()
        db.execute("SELECT 1")
        db.close()
        db_status = "connected"
    except Exception:
        db_status = "disconnected"
# Check Redis
    try:
        redis_client.ping()
        redis_status = "connected"
    except Exception:
        redis_status = "disconnected"
return {"status": "ok", "database": db_status, "redis": redis_status}
@app.get("/tasks", response_model=list[TaskResponse])
def get_tasks():
    # Cache trong Redis 30 giây
    cached = redis_client.get("tasks_cache")
    if cached:
        import json
        return json.loads(cached)
db = SessionLocal()
    tasks = db.query(TaskModel).order_by(TaskModel.created_at.desc()).all()
    db.close()
# Lưu cache
    import json
    redis_client.setex("tasks_cache", 30, json.dumps([TaskResponse.from_orm(t).dict() for t in tasks], default=str))
    return tasks
@app.post("/tasks", response_model=TaskResponse, status_code=201)
def create_task(task: TaskCreate):
    db = SessionLocal()
    db_task = TaskModel(title=task.title)
    db.add(db_task)
    db.commit()
    db.refresh(db_task)
    db.close()
# Xoá cache khi có task mới
    redis_client.delete("tasks_cache")
    logger.info(f"Task created: {task.title}")
    return db_task
# Graceful shutdown handlers
def handle_sigterm(signum, frame):
    logger.info("SIGTERM received")
    sys.exit(0)
signal.signal(signal.SIGTERM, handle_sigterm)
App này phức tạp hơn một chút so với Node.js: có PostgreSQL làm database chính, Redis làm cache (đếm visits, cache danh sách tasks). Đây là pattern rất phổ biến trong thực tế.
Bước 2: Viết Dockerfile
Tạo file .dockerignore:
__pycache__
*.pyc
*.pyo
.git
.gitignore
.env
README.md
venv/
.venv/
docker-compose*.yml
Dockerfile*
Tạo Dockerfile:
# ============================================
# Stage 1: Build — cài dependencies
# ============================================
FROM python:3.12-slim AS builder
WORKDIR /app
# Cài build dependencies (cần cho psycopg2, v.v.)
RUN apt-get update && apt-get install -y --no-install-recommends \
    gcc \
    libpq-dev \
    && rm -rf /var/lib/apt/lists/*
COPY requirements.txt .
RUN pip install --no-cache-dir --prefix=/install -r requirements.txt
# ============================================
# Stage 2: Runtime
# ============================================
FROM python:3.12-slim
# Cài runtime dependencies
RUN apt-get update && apt-get install -y --no-install-recommends \
    libpq5 \
    curl \
    && rm -rf /var/lib/apt/lists/*
# Tạo non-root user
RUN groupadd -r appgroup && useradd -r -g appgroup appuser
WORKDIR /app
# Copy Python packages từ builder
COPY --from=builder /install /usr/local
# Copy source code
COPY app/ ./app/
# Đổi ownership
RUN chown -R appuser:appgroup /app
USER appuser
EXPOSE 8000
# Health check
HEALTHCHECK --interval=30s --timeout=5s --start-period=15s --retries=3 \
  CMD curl -f http://localhost:8000/health || exit 1
# Chạy bằng gunicorn với uvicorn worker
CMD ["gunicorn", "app.main:app", \
     "--worker-class", "uvicorn.workers.UvicornWorker", \
     "--workers", "2", \
     "--bind", "0.0.0.0:8000", \
     "--access-logfile", "-", \
     "--error-logfile", "-"]
Mấy điểm cần lưu ý:
- python:3.12-slim: Bản slim nhẹ hơn bản đầy đủ (~150MB vs ~900MB). Đừng dùng Alpine cho Python vì hay gặp lỗi compile với các package C extension.
- Multi-stage build: Stage 1 cài
gcc,libpq-dev(build tools cho psycopg2). Stage 2 chỉ cầnlibpq5(runtime library). Image nhỏ hơn ~200MB. - gunicorn + uvicorn worker: Gunicorn quản lý process, uvicorn xử lý async. Đây là combo chuẩn cho FastAPI production.
- –access-logfile –: Log ra stdout thay vì file. Docker sẽ capture được qua
docker logs.
Bước 3: Viết docker-compose.yml
services:
  app:
    build: .
    container_name: python-app
    restart: unless-stopped
    ports:
      - "8000:8000"
    environment:
      - DATABASE_URL=postgresql://appuser:secret@postgres:5432/myapp
      - REDIS_URL=redis://redis:6379/0
    depends_on:
      postgres:
        condition: service_healthy
      redis:
        condition: service_healthy
    networks:
      - app-network
postgres:
    image: postgres:16-alpine
    container_name: python-postgres
    restart: unless-stopped
    environment:
      POSTGRES_USER: appuser
      POSTGRES_PASSWORD: secret
      POSTGRES_DB: myapp
    volumes:
      - postgres-data:/var/lib/postgresql/data
    healthcheck:
      test: ["CMD-SHELL", "pg_isready -U appuser -d myapp"]
      interval: 10s
      timeout: 5s
      retries: 5
      start_period: 20s
    networks:
      - app-network
redis:
    image: redis:7-alpine
    container_name: python-redis
    restart: unless-stopped
    volumes:
      - redis-data:/data
    healthcheck:
      test: ["CMD", "redis-cli", "ping"]
      interval: 10s
      timeout: 5s
      retries: 5
    networks:
      - app-network
volumes:
  postgres-data:
  redis-data:
networks:
  app-network:
Chạy:
docker compose up -d --buildTest:
# Trang chủ (mỗi lần gọi, visits tăng lên nhờ Redis)
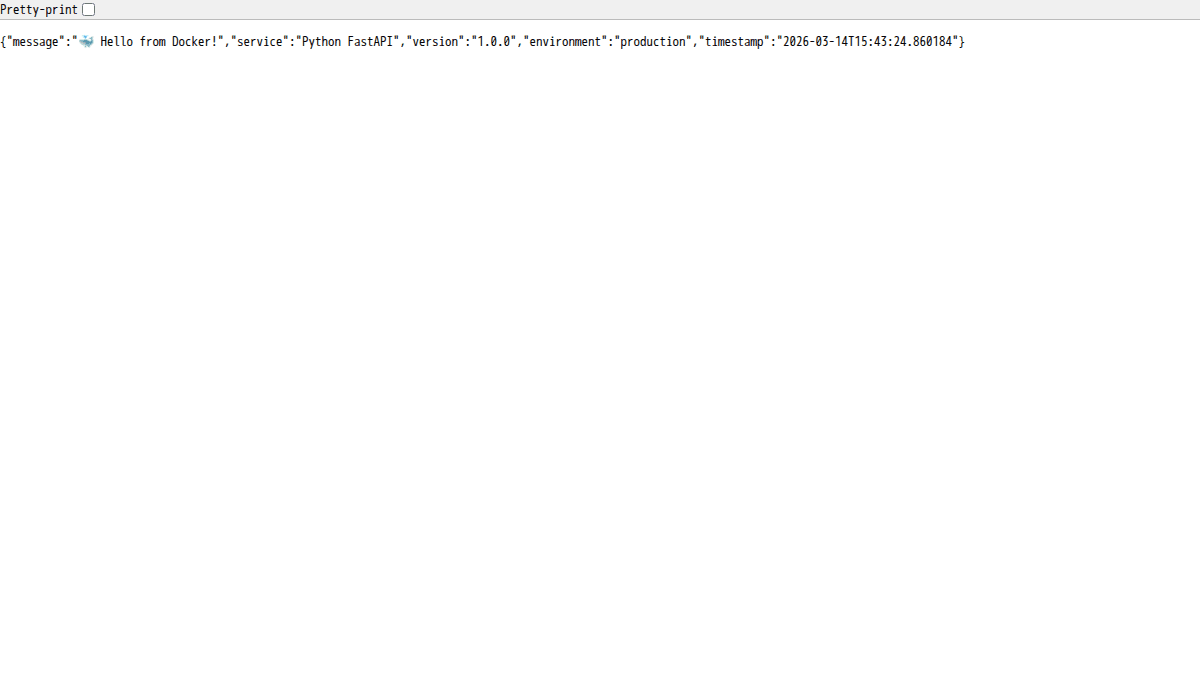
curl http://localhost:8000/
# Health check
curl http://localhost:8000/health
# Tạo task
curl -X POST http://localhost:8000/tasks \
-H "Content-Type: application/json" \
-d '{"title": "Learn FastAPI"}'
# Xem tasks
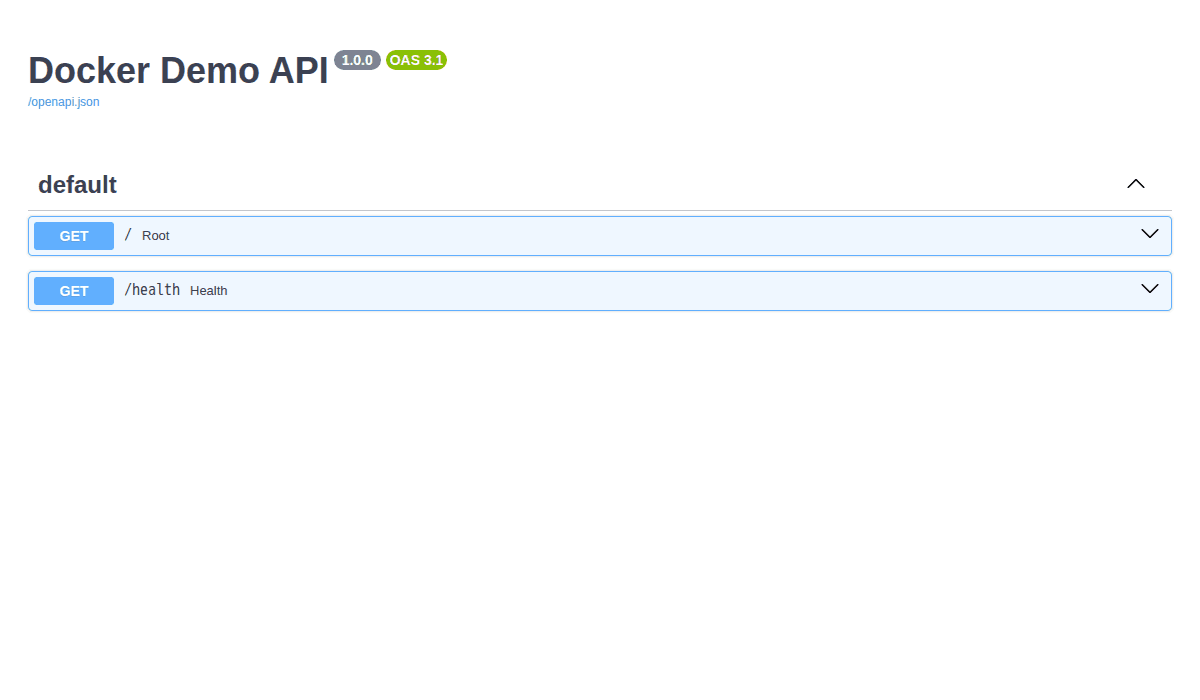
curl http://localhost:8000/tasksFastAPI còn tự tạo docs API cho bạn tại http://localhost:8000/docs: rất tiện để test trực tiếp trên trình duyệt.
Patterns chung cho cả Node.js và Python
Dù viết app bằng ngôn ngữ nào, khi chạy trong Docker đều nên tuân theo những patterns sau. Mình đã áp dụng chúng ở trên, giờ sẽ giải thích kỹ hơn.
Multi-stage build: Build stage vs Runtime stage
Ý tưởng rất đơn giản:
- Build stage : Cài build tools (gcc, npm, node-gyp…), compile code, cài dependencies. Stage này “bẩn” , đầy đủ tools nhưng nặng.
- Runtime stage: Chỉ copy output cần thiết từ build stage. Không có build tools, không có source code thừa. Image nhẹ, ít lỗ hổng bảo mật.
So sánh kích thước image:
# Không multi-stage (mọi thứ trong 1 stage)
node-app-single    →  ~350MB
python-app-single  →  ~650MB
# Có multi-stage
node-app           →  ~180MB
python-app         →  ~250MB
Nhỏ hơn = pull nhanh hơn, deploy nhanh hơn, ít attack surface hơn.
Non-root user trong container
Mặc định, process trong container chạy bằng root. Nếu attacker exploit được app, họ có root trong container, và nếu có lỗ hổng container escape, họ có root trên host luôn.
Giải pháp: luôn tạo và chạy bằng non-root user.
# Alpine (Node.js)
RUN addgroup -S appgroup && adduser -S appuser -G appgroup
# Debian/Slim (Python)
RUN groupadd -r appgroup && useradd -r -g appgroup appuser
# Cả hai
USER appuser
Lưu ý: Một số thao tác cần root (bind port < 1024, cài package). Hãy làm những việc đó TRƯỚC dòng USER appuser.
Graceful shutdown (SIGTERM handling)
Khi bạn chạy docker compose down hoặc docker stop, Docker gửi signal SIGTERM cho process chính trong container. Nếu app không xử lý SIGTERM, Docker đợi 10 giây rồi gửi SIGKILL (kill cứng).
Vấn đề: Kill cứng có thể gây mất dữ liệu, request đang xử lý dở bị cắt, database connection không đóng đúng cách, file đang ghi bị corrupt.
Giải pháp: Bắt SIGTERM, dọn dẹp, rồi mới exit.
Node.js:
process.on('SIGTERM', () => {
  console.log('SIGTERM received. Closing server...');
// Ngừng nhận request mới
  server.close(() => {
    // Đóng database connection
    mongoose.connection.close();
    console.log('Cleanup done. Exiting.');
    process.exit(0);
  });
});
Python (FastAPI):
import signal, sys
def handle_sigterm(signum, frame):
    logger.info("SIGTERM received. Cleaning up...")
    engine.dispose()      # Đóng DB connections
    redis_client.close()  # Đóng Redis
    sys.exit(0)
signal.signal(signal.SIGTERM, handle_sigterm)
# Hoặc dùng FastAPI lifecycle events:
@app.on_event("shutdown")
def shutdown():
    engine.dispose()
    redis_client.close()
Logging best practices
Quy tắc vàng: Log ra stdout/stderr, không log ra file.
Tại sao? Vì Docker đã có hệ thống logging driver riêng. Khi app log ra stdout, Docker capture lại và bạn xem bằng docker logs. Nếu log ra file trong container, file đó mất khi container bị xoá.
# Xem logs
docker logs node-app
# Xem logs realtime
docker logs -f node-app
# Xem 50 dòng cuối
docker logs --tail 50 node-app
# Xem logs trong khoảng thời gian
docker logs --since 2024-01-01T00:00:00 node-app
Thêm mấy tips:
- Dùng structured logging (JSON format): dễ parse, dễ tìm kiếm khi dùng với ELK, Loki, hay bất kỳ log aggregator nào.
- Luôn có timestamp và log level: để biết lỗi xảy ra khi nào và nghiêm trọng đến đâu.
- Không log sensitive data: passwords, tokens, PII (personal information) tuyệt đối không được log.
Development vs Production Dockerfile
Ở phần Node.js, bạn đã thấy mình tách thành 2 file: Dockerfile (production) và Dockerfile.dev (development). Đây là practice rất phổ biến. So sánh chi tiết:
Development Dockerfile
Ưu tiên: tốc độ phát triển.
- Cài cả devDependencies (nodemon, pytest, debugger…)
- Bind mount source code → sửa code không cần rebuild
- Expose debug ports (9229 cho Node, 5678 cho Python debugpy)
- Hot reload enabled
- Không cần multi-stage (chấp nhận image to)
Production Dockerfile
Ưu tiên: bảo mật, nhẹ, nhanh.
- Multi-stage build: chỉ giữ runtime cần thiết
- Chỉ production dependencies (npm ci –only=production)
- Non-root user
- Không expose debug ports
- COPY source code vào image (không bind mount)
- Health check bật sẵn
Bảng so sánh nhanh:
| Tiêu chí | Development | Production |
|---|---|---|
| Base image | Full (node:20, python:3.12) | Slim/Alpine (node:20-alpine, python:3.12-slim) |
| Dependencies | Tất cả (dev + prod) | Chỉ production |
| Source code | Bind mount từ host | COPY vào image |
| Hot reload | Có (nodemon, uvicorn –reload) | Không |
| Debug port | Mở (9229, 5678) | Đóng |
| User | root (tiện cho dev) | Non-root |
| Image size | ~500MB+ | ~150-250MB |
| Build stages | 1 | 2+ (multi-stage) |
Tạo Dockerfile.dev cho Python tương tự:
FROM python:3.12-slim
WORKDIR /app
# Cài build dependencies
RUN apt-get update && apt-get install -y --no-install-recommends \
    gcc libpq-dev curl \
    && rm -rf /var/lib/apt/lists/*
COPY requirements.txt .
RUN pip install --no-cache-dir -r requirements.txt
RUN pip install --no-cache-dir debugpy  # Debug tool
COPY . .
EXPOSE 8000 5678
# Chạy uvicorn trực tiếp với --reload
CMD ["uvicorn", "app.main:app", "--host", "0.0.0.0", "--port", "8000", "--reload"]
Và docker-compose.dev.yml cho Python:
services:
  app:
    build:
      context: .
      dockerfile: Dockerfile.dev
    container_name: python-app-dev
    restart: unless-stopped
    ports:
      - "8000:8000"
      - "5678:5678"
    environment:
      - DATABASE_URL=postgresql://appuser:secret@postgres:5432/myapp
      - REDIS_URL=redis://redis:6379/0
    volumes:
      - ./app:/app/app    # Bind mount source
    depends_on:
      postgres:
        condition: service_healthy
      redis:
        condition: service_healthy
    networks:
      - app-network
postgres:
    image: postgres:16-alpine
    container_name: python-postgres-dev
    restart: unless-stopped
    ports:
      - "5432:5432"   # Expose cho GUI tools (pgAdmin, DBeaver)
    environment:
      POSTGRES_USER: appuser
      POSTGRES_PASSWORD: secret
      POSTGRES_DB: myapp
    volumes:
      - postgres-dev-data:/var/lib/postgresql/data
    healthcheck:
      test: ["CMD-SHELL", "pg_isready -U appuser -d myapp"]
      interval: 10s
      timeout: 5s
      retries: 5
      start_period: 20s
    networks:
      - app-network
redis:
    image: redis:7-alpine
    container_name: python-redis-dev
    restart: unless-stopped
    ports:
      - "6379:6379"   # Expose cho Redis CLI, RedisInsight
    volumes:
      - redis-dev-data:/data
    healthcheck:
      test: ["CMD", "redis-cli", "ping"]
      interval: 10s
      timeout: 5s
      retries: 5
    networks:
      - app-network
volumes:
  postgres-dev-data:
  redis-dev-data:
networks:
  app-network:
Workflow hàng ngày:
# Development
docker compose -f docker-compose.dev.yml up -d --build
# Production
docker compose up -d --build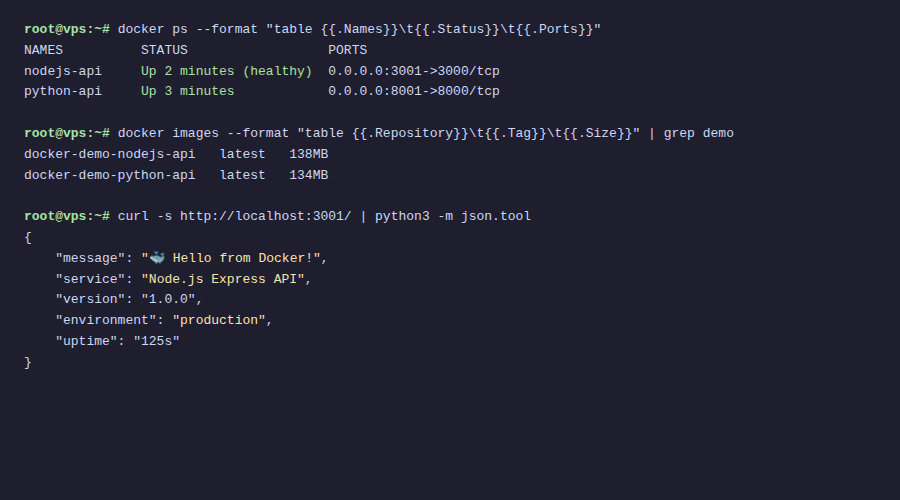
📚 Serie Docker từ A đến Z
- Bài 1: Docker là gì? Tại sao nên dùng Docker trên VPS
- Bài 2: Cài đặt Docker và Docker Compose trên VPS Ubuntu
- Bài 3: Làm quen với Docker – Các lệnh cơ bản cần biết
- Bài 4: Docker Image & Dockerfile – Tự tạo Image riêng
- Bài 5: Docker Volume & Network – Quản lý dữ liệu và mạng
- Bài 6: Docker Compose là gì? Cài đặt và cú pháp cơ bản
- Bài 7: Deploy WordPress + MySQL + phpMyAdmin bằng Docker Compose
- Bài 8: Deploy LEMP Stack (Nginx + PHP-FPM + MariaDB) bằng Docker Compose
- Bài 9: Biến môi trường & file .env trong Docker Compose
- Bài 10: Reverse Proxy với Nginx Proxy Manager + SSL tự động
- Bài 11: Deploy ứng dụng Node.js / Python với Docker Compose (đang đọc)
- Bài 12: Backup & Restore dữ liệu Docker Volume
- Bài 13: Monitoring Docker với Portainer, Uptime Kuma và cAdvisor
- Bài 14: Docker Logging – Quản lý log hiệu quả
- Bài 15: Bảo mật Docker trên VPS
- Bài 16: CI/CD đơn giản – Auto deploy với Webhook + Docker Compose
- Bài 17: Docker Compose trong thực tế – Tổng hợp project mẫu
Tổng kết
Qua bài này, bạn đã:
- Deploy Node.js (Express) + MongoDB bằng Docker Compose: từ viết code, Dockerfile đến docker-compose.yml
- Deploy Python (FastAPI) + PostgreSQL + Redis: stack phức tạp hơn nhưng cùng pattern
- Áp dụng multi-stage build để giảm kích thước image
- Chạy container bằng non-root user cho bảo mật
- Xử lý graceful shutdown đúng cách
- Setup health check cho cả app và database
- Phân biệt Development vs Production Dockerfile
- Cấu hình hot reload cho quá trình phát triển
Pattern bạn học trong bài này áp dụng được cho bất kỳ ngôn ngữ nào: Go, Rust, Java, PHP… Cốt lõi vẫn là: multi-stage build, non-root user, health check, graceful shutdown, tách dev/prod config.
App đang chạy rồi, nhưng dữ liệu thì sao? MongoDB, PostgreSQL, Redis : nếu VPS chết, dữ liệu mất hết? Trong Bài 12, mình sẽ hướng dẫn bạn Backup & Restore dữ liệu Docker , từ backup volumes, database dump, đến tự động hoá backup theo lịch. Đảm bảo dữ liệu của bạn luôn an toàn. Hẹn gặp bạn ở bài tiếp theo! 🚀
👈 Bài trước: Reverse Proxy với Nginx Proxy Manager + SSL tự động
👉 Bài tiếp: Backup & Restore dữ liệu Docker Volume
Có thể bạn cần xem thêm
- Docker Image & Dockerfile – Tự tạo Image riêng
- Deploy Docker Compose trên Coolify - Ứng dụng phức tạp multi-container
- Deploy LEMP Stack (Nginx + PHP-FPM + MariaDB) bằng Docker Compose
- Docker Compose trong thực tế – Tổng hợp project mẫu
- CI/CD đơn giản – Auto deploy với Webhook + Docker Compose
- Bảo mật Docker trên Linux VPS - Từ image đến runtime
Về tác giả

Thạch Phạm
Đồng sáng lập và Giám đốc điều hành của AZDIGI. Có hơn 15 năm kinh nghiệm trong phổ biến kiến thức liên quan đến WordPress tại thachpham.com, phát triển website và phát triển hệ thống.