

Nội dung
Creating an HTML signature in Roundcube will be essential if you often use it to send/receive emails on the Webmail interface.
I. Introduction
Introduction By default, the Roundcube Webmail interface will not have any signature. And you need to set up your own signature, but if you want to create an HTML signature, you will need to design it yourself or find a template available on the internet.
But in this article, AZDIGI will use the available template to make it as easy as possible for you to have an HTML signature, even for those who don’t know how to program HTML.
II. Create the HTML Signature in RoundCube
To create an HTML signature in Roundcube, we need to follow these 3 steps.
Step 1: Design each HTML signature with hubspot.com
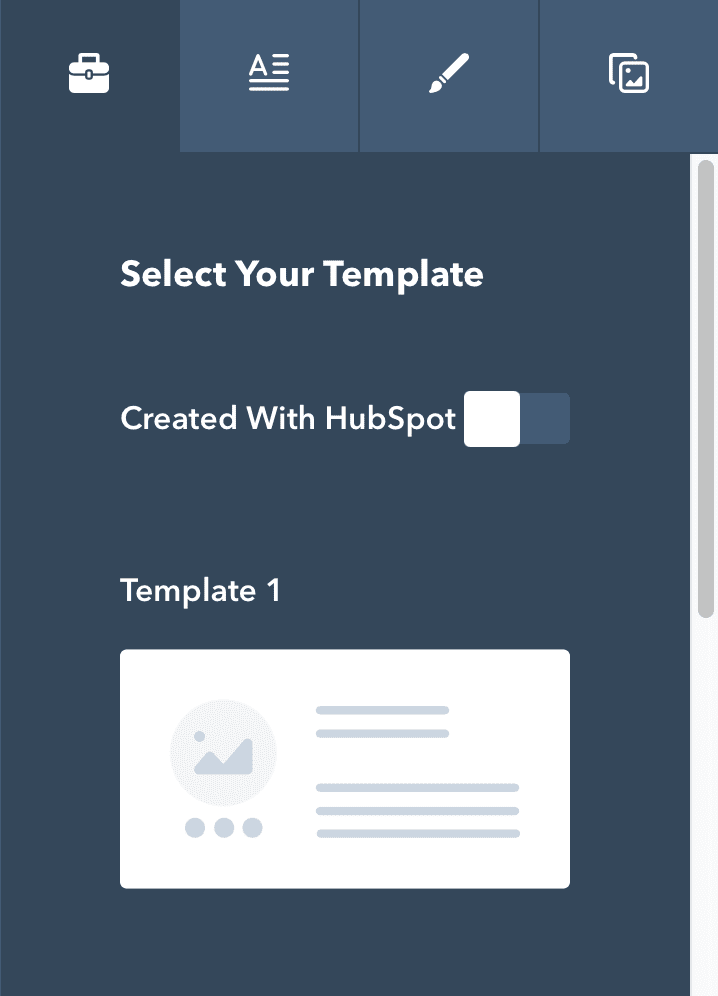
With hubspot.com, you don’t need to sign up for an account; just visit and select some of the available theme templates on the left side of the page. Then fill in the information in the remaining tabs and your signature will gradually form.
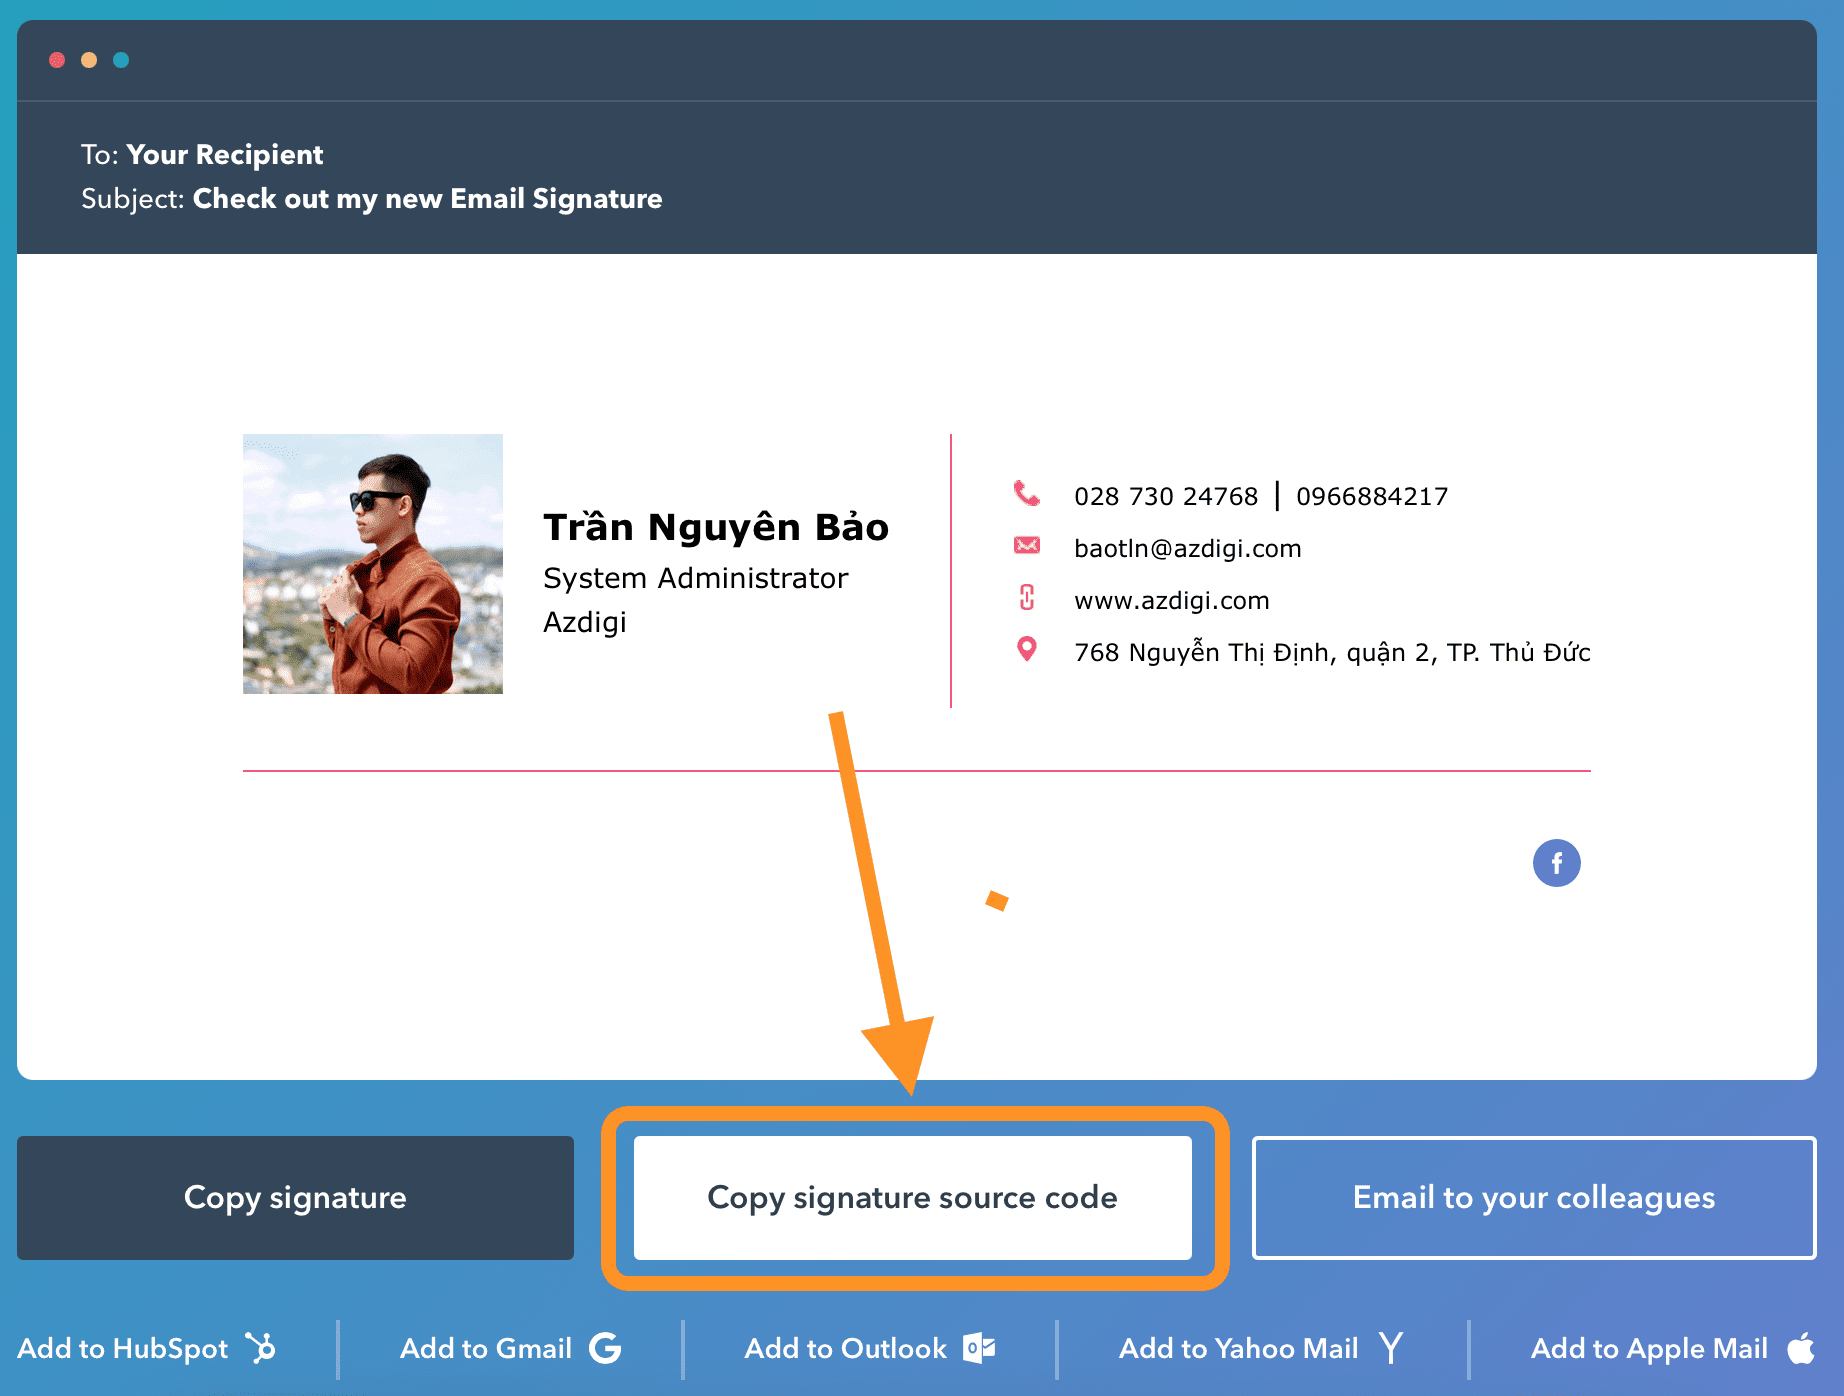
Then you will receive an email as below. And you will need to click this hold button to get the HTML code. This code will be used for the following steps:
Step 2: Log in to the webmail interface
To log in to the webmail interface,
you will have 2 methods:
- Method 1: Access the link http://yourdomain.com:2096
- Method 2: Access the link https://h01.azdigimail.com:2096
Then log in to the email account you need to set up the HTML signature.
Step 3: Set up HTML signature in Roundcube
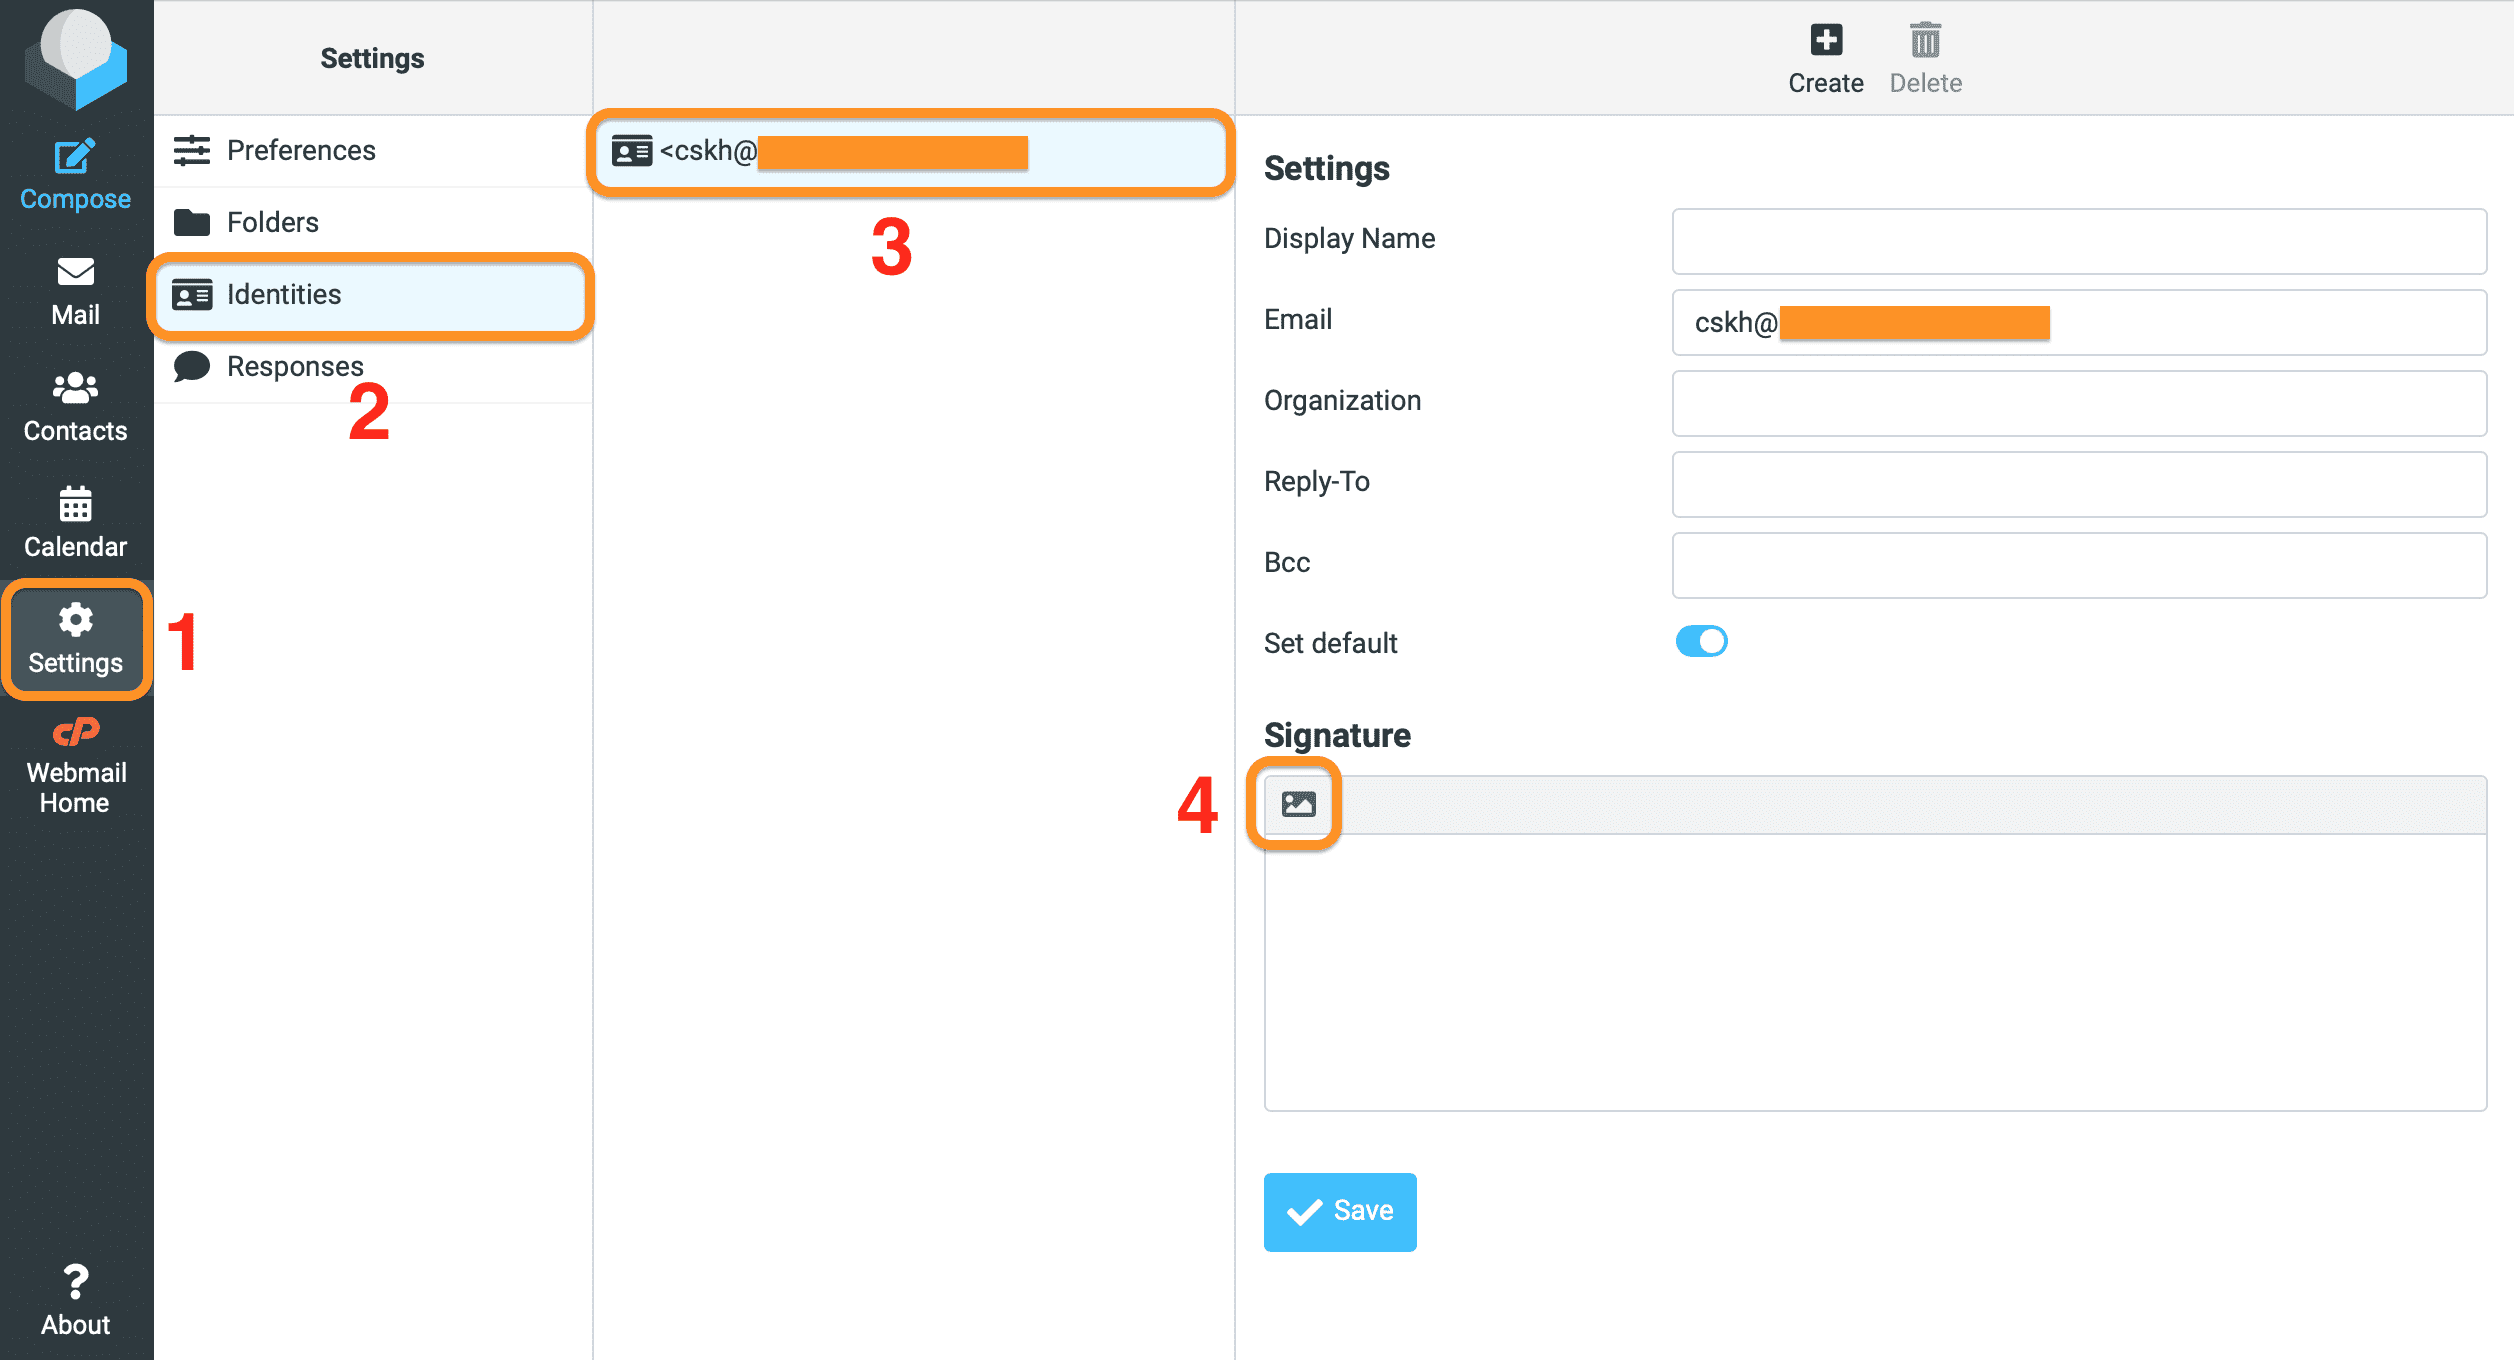
Once you have entered the Webmail (Roundcube) interface, please follow the instructions below to install the signature.
Note: By default, Roundcube only allows plain text signature settings and you will need to select (4) as shown below to switch to HTML mode.
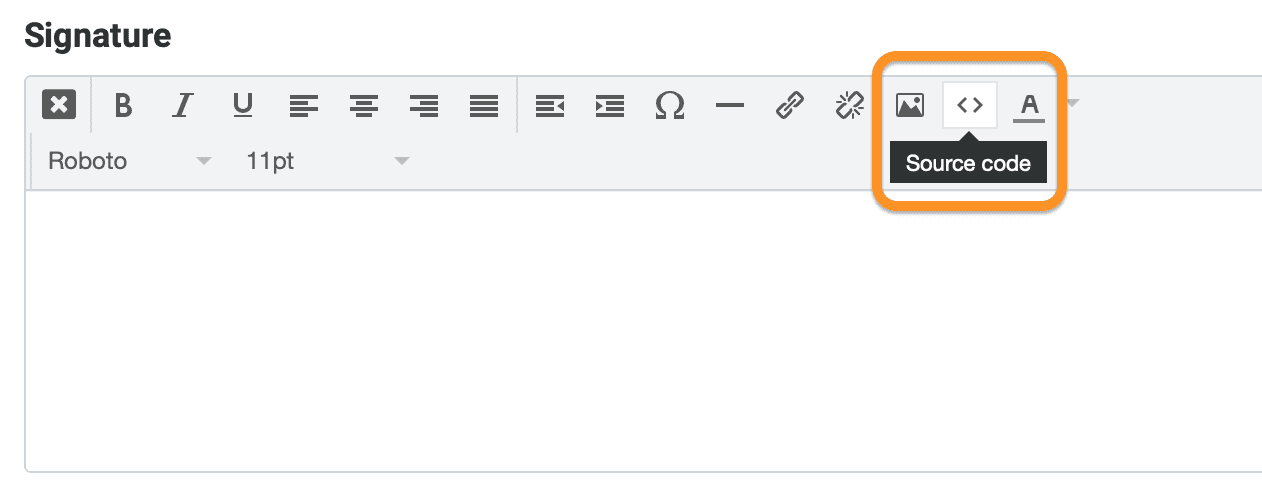
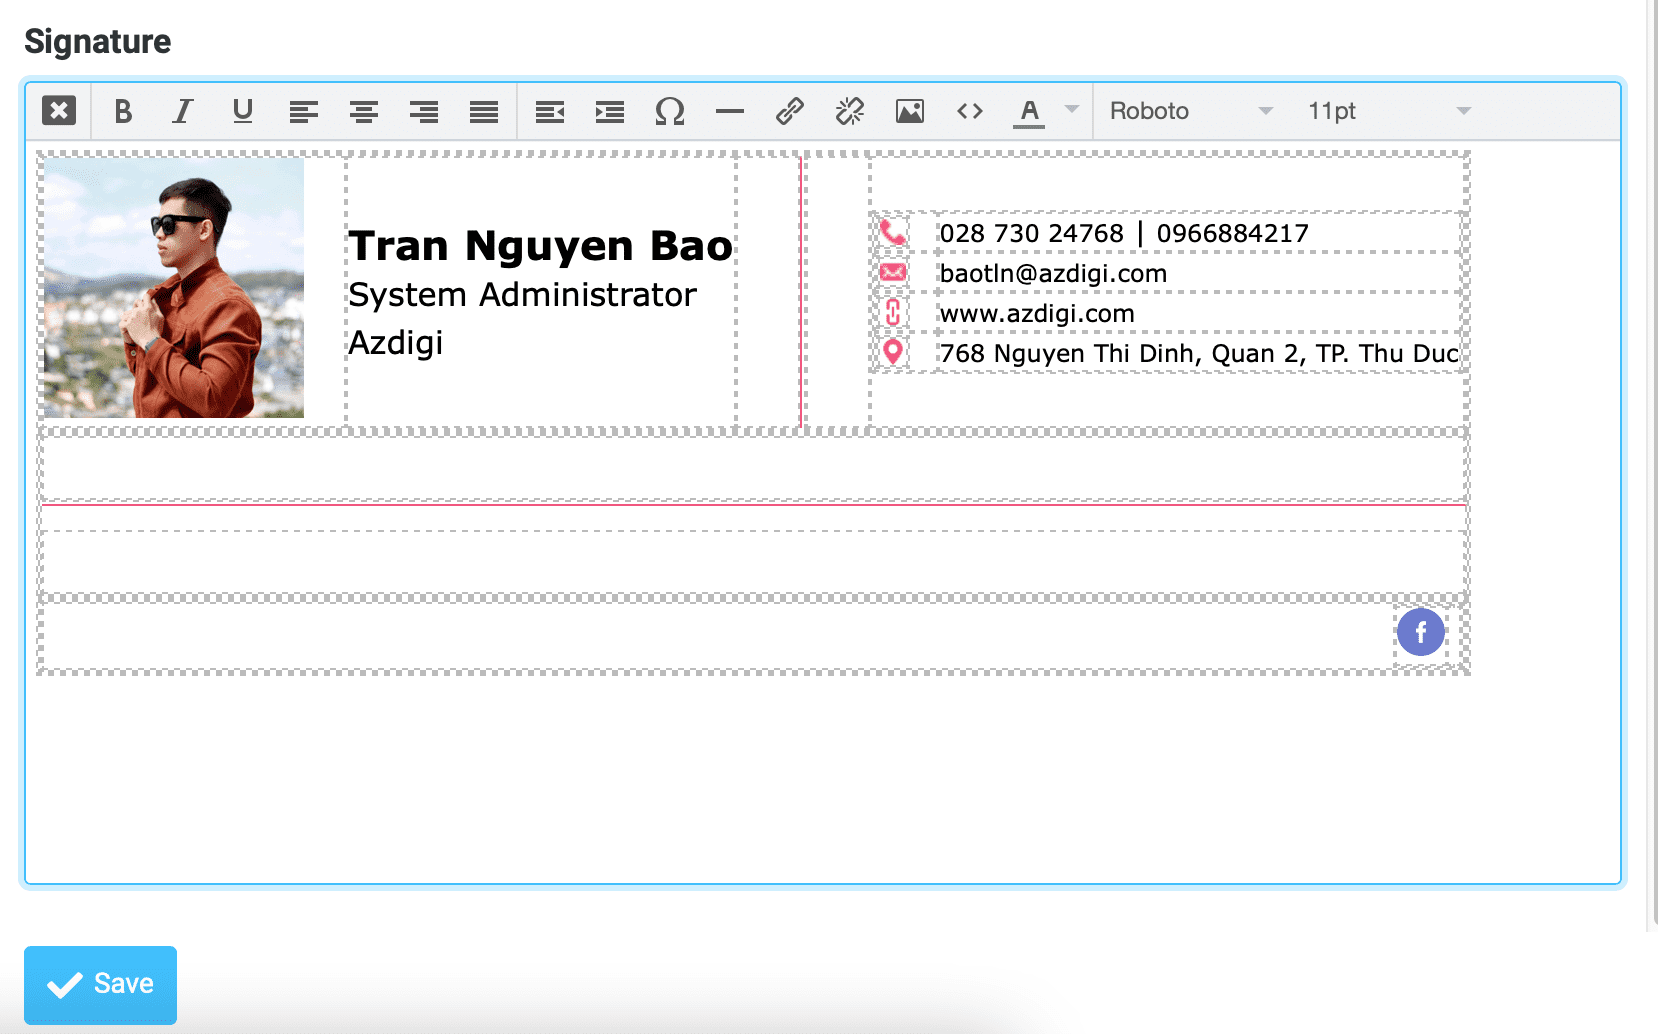
Next, go to the Source code feature to insert the HTML code you copied in step 1.
Below is my result. You need to click Save to finish.
From now on, when sending mail, by default, you will have this signature inserted below.
III. Summary
So with just 3 simple steps, you can successfully create an HTML signature in Roundcube and it’s also quite beautiful. However, I do not encourage you to use Webmail directly to send and receive mail because there are many limitations. However, I do not encourage you to use Webmail directly to send and receive mail because there are many limitations.
- Add an Email account to the Mail MacOS app.
- Add an Email account to the Gmail app.
- How to configure email into Outlook.
Hope this article will be of help to you. Wishing you success!
If you find the article useful, don’t forget to rate it 5 stars!
To refer to the documentation for using mail, you can access the Pro Mail Hosting Guide at the link below:
If you need assistance, you can contact support in the ways below:
- Hotline 247: 028 888 24768 (Ext 0)
- Ticket/Email: You use the email to register for the service and send it directly to: support@azdigi.com.
