
In this article, AZDIGI will guide you to Use SCP and RSYNC to migrate data on Linux, let’s do it!

I. OVERVIEW
In the process of using a Server/VPS, there are times when you need to move data from one VPS to another for use. VPS has a built-in Controller, you can use the functions that the Controller supports to move. But if there is no support or the data is too large, but the panel doesn’t meet enough, how do you do it? And in this article, AZDIGI will share with you 2 tools, SCP and RSYNC. This is also how the Technical Department supports you to migrate data from other providers.
II. IMPLEMENTATION STEPS
1. Use SCP to migrate data
Step 1: Install SCP
SCP (Secure Copy) is an application in Linux that uses the SSH protocol to copy data from a Linux to a Linux server. Before doing this, please install SCP (if not already)
On Ubuntu/Debian
apt-get install scp
On RedHat/CentOS
yum install scp -y
Step 2: Use SCP
SCP implementation model
- IP Client: The server sends the data, you will do it on this server.
- IP server: The server receives the data, you will do it on this server.
Execution syntax:
scp -option source_file username@destination_host:/destination_folder
Script annotation:
- scp: The scp command execute
- -option: Secondary options
- source_file: File/Folder to copy
- Username@destination_host: username and IP/hostname (Example root@45.252.252.252)
- /destination_folder: The destination folder to copy to.
Some important options need to use:
- –P port specifies the exact input port of the server (TCP’s default port is 22) (For example, if the Destination server has SSH Port 2222, you will enter -P 2222)
- –c cipher helps you determine the encryption algorithm you want to use. Some values you can put in are ‘aes256-ctr’, ‘aes256-cbc’, ‘blowfish-cbc’, ‘arcfour’, ‘arcfour128’, ‘arcfour256’, ‘cast128-cbc’, aes128-ctr’, ‘aes128-cbc’, ‘aes192-ctr’, ‘aes192-cbc’, and 3des-cbc’. The default selection in the configuration is ‘AnyStdCipher’
- –q will operate in silent mode, which means only serious errors will show up.
- –r là recursive copying, means including all subdirectories.
- -4 or -6 is used when you want to select the IPv4 or IPv6 protocol version.
- -p is “preserve”, used to save the modification time and properties of the file.
- –u will delete the source file after the conversion is complete.
- -c will help compress data in transit.
Practical examples:
I will examples for you to visualize better. I have 2 VPS with IP addresses and descriptive names as follows so you can easily know which is the source server and which is the destination server.
- Source Server: 103.110.84.109
- Destination Server: 103.221.220.27
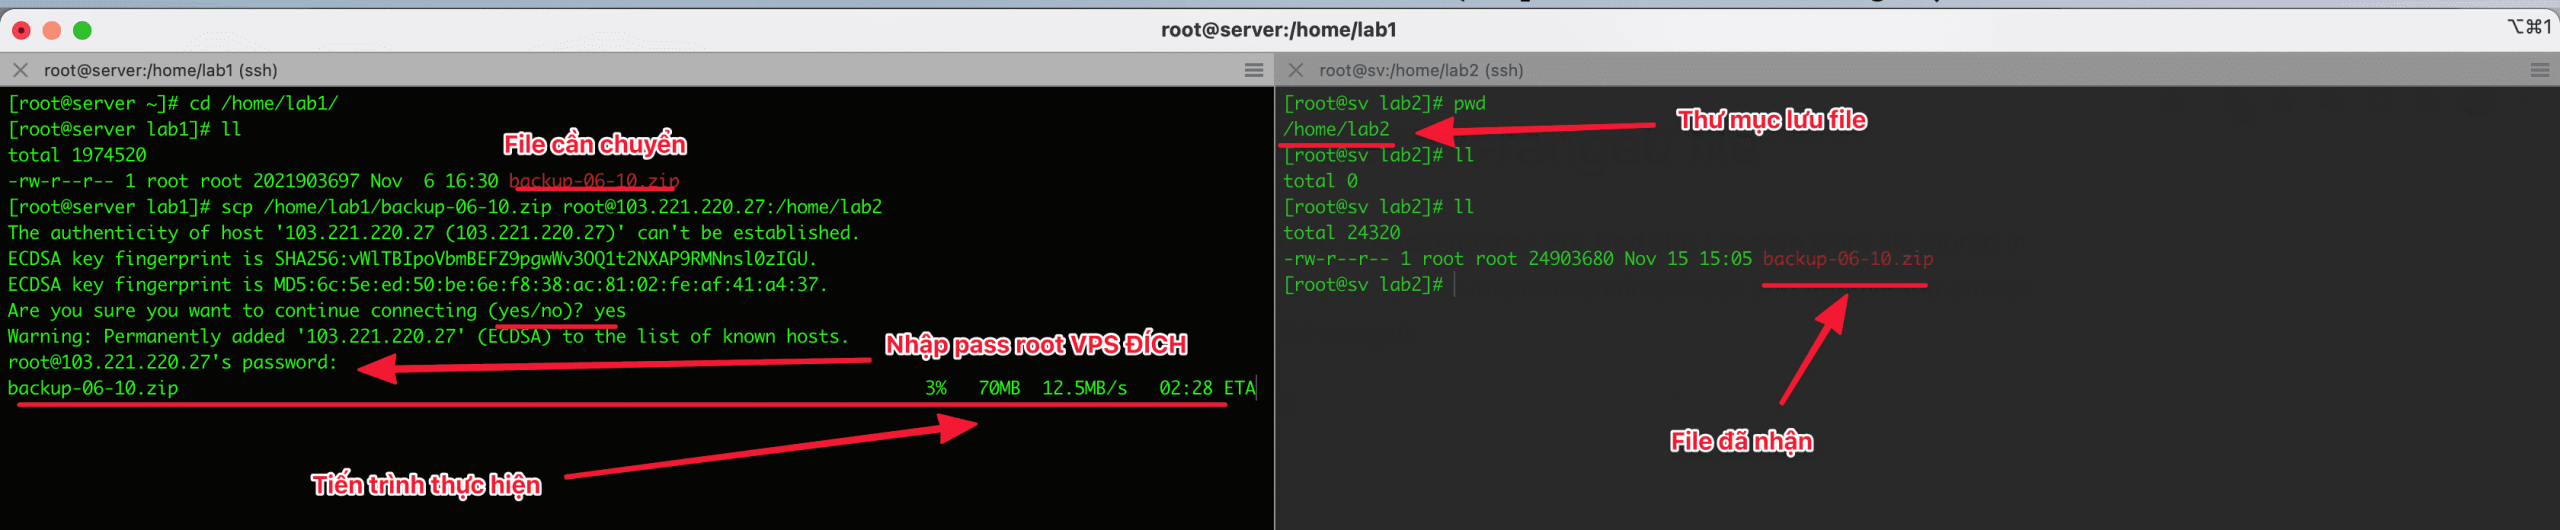
At the source server, I copy a file named backup-06-10.zip in the /home/lab1 directory to the target machine with the directory as /home/lab2

Syntax implemented in the example
scp /home/lab1/backup-06-10.zip root@103.221.220.27:/home/lab2
In there:
- scp: command scp
- /home/lab1/backup-06-10.zip: File path
- root@103.221.220.27: Destination server to transfer files to
- /home/lab2: File storage directory at the Destination server
2. Use Rsync to sync data
In addition to the above SCP, I would like to share one more tool that can copy and synchronize data from local servers or remote servers, which is Rsync. With servers that have Rsync installed, they are available to move or synchronize data between servers. Synchronization is very time-consuming but with Rsync, it is completely possible to save you a lot of time.
Step 1: Install Rsync on Linux
On Debian/Ubuntu
apt-get install rsync
On RedHat/CentOS
yum install rsync
Step 2: Use Rsync
Rsync implementation model
- IP Client: The server sends the data, you will do it on this server.
- IP server: The server receives the data, you will do it on this server.
Execution syntax:
rsync -option source_file username@destination_host:/destination_folder
Script annotation:
- Rsync: The rsync command execute
- -option: Secondary options
- source_file: File/Folder to copy
- Username@destination_host: username and IP/hostname (Example root@45.252.252.252)
- /destination_folder: The destination folder to copy to.
Some important options in Rsync
- -v: show result status
- -r: copy data recursively, but don’t guarantee file and directory parameters
- -a: allows copying data recursively, while preserving all parameters of folders and files
- -z: compress data when transferring, save bandwidth but take a little more time
- -h: human-readable, easy-to-read output
- -e ‘ssh -p PORT’: Optional when using private ssh port (For example, Destination server with SSH port 22, you would use is -e ‘ssh -p 2222’)
- –delete: delete the data in the destination if the source does not exist that data.
- –exclude: Exclude data that you do not want to transmit, if you need to exclude multiple files or folders in different paths, each of them you must add the corresponding -exclude.
Practical examples:
I will examples for you to visualize better. I have 2 VPS with IP addresses and descriptive names as follows so you can easily know which is the source server and which is the destination server.
- Source Server: 103.110.84.109
- Destination Server: 103.221.220.27
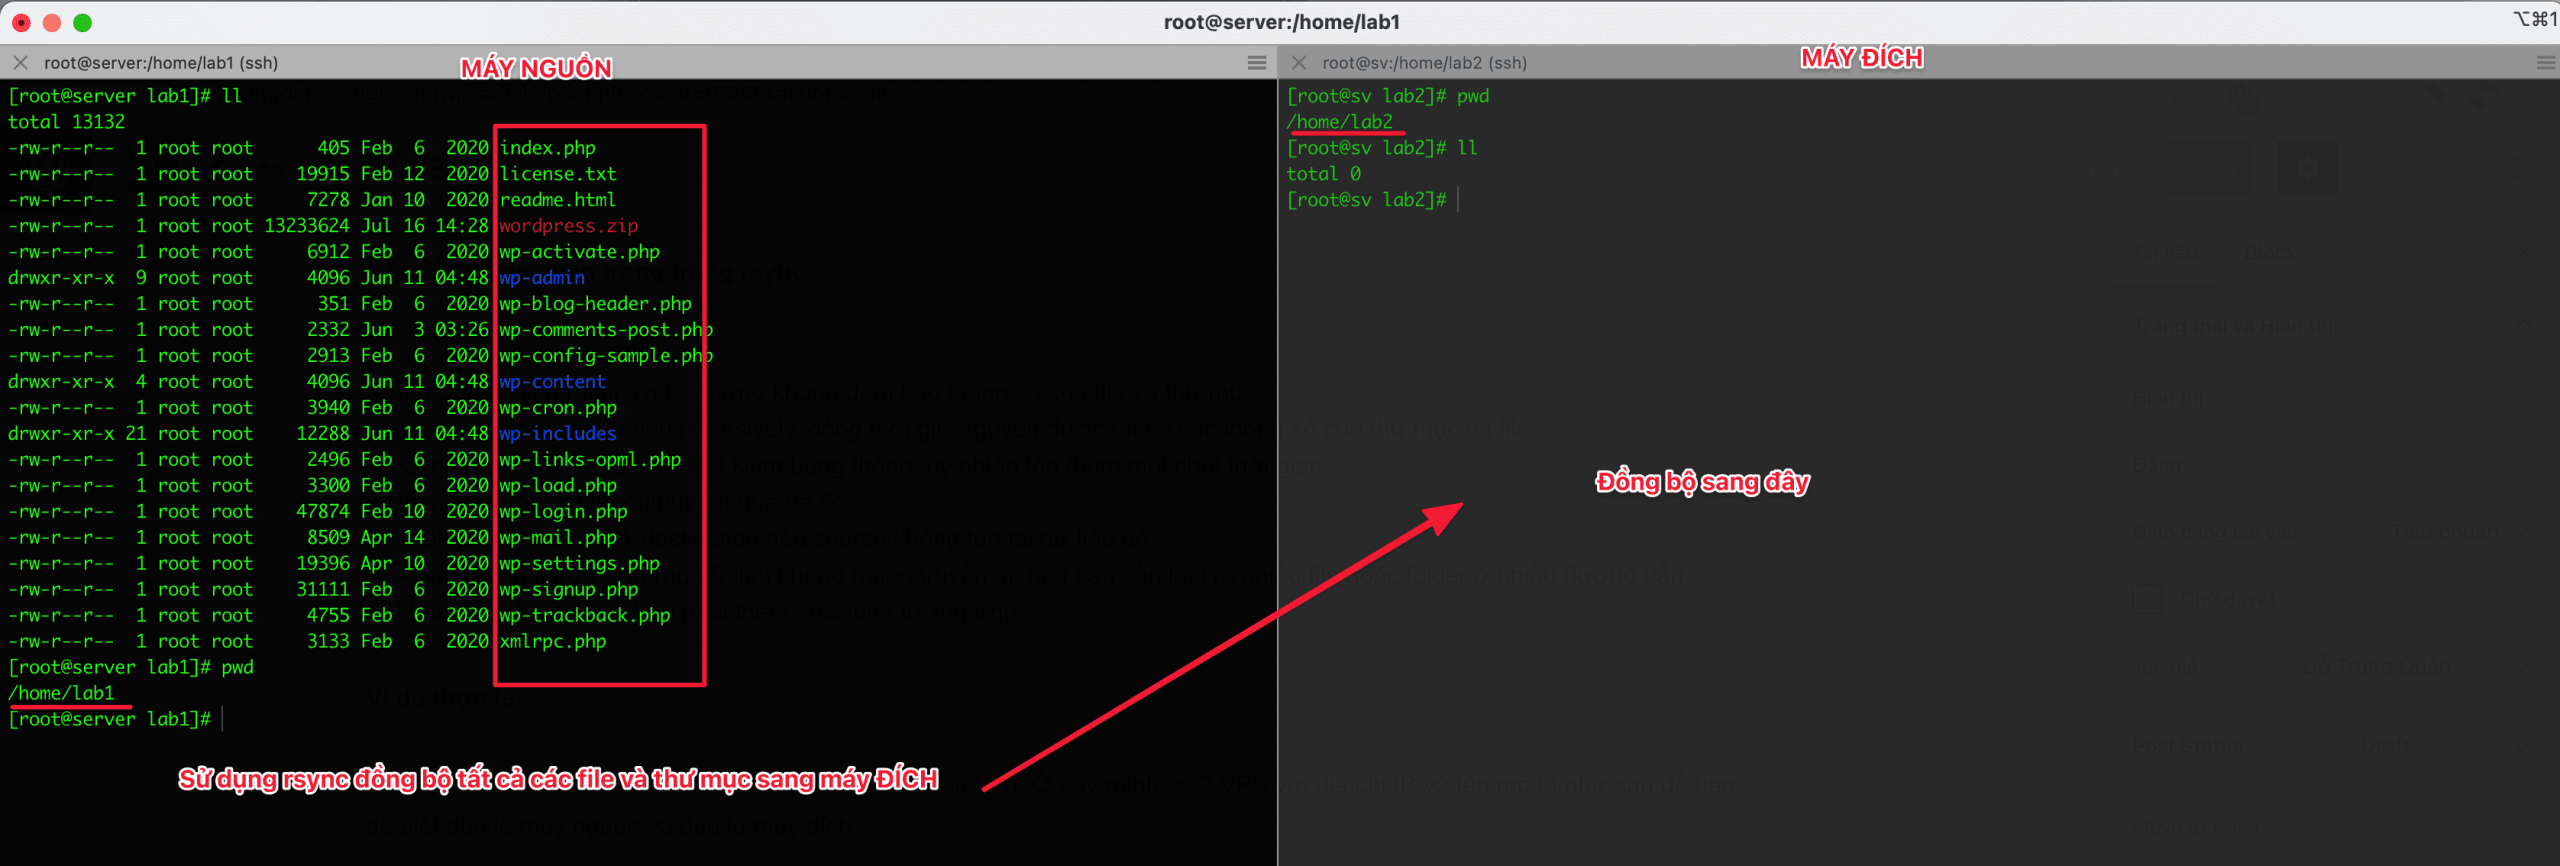
At the source server, I will sync a set of WordPress source code in the /home/lab1 directory to the destination server with the directory as /home/lab2
Syntax of execution
rsync -azvh /home/lab1/* root@103.221.220.27:/home/lab2
In there:
- rsync: sync command
- -avzh: Included options (You can see the option comments above)
- /home/lab1/* : Source folder, sync all files and folders in lab1 folder (sign * means all)
- root@103.221.220/27: Destination Server, the server to which the file is synced
- /home/lab2: The destination server directory, the files will be saved here.
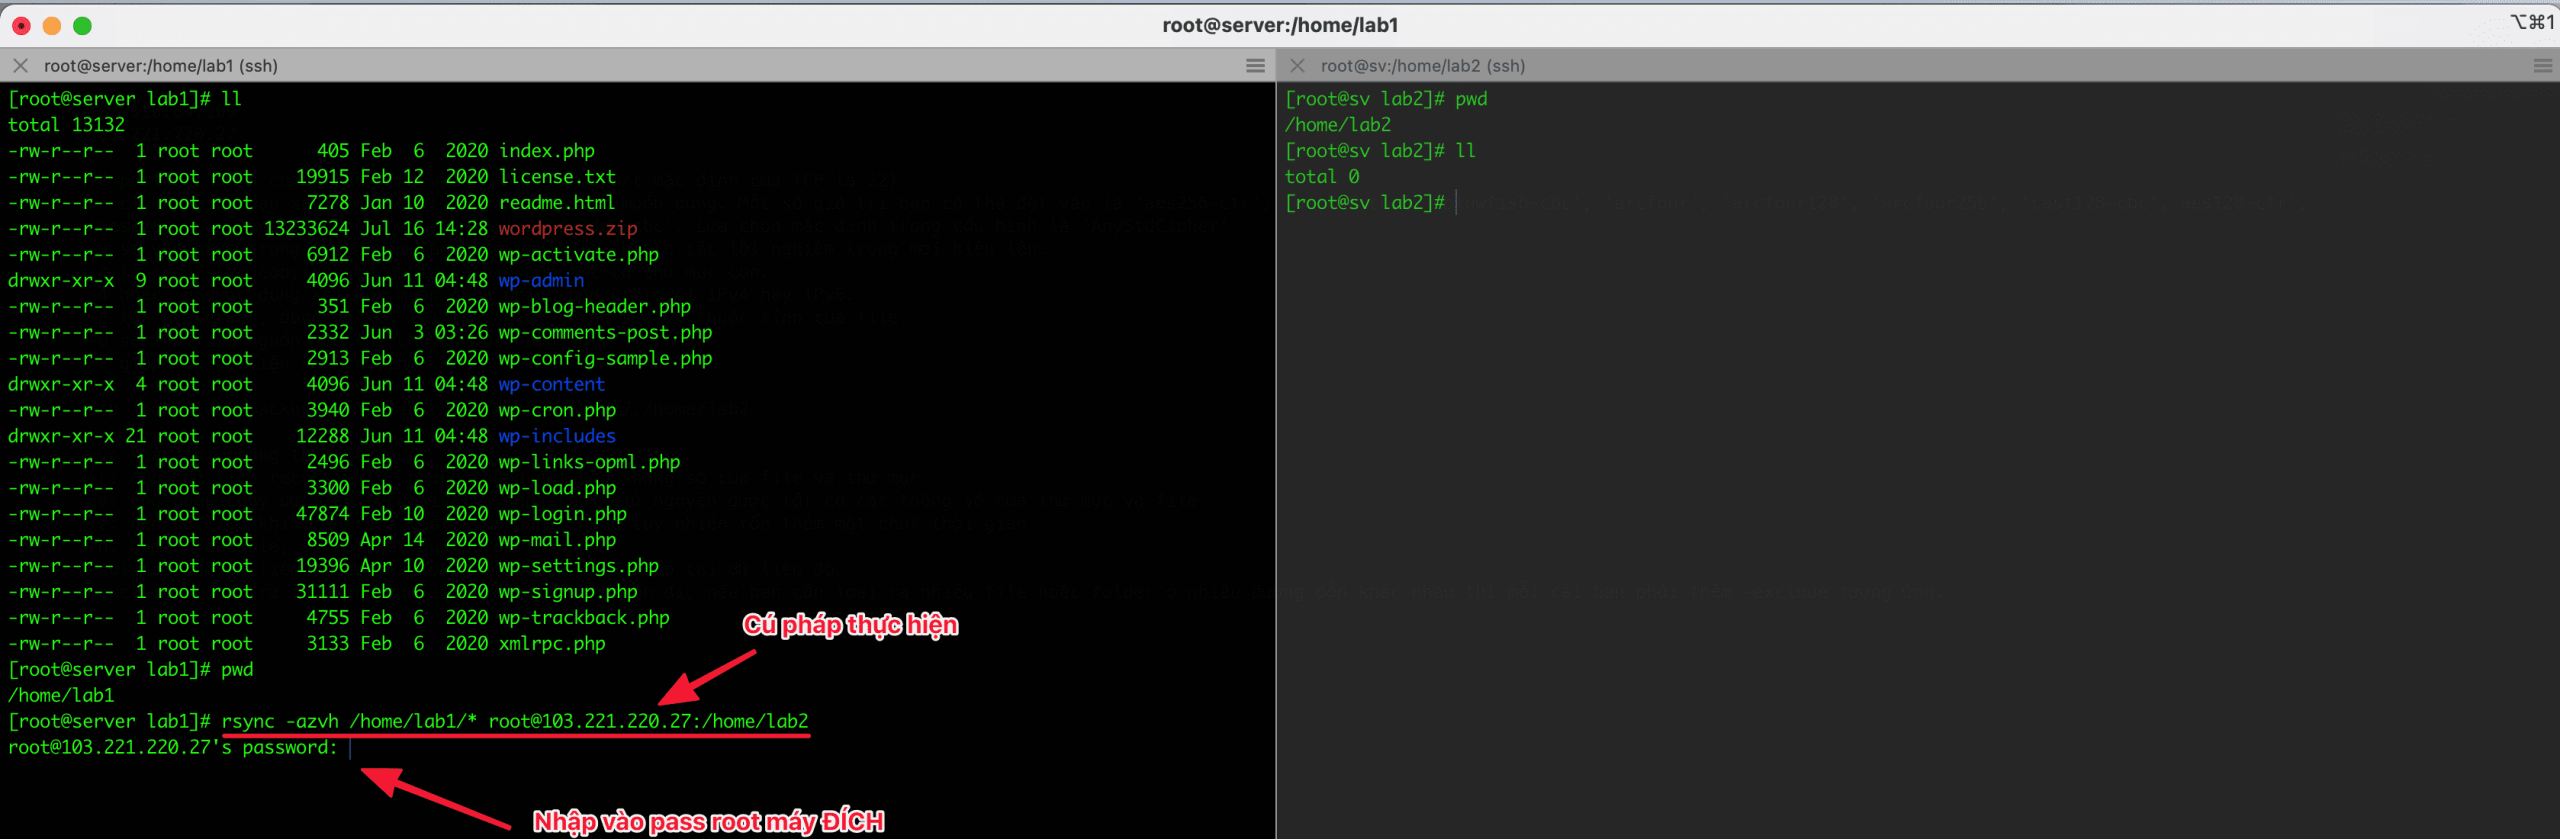
Illustration during the Rsync process.
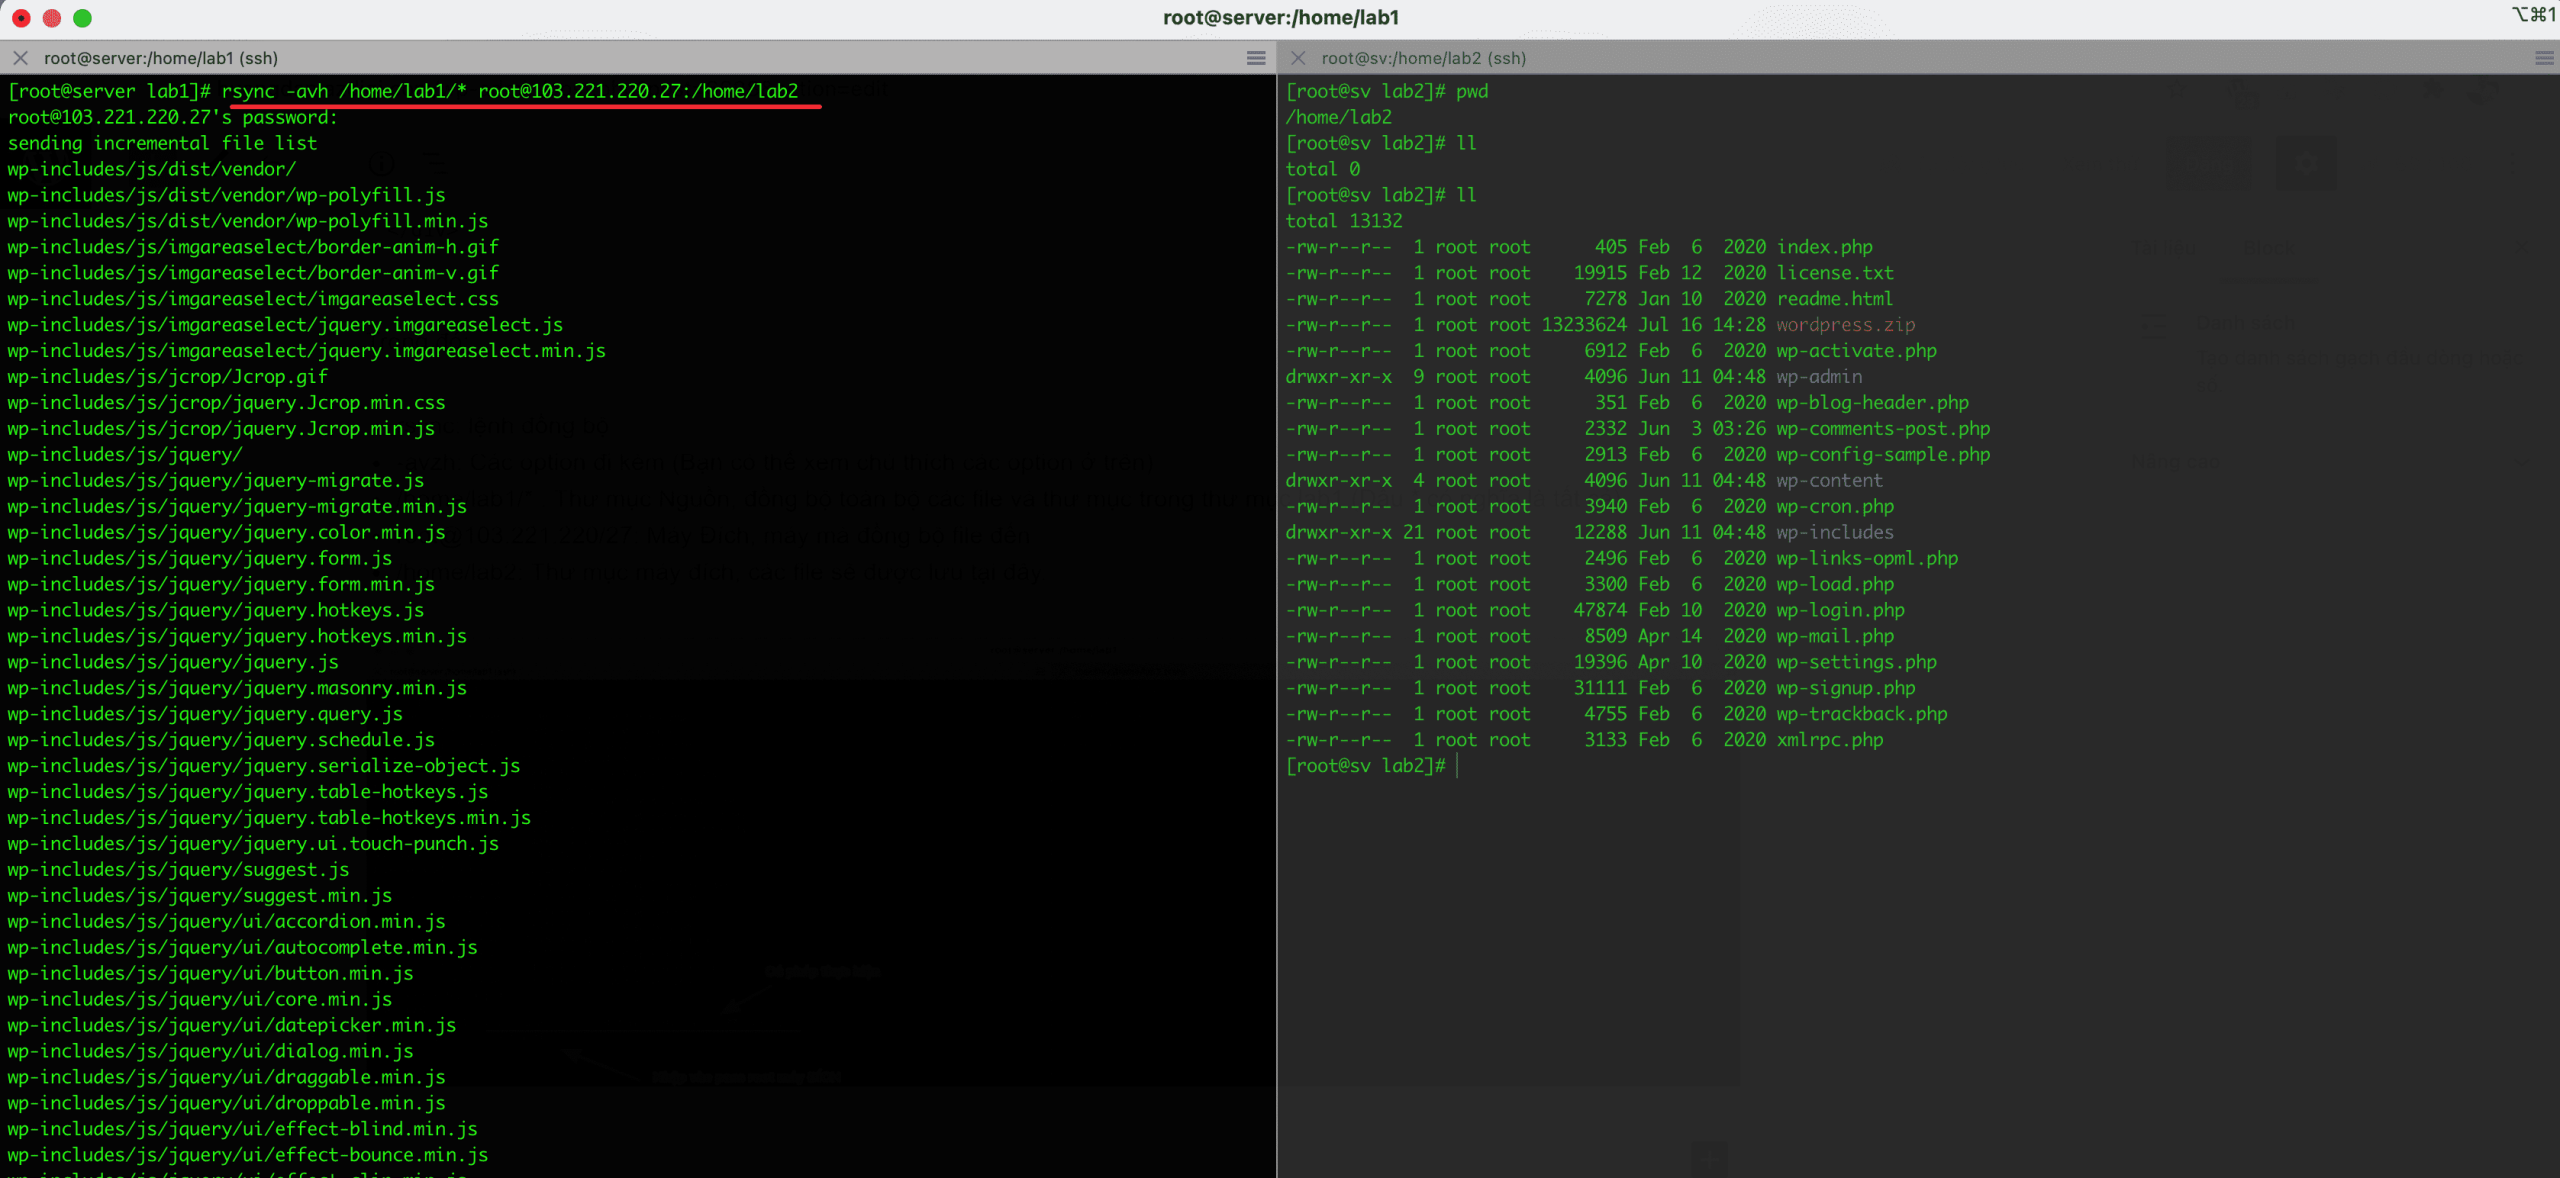
Note: If the data is too large and you cannot track it during the migration, use Screen to do it.
III. Summary
Hopefully, this article will bring a lot of useful things to you in the process of migrating and synchronizing data in servers together safely and easily. Thereby helping you save a lot of time as well as being proactive in data management and operation.
About the author

Thạch Phạm
Đồng sáng lập và Giám đốc điều hành của AZDIGI. Có hơn 15 năm kinh nghiệm trong phổ biến kiến thức liên quan đến WordPress tại thachpham.com, phát triển website và phát triển hệ thống.