
Install Let’s Encrypt SSL on OpenLiteSpeed with a few simple steps.
I. Introduction
What is an SSL certificate?
SSL is a certificate that helps encrypt information on devices or applications that support this encryption. SSL certificate will have Private Key and Public Key, in which Public Key will be installed in terminal applications that browsers or other applications can access. Private Key will be installed in applications that handle receiving data.
Its purpose of operation is like the key to helping decrypt the data sent from the terminal, which is also encrypted through the Public Key.
What is Let’s Encrypt?
Let’s Encrypt is an SSL authentication organization like Comodo, GeoTrust and Symantec, but the difference is that they are a non-profit organization established with the auspices of influential organizations in the world Cisco, Akamai, Mozilla, Facebook… Therefore, Let’s Encrypt SSL certificates will be no different from other types of SSL certificates. However, you must renew them every 90 days to continue using them.
So how to install Let’s Encrypt SSL on a website using OpenLiteSpeed, please see the steps below.
II. Implementation guide
To install Let’s Encrypt SSL on a server using OpenLiteSpeed, you can follow these 4 steps:
Step 1: Install Certbot
Note: During the implementation process, remember to replace the domain azdigi.cf with your domain name.
With CentOS 7, Certbot is available at EPEL Repository and you just need to enable and install it with the following 2 commands:
rpm -ivh https://dl.fedoraproject.org/pub/epel/epel-release-latest-7.noarch.rpm
yum install certbot
Step 2: Create a Let’s Encrypt certificate for the domain
You need to create a certificate for your domain with the command below:
certbot certonly --webroot -w /usr/local/lsws/azdigi.cf/html/ -d azdigi.cf
After entering the above command, you need to enter your email and answer as follows:
- Question 1: Enter your email to receive information
- Question 2: You press A (Agree)
- Question 3: You press N (No)
After completing the information, the installation process will take a few seconds. If you receive the message below, you have completed the certificate creation.
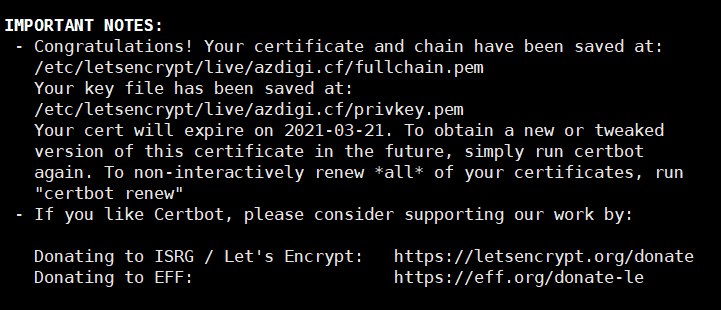
You will see that the path to save the certificate files will be at /etc/letsencrypt/live/azdigi.cf . You can move to the above link to see the .pem configuration files as shown below:
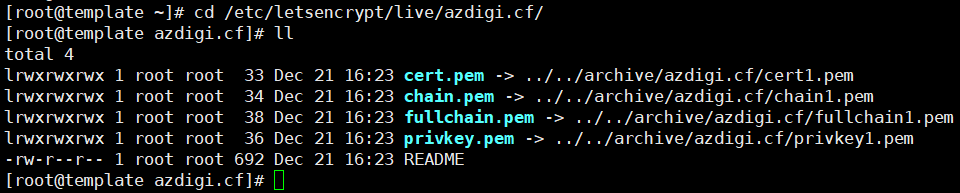
In the next step, you need to declare the path to the fullchain.pem and privkey.pem files in the OpenLiteSpeed configuration.
Step 3: Configure Let’s Encrypt SSL in OpenLiteSpeed
First, you access OpenLiteSpeed under the link https://45.252.249.104:7080/ and log in with the admin information created earlier when installing OpenLiteSpeed. You can refer to the article below to reset the information if you have forgotten this information.
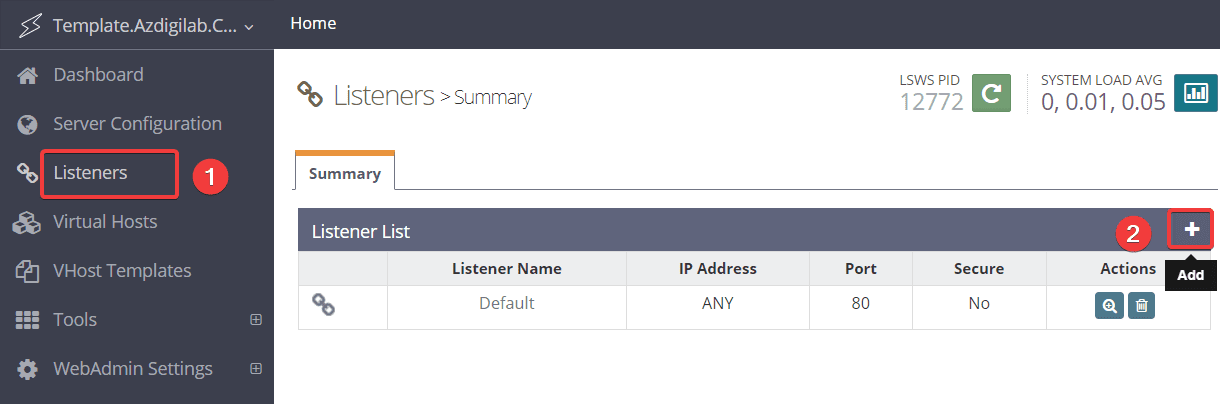
After successfully logging in to OpenLiteSpeed, you access Listeners (1) => Add (2).
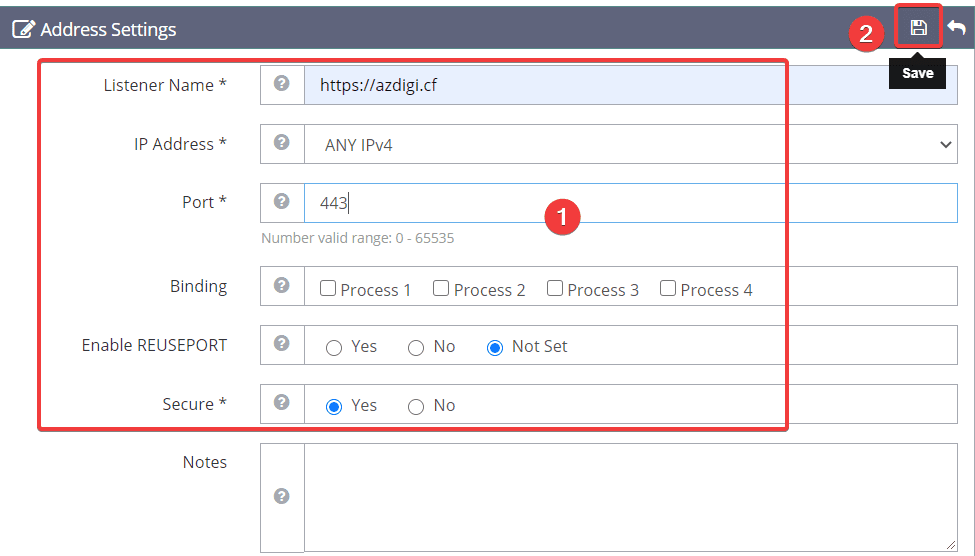
You fill in the information Listener Name, Port, Secure (1) and click Save (2).
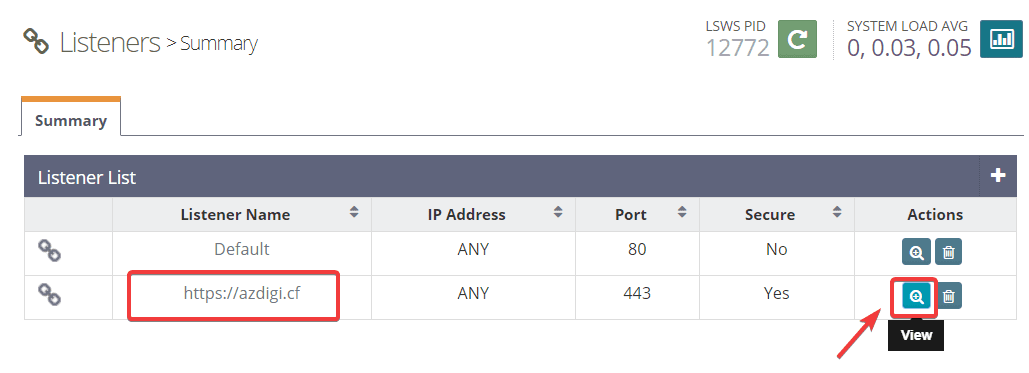
Next, click View in the Listener section (443) just created to edit.
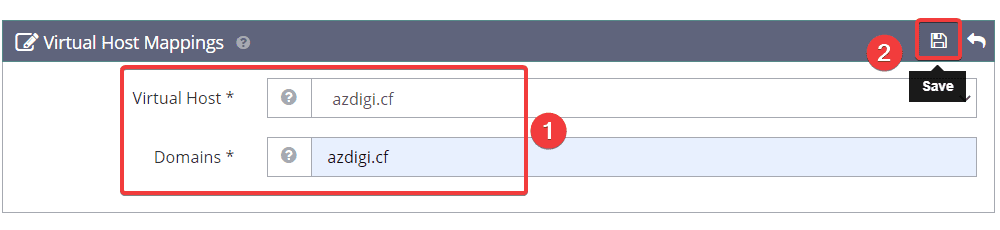
In the Virtual Host Mappings section, click Add (+).

Then you Map virtual host with your domain as shown below:
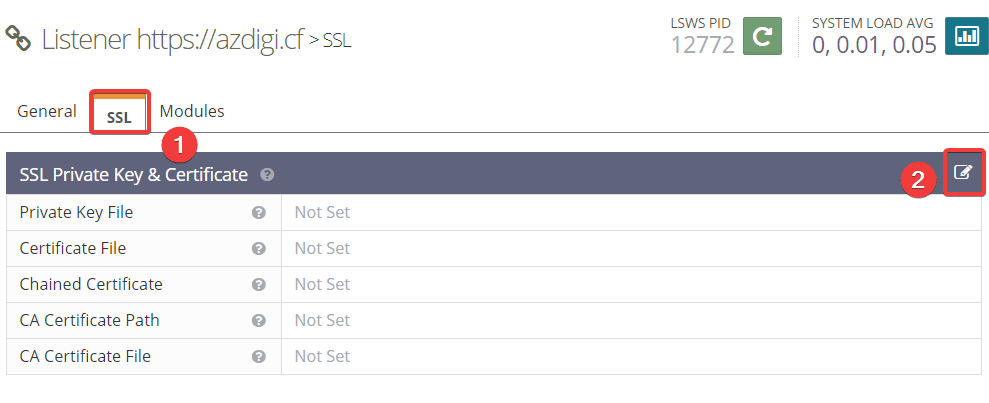
Next, click on the SSL tab (1) => click Edit (2) to edit the SSL Private Key & Certificate section.
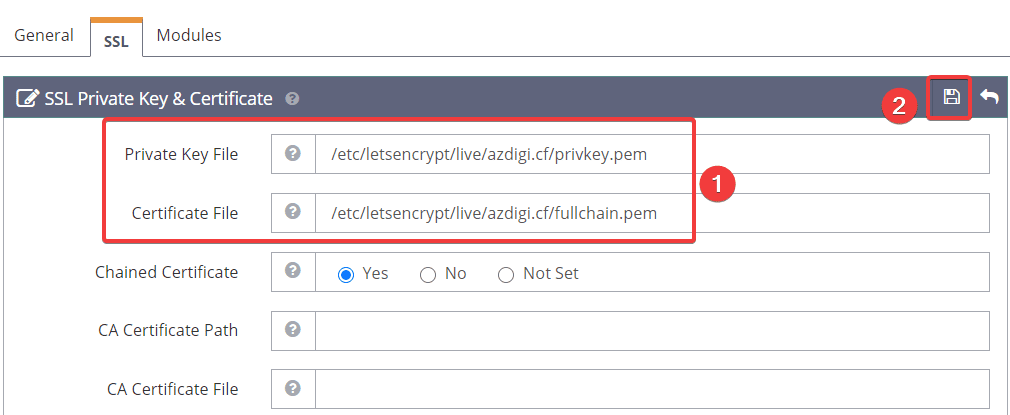
Enter the private key and certificate path respectively (1) => Save (2).
Private Key File <=> /etc/letsencrypt/live/azdigi.cf/privkey.pem
Certificate File <=> /etc/letsencrypt/live/azdigi.cf/fullchain.pem
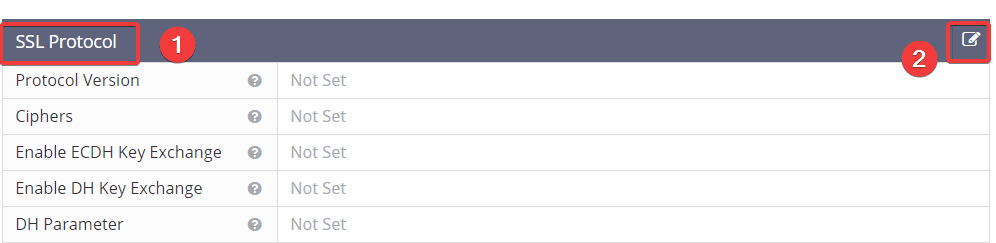
Next, click SSL Protocol (1) => Edit (2)
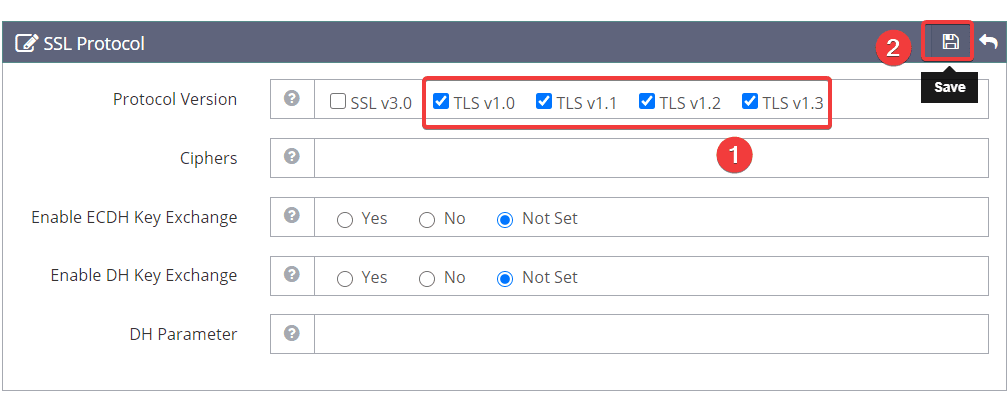
You tick as shown below (1) and click Save (2).
Now you restart Litespeed by clicking on the Graceful Restart button:

Step 4: Check SSL operation after installation
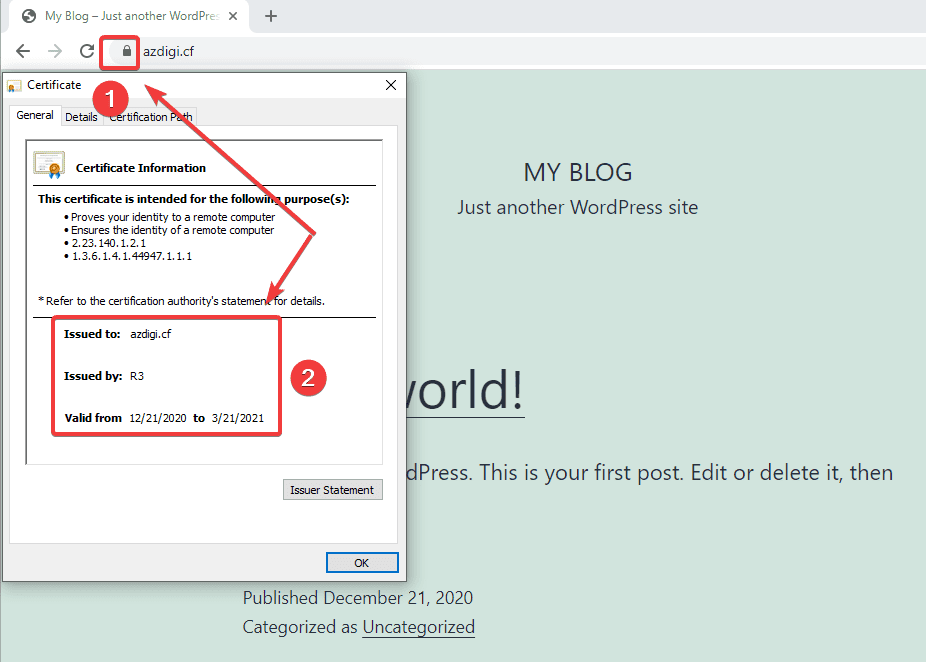
If you use WordPress, you can install and activate the Really Simple SSL Plugin so that the website automatically redirects http => https and can check it on the website.
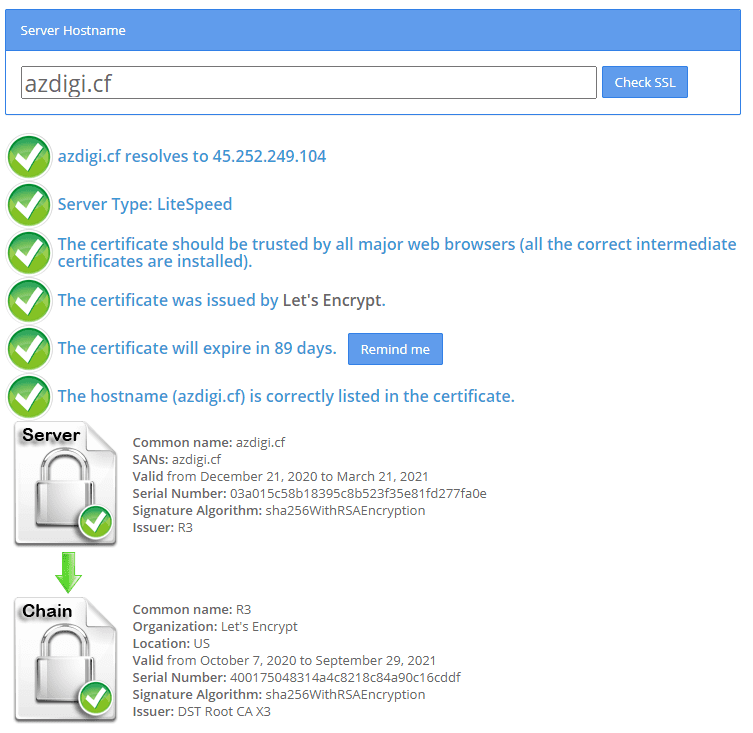
Alternatively, you visit the SSL Shopper page to check. Here will check the details of the time limit and SSL certificate provider you use.
III. Summary
Thus, AZDIGI has shown you how to install Let’s Encrypt SSL on websites using OpenLiteSpeed in the most detail. Installing this seemingly simple SSL helps a lot for your website in terms of security as well as good for SEO. Hopefully, this article will help you to install Let’s Encrypt SSL successfully!
If you find the article helpful, please share it widely. In addition, you can refer to some other articles about OpenLiteSpeed at the link below:
- How to add the website to OpenLiteSpeed WebAdmin GUI
- Install OpenLiteSpeed, MariaDB and PHP on Centos 7
- Install WordPress on Openlitespeed
If you need assistance, you can contact support in the ways below:
- Hotline 247: 028 888 24768 (Ext 0)
- Ticket/Email: You use the email to register for the service and send it directly to: support@azdigi.com .
About the author

Thạch Phạm
Đồng sáng lập và Giám đốc điều hành của AZDIGI. Có hơn 15 năm kinh nghiệm trong phổ biến kiến thức liên quan đến WordPress tại thachpham.com, phát triển website và phát triển hệ thống.