
In this article, AZDIGI will show you how to install Redis on a server using aaPanel and configure Redis with WordPress Website to optimize, increase load capacity and help improve site loading speed.
I. Overview
Redis is an open-source software used to store structured data, which can be used as a database, cache, or message broker. It is a very powerful and popular KEY-VALUE data storage system today. Redis stands out because it supports many basic data structures such as hash, list, set, sorted set, string. All data is recorded and stored in RAM, so data read and write speed will be very fast. For details on installation and configuration steps, please see below.
II. Implementation guide
To install Redis on the server and configure Redis with your website, you can follow these 2 steps.
Step 1: Install Redis and adjust the parameters .
To install Redis, you can do a quick installation by accessing the aaPanel admin page at the following link: http://IP:8888/ and login in with the information provided when installing aaPanel. If you accidentally forget this information, you can change it through the instructions below:
After successfully logging into aaPanel, go to
App Store => Deployment => Redis.
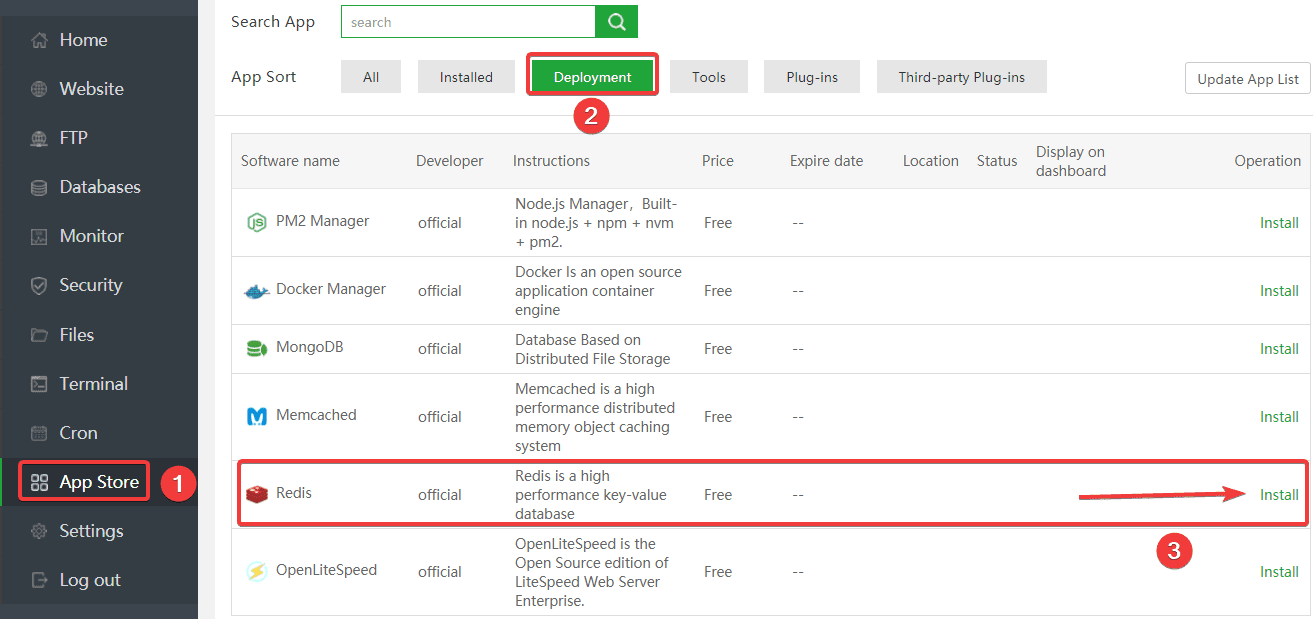
Next, click confirm.

The installation process will take about 10-15 minutes, you need to wait for the process to complete.
After the installation is complete, you need to adjust the maxmemory parameter on Redis by accessing the Setting section.
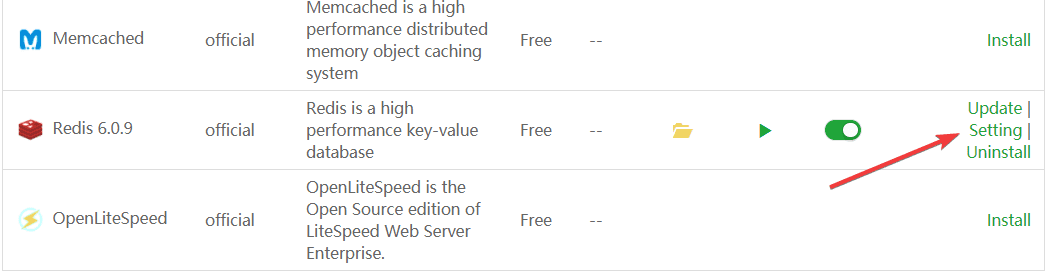
At the configuration parameter table, select Performance tuning => maxmemory (RAM parameters used on Redis, I set up a maximum of 256MB) => Save.

Step 2: Configure Redis with WordPress Website
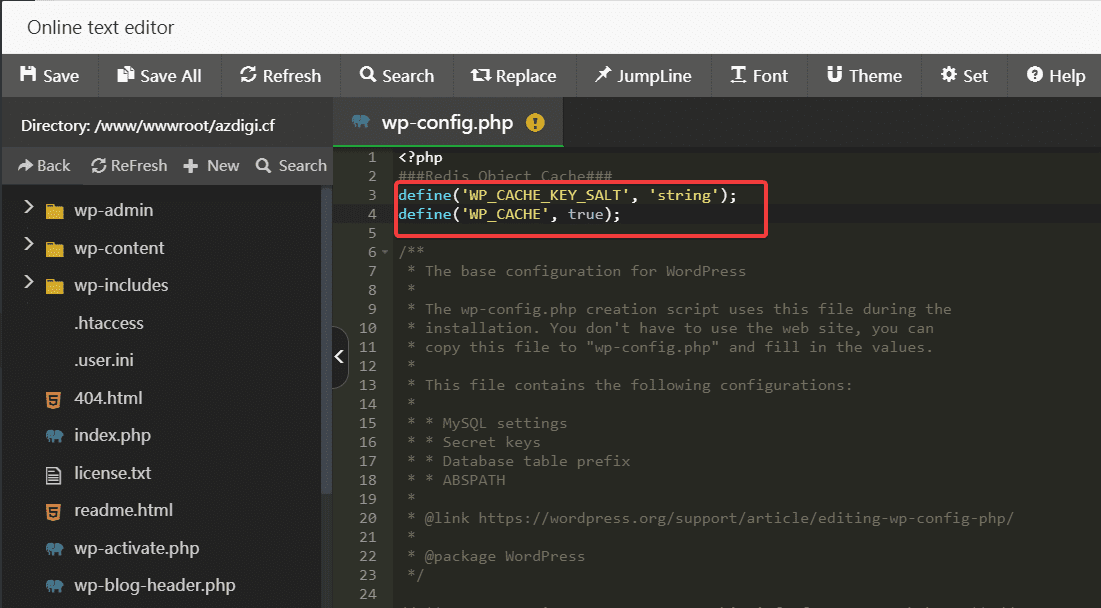
To connect Redis to your WordPress website, you first need to find your website’s wp-config.php configuration file, insert the code below, and Save it.
define('WP_CACHE_KEY_SALT', 'string');
define('WP_CACHE', true);
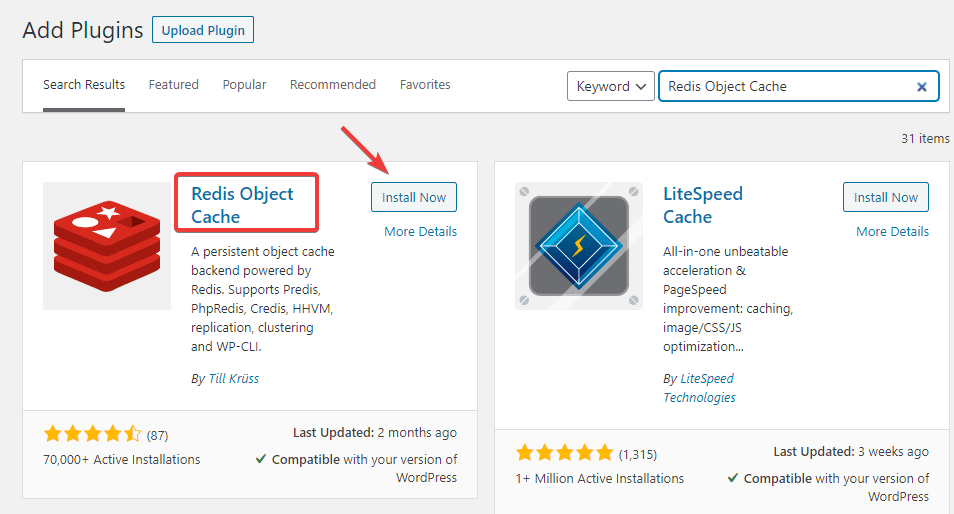
After adding the above code, you access the WordPress admin page and install the Redis Object Cache plugin as shown below:
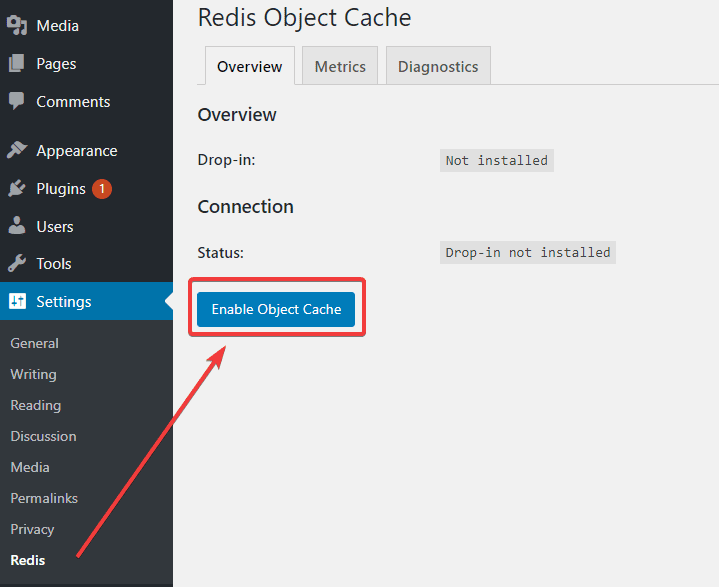
After installation is complete, you Activate Plugin and connect Redis as follows: Settings => Redis => Enable Object Cache
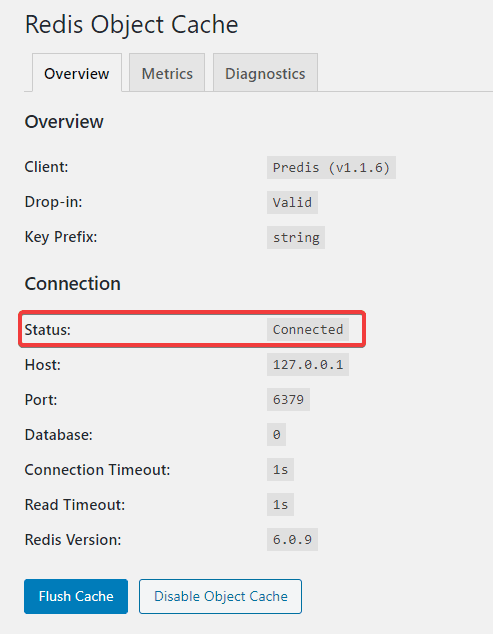
If you receive the Connected message as below, it is successful.
III. Summary
So in this article, AZDIGI has shown you how to install and configure Redis completely to help optimize your website and speed up page loading significantly. Hopefully, this article will help you do it successfully, helping your server as well as your website improve significantly in performance. If you find this helpful article, you can share it widely!
About the author

Thạch Phạm
Đồng sáng lập và Giám đốc điều hành của AZDIGI. Có hơn 15 năm kinh nghiệm trong phổ biến kiến thức liên quan đến WordPress tại thachpham.com, phát triển website và phát triển hệ thống.