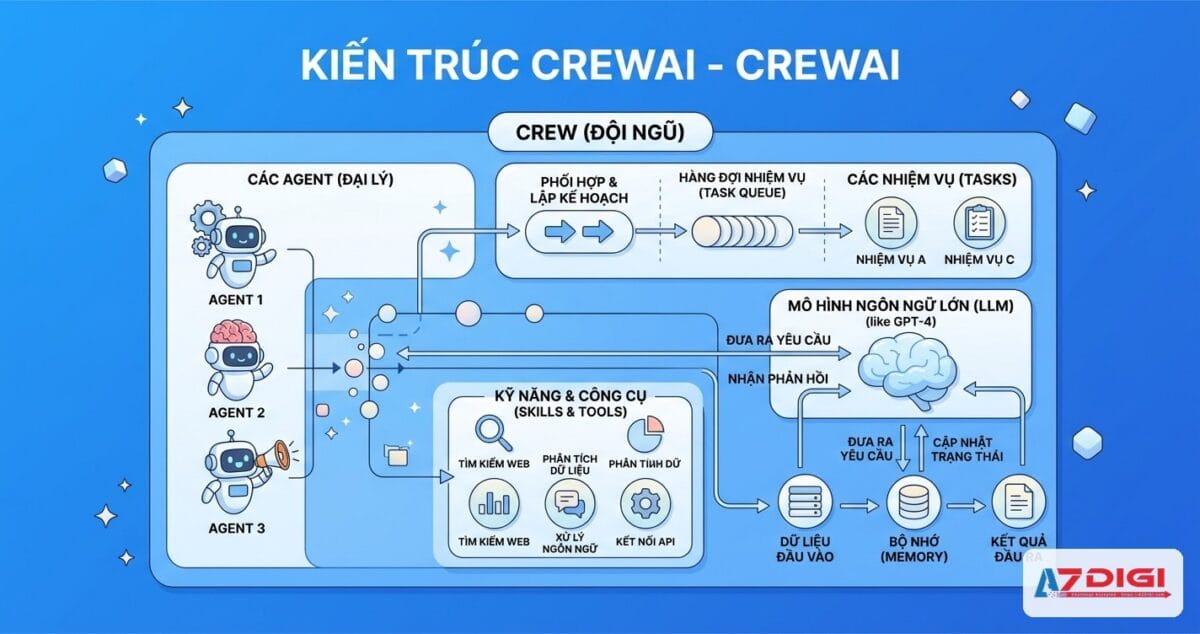
CrewAI là framework Python mã nguồn mở giúp bạn xây dựng hệ thống multi-agent AI. Thay vì dùng một AI chatbot duy nhất, bạn tạo ra cả một đội ngũ AI agents, mỗi agent có vai trò riêng, cùng phối hợp hoàn thành công việc. Bài viết này hướng dẫn chi tiết từ cài đặt đến chạy project CrewAI đầu tiên.
CrewAI là gì?
CrewAI là framework Python cho phép tạo và điều phối nhiều AI agents cùng làm việc. Mỗi agent được gán một role (vai trò), goal (mục tiêu) và backstory (bối cảnh). Khi ghép các agents lại thành một crew, chúng tự phối hợp để giải quyết task phức tạp.
Ví dụ thực tế: bạn tạo một agent Researcher chuyên tìm kiếm thông tin, một agent Writer chuyên viết bài. Researcher tìm dữ liệu xong, tự động chuyển cho Writer viết thành báo cáo hoàn chỉnh. Toàn bộ quy trình chạy tự động.
CrewAI do João Moura phát triển từ cuối năm 2023. Khi kiểm tra ngày 11/08/2026, repository đã có hơn 56.000 GitHub stars. Số liệu này thay đổi theo thời gian, có thể xem trực tiếp tại repository CrewAI.
So sánh nhanh: CrewAI vs LangGraph vs AutoGen
Ba framework phổ biến nhất cho multi-agent AI hiện nay:
- CrewAI: Thiết kế theo role-based, dễ bắt đầu nhất. Phù hợp prototyping nhanh, tạo nội dung, automation workflows. Learning curve thấp.
- LangGraph (LangChain): Graph-based state machine, kiểm soát chi tiết luồng xử lý. Phù hợp production-grade workflows cần traceability và human-in-the-loop phức tạp. Learning curve cao.
- AutoGen (Microsoft): Conversation-driven, agents giao tiếp qua tin nhắn. Mạnh về code execution, phù hợp research và developer tools. Đang trong giai đoạn chuyển đổi sang Microsoft Agent Framework.
Cập nhật 11/08/2026: Bài đã được rà soát với CrewAI 1.15.x. Gói hiện yêu cầu Python từ 3.10 đến dưới 3.14. Cấu trúc project JSONC là mặc định; phần YAML và Python bên dưới dùng chế độ classic. Nguồn kiểm tra: PyPI, Installation và GitHub Releases.
Kiến trúc CrewAI: Agent, Task, Tool, Crew
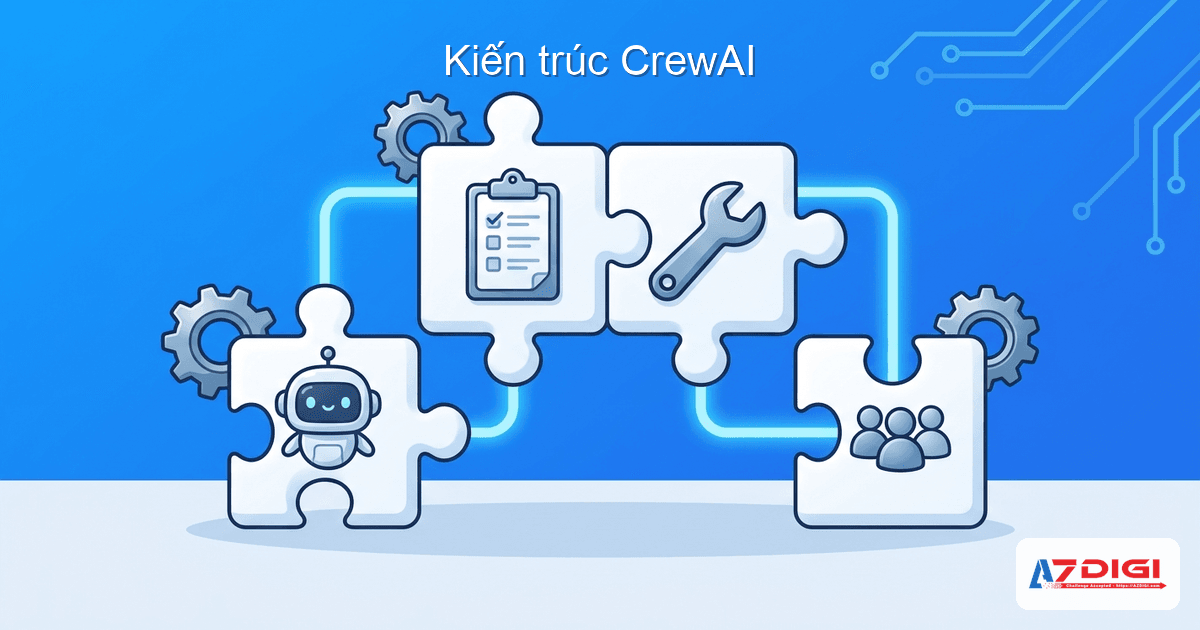
CrewAI xoay quanh 4 khái niệm cốt lõi. Nắm vững 4 thành phần này là bạn hiểu toàn bộ cách CrewAI hoạt động.
Agent
Agent là một thực thể AI có role, goal, backstory. Mỗi agent hoạt động như một thành viên trong team. Ví dụ: agent “Senior Researcher” có mục tiêu tìm kiếm thông tin mới nhất, được cung cấp công cụ tìm kiếm web.
Task
Task là công việc cụ thể giao cho agent. Mỗi task có description (mô tả), expected_output (kết quả mong đợi), và agent phụ trách. Task có thể nhận context từ task trước đó.
Tool
Tool là công cụ mà agent sử dụng để hoàn thành task. CrewAI cung cấp hàng trăm built-in tools: tìm kiếm web, đọc file, scrape website, query database… Bạn cũng có thể tạo custom tools riêng.
Crew
Crew là đội ngũ gồm nhiều agents + tasks. Crew quyết định cách agents phối hợp: chạy tuần tự (sequential) hay phân cấp (hierarchical). Khi gọi crew.kickoff(), toàn bộ workflow bắt đầu thực thi.
Luồng xử lý: Input → Agent nhận Task → Agent dùng Tool xử lý → Output chuyển cho Agent tiếp theo → Crew trả kết quả cuối cùng.
Yêu cầu cài đặt

Trước khi bắt đầu, bạn cần chuẩn bị:
- Python 3.10 đến 3.13: CrewAI chưa hỗ trợ Python 3.14+
- uv: Package manager nhanh, CrewAI CLI dùng uv để quản lý dependencies
- API key của ít nhất một LLM provider: OpenAI, Anthropic, Google Gemini, Groq, hoặc Ollama (chạy local; chi phí phụ thuộc model và hạ tầng)
- Hệ điều hành: macOS, Linux, hoặc Windows (WSL2 khuyến nghị)
Tip: Nếu bạn chạy CrewAI cho production (lượng request lớn, chạy liên tục), nên deploy trên VPS thay vì máy cá nhân. VPS có uptime cao, bandwidth ổn định, và bạn không phải lo máy tắt giữa chừng. Xem thêm hướng dẫn chọn VPS giá rẻ phù hợp.
Cài đặt CrewAI từng bước
Bên dưới là các bước cài đặt chi tiết. Mình demo trên môi trường Docker (Python 3.12), nhưng bạn có thể làm tương tự trên máy local.
Bước 1: Cài uv
uv là package manager viết bằng Rust, nhanh hơn pip rất nhiều lần. CrewAI CLI cần uv để tạo và quản lý project.
# Trên macOS/Linux
curl -LsSf https://astral.sh/uv/install.sh | sh
# Hoặc cài qua pip
pip install uv
# Kiểm tra
uv --version
# Ví dụ ngày 11/08/2026: uv 0.11.33
Bước 2: Cài CrewAI CLI
Dùng uv tool install để cài CrewAI CLI global, có thể gọi lệnh crewai từ terminal. Phiên bản hiển thị phụ thuộc thời điểm cài; bản dưới đây được kiểm tra ngày 11/08/2026 trên PyPI.
# Cài CrewAI CLI
uv tool install crewai
# Kiểm tra version
crewai version
# Ví dụ ngày 11/08/2026: crewai version 1.15.14
Bước 3: Tạo project mới
Lệnh crewai create crew research_demo hiện tạo project theo cấu trúc JSONC. Để làm đúng ví dụ YAML và crew.py trong bài này, dùng cờ --classic. CLI sau đó hỏi LLM provider và model. Xem cấu trúc mặc định và chế độ classic trong tài liệu cài đặt CrewAI.
# Tạo project mới tên research_demo
crewai create crew --classic research_demo
# CLI hỏi bạn chọn provider:
# 1. openai
# 2. anthropic
# 3. gemini
# ...
# Chọn provider → chọn model → nhập API key
# Kết quả:
# Created research_demo/pyproject.toml
# Created research_demo/src/research_demo/crew.py
# Created research_demo/src/research_demo/main.py
# Created research_demo/src/research_demo/config/agents.yaml
# Created research_demo/src/research_demo/config/tasks.yaml
# Crew research_demo created successfully!
Bước 4: Cấu hình .env
File .env chứa model và API key. CrewAI tự tạo file này khi bạn chọn provider ở bước trên. Bạn có thể chỉnh lại bất cứ lúc nào.
# .env - Chỉ dùng model ID đang mở trên tài khoản provider
MODEL=gemini/<model-id-da-xac-nhan>
GEMINI_API_KEY=your-api-key-here
# Hoặc dùng OpenAI
# MODEL=openai/<model-id-da-xac-nhan>
# OPENAI_API_KEY=sk-your-key-here
# Hoặc dùng Ollama sau khi đã pull model local
# MODEL=ollama/<model-da-pull>
# OPENAI_API_BASE=http://localhost:11434
Nếu dùng model local, có thể xem thêm hướng dẫn tích hợp Ollama API để kiểm tra endpoint, streaming và OpenAI-compatible API trước khi nối vào CrewAI.
Cấu trúc project CrewAI ở chế độ classic
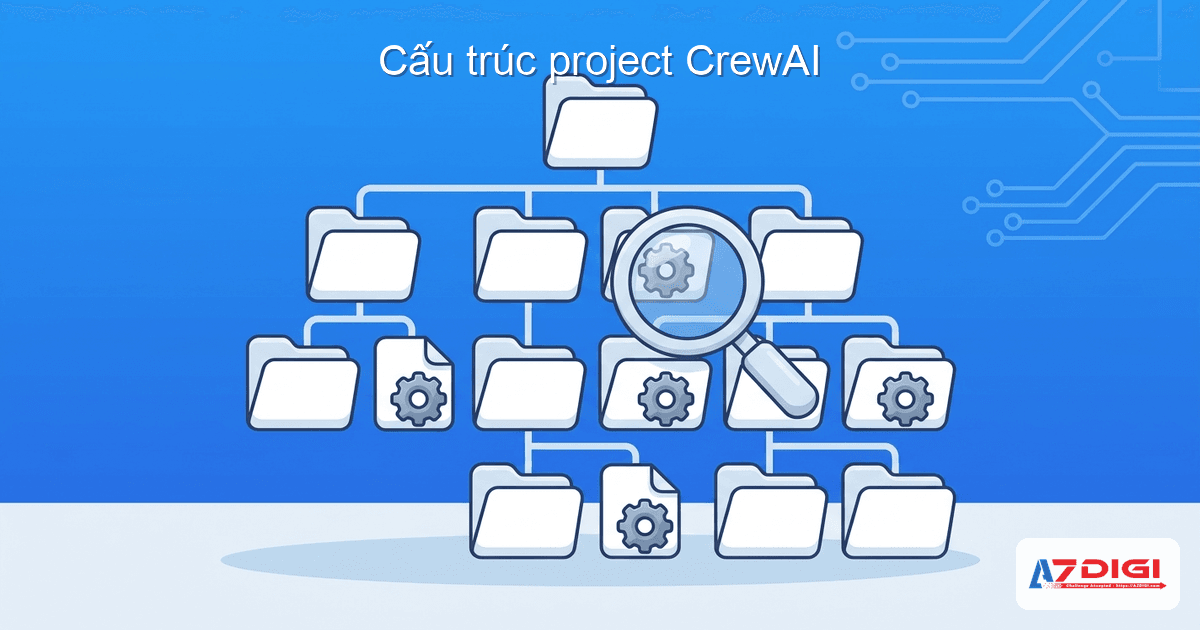
Với lệnh có cờ --classic, project có cấu trúc thư mục như sau:
research_demo/
├── .env                    # API key và model config
├── .gitignore
├── pyproject.toml          # Dependencies (giống package.json)
├── README.md
├── knowledge/              # Thư mục chứa knowledge sources
│   └── user_preference.txt
└── src/
    └── research_demo/
        ├── __init__.py
        ├── main.py         # Entry point - nơi chạy crew
        ├── crew.py         # Định nghĩa Crew, agents, tasks
        ├── config/
        │   ├── agents.yaml # Cấu hình agents (role, goal, backstory)
        │   └── tasks.yaml  # Cấu hình tasks (description, expected_output)
        └── tools/
            ├── __init__.py
            └── custom_tool.py  # Custom tools bạn tự viết
Các file quan trọng nhất:
- agents.yaml: Khai báo agents. Mỗi agent cần role, goal, backstory.
- tasks.yaml: Khai báo tasks. Mỗi task cần description, expected_output, agent.
- crew.py: Code Python gắn agents + tasks lại thành crew. Dùng decorator
@CrewBase. - main.py: Entry point gọi
crew.kickoff()để chạy.
Tạo Agents với agents.yaml (classic)
File agents.yaml là nơi bạn định nghĩa các AI agents. Mỗi agent cần 3 thuộc tính chính:
- role: Vai trò của agent. Ví dụ: “Senior Data Researcher”
- goal: Mục tiêu agent cần đạt được
- backstory: Bối cảnh giúp agent hiểu mình là ai, tạo persona cho LLM
Dưới đây là file agents.yaml mẫu với 2 agents: Researcher tìm thông tin, Writer viết báo cáo.
# src/research_demo/config/agents.yaml
researcher:
  role: >
    {topic} Senior Data Researcher
  goal: >
    Uncover cutting-edge developments in {topic}
  backstory: >
    You're a seasoned researcher with a knack for uncovering the latest
    developments in {topic}. Known for your ability to find the most relevant
    information and present it in a clear and concise manner.
reporting_analyst:
  role: >
    {topic} Reporting Analyst
  goal: >
    Create detailed reports based on {topic} data analysis and research findings
  backstory: >
    You're a meticulous analyst with a keen eye for detail. You're known for
    your ability to turn complex data into clear and concise reports, making
    it easy for others to understand and act on the information you provide.
Chú ý {topic} là biến động. Khi gọi kickoff(inputs={"topic": "AI LLMs"}), CrewAI tự thay thế {topic} thành “AI LLMs” trong tất cả agents và tasks.
Tạo Tasks với tasks.yaml (classic)
File tasks.yaml khai báo các công việc cụ thể. Mỗi task gồm:
- description: Mô tả chi tiết task cần làm gì
- expected_output: Kết quả mong đợi (giúp agent biết output cần trông như thế nào)
- agent: Tên agent phụ trách task này
- context (tùy chọn): Danh sách task trước đó mà task này cần kết quả làm input
# src/research_demo/config/tasks.yaml
research_task:
  description: >
    Conduct a thorough research about {topic}.
    Make sure you find any interesting and relevant information given
    the current year is {current_year}.
  expected_output: >
    A list with 10 bullet points of the most relevant information about {topic}
  agent: researcher
reporting_task:
  description: >
    Review the context you got and expand each topic into a full section
    for a report. Make sure the report is detailed and contains any and
    all relevant information.
  expected_output: >
    A fully fledged report with the main topics, each with a full section
    of information. Formatted as markdown without '```'
  agent: reporting_analyst
Tip: Dùng {variable} để tạo dynamic input. Bạn có thể truyền biến khi gọi kickoff(inputs={...}). Nếu output được xử lý tiếp bằng code, nên khai báo output_pydantic hoặc output_json, rồi thêm guardrail để kiểm tra kết quả. Với quyết định cần người duyệt, task hỗ trợ human_input. Xem các tham số và ví dụ hiện hành trong CrewAI Tasks.
Tạo Crew và chạy (crew.py + main.py)
File crew.py là nơi ghép agents + tasks thành một crew hoàn chỉnh. CrewAI dùng decorator @CrewBase để tự động map agents.yaml và tasks.yaml vào code Python.
# src/research_demo/crew.py
from crewai import Agent, Crew, Process, Task
from crewai.project import CrewBase, agent, crew, task
@CrewBase
class ResearchDemo():
    """ResearchDemo crew"""
# Decorator @agent map với key trong agents.yaml
    @agent
    def researcher(self) -> Agent:
        return Agent(
            config=self.agents_config['researcher'],
            verbose=True  # Bật log thực thi chi tiết để debug
        )
@agent
    def reporting_analyst(self) -> Agent:
        return Agent(
            config=self.agents_config['reporting_analyst'],
            verbose=True
        )
# Decorator @task map với key trong tasks.yaml
    @task
    def research_task(self) -> Task:
        return Task(
            config=self.tasks_config['research_task'],
        )
@task
    def reporting_task(self) -> Task:
        return Task(
            config=self.tasks_config['reporting_task'],
            output_file='report.md'  # Xuất kết quả ra file
        )
# Decorator @crew tạo Crew object
    @crew
    def crew(self) -> Crew:
        return Crew(
            agents=self.agents,   # Tự động lấy từ @agent decorators
            tasks=self.tasks,     # Tự động lấy từ @task decorators
            process=Process.sequential,  # Chạy tuần tự
            verbose=True,
        )
File main.py là entry point, nơi bạn gọi kickoff():
# src/research_demo/main.py
from datetime import datetime
from research_demo.crew import ResearchDemo
def run():
    inputs = {
        'topic': 'AI LLMs',
        'current_year': str(datetime.now().year)
    }
    # Chạy crew - bắt đầu toàn bộ workflow
    ResearchDemo().crew().kickoff(inputs=inputs)
Quy trình tuần tự và phân cấp
CrewAI hỗ trợ 2 kiểu process:
- Sequential: Tasks chạy lần lượt theo thứ tự. Task sau nhận kết quả task trước làm context. Đơn giản, dễ debug.
- Hierarchical: Có một manager agent tự động phân chia và delegate tasks cho các agents. Manager quyết định thứ tự và agent nào làm gì. Phù hợp workflow phức tạp.
Chạy crew và xem kết quả
Chạy project bằng lệnh crewai run:
cd research_demo
crewai run
Output mẫu khi chạy (rút gọn):
╭──────────────── 🚀 Crew Execution Started ────────────────╮
│  Crew Execution Started                                    │
│  Name: crew                                                │
│  ID: 5f4578aa-ade6-40d8-a7d5-4e8f02df1af0                 │
╰────────────────────────────────────────────────────────────╯
╭──────────────────── 📋 Task Started ──────────────────────╮
│  Task Started: research_task                               │
╰────────────────────────────────────────────────────────────╯
╭──────────────────── 🤖 Agent Started ─────────────────────╮
│  Agent: AI LLMs Senior Data Researcher                     │
│  Task: Conduct a thorough research about AI LLMs...        │
╰────────────────────────────────────────────────────────────╯
# Agent Working... (gọi LLM, xử lý task)
╭──────────────────── ✅ Task Completed ────────────────────╮
│  Task Completed: research_task                             │
│  Agent: AI LLMs Senior Data Researcher                     │
╰────────────────────────────────────────────────────────────╯
╭──────────────────── 📋 Task Started ──────────────────────╮
│  Task Started: reporting_task                              │
╰────────────────────────────────────────────────────────────╯
╭──────────────────── 🤖 Agent Started ─────────────────────╮
│  Agent: AI LLMs Reporting Analyst                          │
│  Task: Review the context and expand into full report...   │
╰────────────────────────────────────────────────────────────╯
# Agent Working... (nhận kết quả research, viết report)
╭──────────────────── ✅ Task Completed ────────────────────╮
│  Task Completed: reporting_task                            │
│  Output saved to: report.md                                │
╰────────────────────────────────────────────────────────────╯
╭──────────────── 🎉 Crew Execution Completed ──────────────╮
│  Crew Execution Completed                                  │
│  Name: crew                                                │
╰────────────────────────────────────────────────────────────╯
Kết quả cuối cùng được ghi vào file report.md. Toàn bộ workflow hoàn thành tự động: Researcher tìm thông tin, Reporting Analyst nhận kết quả và viết thành báo cáo chi tiết.
Flows: luồng xử lý nâng cao theo sự kiện
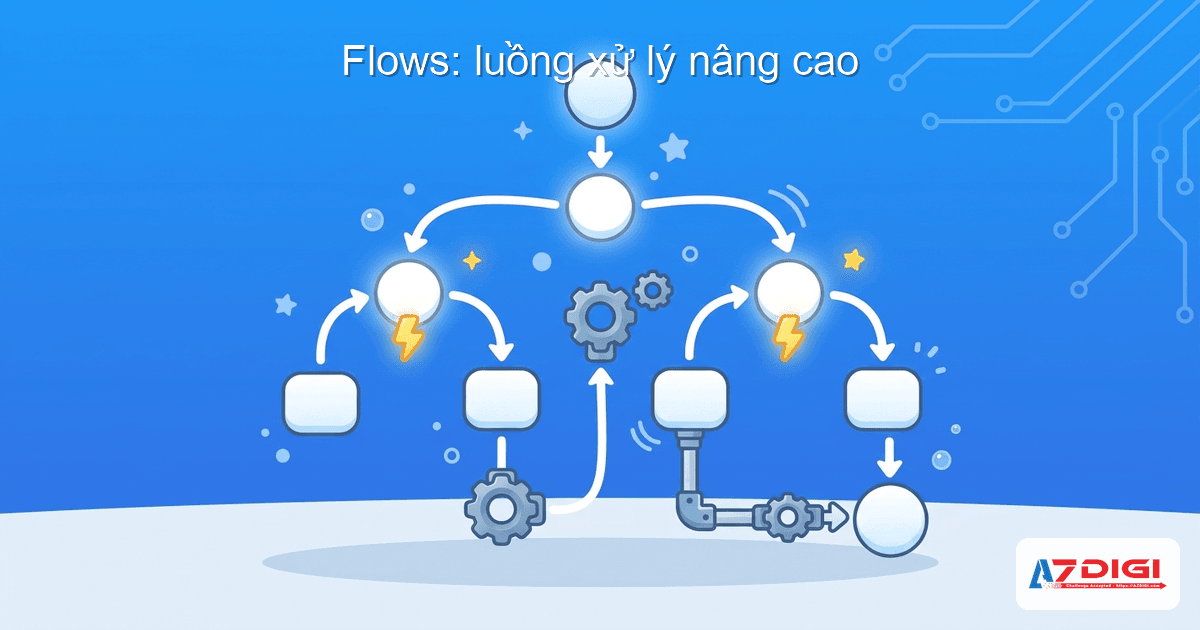
Từ phiên bản 0.80+, CrewAI giới thiệu Flows: cách xây dựng workflow phức tạp hơn, kết hợp code Python thường với Crew execution.
Flows vs Crews: Khi nào dùng cái nào?
| Chọn | Phù hợp khi | Ví dụ |
|---|---|---|
| Crew | Nhiều agent cần tự phối hợp để hoàn thành một nhóm task liên quan. | Researcher chuyển dữ liệu cho Writer tạo báo cáo. |
| Flow | Luồng cần thứ tự rõ, state, điều kiện, vòng lặp hoặc API call. | Nhận input, xác thực, gọi API, kiểm tra kết quả. |
| Flow + Crew | Code điều phối luồng, còn một số bước cần nhóm agent xử lý linh hoạt. | Flow xác thực dữ liệu, gọi Crew phân tích, rồi chuyển kết quả sang bước duyệt. |
Crew và Flow giải quyết hai lớp khác nhau. Crew phụ trách cộng tác giữa agent; Flow kiểm soát đường đi và trạng thái của workflow. Cách phân biệt này cũng được CrewAI mô tả trong README chính thức.
Điều kiện chạy ví dụ Flow: Code được compile với Python 3.11, crewai==1.15.14, crewai-cli==1.15.14 và litellm==1.96.0 ngày 11/08/2026. Cài đúng package bằng pip install crewai==1.15.14 litellm==1.96.0, đặt MODEL và API key hợp lệ trước khi chạy. Bước QA đã cài package thật, tạo scaffold classic bằng --skip_provider, compile source sinh ra và kiểm tra syntax, import cùng API fields; không gọi LLM bên ngoài. Nguồn package: CrewAI 1.15.14 và LiteLLM 1.96.0.
Ví dụ Flow đơn giản
from os import environ
from crewai.flow.flow import Flow, listen, start
from litellm import completion
class CityFactFlow(Flow):
    model = environ["MODEL"]
@start()
    def generate_city(self):
        """Bước 1: Tạo tên thành phố ngẫu nhiên"""
        response = completion(
            model=self.model,
            messages=[{
                "role": "user",
                "content": "Return the name of a random city in the world."
            }]
        )
        random_city = response["choices"][0]["message"]["content"]
        print(f"Random City: {random_city}")
        return random_city
@listen(generate_city)
    def generate_fun_fact(self, random_city):
        """Bước 2: Lắng nghe kết quả bước 1, tạo fun fact"""
        response = completion(
            model=self.model,
            messages=[{
                "role": "user",
                "content": f"Tell me a fun fact about {random_city}"
            }]
        )
        return response["choices"][0]["message"]["content"]
# Chạy flow
flow = CityFactFlow()
result = flow.kickoff()
print(f"Fun fact: {result}")
Decorator @start() đánh dấu bước đầu tiên. @listen(generate_city) đánh dấu bước tiếp theo sẽ tự chạy khi generate_city hoàn thành. Flow hỗ trợ state management tự động: mỗi flow instance có ID riêng, dữ liệu được lưu xuyên suốt các bước.
Kết hợp Flow + Crew
Sức mạnh thực sự của Flows là kết hợp với Crew. Bạn có thể tạo một Flow với bước 1 là xử lý dữ liệu bằng Python, bước 2 gọi Crew để agents phân tích, bước 3 lại dùng Python gửi email kết quả.
from crewai.flow.flow import Flow, listen, start
class ContentPipeline(Flow):
@start()
    def fetch_topics(self):
        """Bước 1: Lấy danh sách topics từ API"""
        # Code Python thường, gọi API, query database...
        return ["AI Agents", "RAG patterns", "Fine-tuning LLMs"]
@listen(fetch_topics)
    def research_and_write(self, topics):
        """Bước 2: Dùng Crew để research + viết bài"""
        from research_demo.crew import ResearchDemo
        results = []
        for topic in topics:
            result = ResearchDemo().crew().kickoff(
                inputs={"topic": topic, "current_year": "2026"}
            )
            results.append(result)
        return results
@listen(research_and_write)
    def publish(self, results):
        """Bước 3: Publish kết quả"""
        for r in results:
            print(f"Publishing: {r.raw[:100]}...")
        return "Done"
Ứng dụng thực tế của CrewAI

Không phải use case nào cũng cần nhiều agent. Bảng dưới đây giúp chọn kiến trúc và điểm kiểm soát thay vì chỉ thêm agent vào workflow.
| Bài toán | Kiến trúc | Tool hoặc dữ liệu | Điểm kiểm soát |
|---|---|---|---|
| Nghiên cứu và viết báo cáo | Crew tuần tự | Nguồn web, tài liệu nội bộ | Yêu cầu trích nguồn; người duyệt bản cuối |
| Xử lý ticket | Flow + Crew | Helpdesk API, knowledge base | Chuyển cho người thật khi vượt phạm vi |
| Làm sạch và phân tích dữ liệu | Flow | API, database, Python | Schema, validation và log lỗi |
| Quy trình nội dung | Crew + bước duyệt | Brief, nguồn, CMS | Không tự publish; kiểm tra fact và link |
Checklist trước khi chạy production:
- Giới hạn
max_iter,max_execution_timevàmax_rpmtheo workload. - Dùng output contract, guardrail và bước duyệt người thật cho kết quả nhạy cảm.
- Giữ API key trong biến môi trường; đánh giá
code_execution_modetrước khi cho agent chạy code. - Bật log hoặc tracing, rồi chọn memory và knowledge source theo dữ liệu thật sự cần dùng.
Tham khảo Agents và Crews. Nếu cần môi trường Linux chạy liên tục, có thể xem cấu hình Pro VPS và hướng dẫn Docker Compose.
Câu hỏi thường gặp
Các câu trả lời dưới đây được rà soát ngày 11/08/2026 theo FAQ CrewAI, LLM Connections và PyPI.
CrewAI có miễn phí không?
CrewAI là dự án mã nguồn mở theo MIT License. Chi phí vận hành không phải lúc nào cũng bằng 0: nó phụ thuộc model, API provider hoặc hạ tầng local mà bạn chọn.
Có cần biết Python để dùng CrewAI không?
Bạn nên biết Python cơ bản, cách cài package, cấu hình biến môi trường và chạy lệnh terminal. CrewAI 1.15.14 yêu cầu Python từ 3.10 đến dưới 3.14; kiểm tra lại phiên bản hiện hành trên PyPI trước khi cài.
CrewAI khác gì LangChain?
CrewAI là framework Python độc lập với các primitive riêng cho agent, task, crew, flow, tool và orchestration. Việc chọn CrewAI hay framework khác phụ thuộc bài toán; với CrewAI, dùng Crew cho cộng tác agent linh hoạt và Flow cho luồng event-driven cần kiểm soát rõ.
Chạy CrewAI trên local hay cloud?
Có thể phát triển local hoặc triển khai trên hạ tầng cloud/VPS. Cấu hình CPU, RAM hay GPU phụ thuộc model, tool, số agent và workload; không có một cấu hình đúng cho mọi dự án. Trước production, cần kiểm tra timeout, RPM, secrets, tracing và điều kiện chạy code.
CrewAI có dùng được với Ollama không?
Có. FAQ và tài liệu kết nối model của CrewAI xác nhận hỗ trợ model local, gồm Ollama. Hãy pull một model thật sự có trên máy, khai báo MODEL=ollama/<model-da-pull> cùng endpoint hợp lệ rồi chạy thử trong môi trường riêng. Xem LLM Connections và hướng dẫn tích hợp Ollama API.
Tổng kết
CrewAI hỗ trợ hai cách khởi tạo project. Cấu trúc mặc định hiện dùng JSONC; chế độ --classic dùng YAML và Python như ví dụ trong bài. Sau khi khai báo agent, task và process, bạn chạy project bằng crewai run.
CrewAI phù hợp khi một workflow cần nhiều agent có vai trò rõ. Với luồng cần điều kiện và state chặt chẽ, nên đặt Crew bên trong Flow. Có thể xem thêm hướng dẫn OpenClaw nếu mục tiêu là vận hành trợ lý AI qua chat.
Bắt đầu với một crew đơn giản, rồi thêm agents, tools, flows dần dần khi bạn quen với framework. Đó là cách học CrewAI hiệu quả nhất.
Có thể bạn cần xem thêm
Về tác giả

Trần Thắng
Chuyên gia tại AZDIGI với nhiều năm kinh nghiệm trong lĩnh vực web hosting và quản trị hệ thống.